
URL copied to clipboard

Add New News
41 views
__readtime__ Min
read
Tabs Overview
- The Add New News screen is used to create and publish news articles that appear on the frontend of the website.
- From the left menu, go to Insights > Add New News
- The screen Create new News on page will open
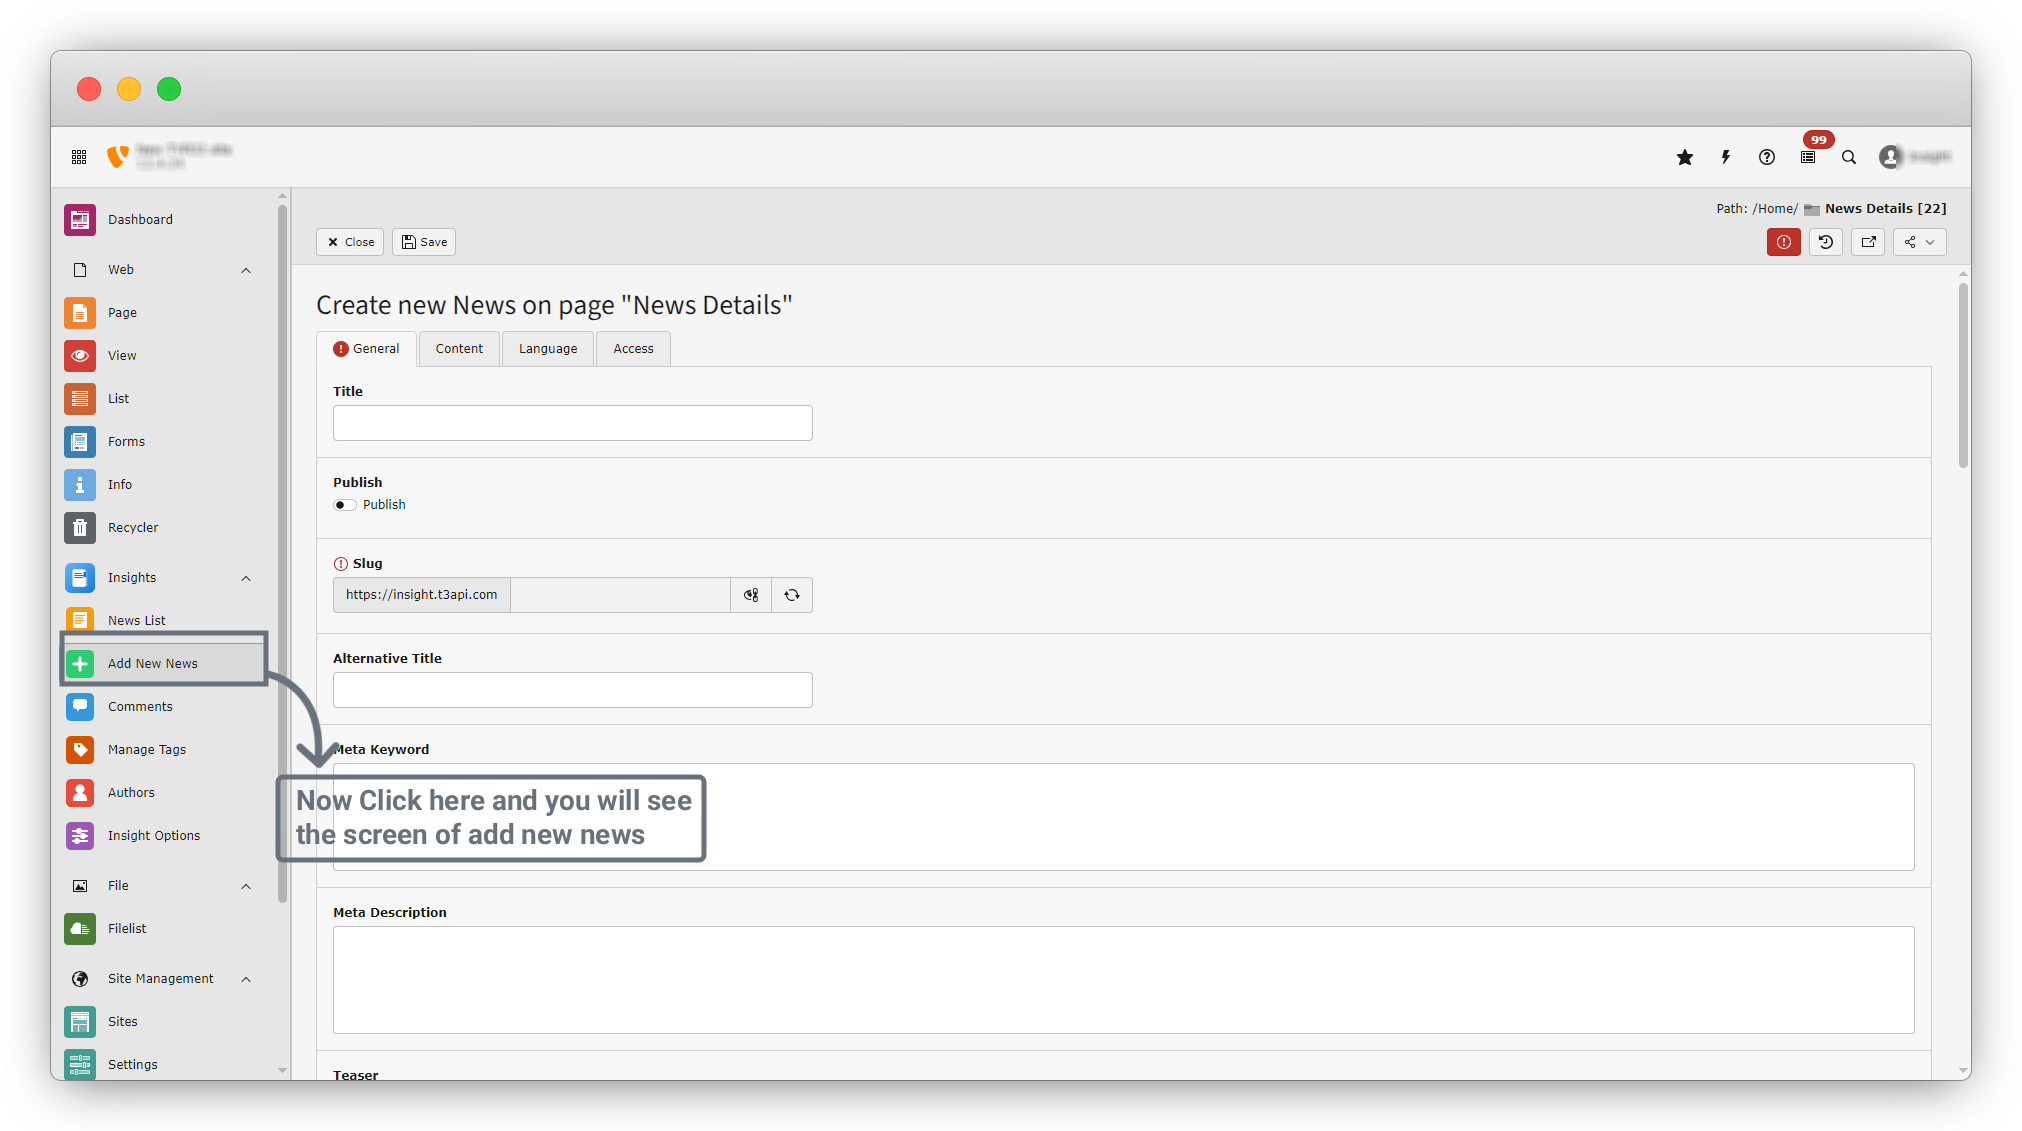
Tabs Overview
At the top, you will see tabs:
- General (main content - most used)
- Content
- Language
- Access
let's see all tabs in detail.
General Tab
The first tab is the general tab you can see in this screenshot. If you need to create simple news, by using only the general tab you will create the news.
Some fields are required and some are optional, also some fields are filled by default if you save the news without filling that field.
Here are details of every field in the general tab.
1. Title (Required)
Enter the main headline of news
This is show on
- News Listing Page
- News Detail page
2. Publish
- Enable Publish to make the news visible on the frontend
- If disabled, the news will stay as draft
- Enable this when the news is ready to go live
3. Recommended
- Enable this option to display the news item on the home page.
- Use this setting when you want to mark a news item as recommended.
4. Slug (url)
- Automatically generated from title
- It is used to create the News Url
- Note: Avoid changing this unless necessary
5. Alternative Title (optional)
- Used when you want a different title for SEO or frontend.
- If empty, the main Title is used
6. Meta Keywords (SEO-optional)
- Keywords for search engines
- Separate keywords with commas
- Example: `technology, product launch, innovation`
7. Meta Description (SEO – Optional)
- Short description for search engines
- Recommended length: 150–160 characters
- Example:`Discover our latest product launch designed to improve performance and user experience.`
8. Teaser (Optional)
- Short summary shown in news listing pages
- Helps users quickly understand the article
9. Description (Main Content)
- The main body content of the news
- This appears on the news detail page
- You can add:
- Text
- Formatting
- Links and many more
10. Publish Date
- Date when the news becomes visible and archive.
11. Archive date (optional)
- Date after which the news is archived
- Archived news may stop showing on frontend (depends on configuration)
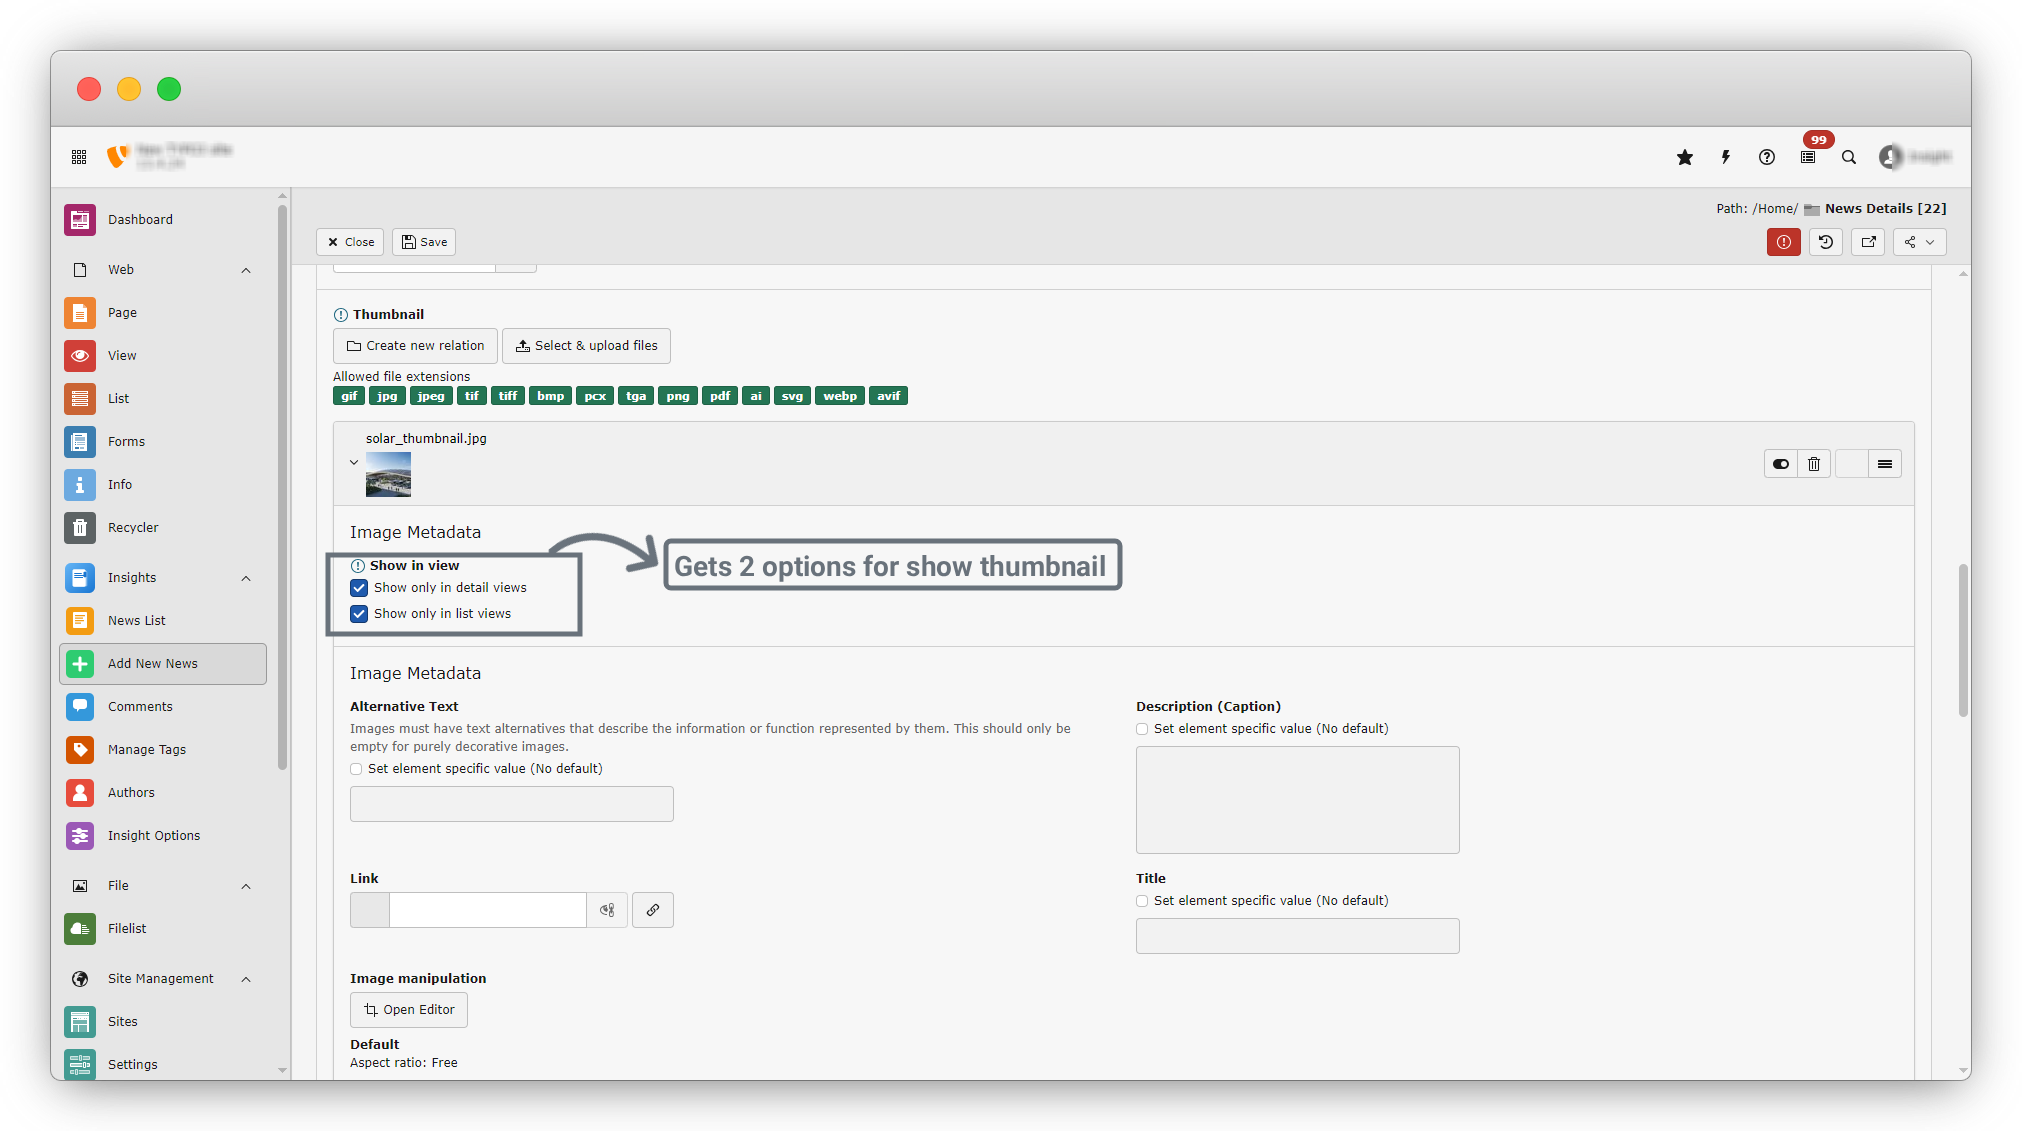
12. Thumbnail (Optional but Recommended)
- Upload a featured image for the news
- Used in: News list and News detail header
- Supported formats: `jpg, jpeg, png, webp, svg, gif, bmp and many more`
- Show options : there are 2 options to show a thumbnail.
- Show only in List view : This will show thumbnail in list view only, not in details.
- Show only in detail view: This will show thumbnail in details view only
- If you want to show a thumbnail in both views just check both checkboxes.
13. Category
- Select one or more news categories
- Categories help: Organize content and Filter news on frontend
- You need to create categories using the default TYPO3 standard of category create.
14. Viewers
- Auto-managed field
- Shows how many times the news is viewed
- Usually not edited manually
15. Author
- Select the author of the news
- Author name appear on frontend news details page
- Example: `Alex Morgan`
16. Tags (Optional)
- Select relevant tags from Available Items
- Click arrows to move them to Selected Items
- Tags help:
- Improve filtering
- Show related news
17. Related Files (Optional)
- Attach additional files such as:
- PDFs
- Images
- Videos
- Can be used for downloads or references
18. Previous News / Next News (Optional)
- Manually link previous and next news articles
- Improves navigation on news detail page
19. Related Posts (Optional)
- Link related news articles
- These may appear as Related News on frontend
Lets fill all details in the details tab. See the screenshot below to fill all fields to create a news item.
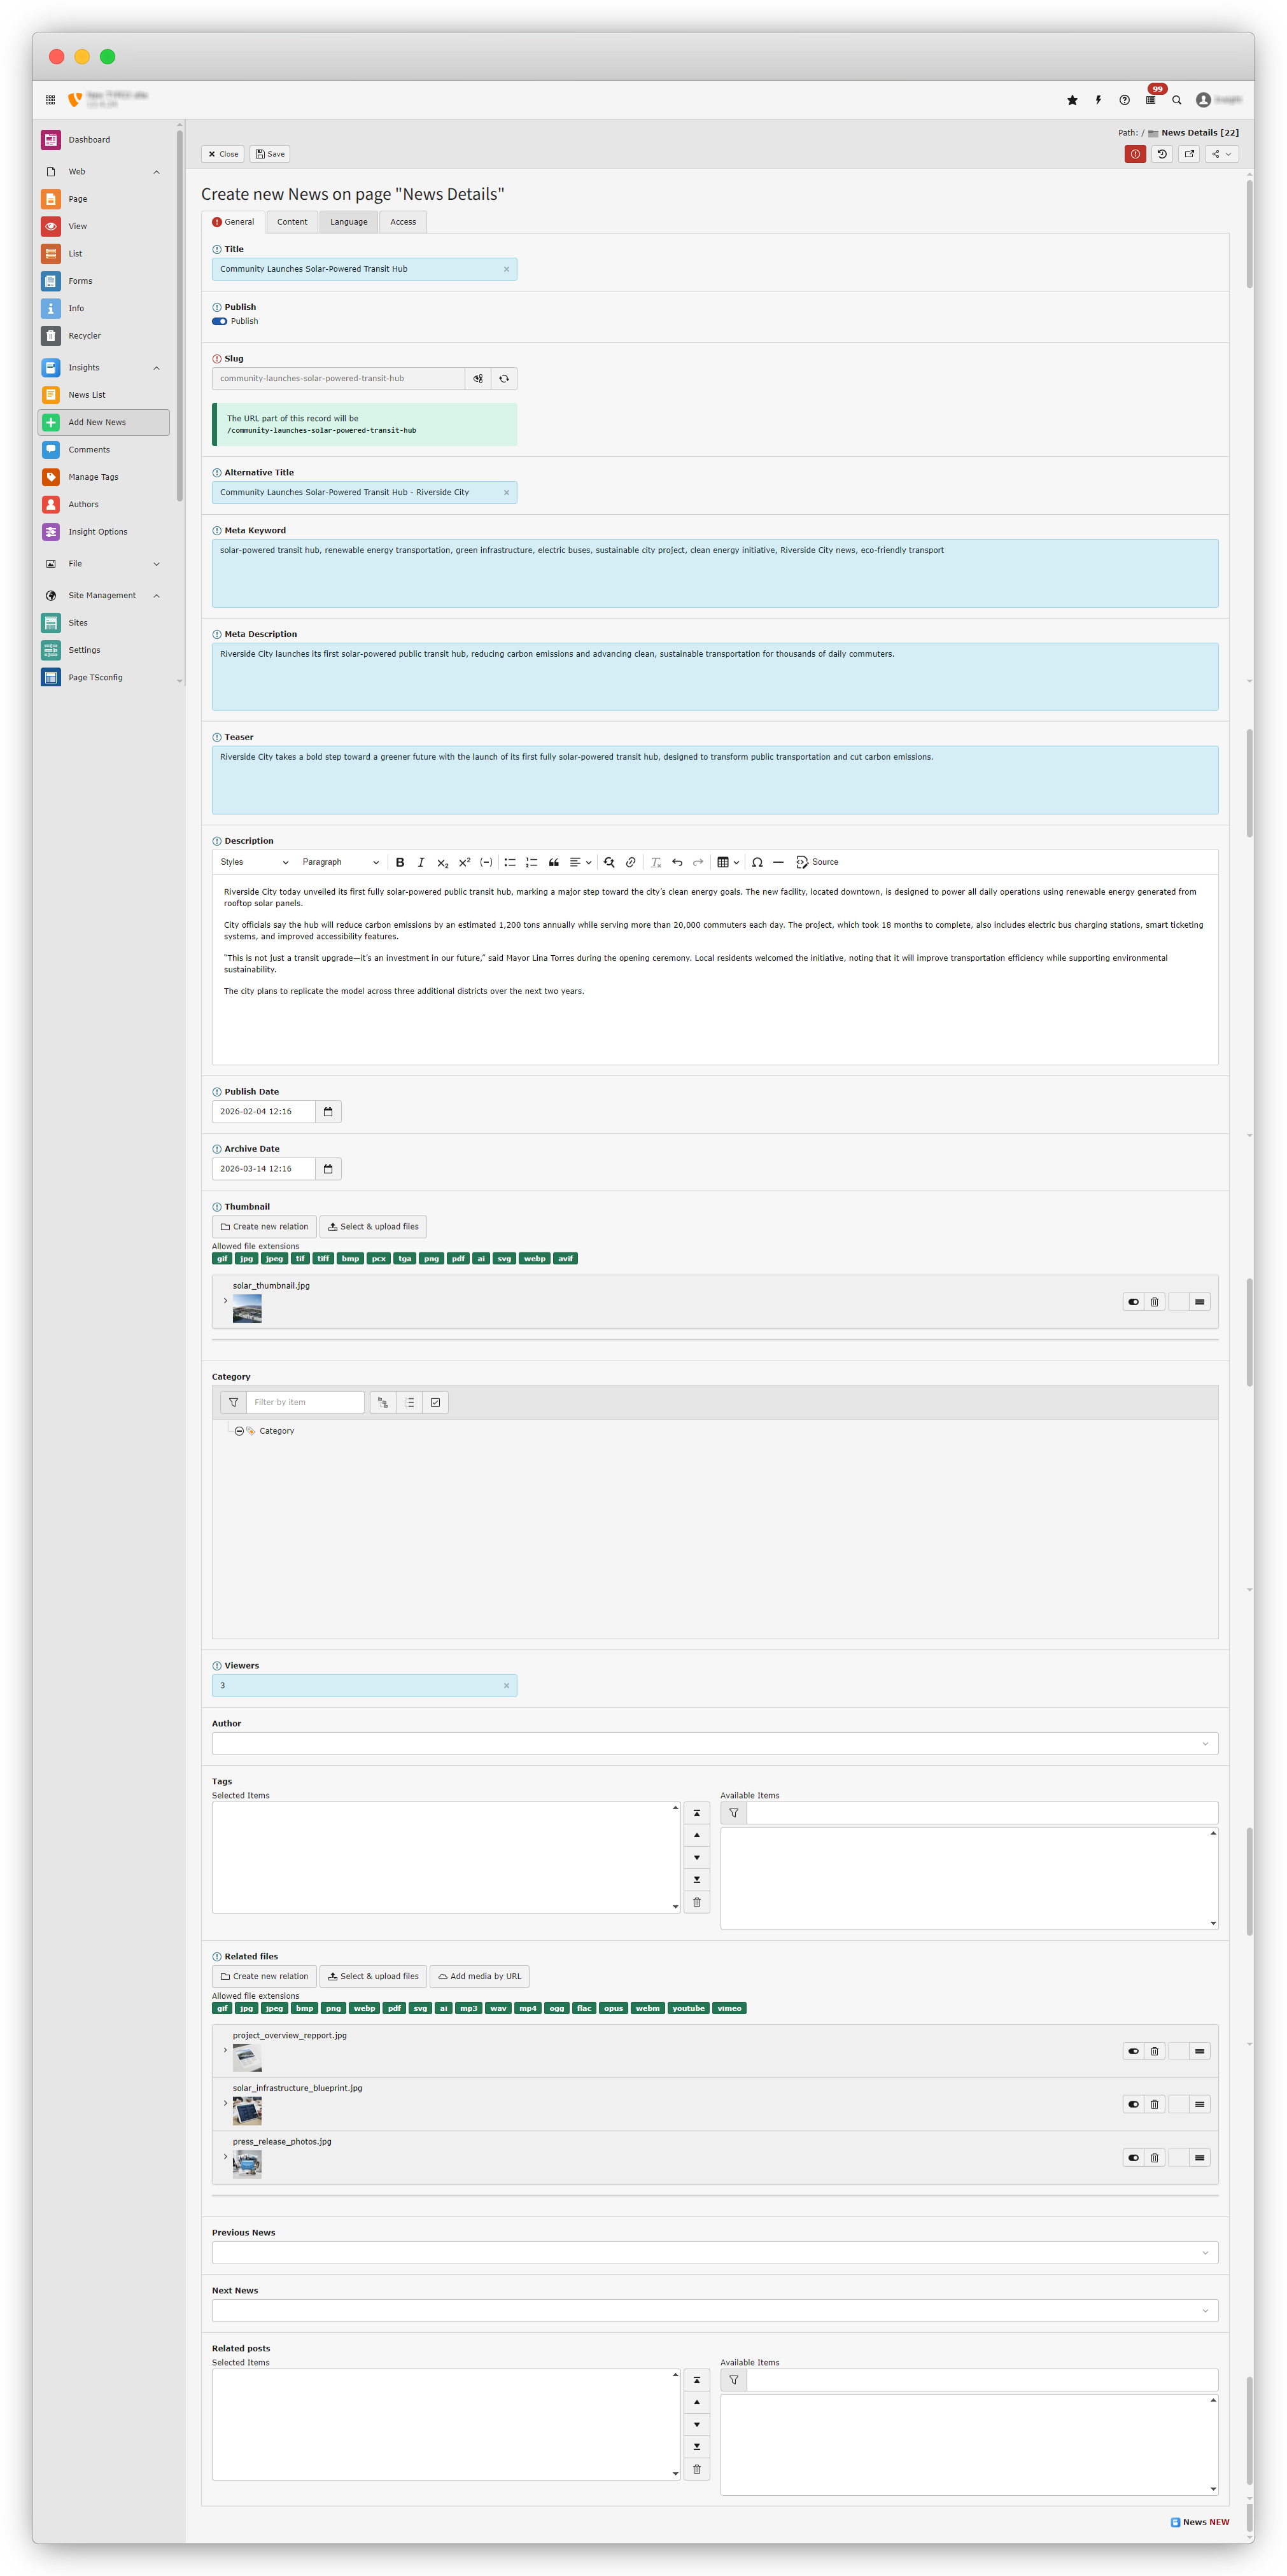
After filling in the basic details, you can save the news—there’s no need to fill in the Content or other tab details.
1. On the top-left side, you will see the Save button. Click on Save, and you will see a message confirming that the news has been saved successfully.
2. The news has now been saved successfully.
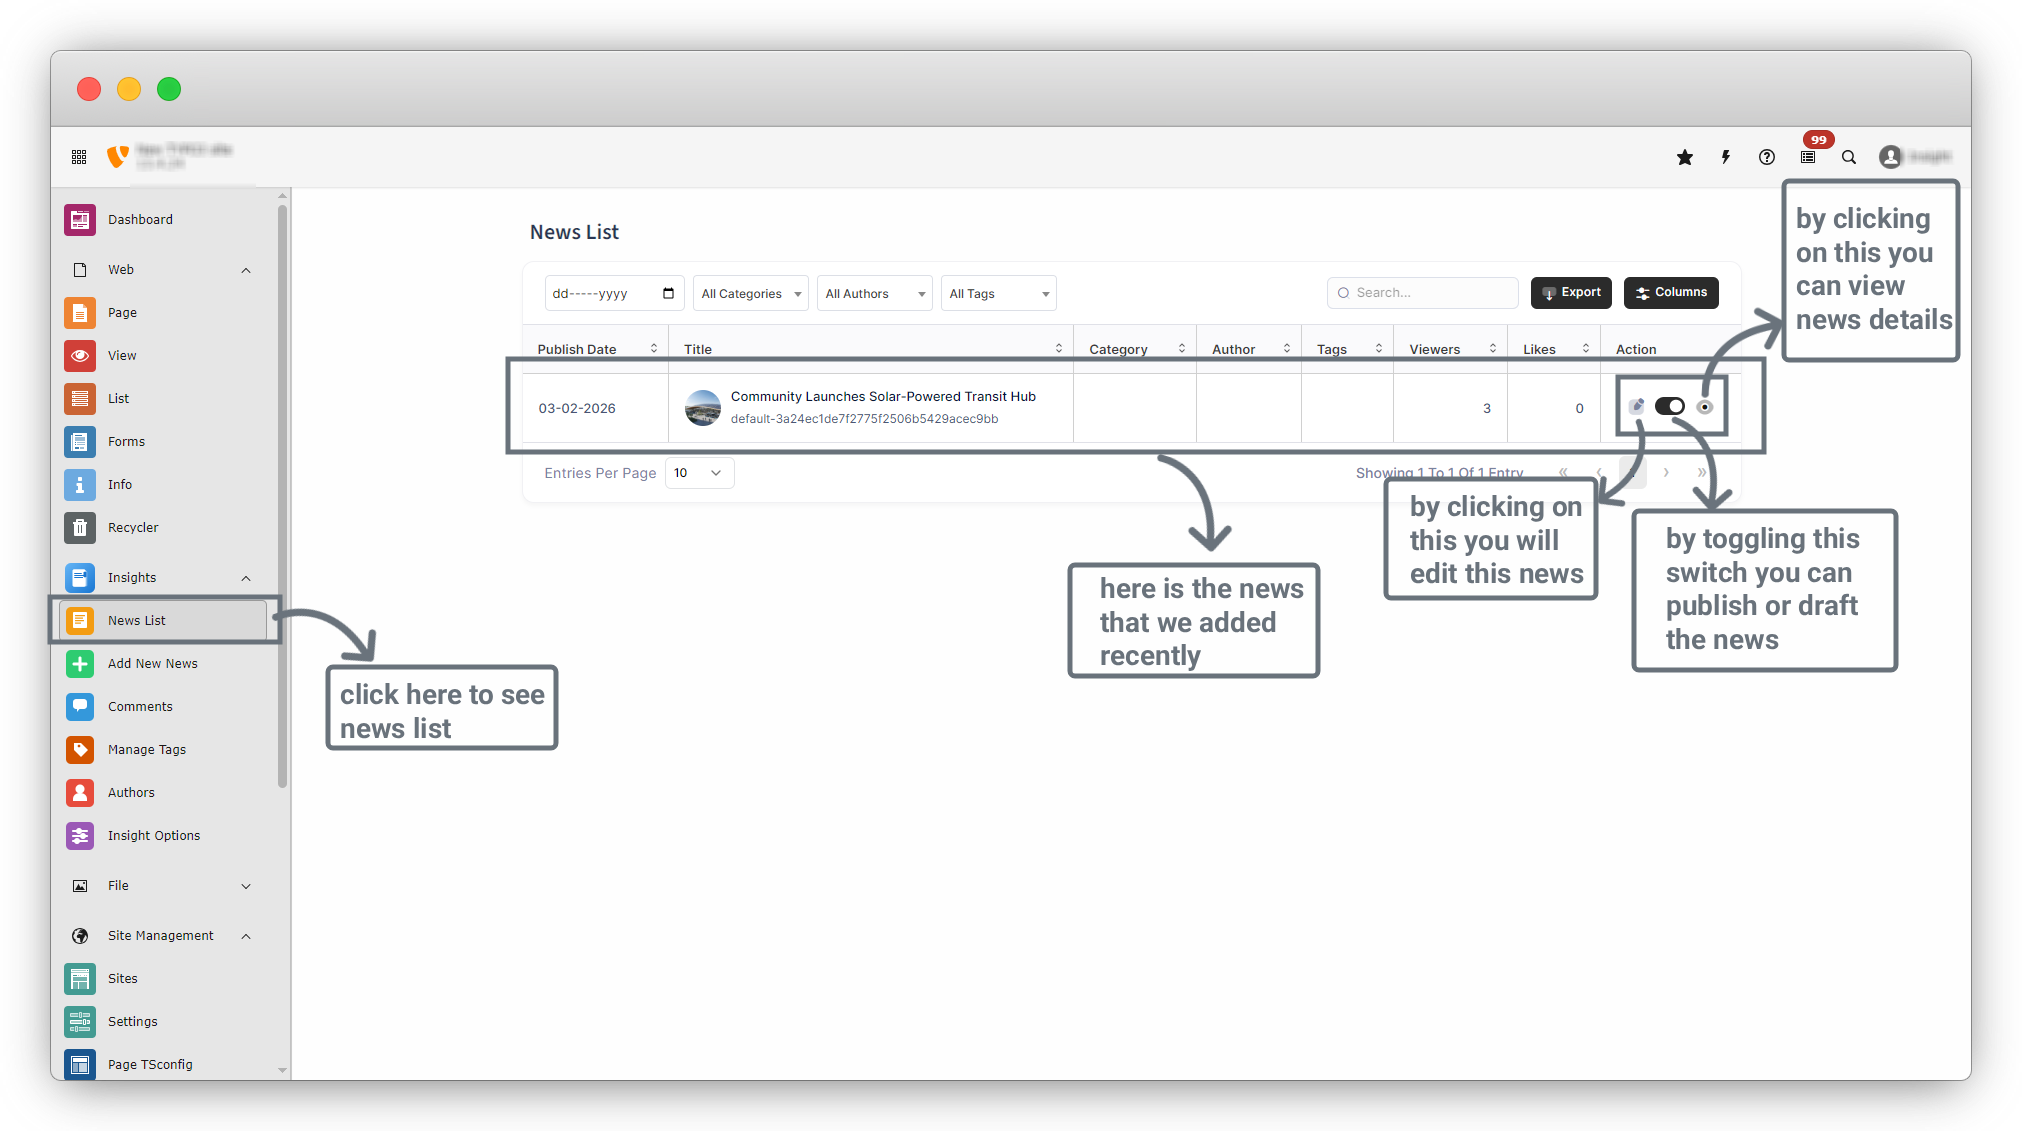
3. On the sidebar, go to Insights > News List, and you will see the news you added displayed in the list.
4. In the News List, there are three buttons for each news item:
- Edit: Click the Edit (notepad) icon to edit the news.
- Publish : Toggle this switch to publish the news or save it as a draft.
- View: Click the View (eye) icon to see the details of the news.
5. Now, go to the Page menu on the sidebar. Click on the List page, and you will see the screen as shown in the screenshot below.
6. Click on the “View Webpage” button to see the frontend view of the list.
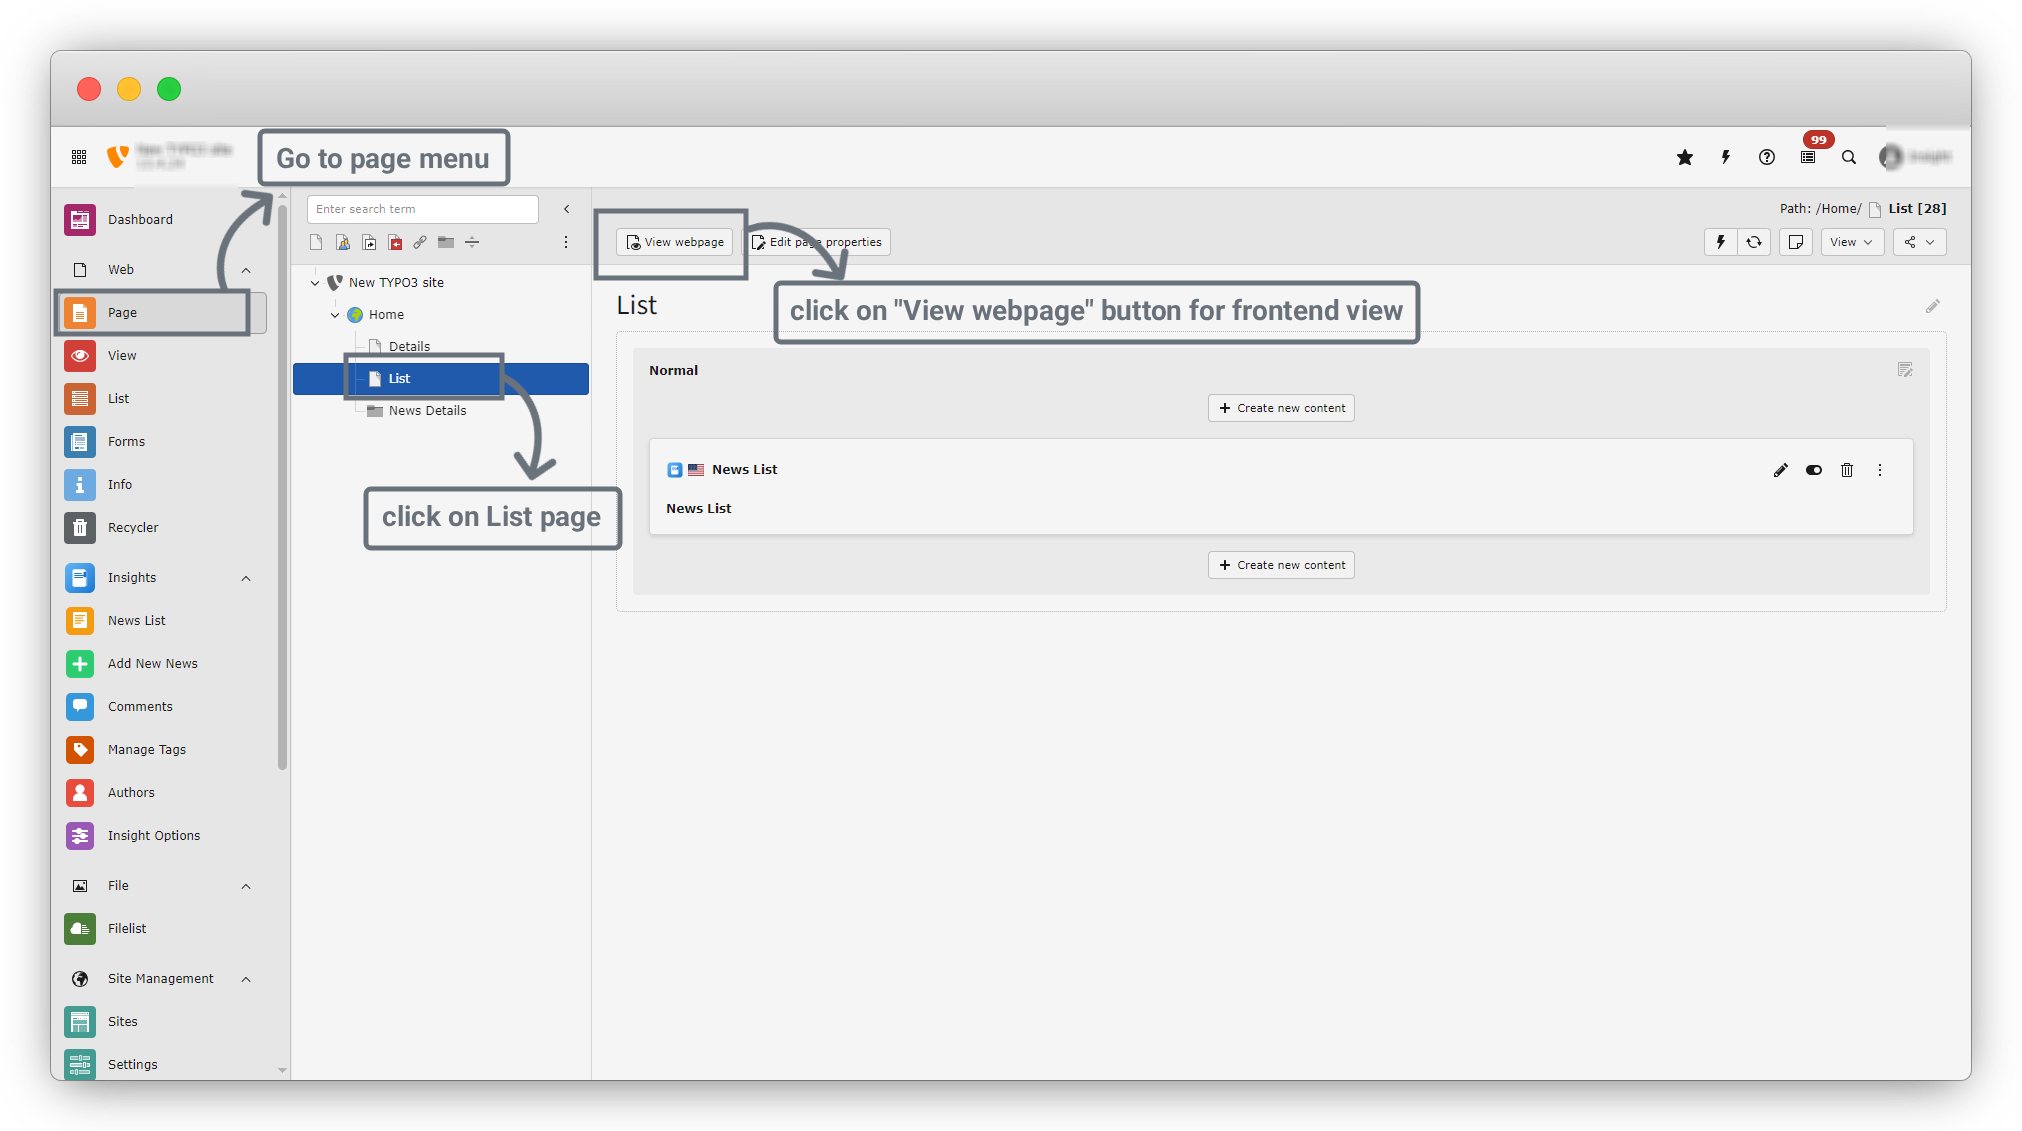
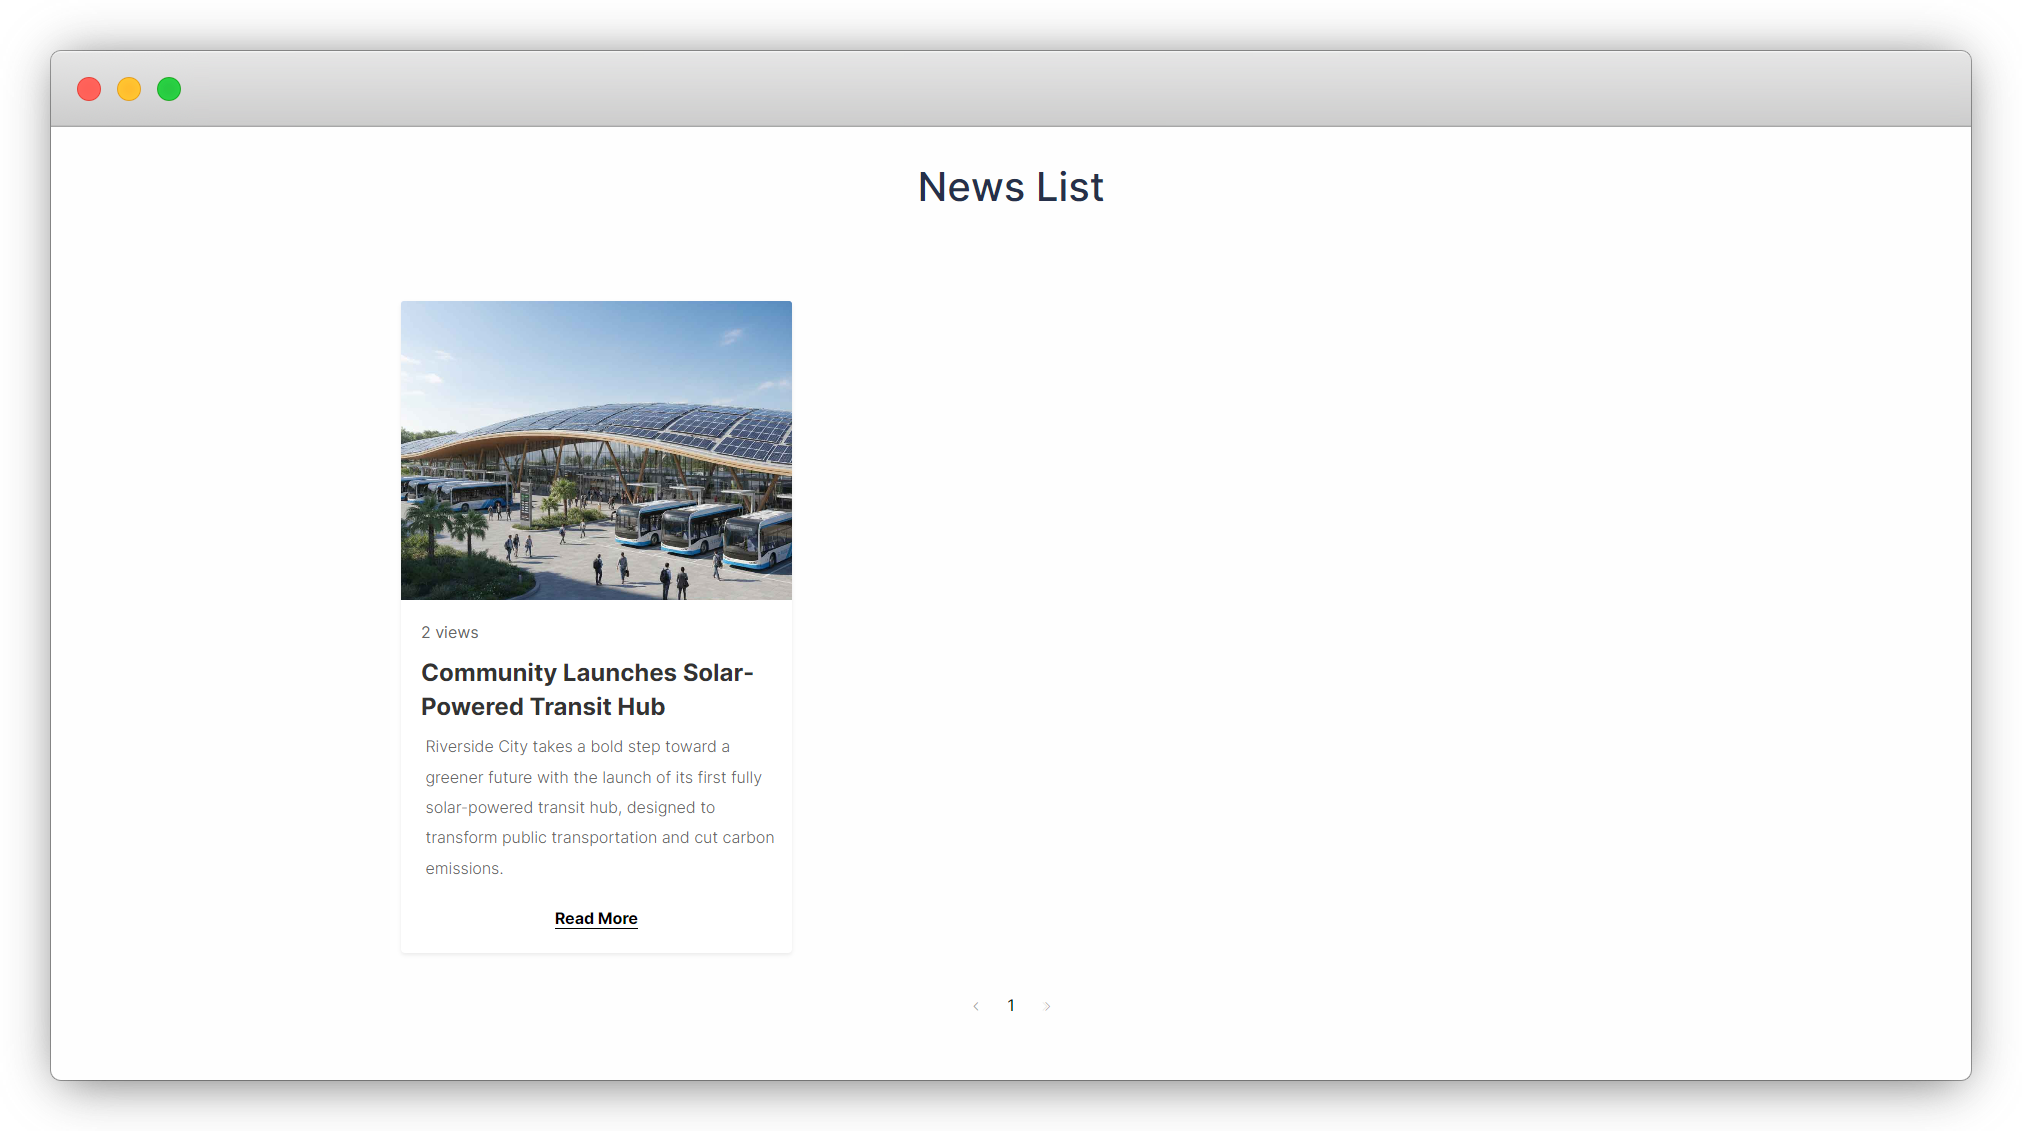
7. In the frontend, the news items will be displayed, and by clicking the “Read More” button, you can open the corresponding News Details page.
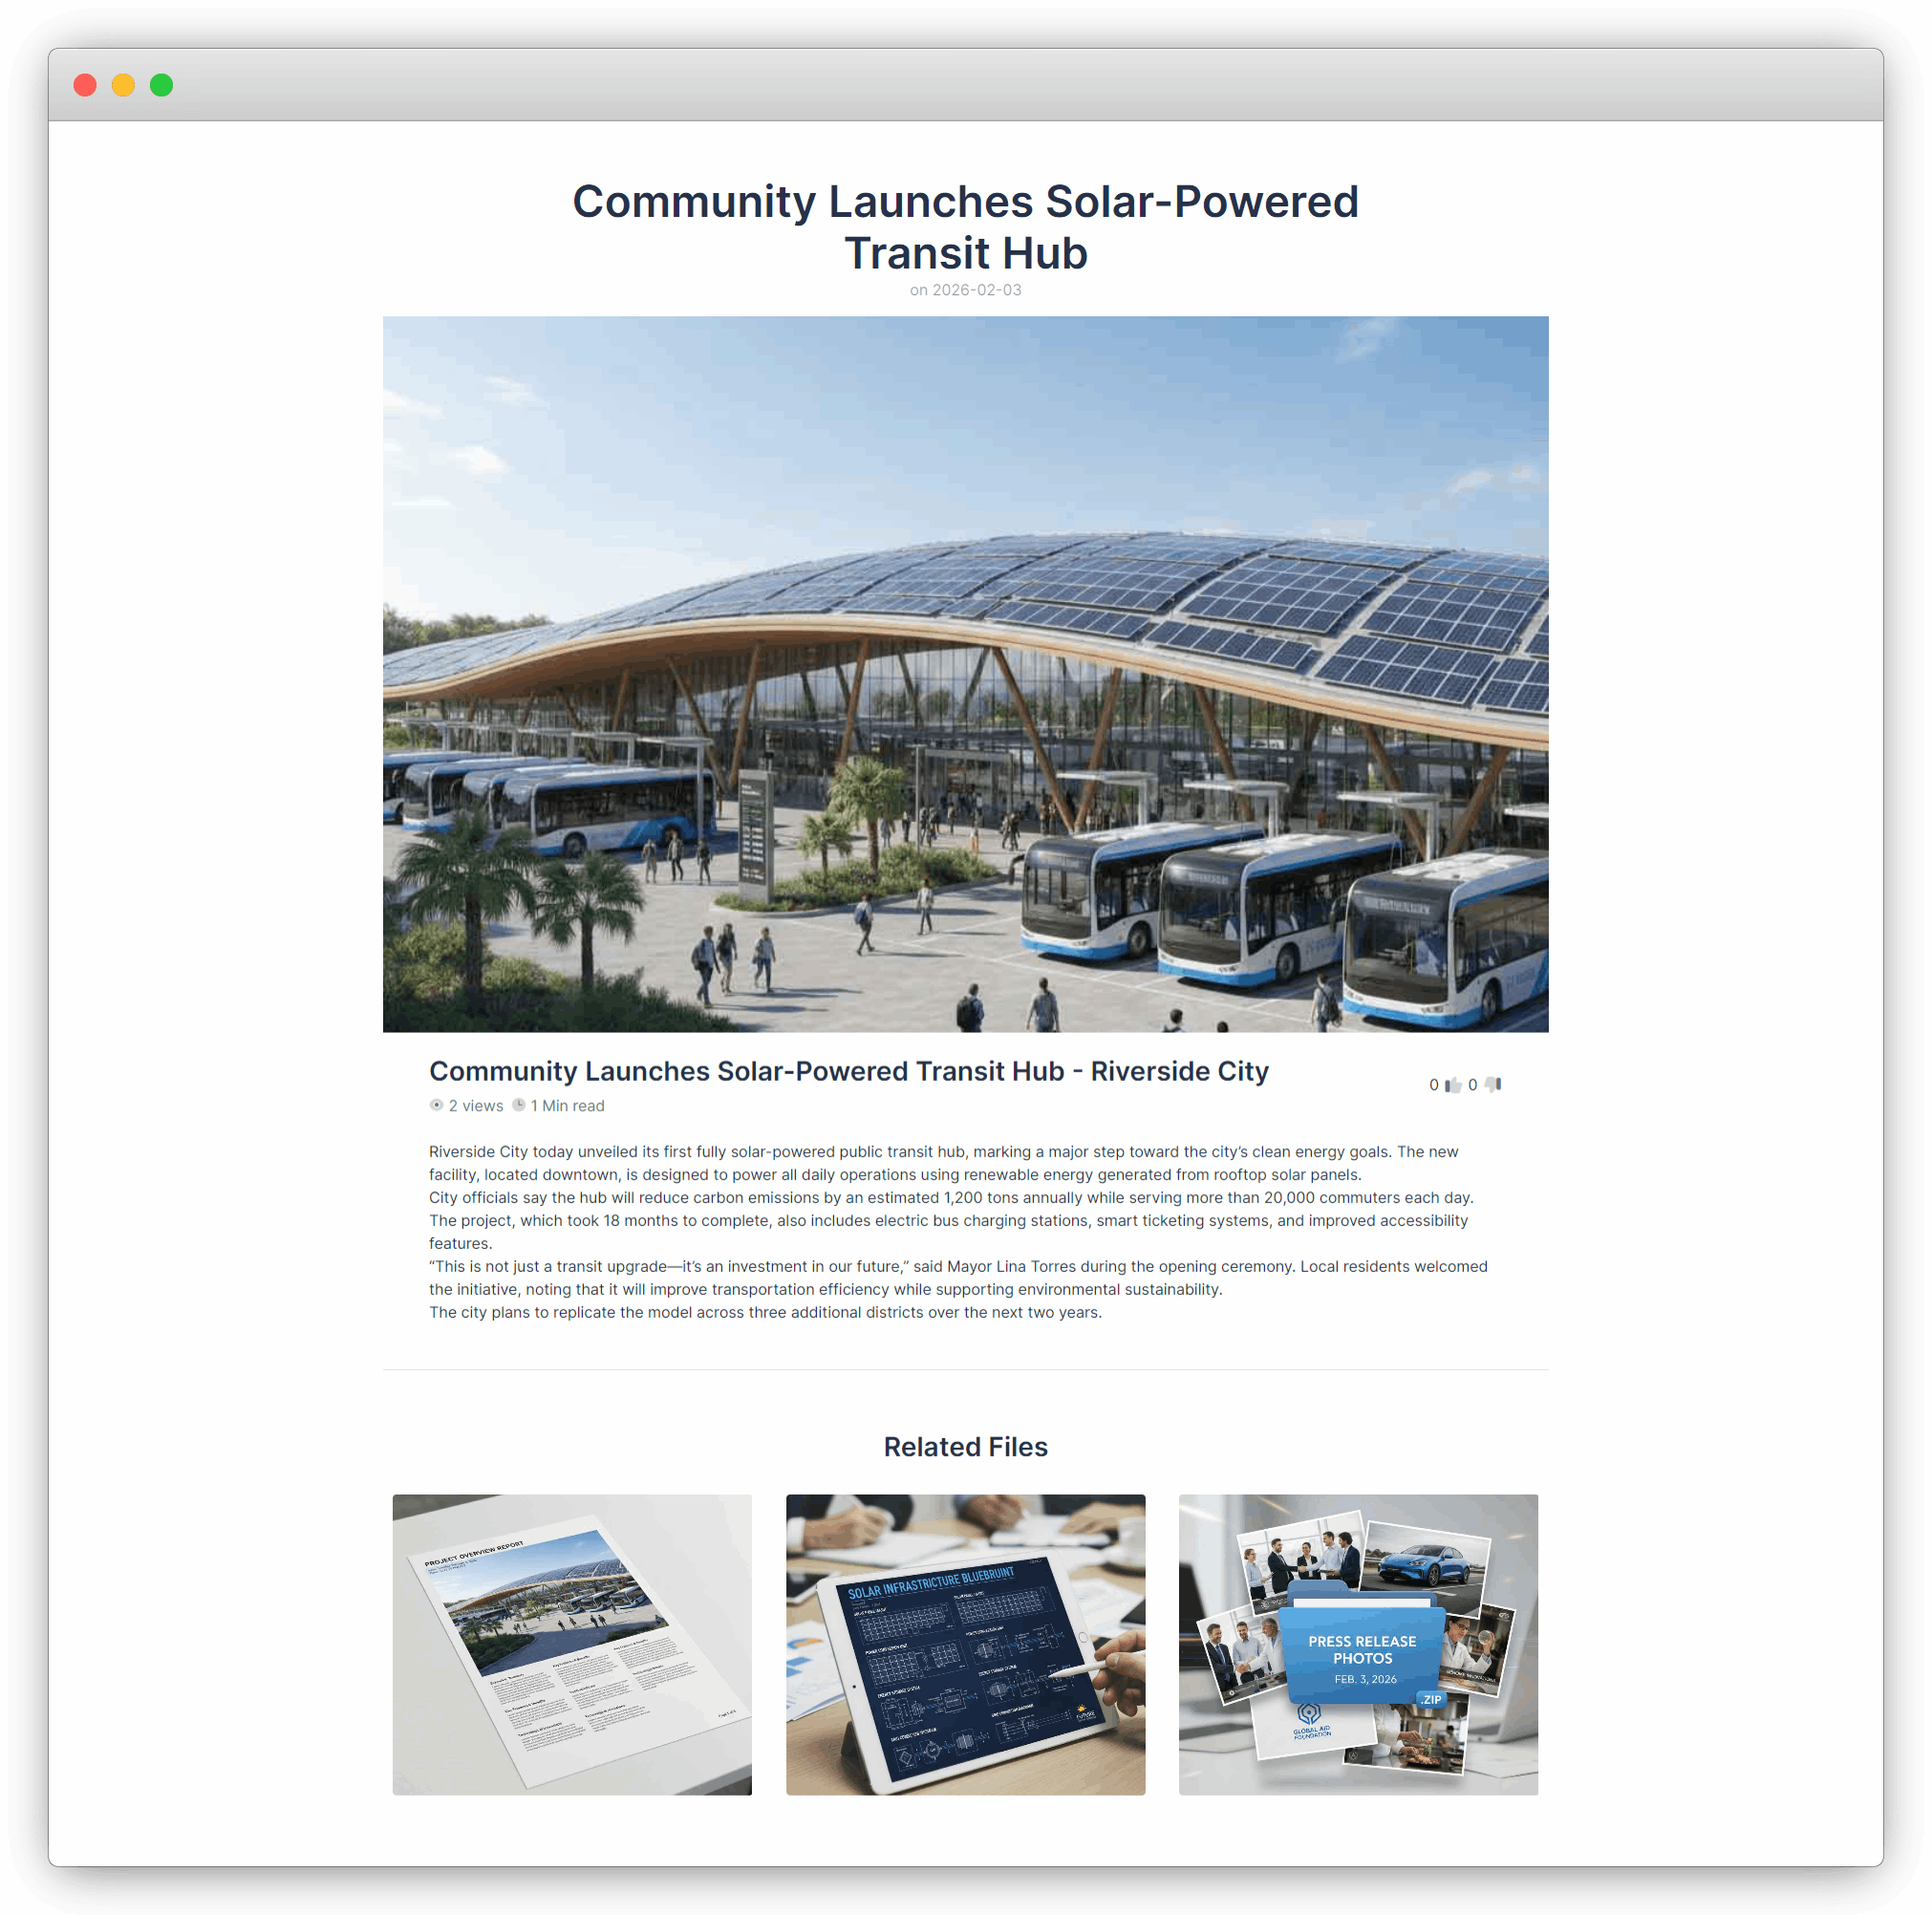
8. In the below screenshot our news details page will be shown there.
9. You can add multiple news like added in screenshot.

Content Tab
If you want to add content, you can do so using the Content tab.
The Content tab offers many options for designing and formatting your news content.
Now, we will add content to the news item we previously created.
Edit News
1. In the News List, you will see an Edit icon. Click on the Edit button.
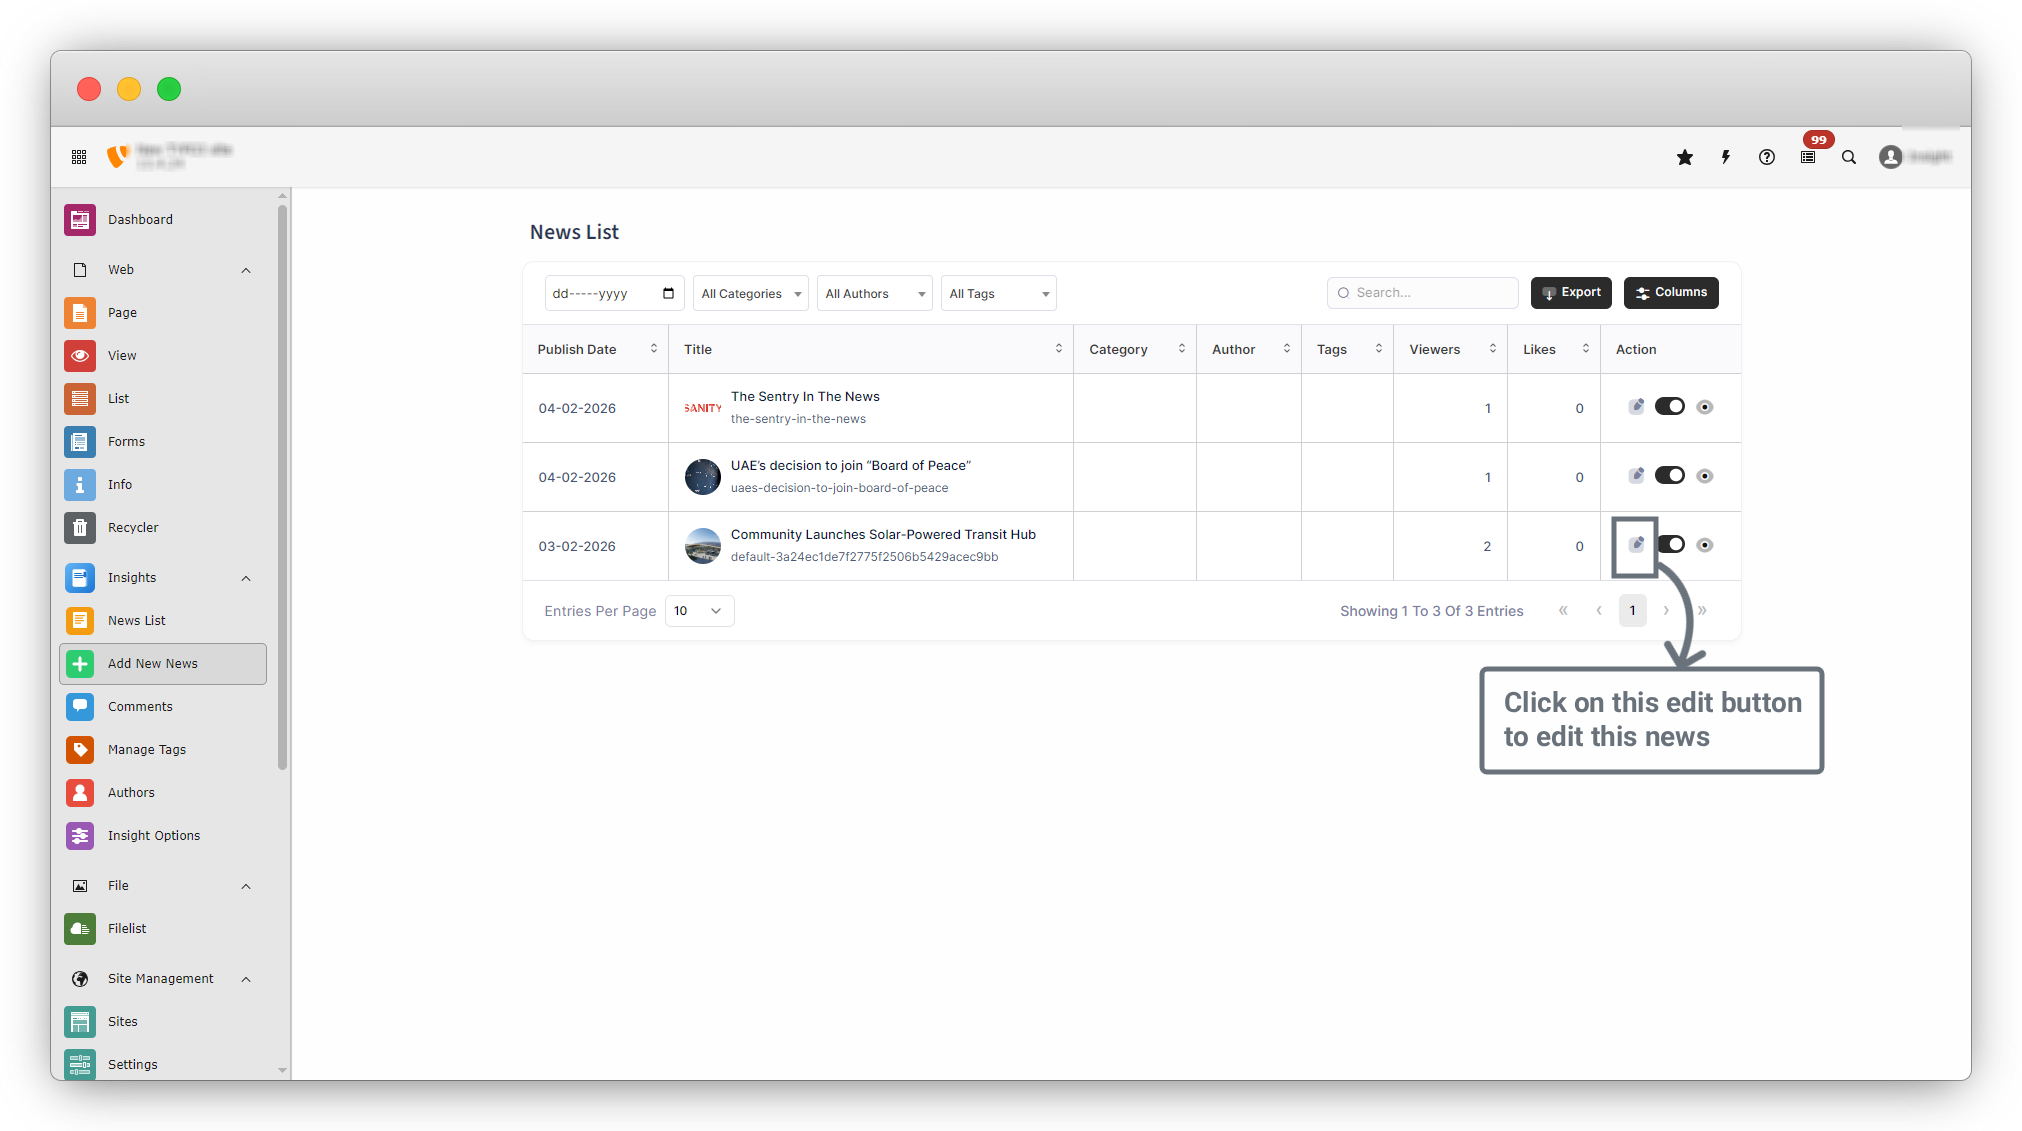
2. The Edit News page will open. This page is similar to the Add New News page, but the fields are already filled with the existing details.
Add Content
1. After clicking the Edit button, the Edit page will open. As shown in the screenshot below, click on the Content tab and then click the “+ Create New” button.
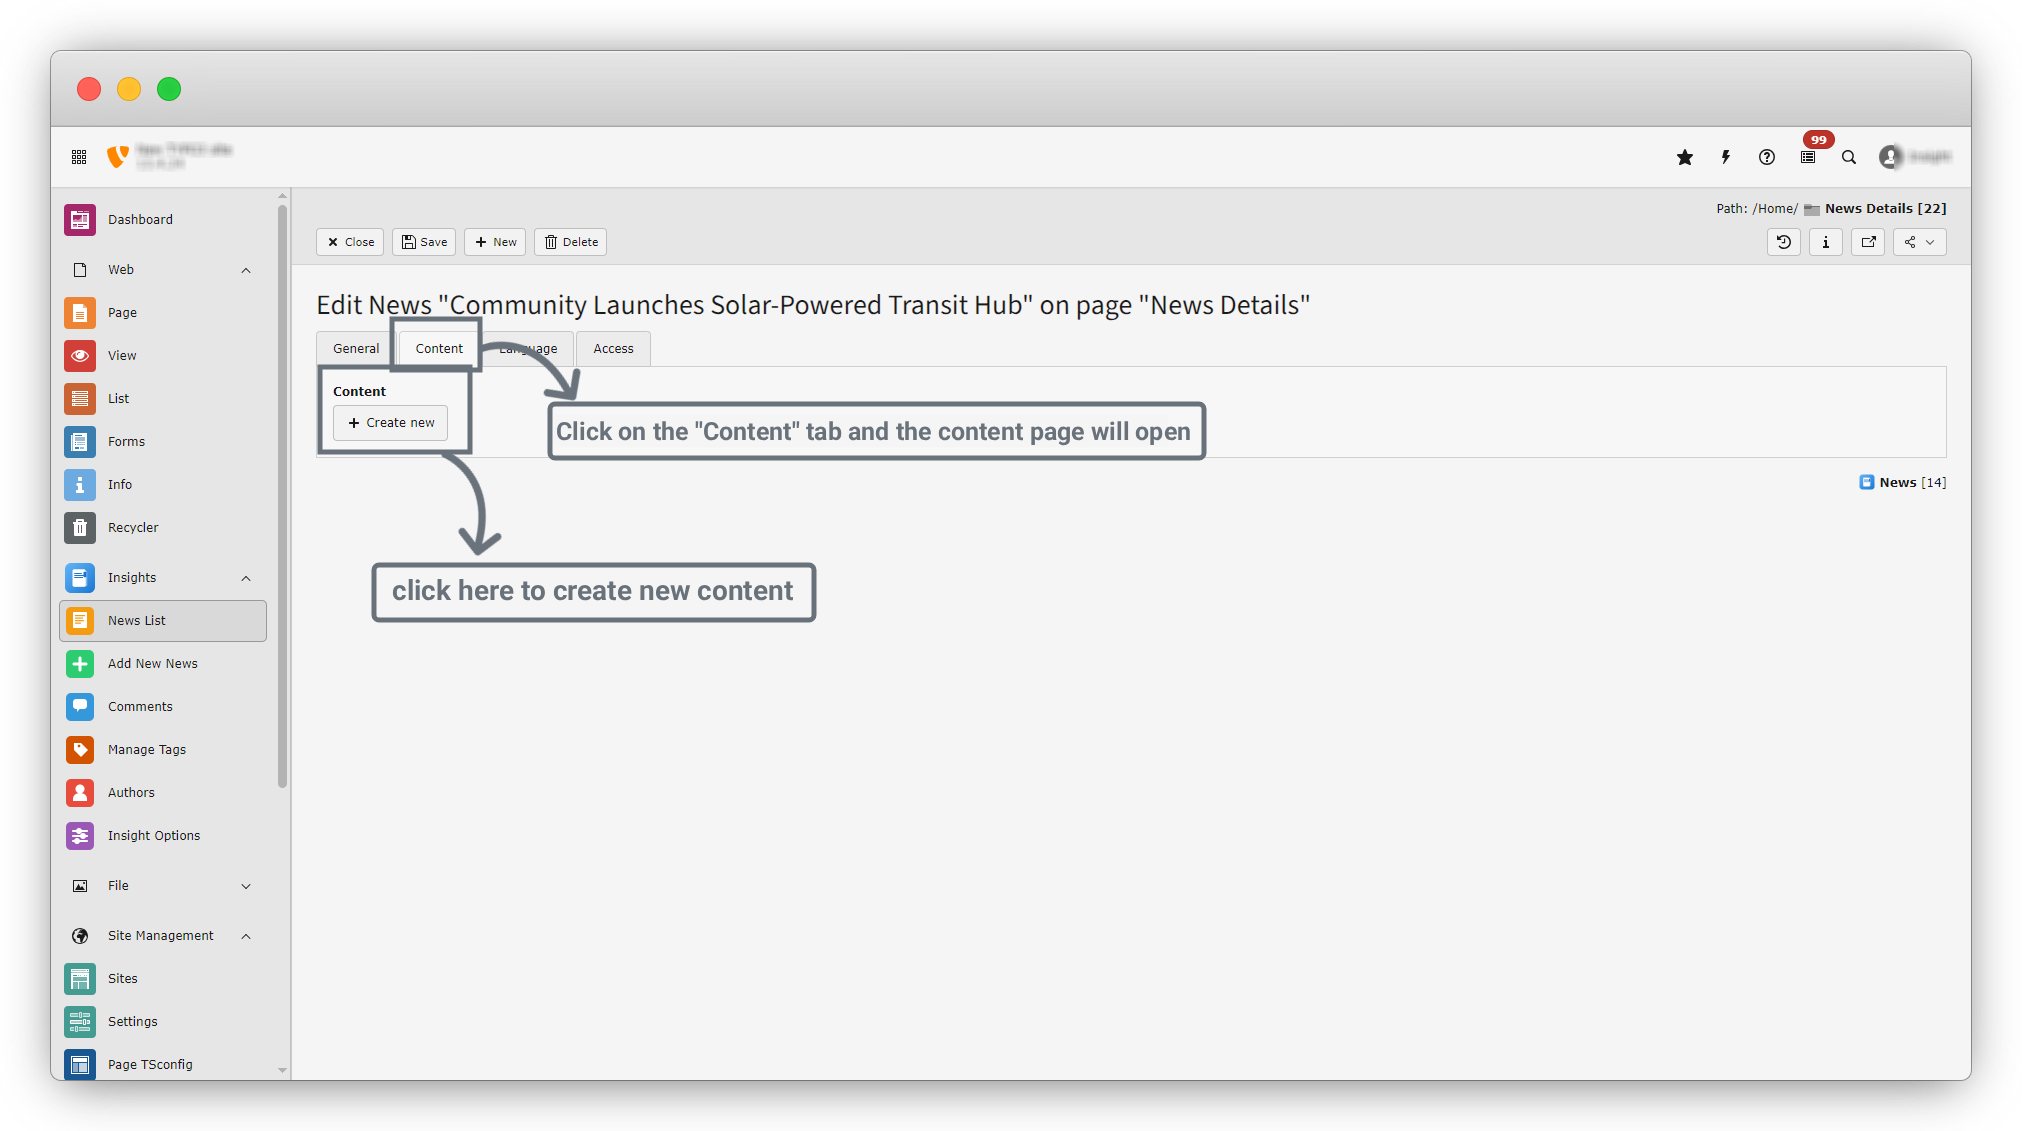
2. After clicking the “+ Create New” button, a blank form will open.
3. You will see a field called “Type”. This is a dropdown field where you can find many content types. You can use these types to add different kinds of content.
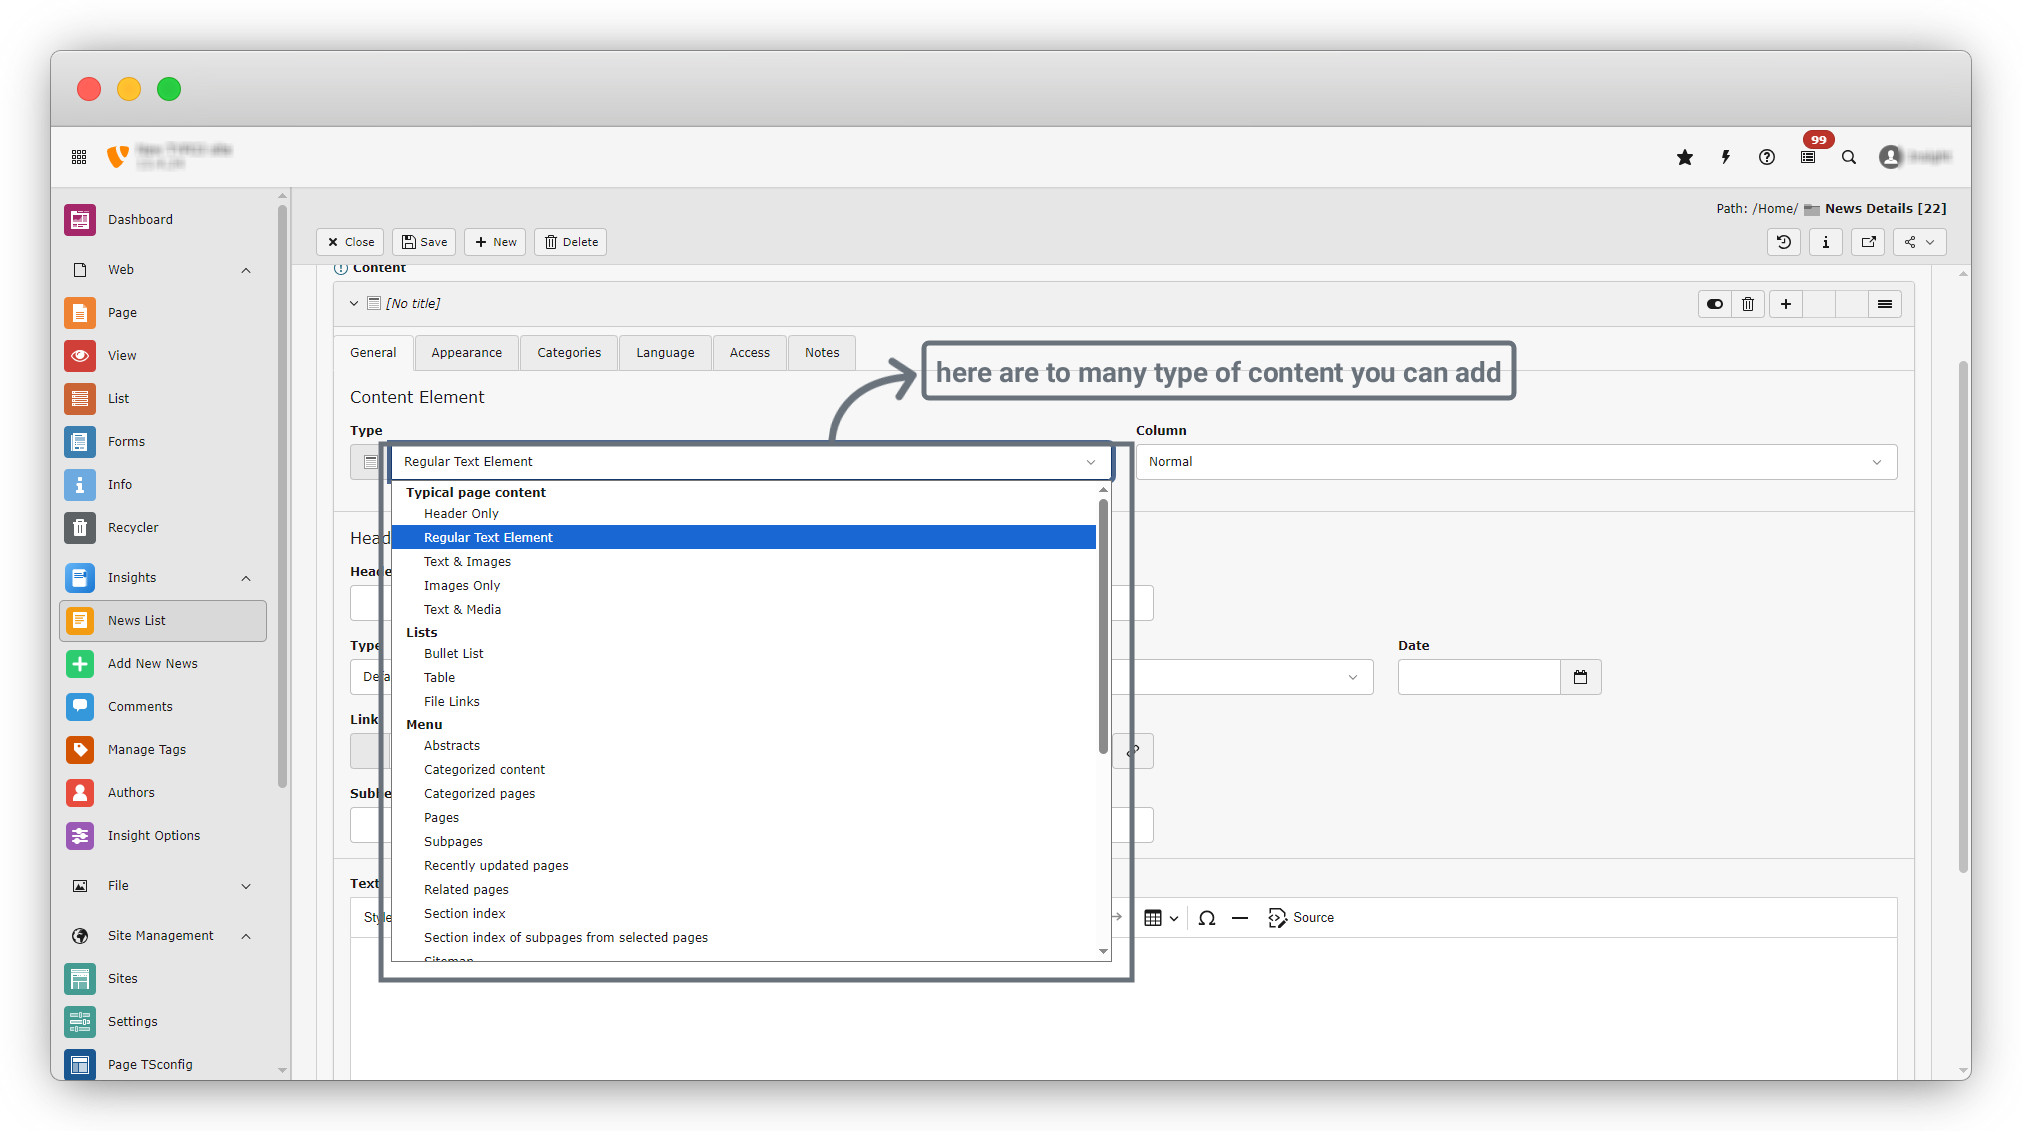
4. Let’s create content using the “Regular Text Element” as an example.
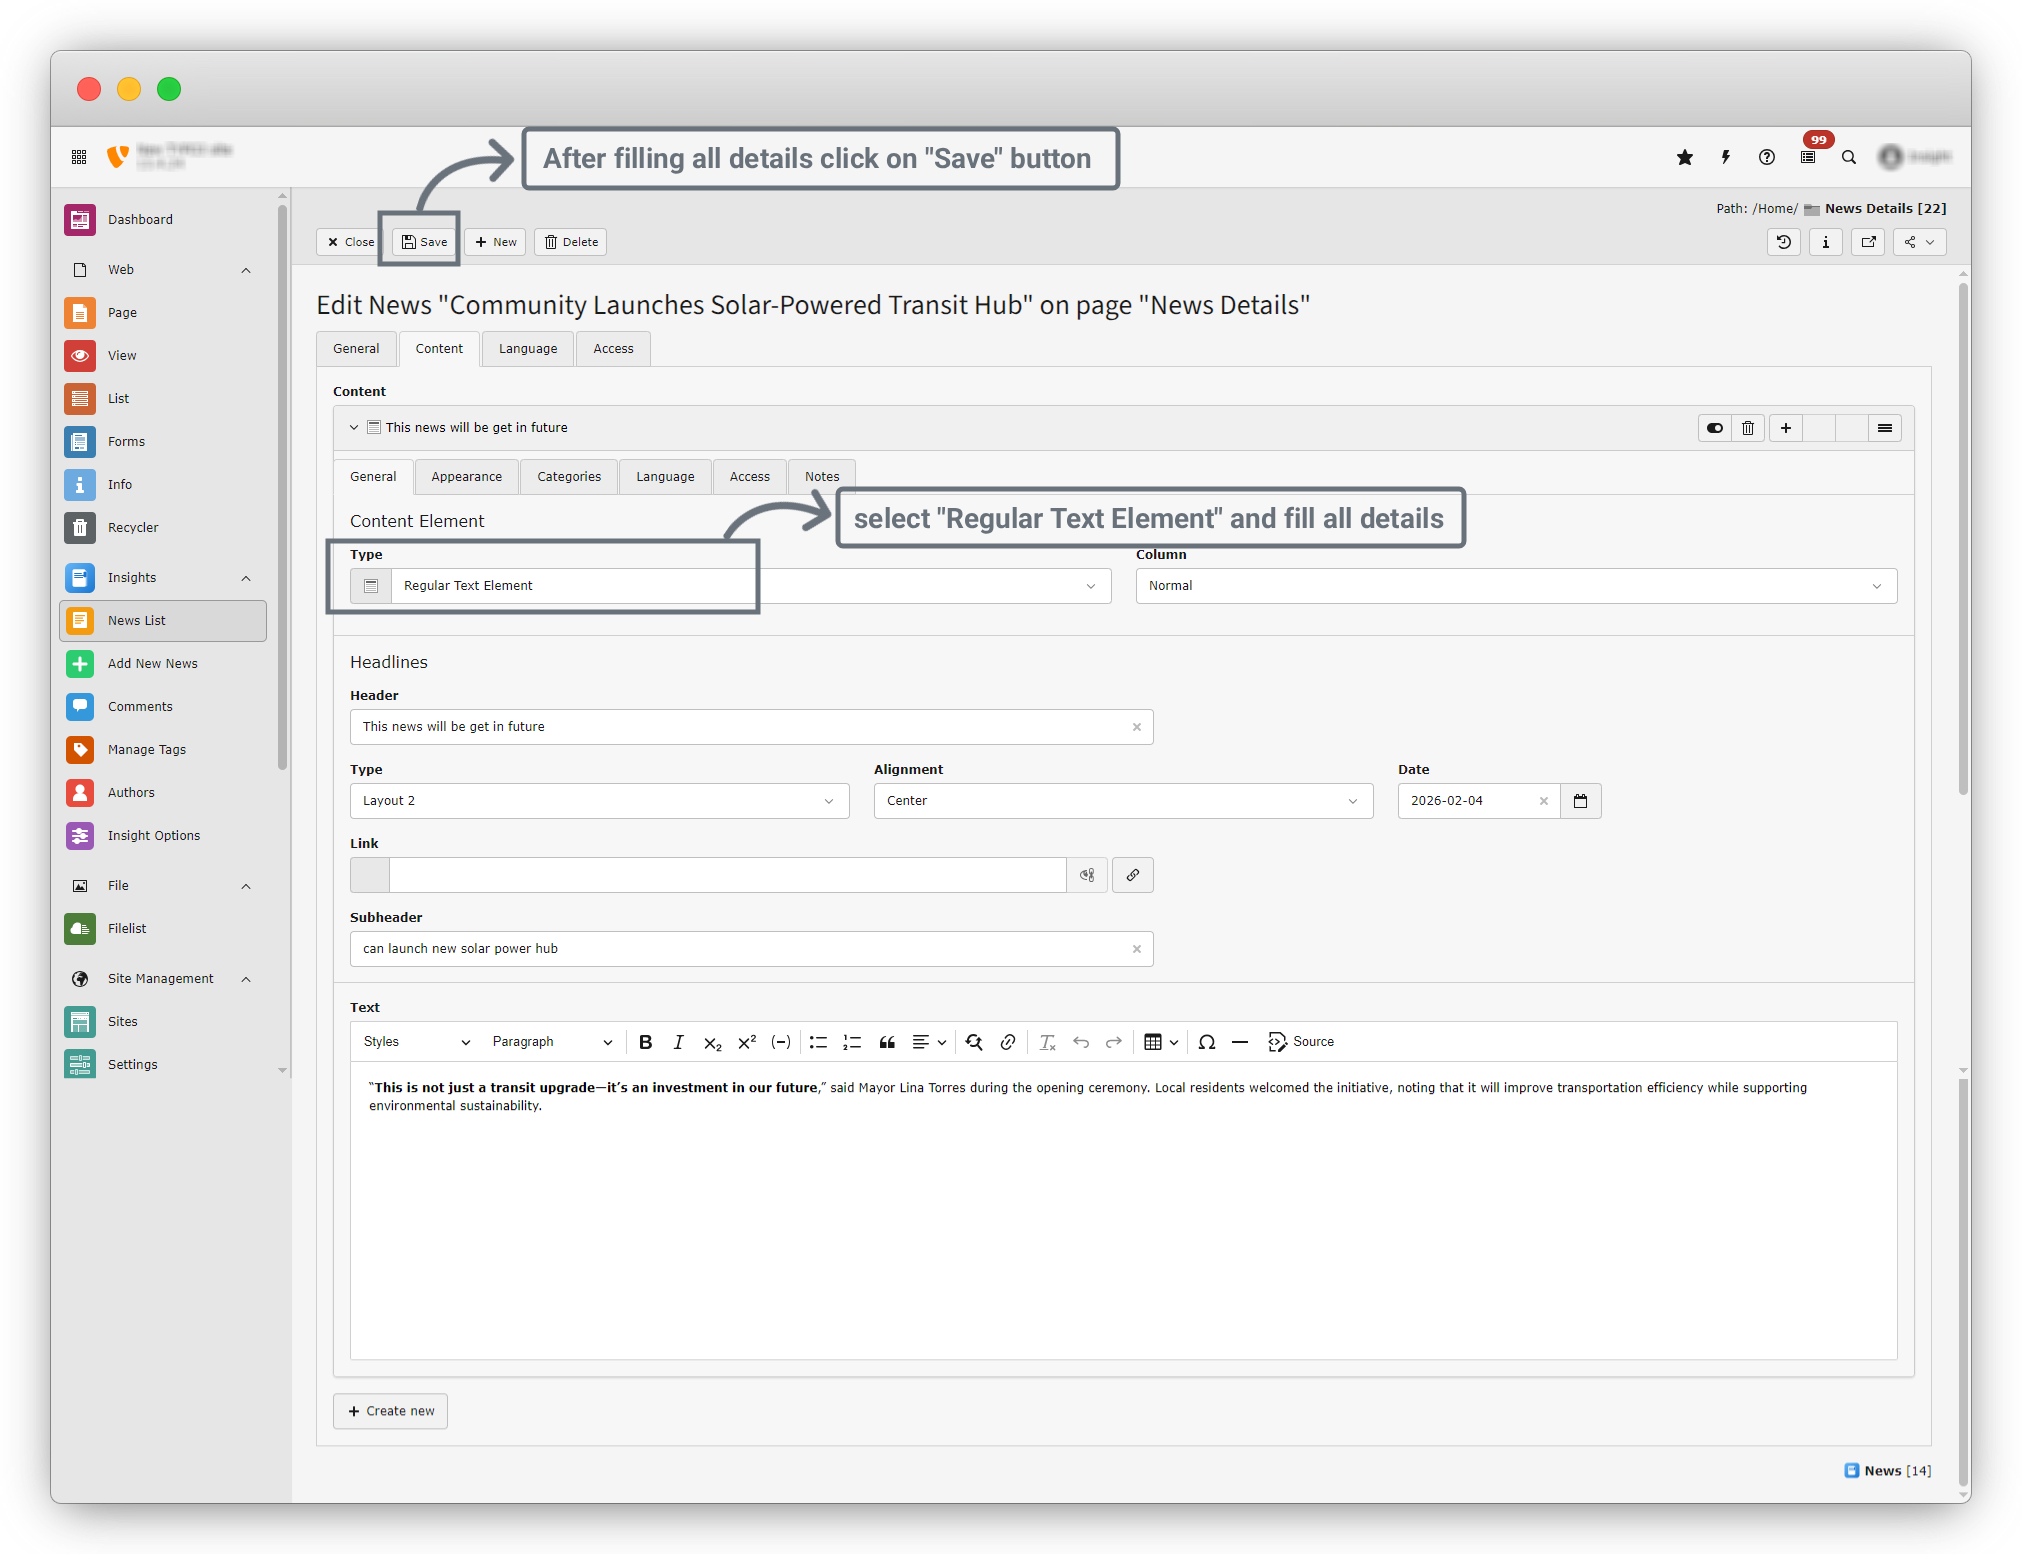
5. Select the “Regular Text Element” type. The related fields will appear. Fill in all the required details and click the Save button.
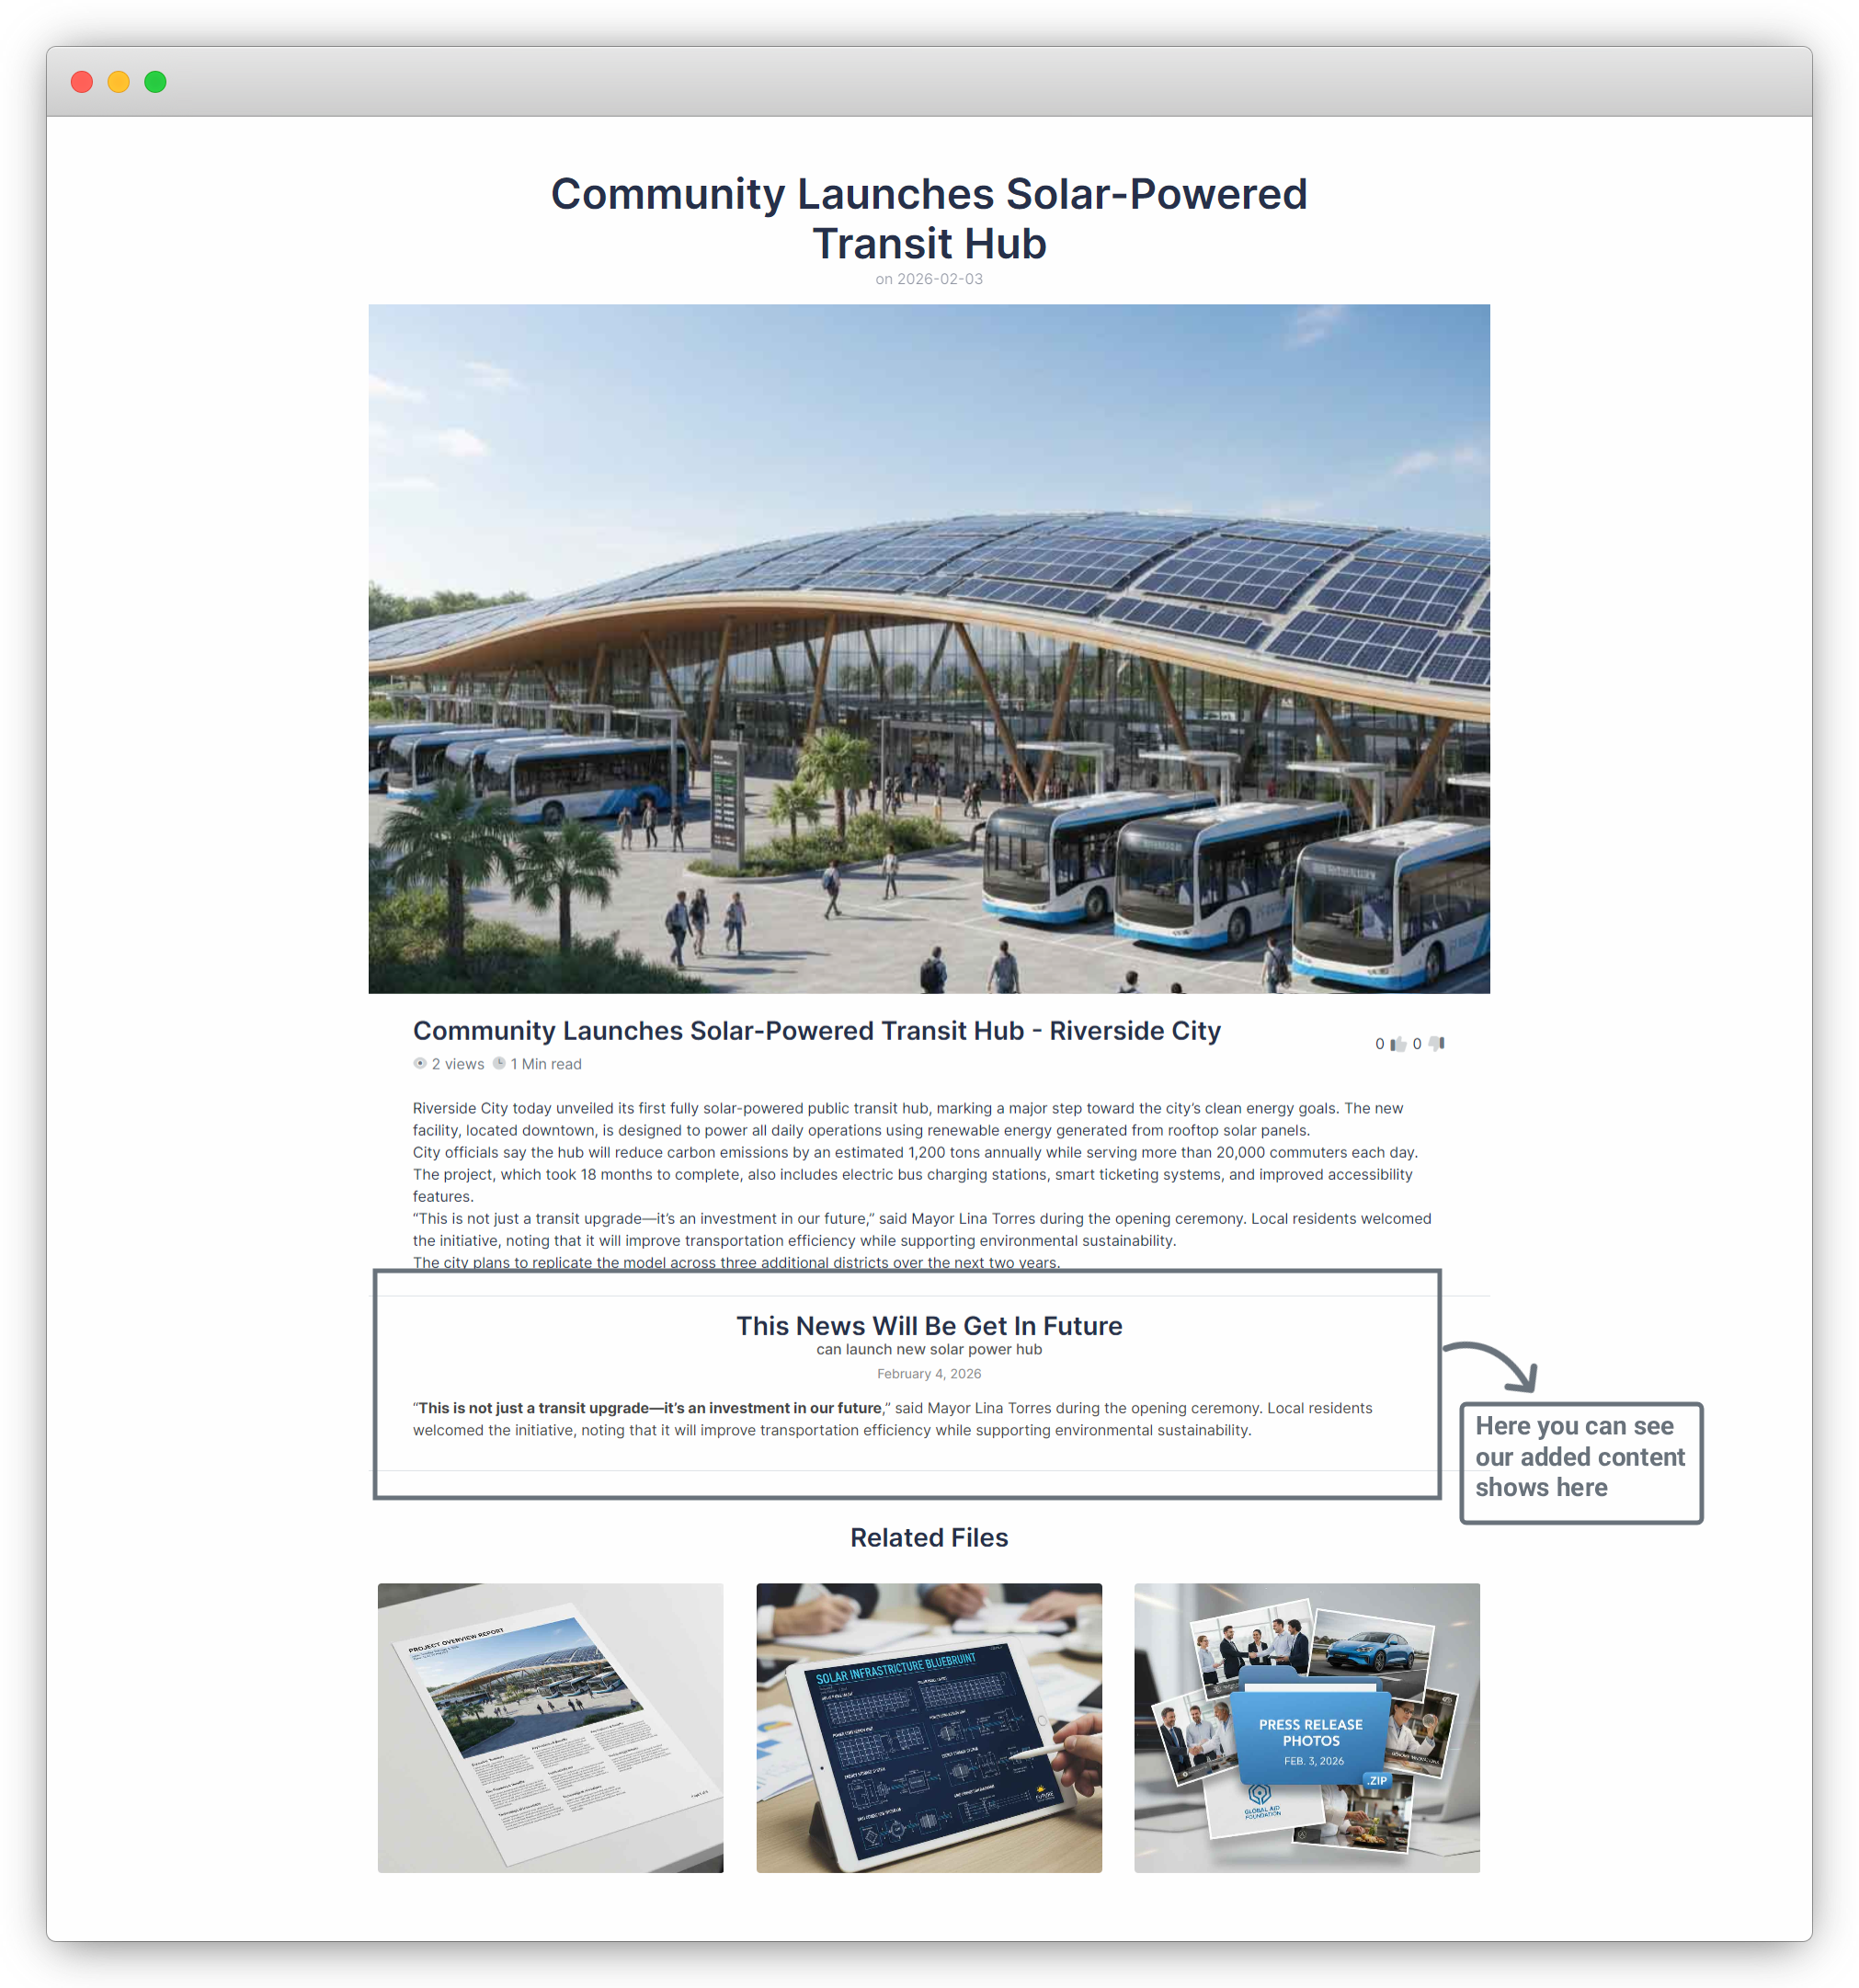
6. Now, open the News Details page. You will see the content displayed there, as shown in the screenshot below.
7. In the Type field dropdown, you can see many options. Each option works differently. You can add them one by one and check how each type works.
Language Tab
In the Language tab, you will see a Language dropdown field.
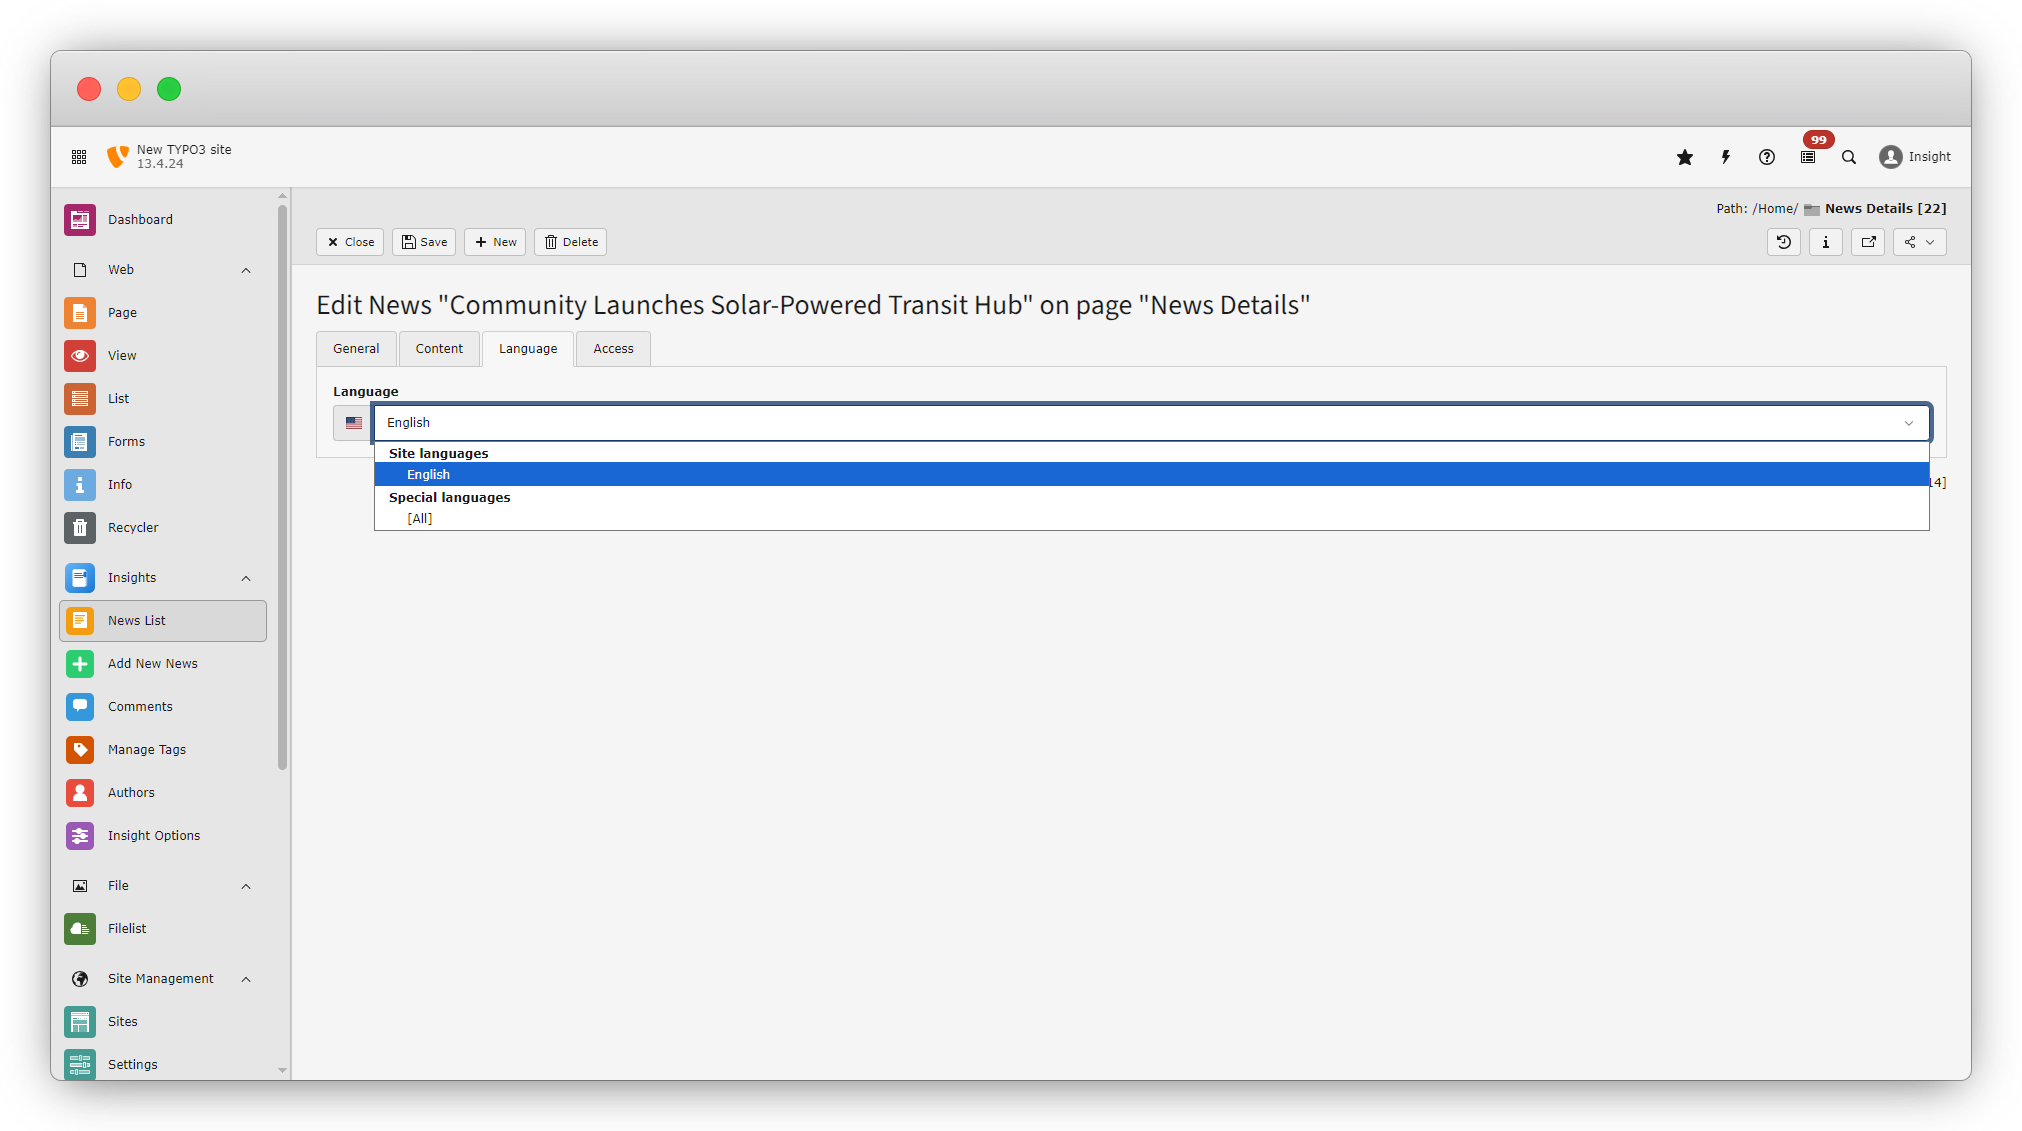
- The dropdown contains two types of languages:
- Site Languages
- Special Languages
- Currently, the Language dropdown shows only English and the All Languages option. You can add more languages from Site Management > Sites module for the frontend view of the site.
- For now, we are not making any changes in the Language tab.
Access Tab
The Access tab controls the accessibility of the news item.
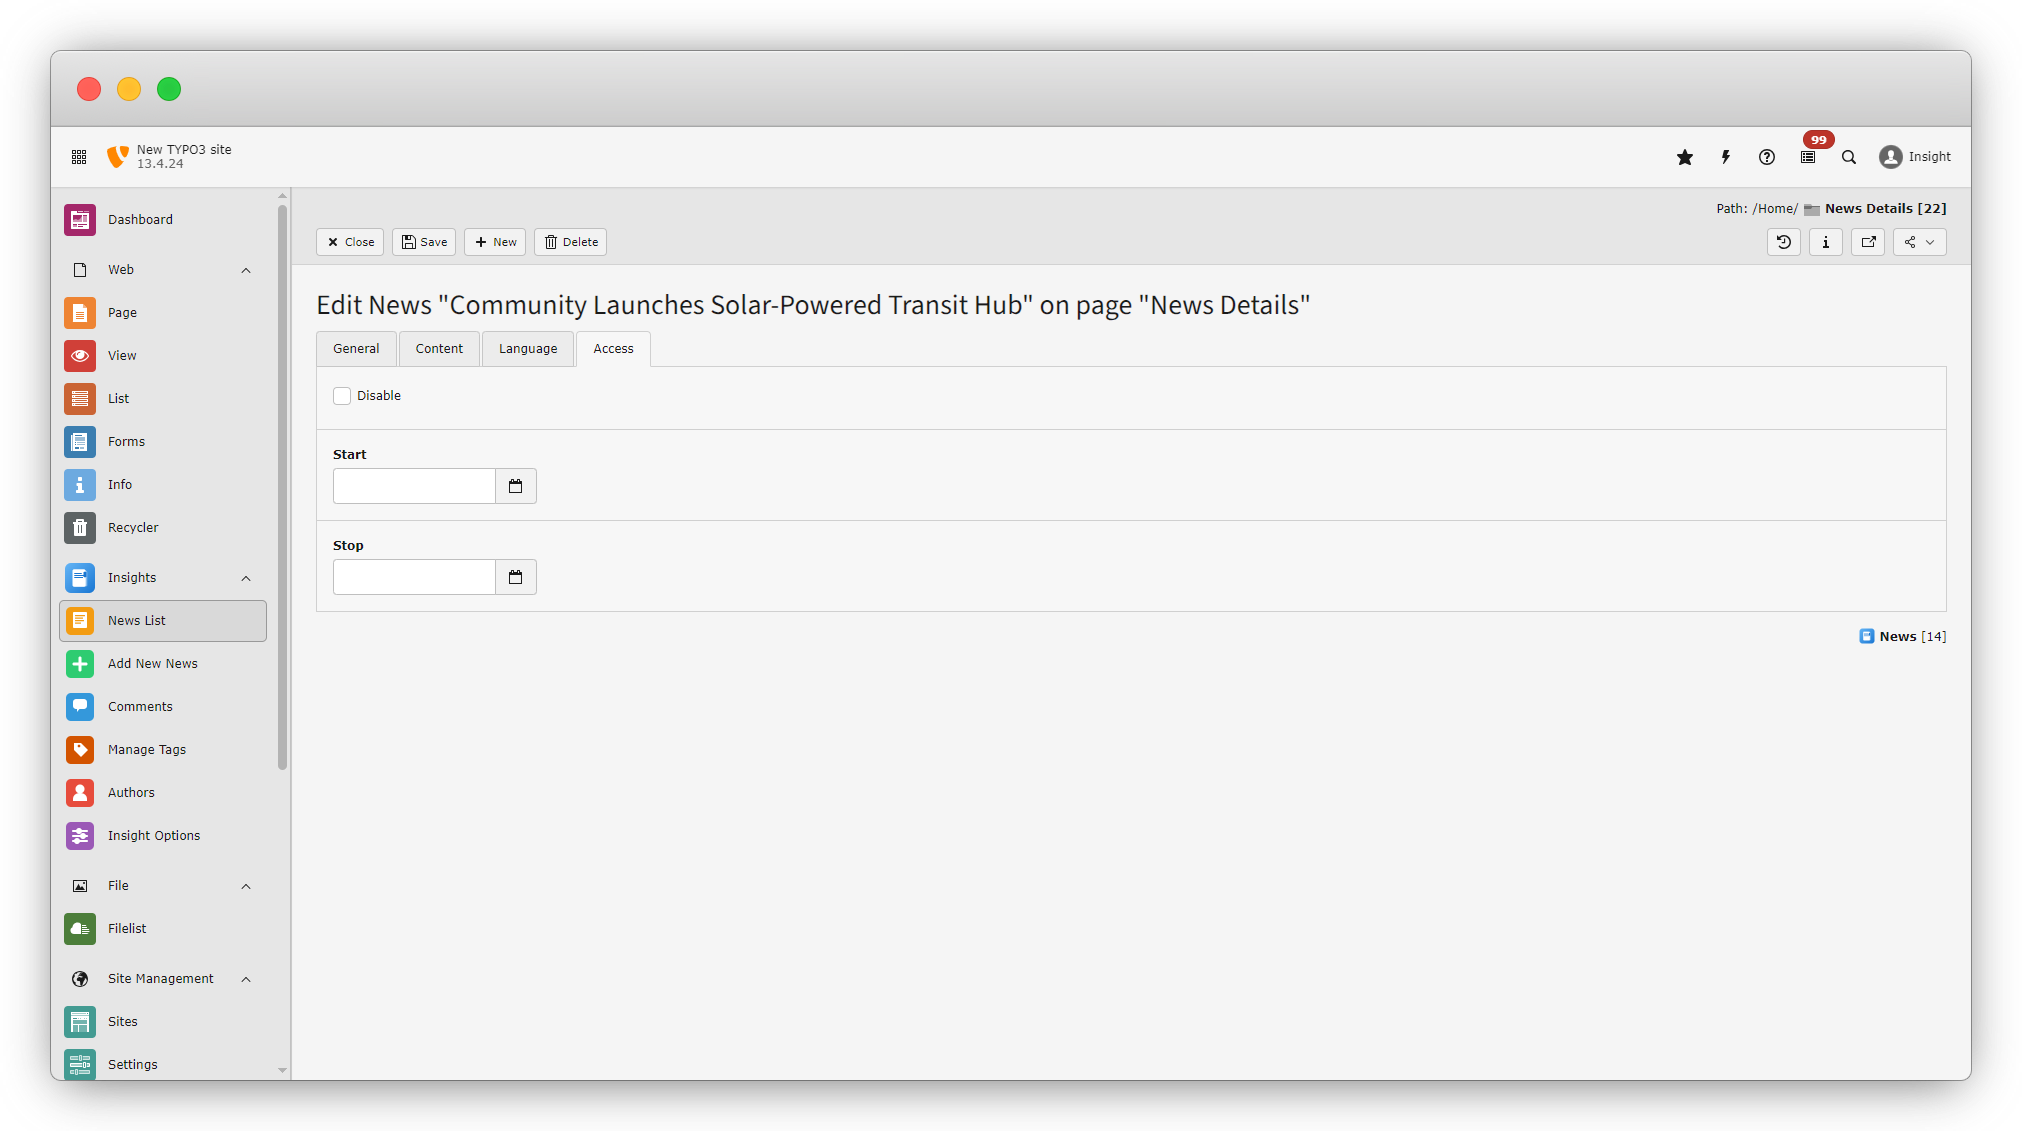
It has three fields:
- Disabled (checkbox): Used to disable the news.
- Start Date (date picker): Specifies the date from which the news will be visible.
- Stop Date (date picker): Specifies the date until which the news will be visible.
Common Mistakes to Avoid
- Forgetting to enable Publish
- Missing Publish Date
- Using very long titles.
- Uploading very large images.
Quick Checklist Before Saving
- Title added
- Description filled
- Publish enabled
- Category selected
- Publish date checked
- Thumbnail uploaded (optional)
- Enable List and detail view of thumbnail
Share


