
URL copied to clipboard

Theme Options
43 views
__readtime__ Min
read
1. Add Header
Go to Theme Options > Header. You can upload the logo and favicon from here. Also, you can upload CSS and JS files from here. Just go to the Header tab and upload your logo, favicon, CSS file and JS file.

2. Add Logo
1. Here is an example of a logo upload.

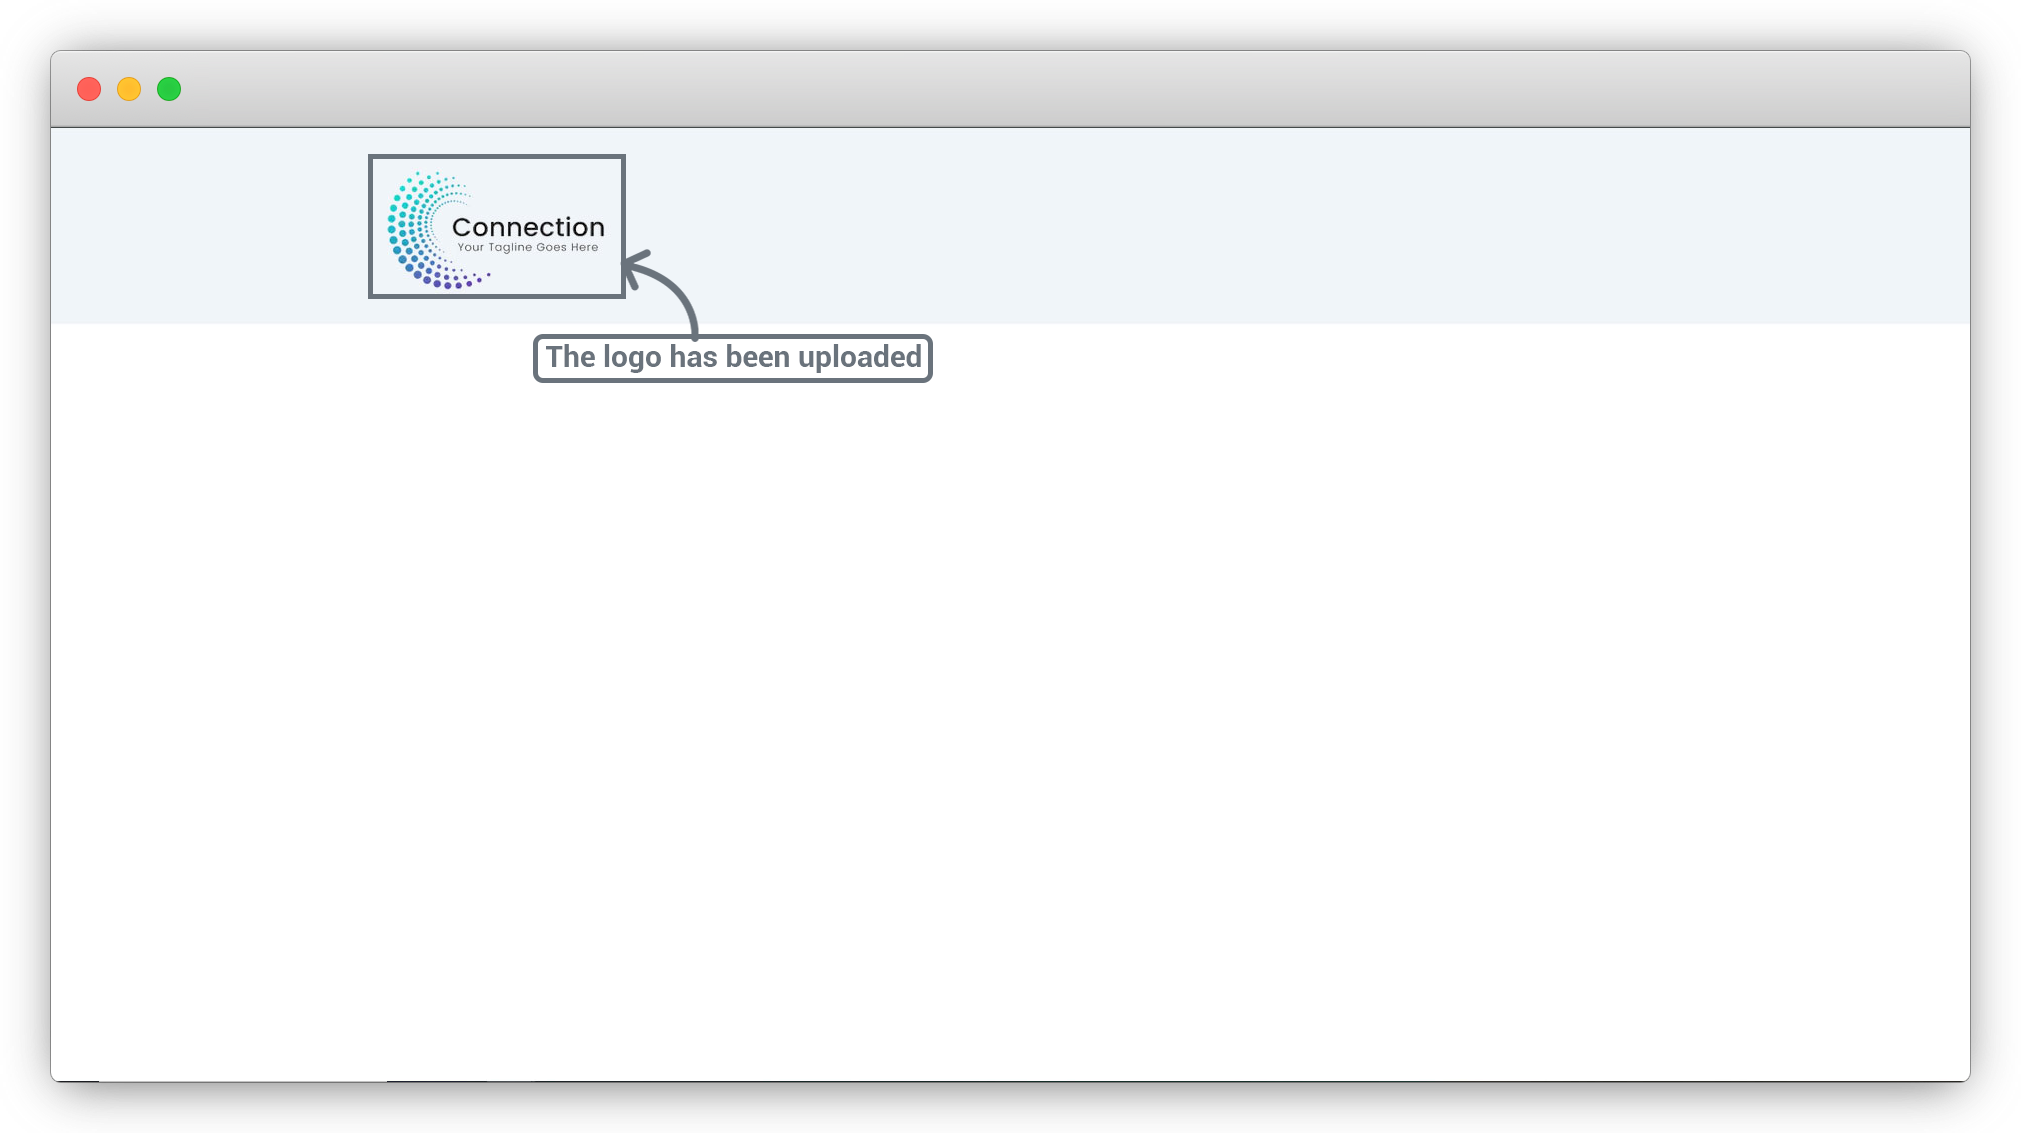
2. After uploading the logo, click on the “Save Changes” button and then check on Frontend and you will see the logo has been uploaded.
3. Like the logo, you can add a favicon, and CSS file and also upload theme fonts from the Logo, Favicon etc.
4 Logo custom height and width: If you don’t set any height and width for the logo, it will be rendered with its default size, but if you want to set custom height and width then you can set it from here.
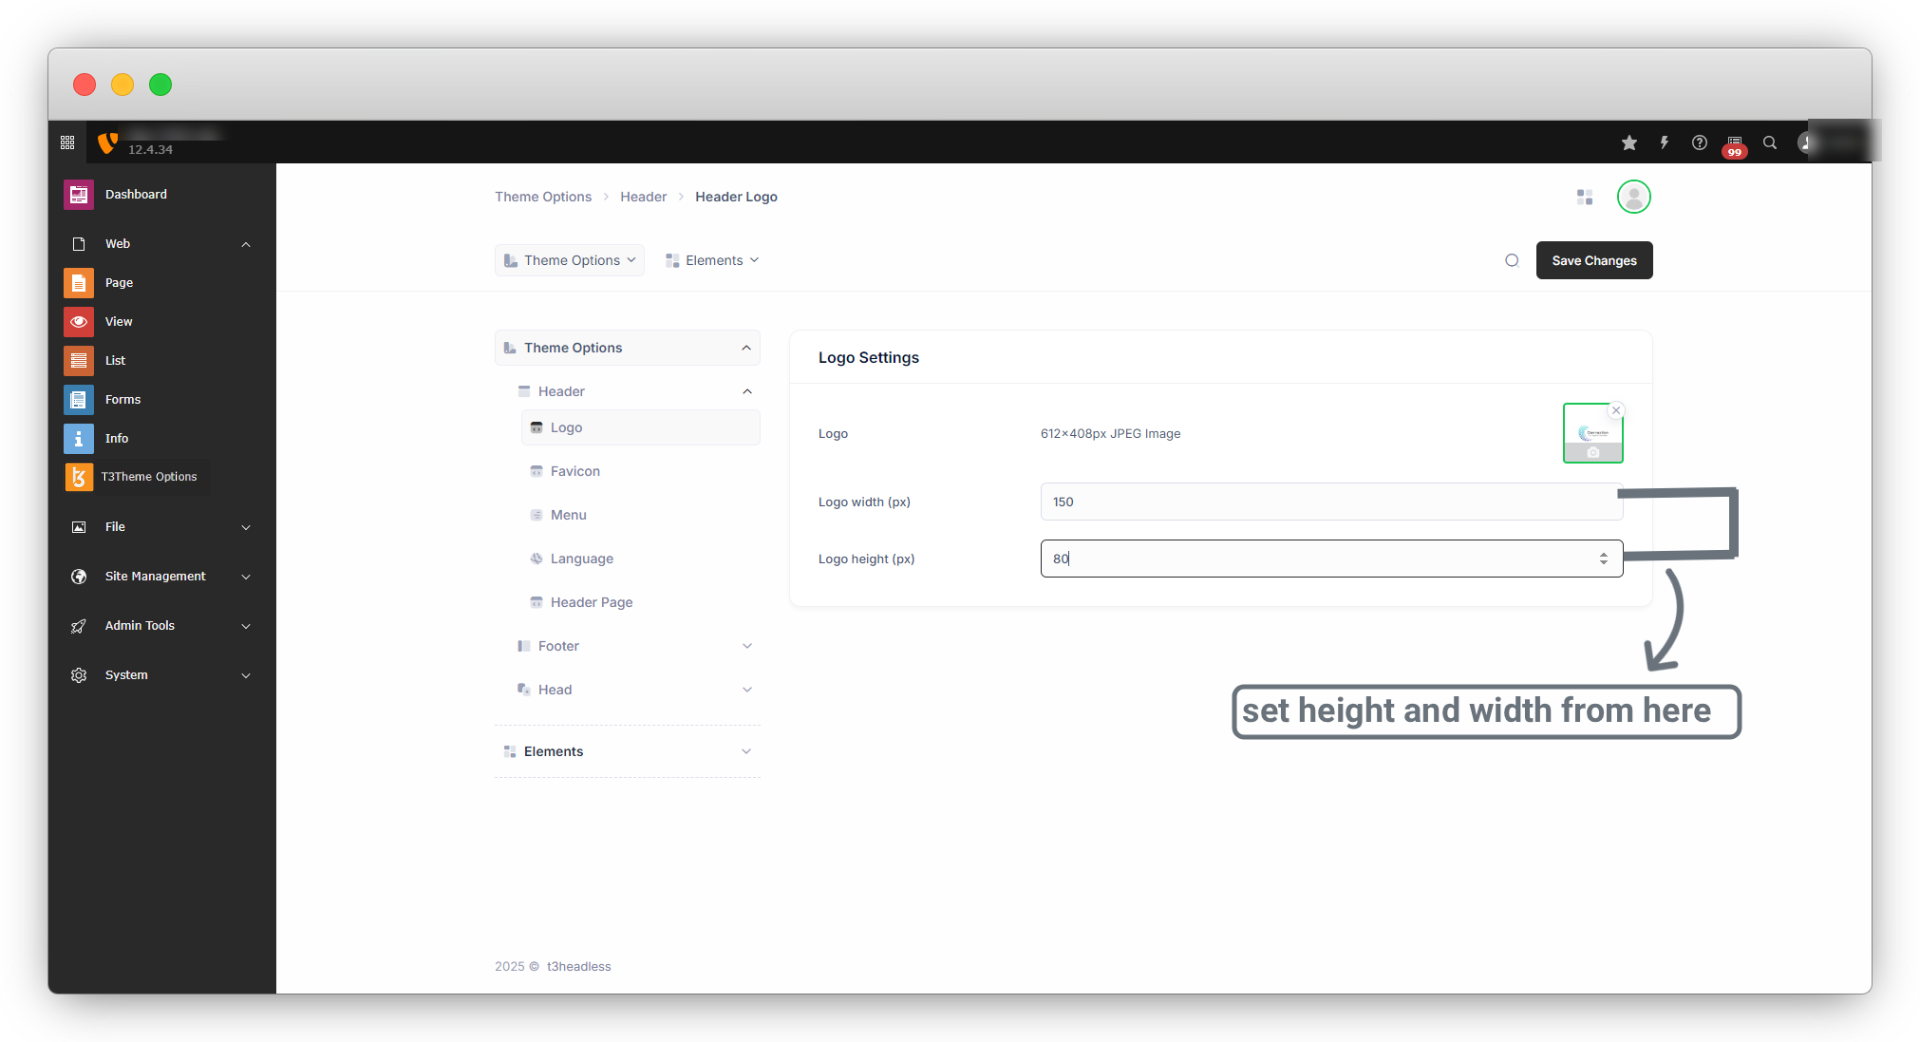
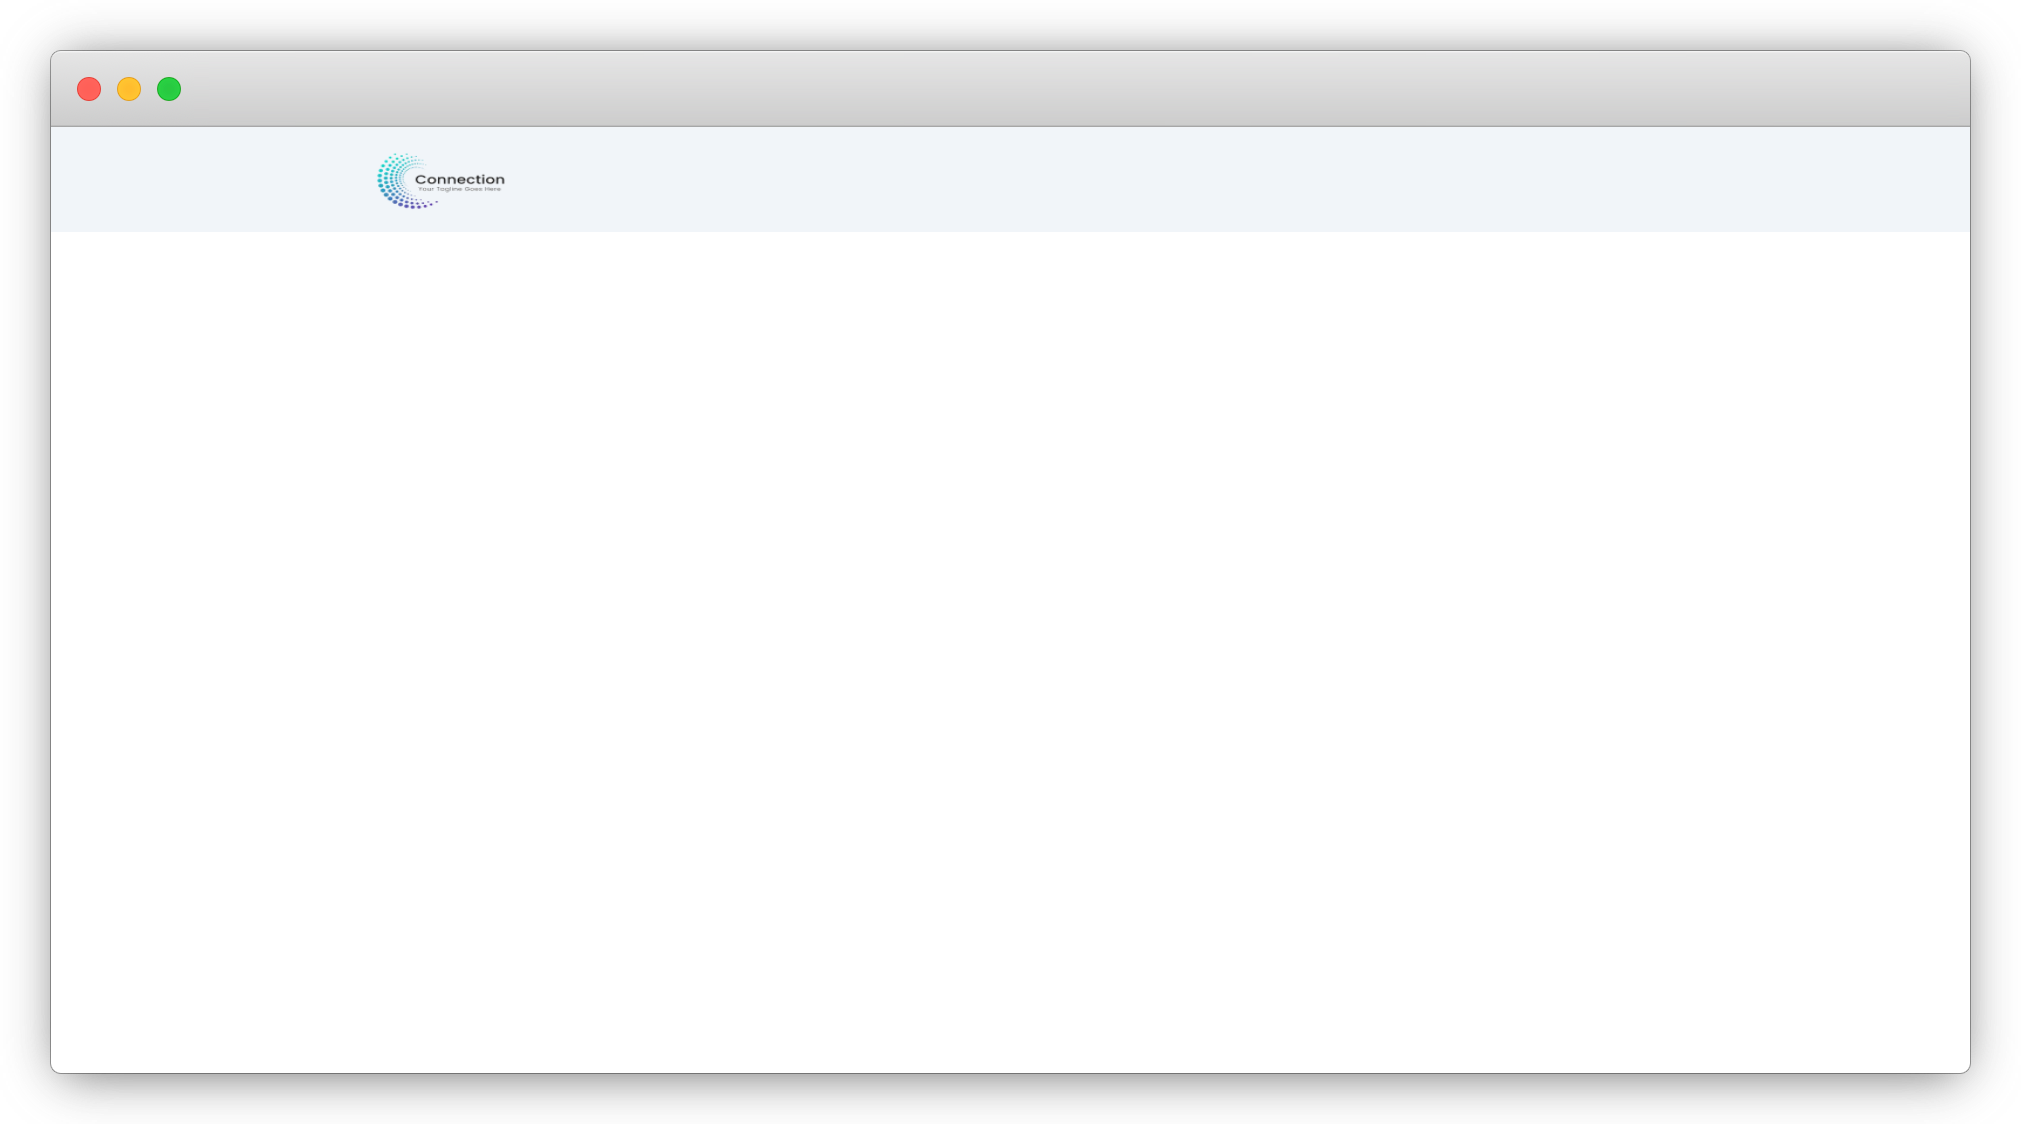
The logo will be rendered with the custom width and height.
5. Select Header Page: If you want a header or a section throughout the site, you can add that from the “Header Page”. Follow the steps below to add the header page.
5.1 Create a page, here the page “Top Header” has been created, and you can give any name you want. And if you don’t want to create a new page and want to use any existing page, you can use that. But here in this example, we are going to create a new page.
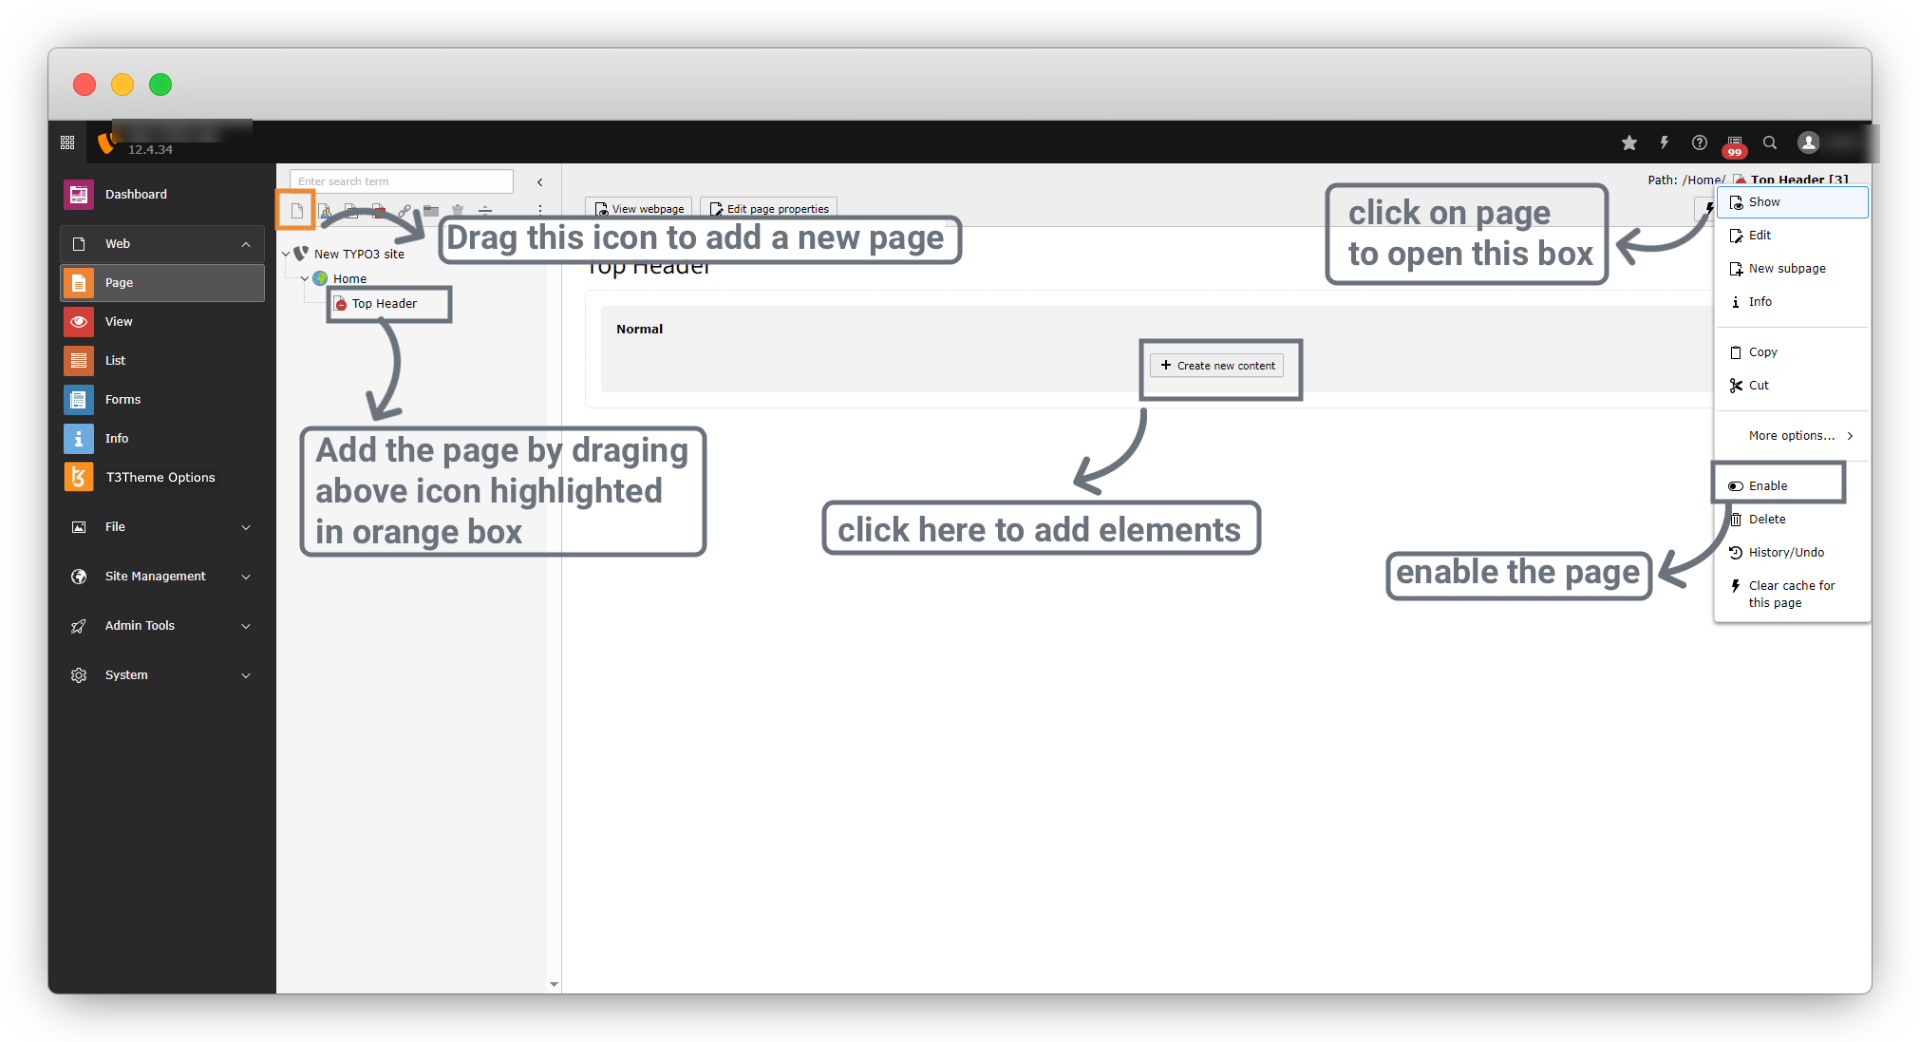
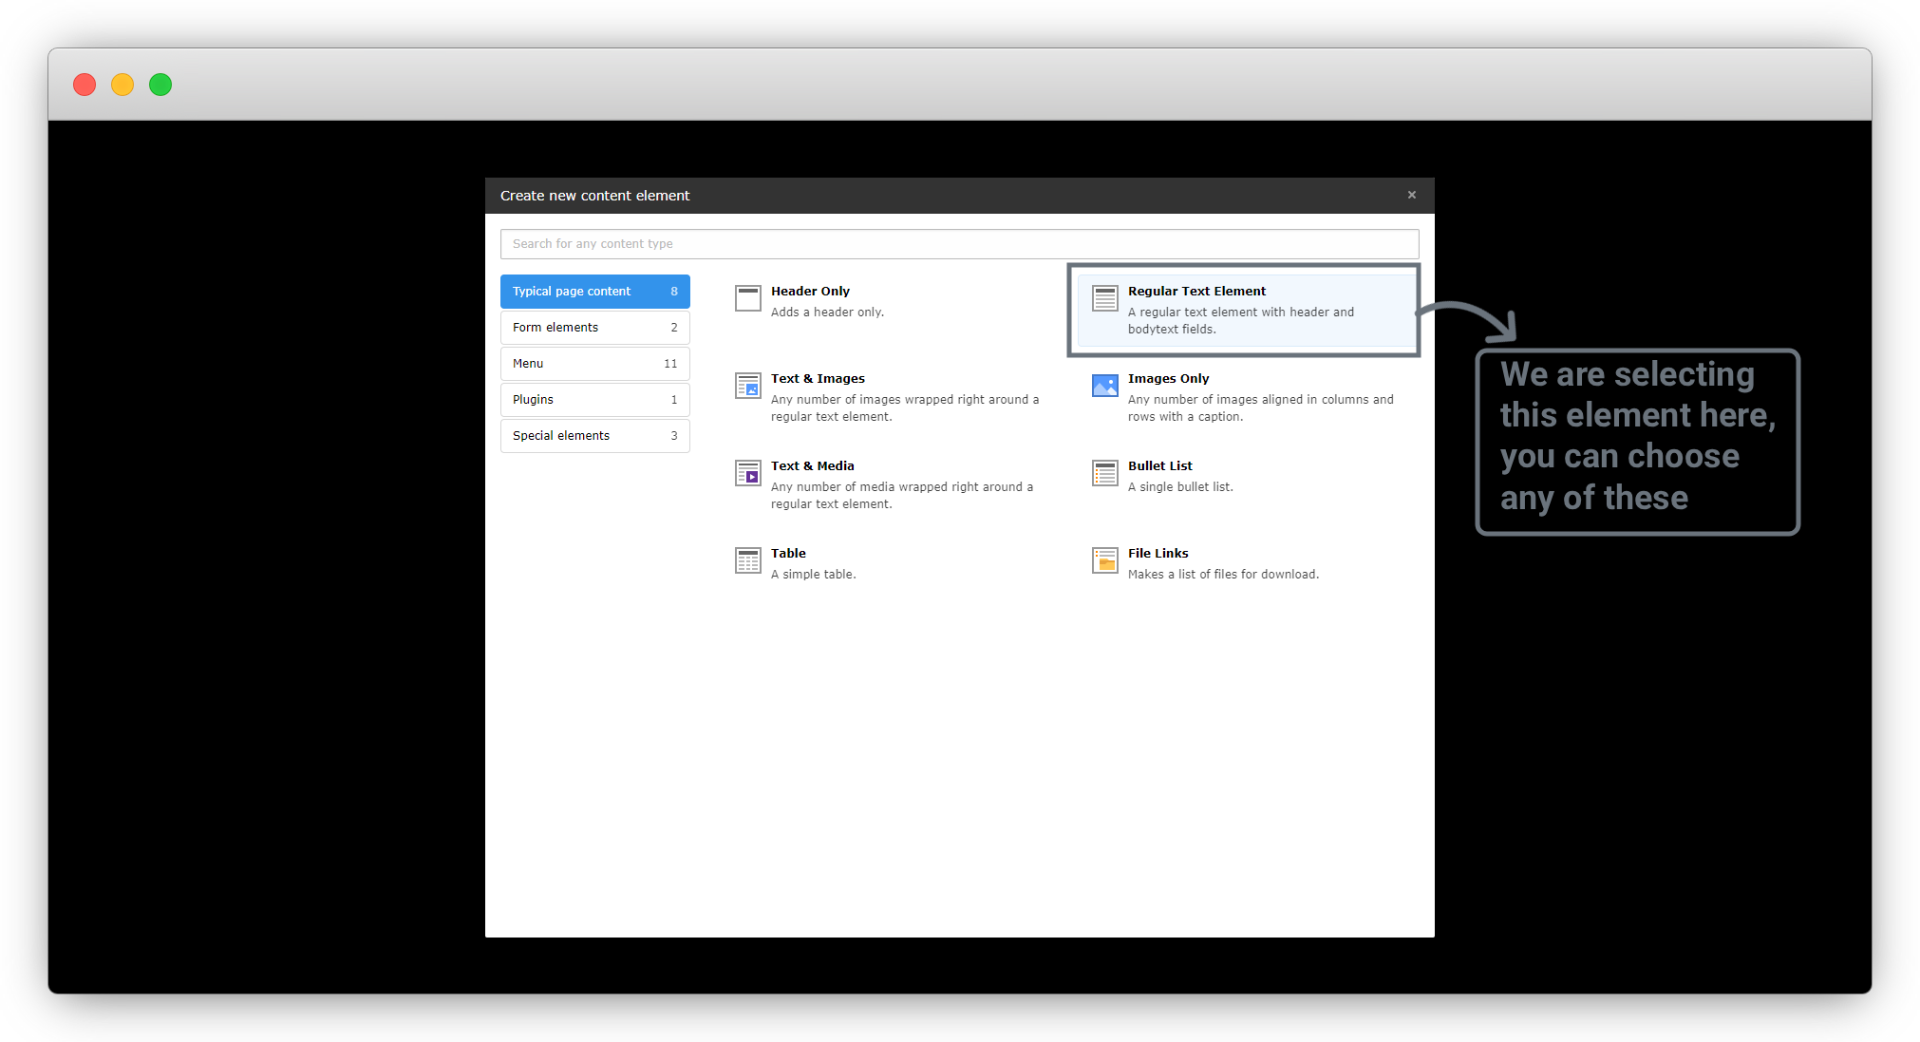
After creating a new page, let’s add content to that page to show on the header. After clicking on + content button the popup will open as in screenshot, you can select any element according to your content on the top header, here we are going to use Regular Text Element.
Now you can add your content to show on the top header.
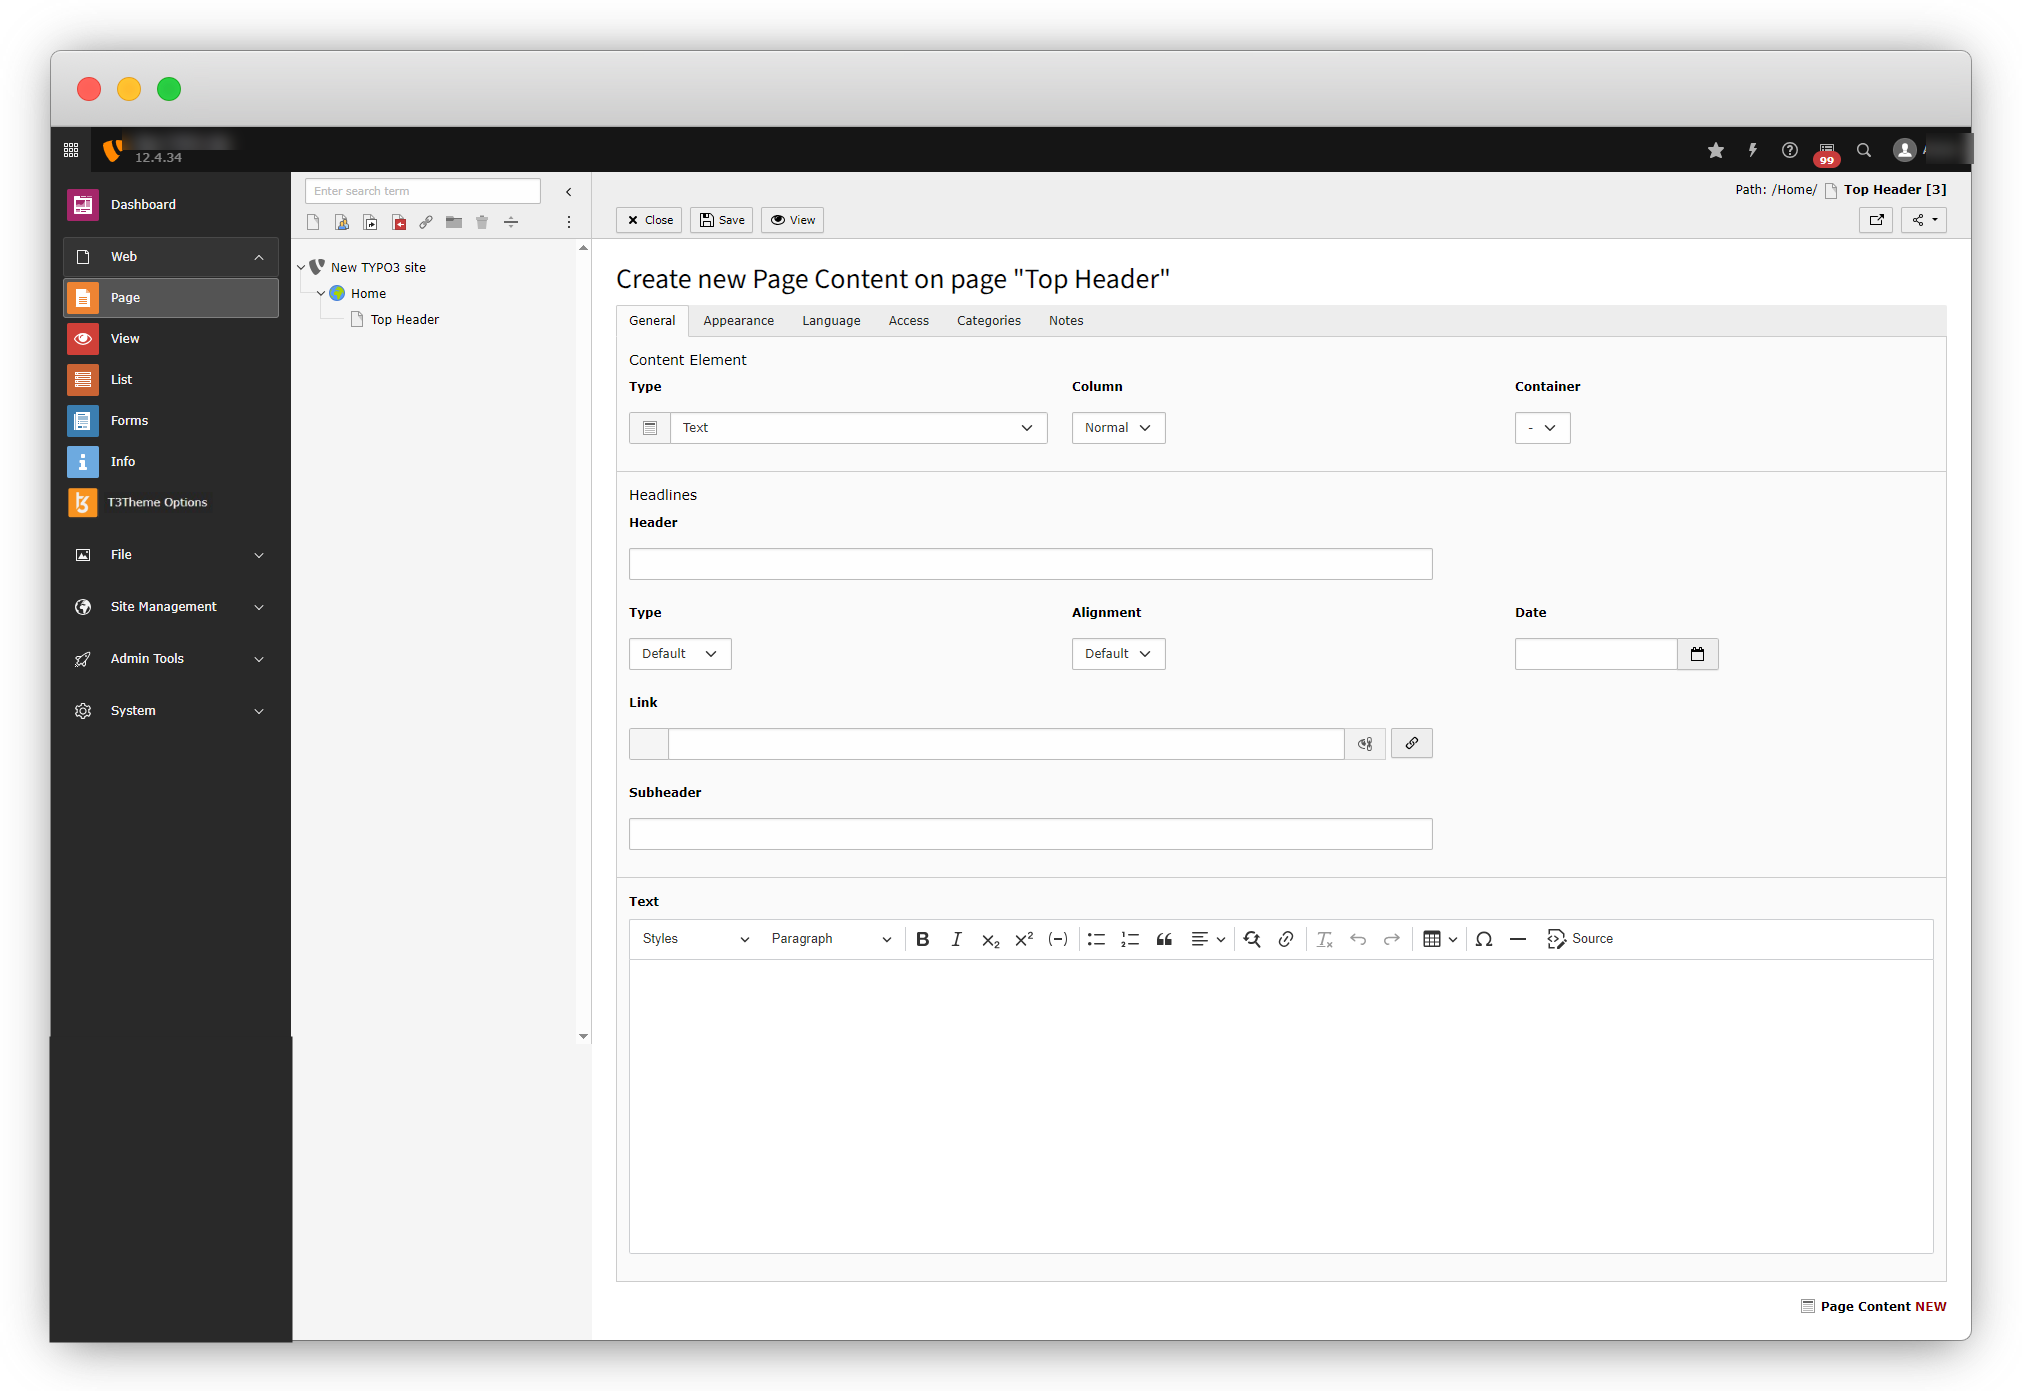
After adding the content click on “Save” at the top and your content will be saved.
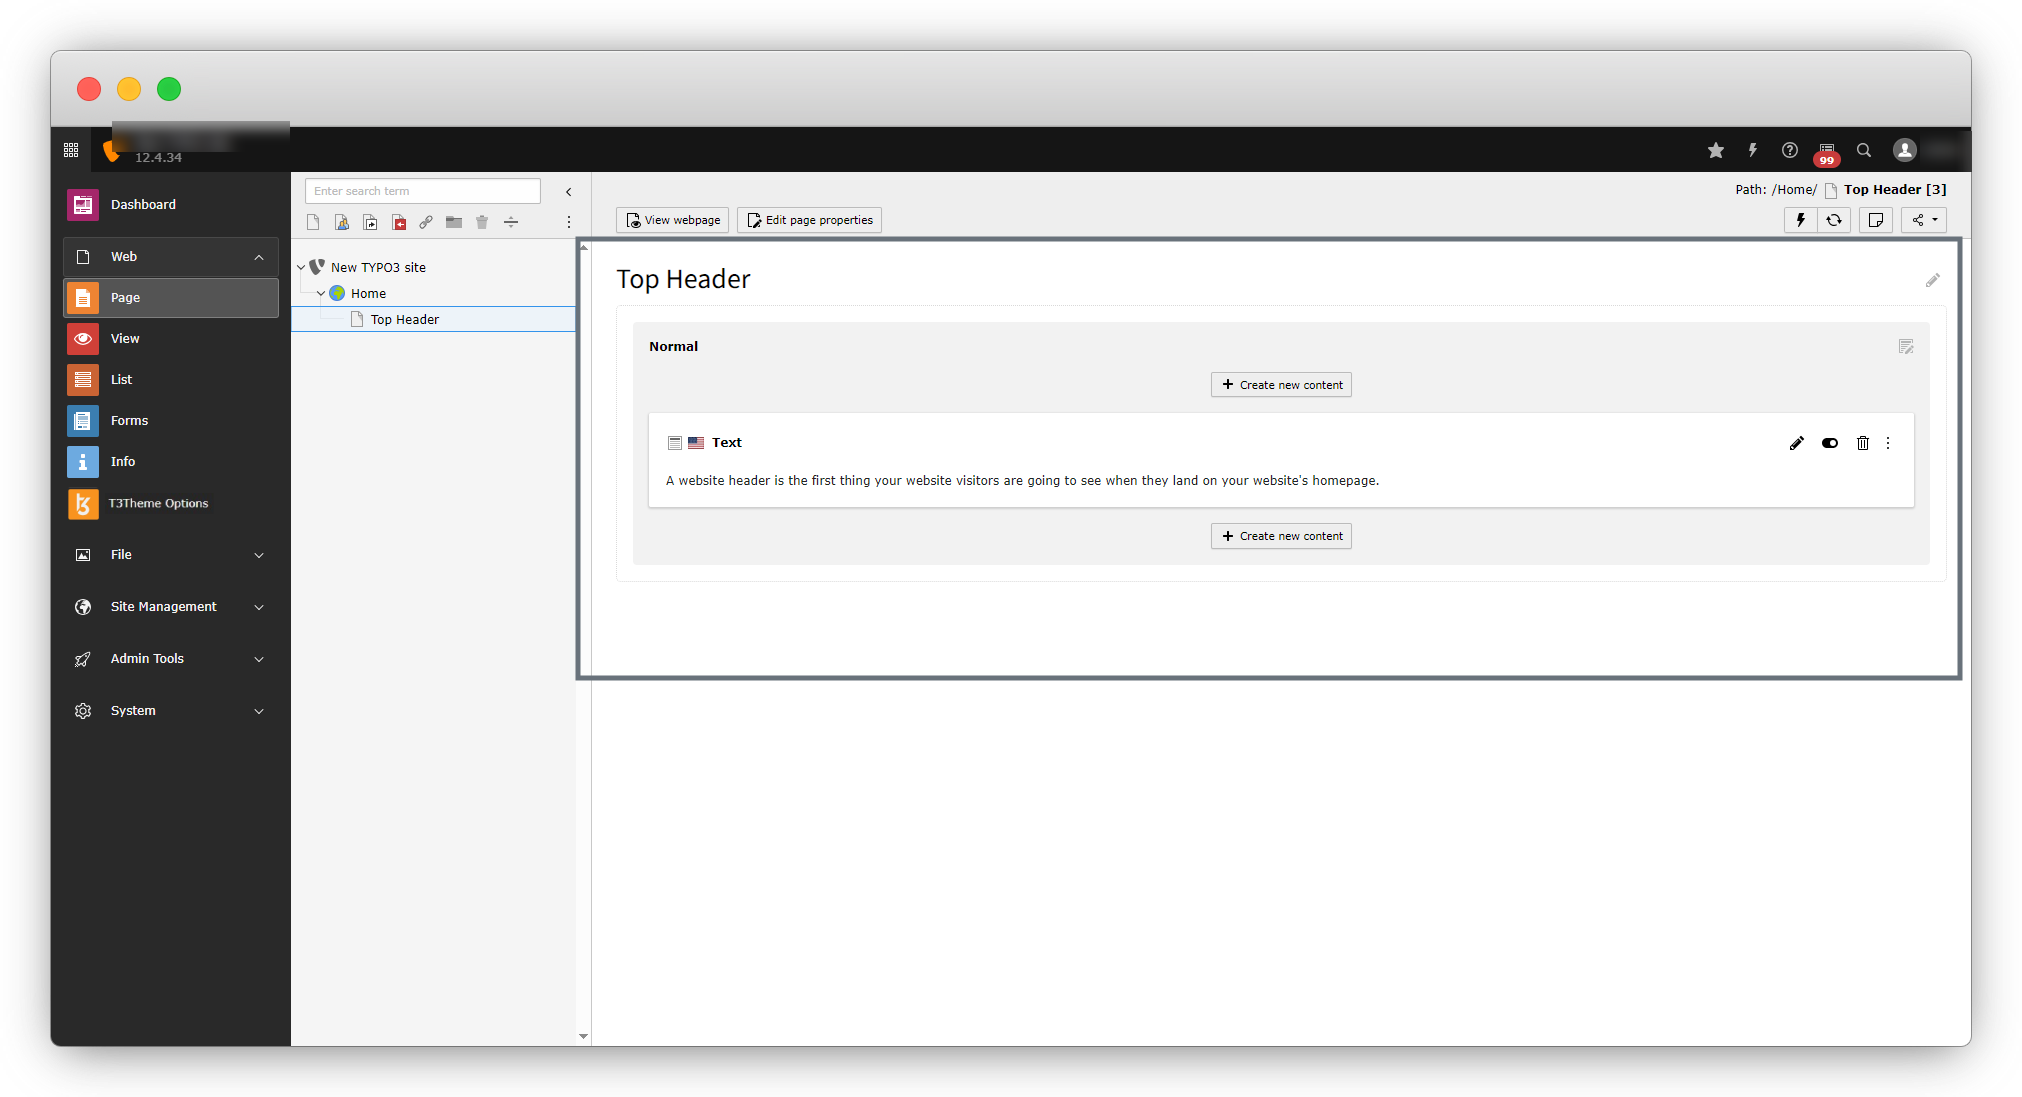
Now select the Header top page in header page and click on “Save Changes”.
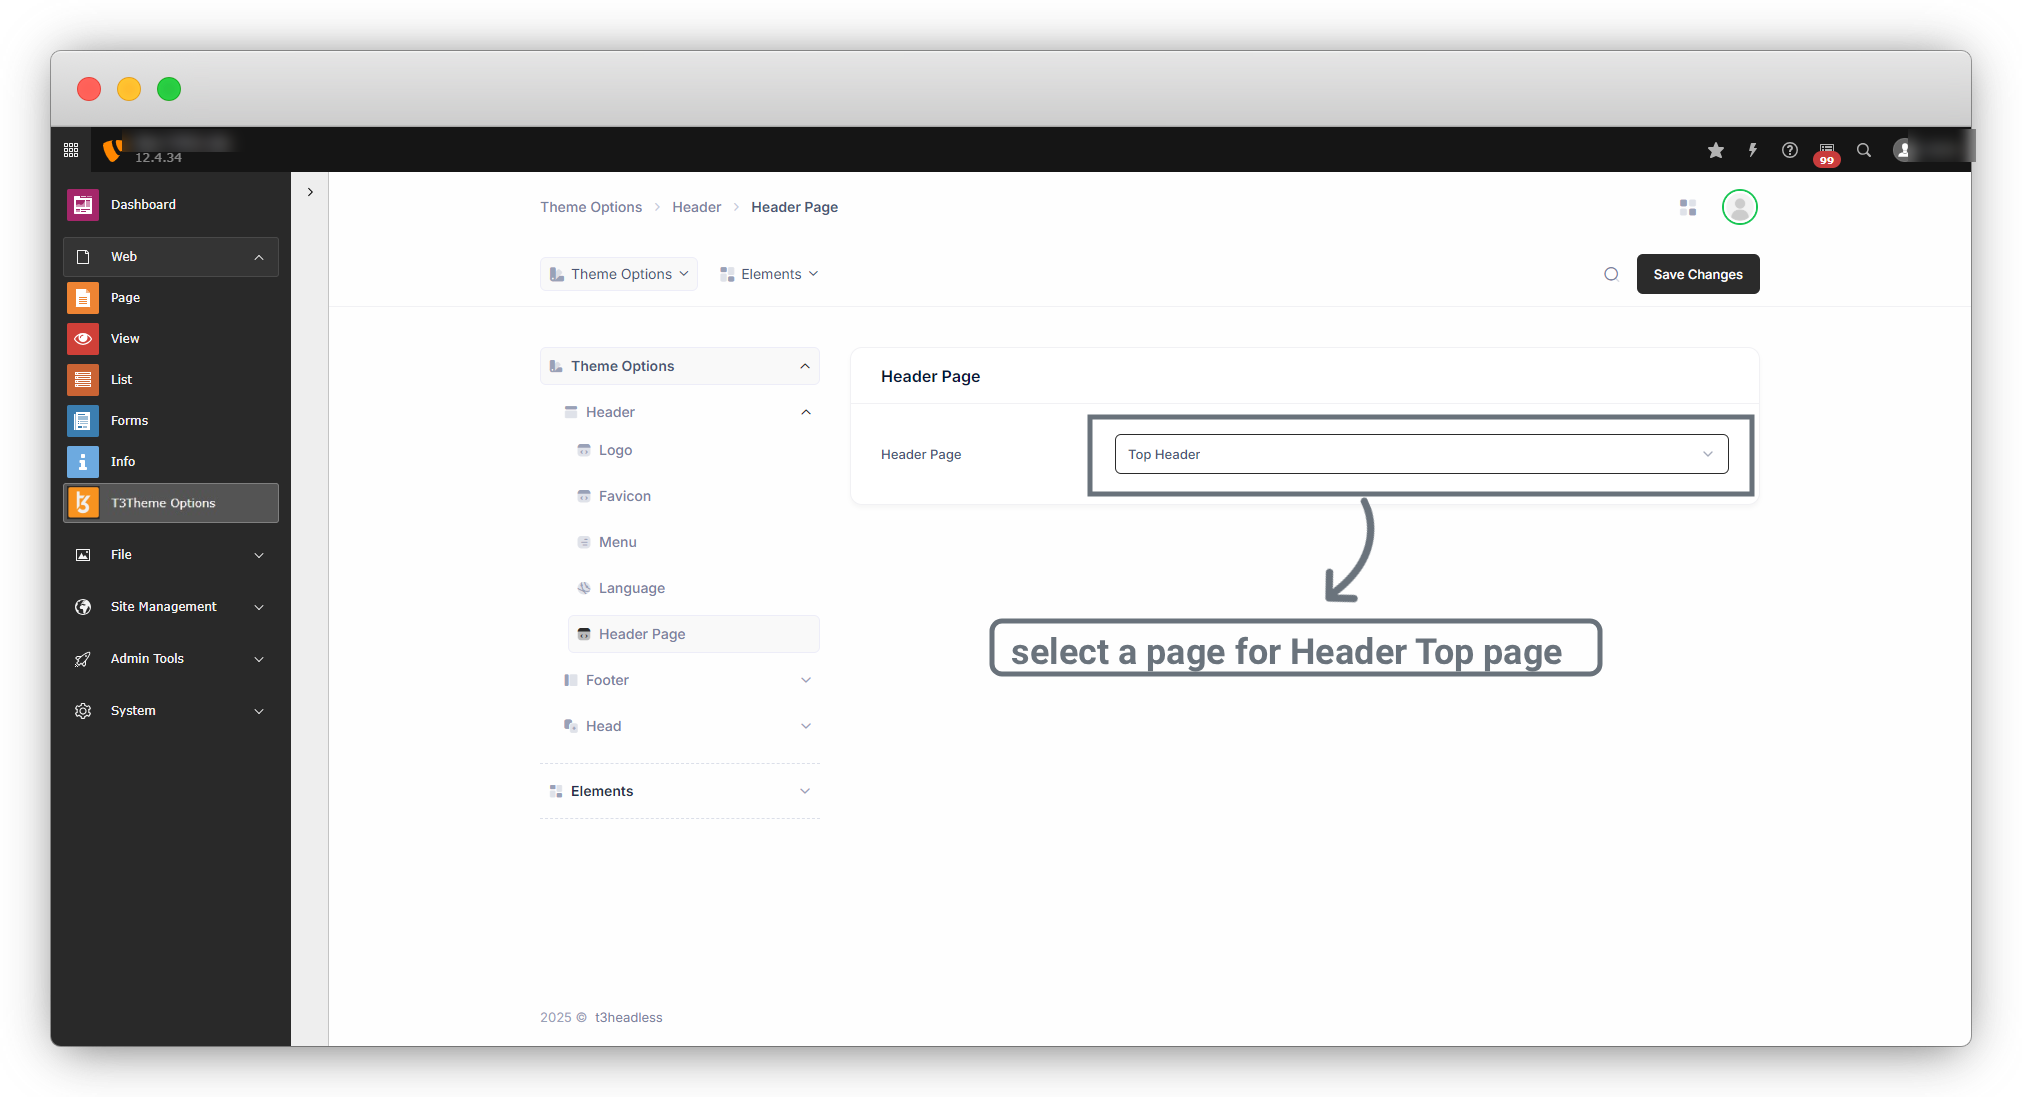
Now refresh the Frontend and you will see the content on the top.
Note : If a Header Page is selected, it takes priority over the Header Logo setting. In this case, even if a logo is configured, it will not be displayed because the Header Page overrides it.
currently we are removing header page and add previous logo only.
3. Theme Fonts
You can upload fonts from here if you want to add custom fonts in your website. To upload custom fonts, please follow the below steps:
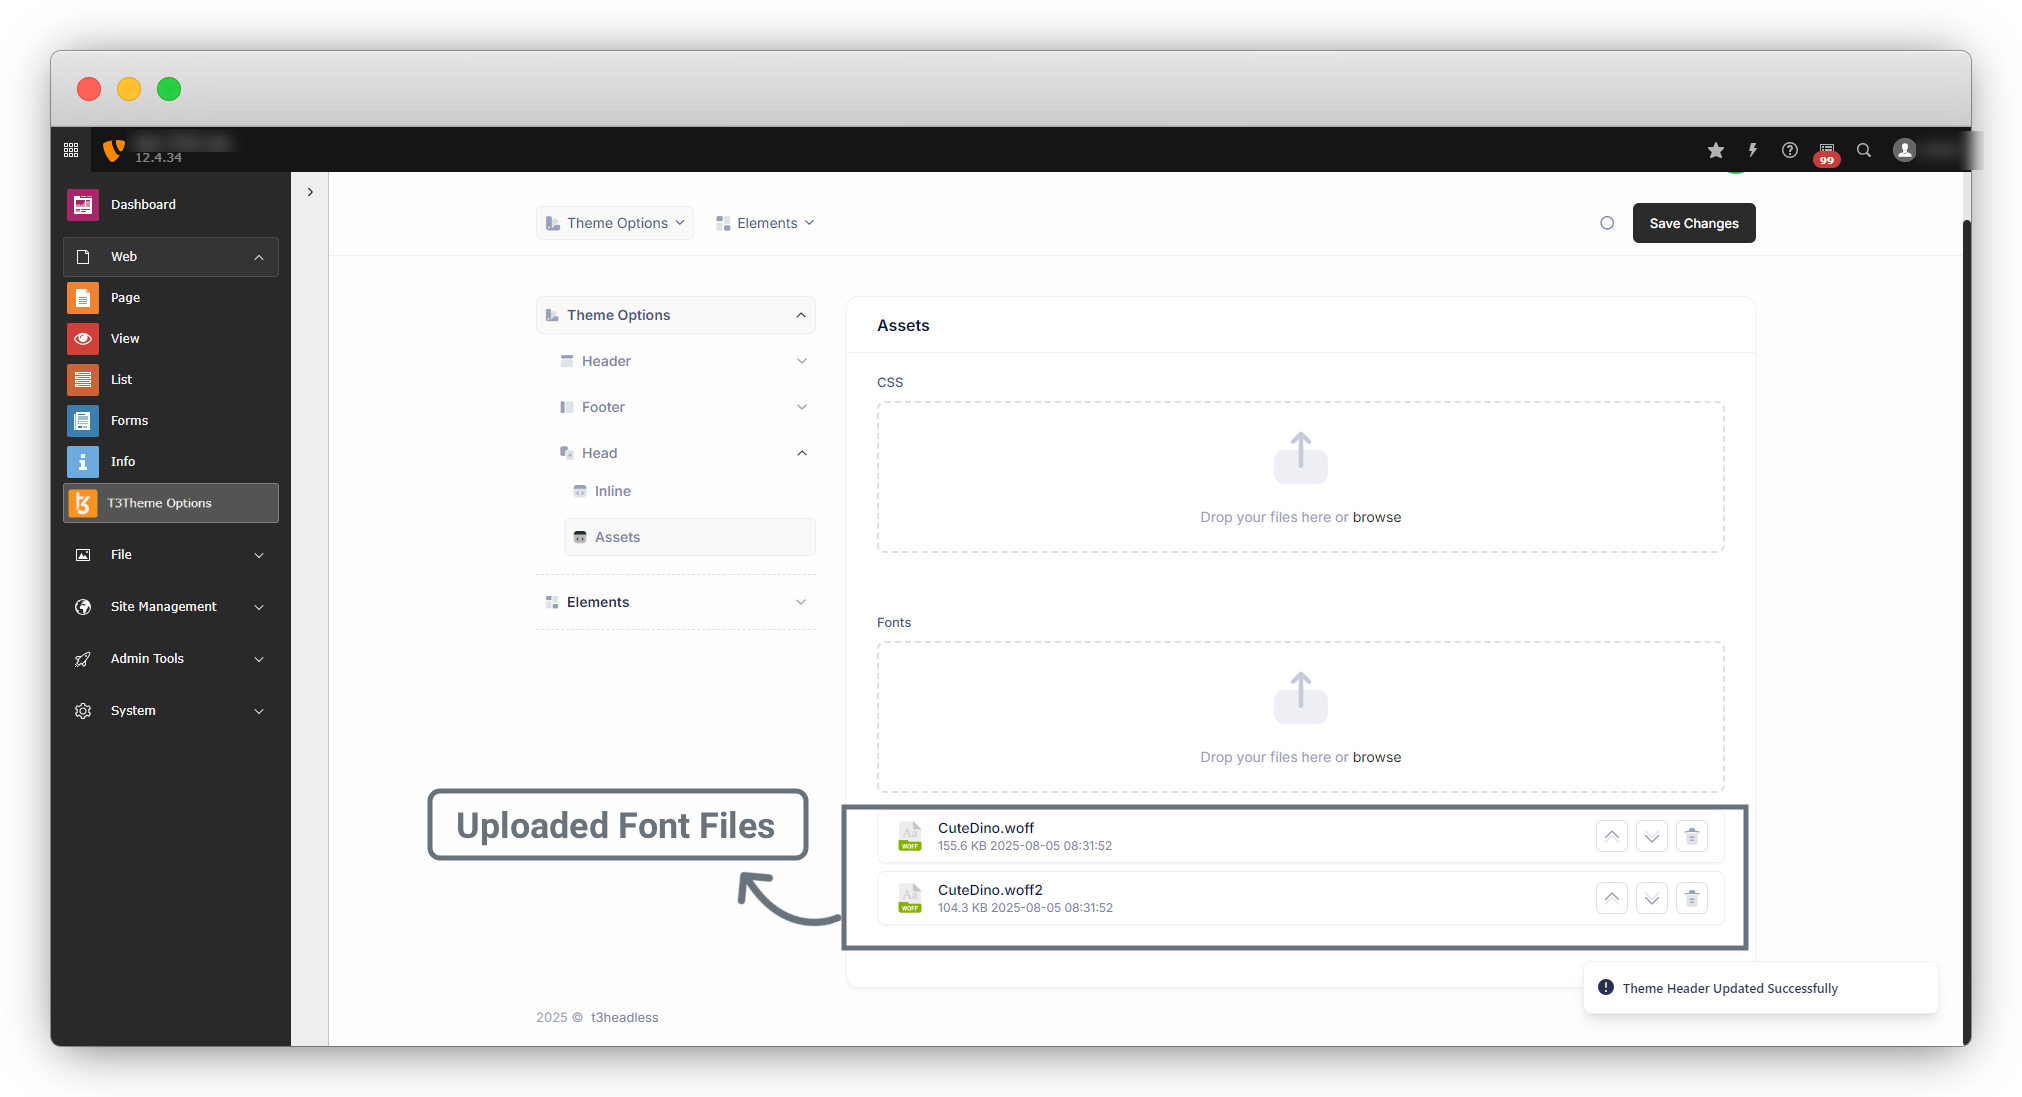
1. Upload font files.
2. To include the fonts in the theme, you must run a command below on headless setup with SSH access:
Command: yarn themebuild
3. After running the command, you will get the message of “Theme updated successfully!!” and the fonts will be loaded now in your headless package.
4. by adding the code below, you should add your custom fonts.
@font-face {
    font-family: 'Cute Dino';
    src: url('/fonts/CuteDino.woff2') format('woff2'),
        url('/fonts/CuteDino.woff') format('woff');
    font-weight: normal;
    font-style: normal;
    font-display: swap;
}
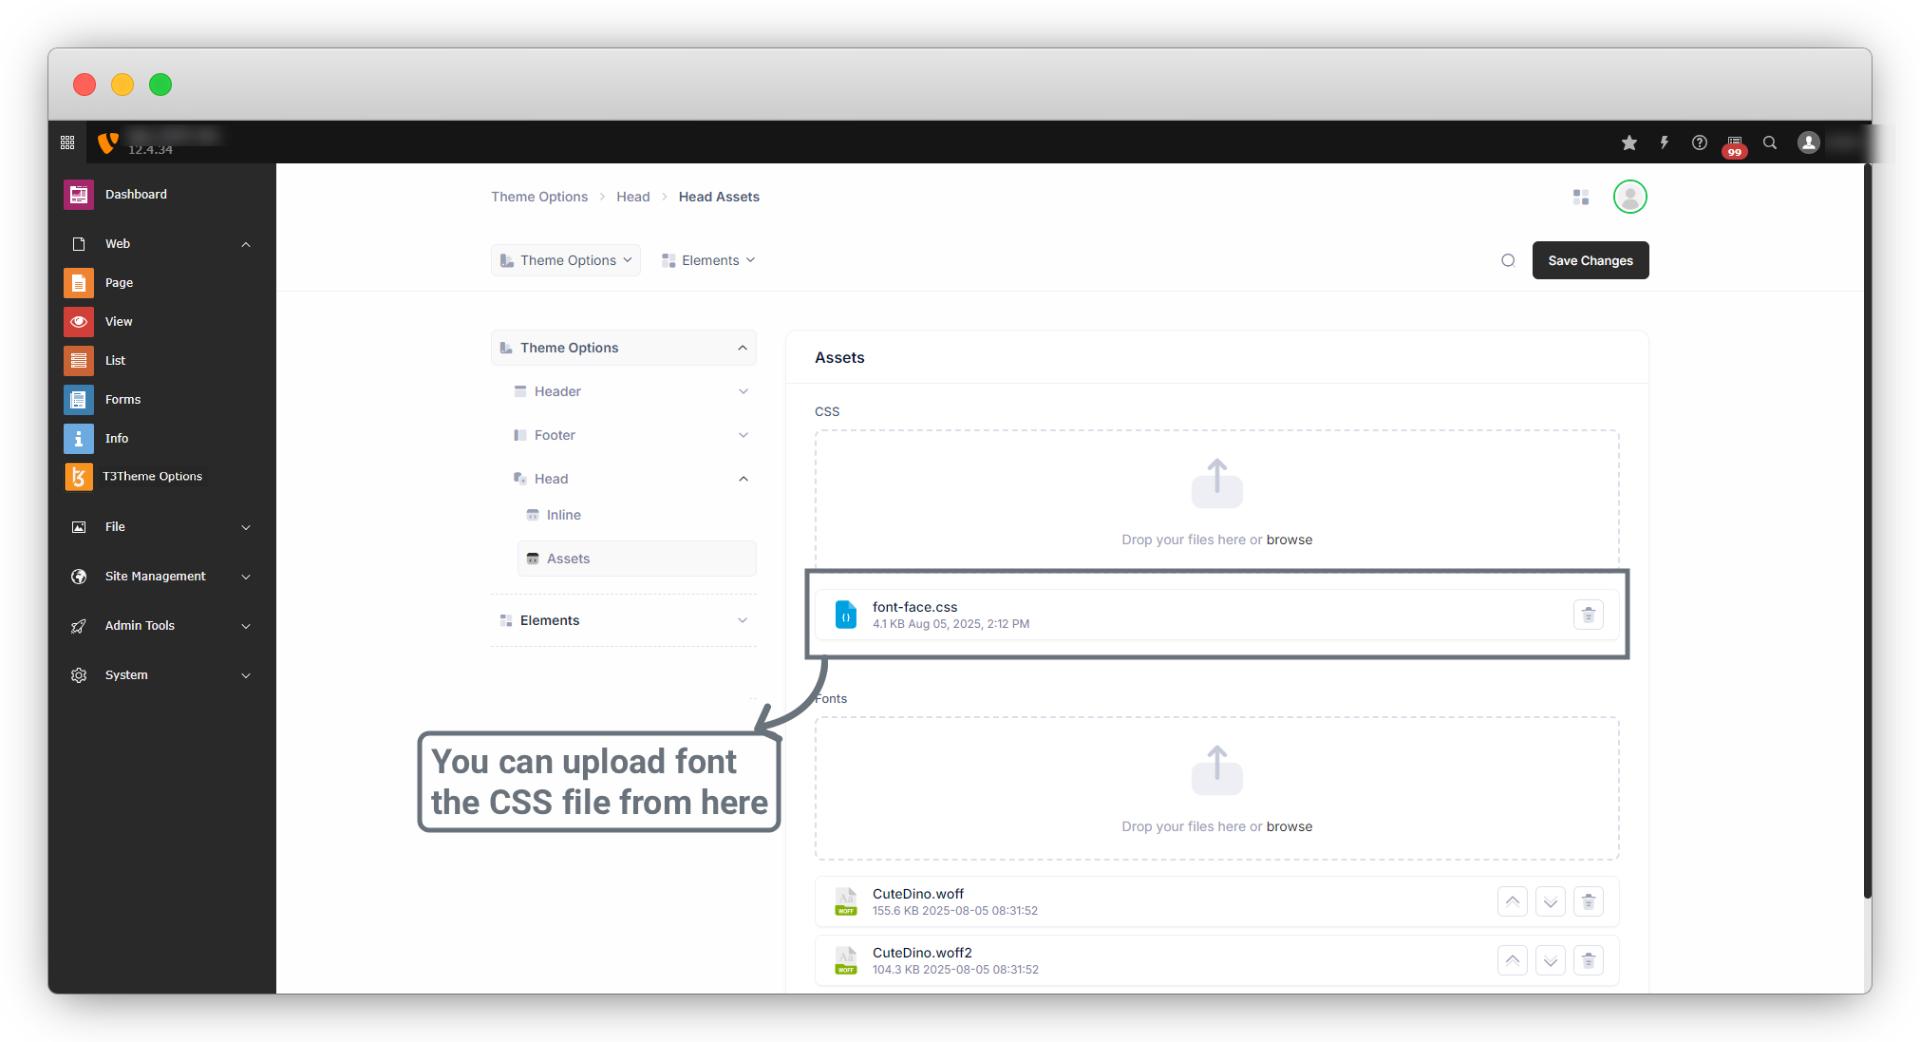
5. Theme Stylesheets: Now you will have to upload the CSS file from the Head assets. You can add multiple CSS files from here.
6. Now you must run the command below on headless setup with SSH access to load the stylesheet:
Command: yarn themebuild
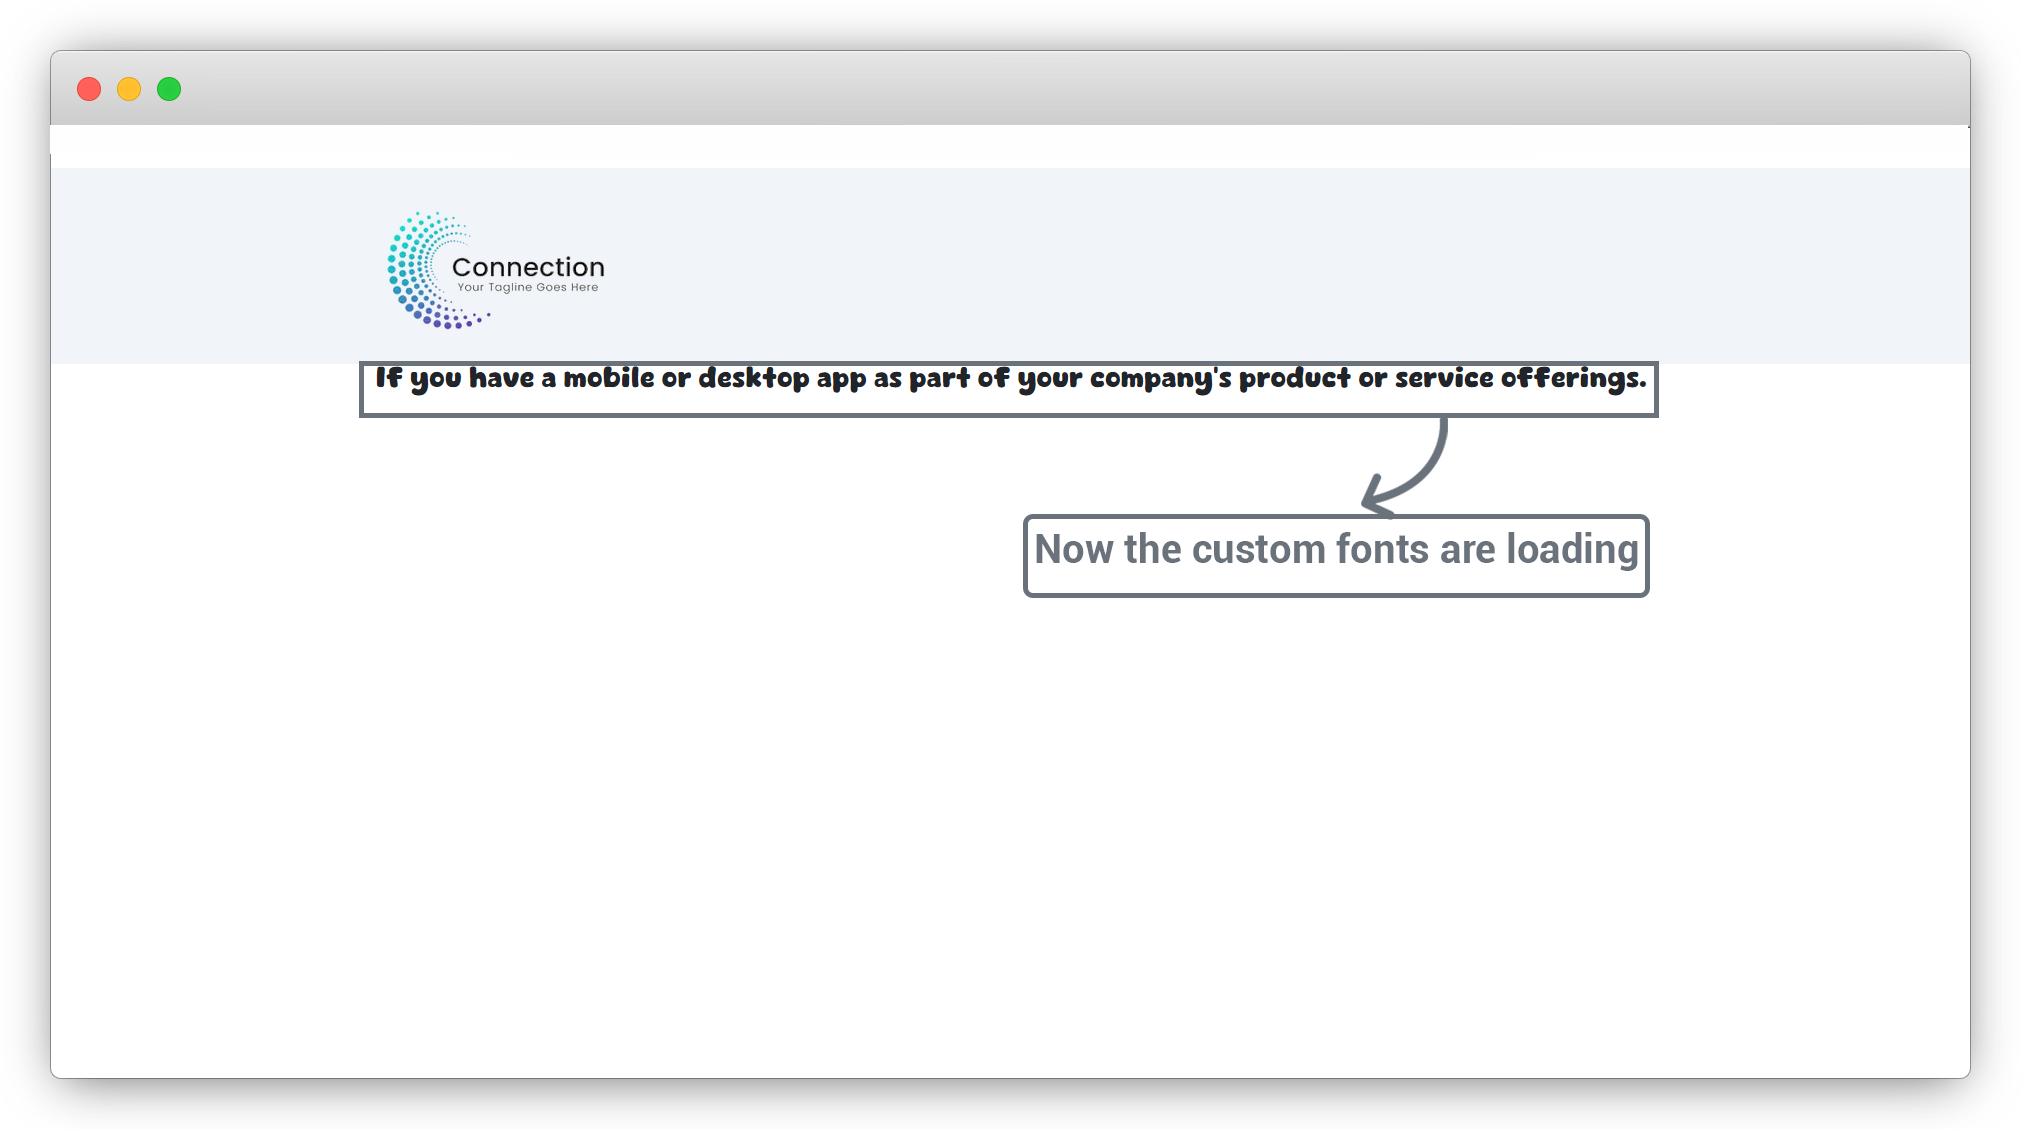
Now the website will load with the custom fonts.
4. Add Footer
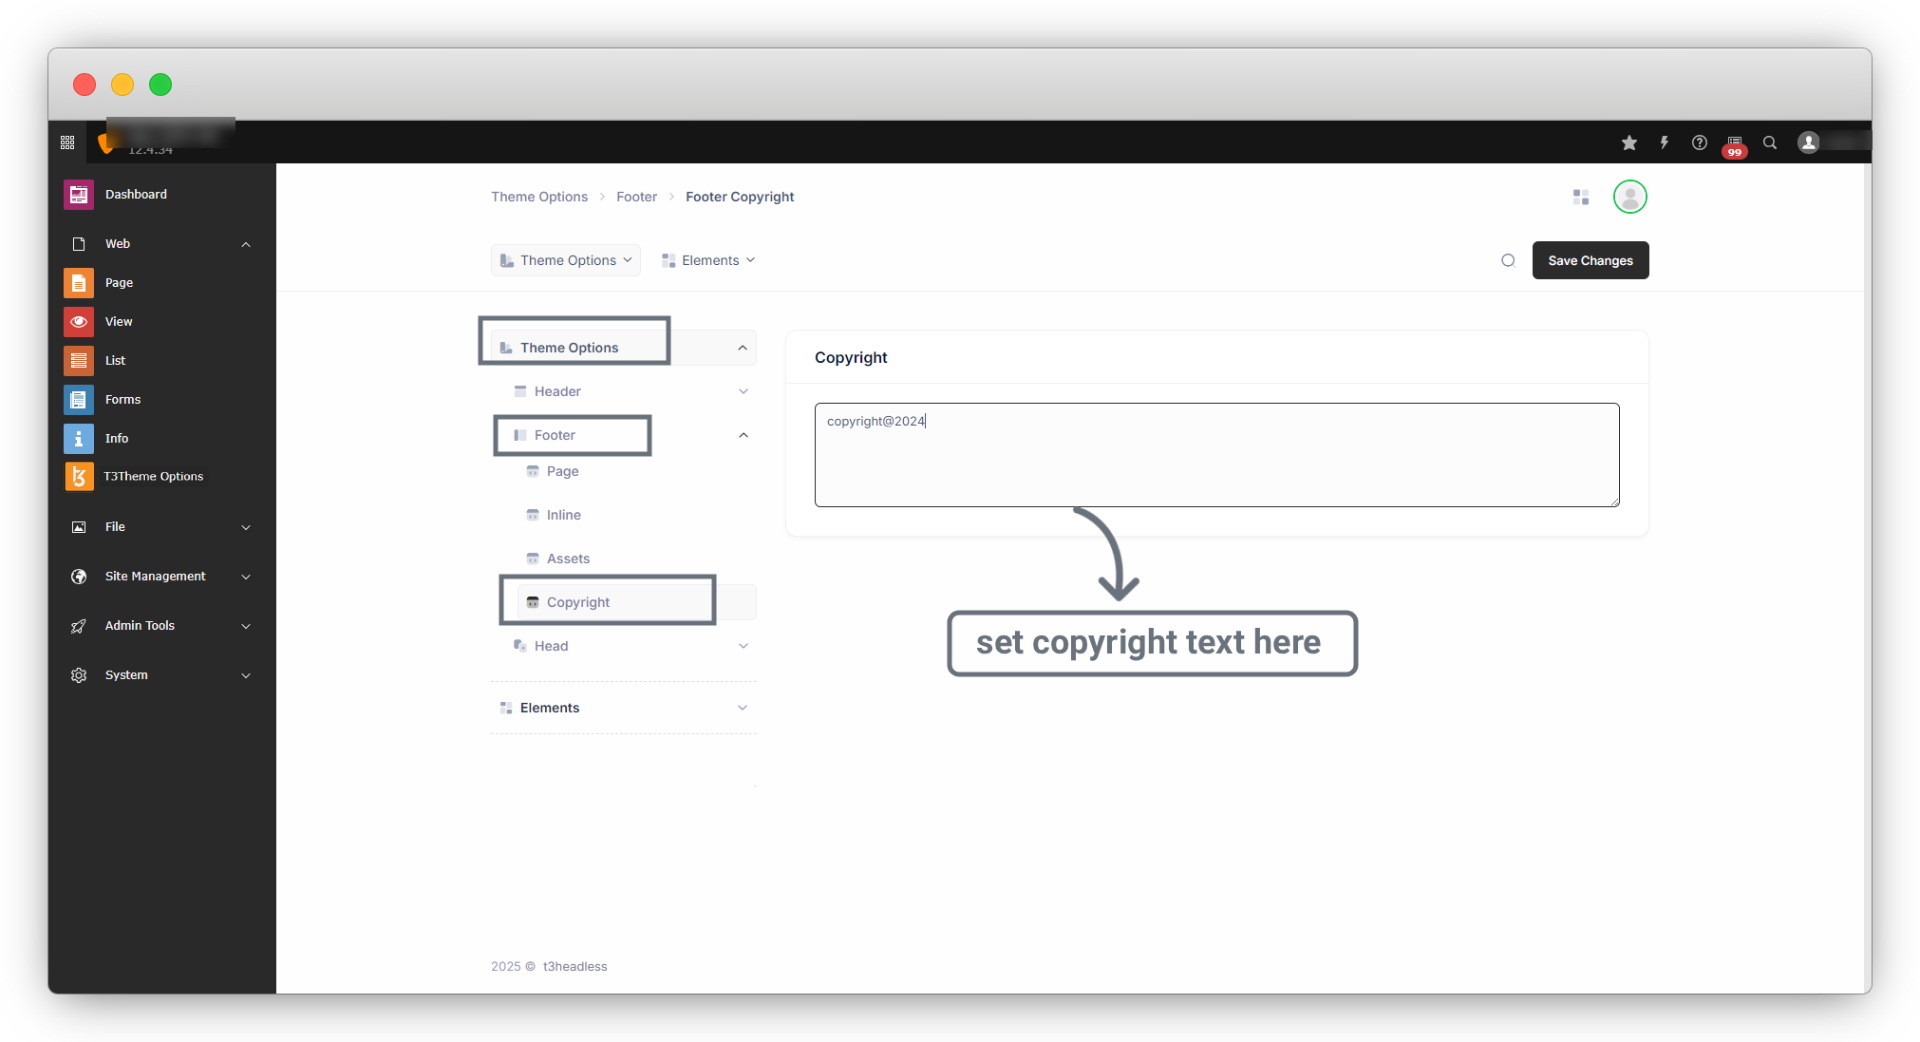
1. Copyright
1.1. Go to Theme Options > Footer > Copyright and you will find an option to set copyright text.
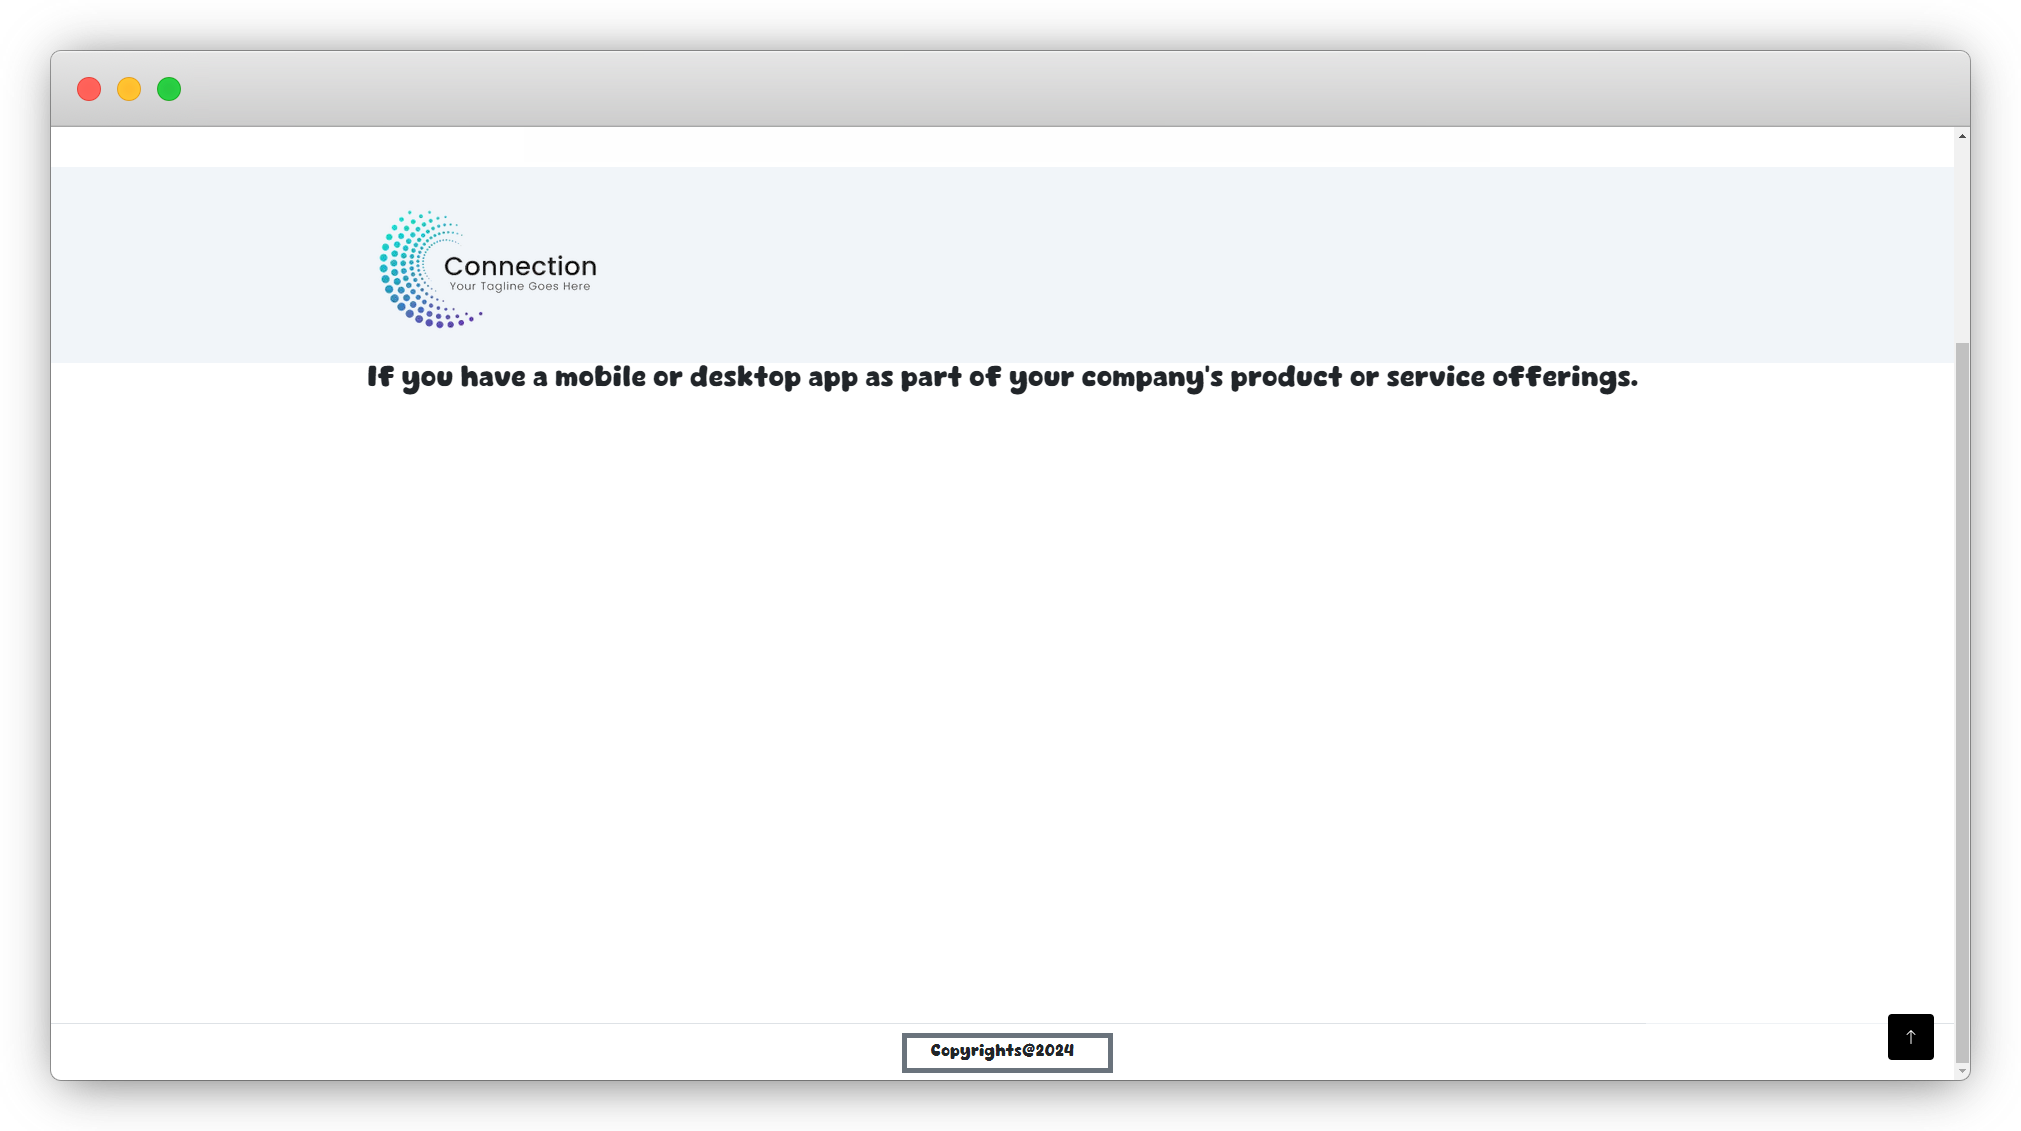
Now refresh the frontend you will see the footer and copyright text.
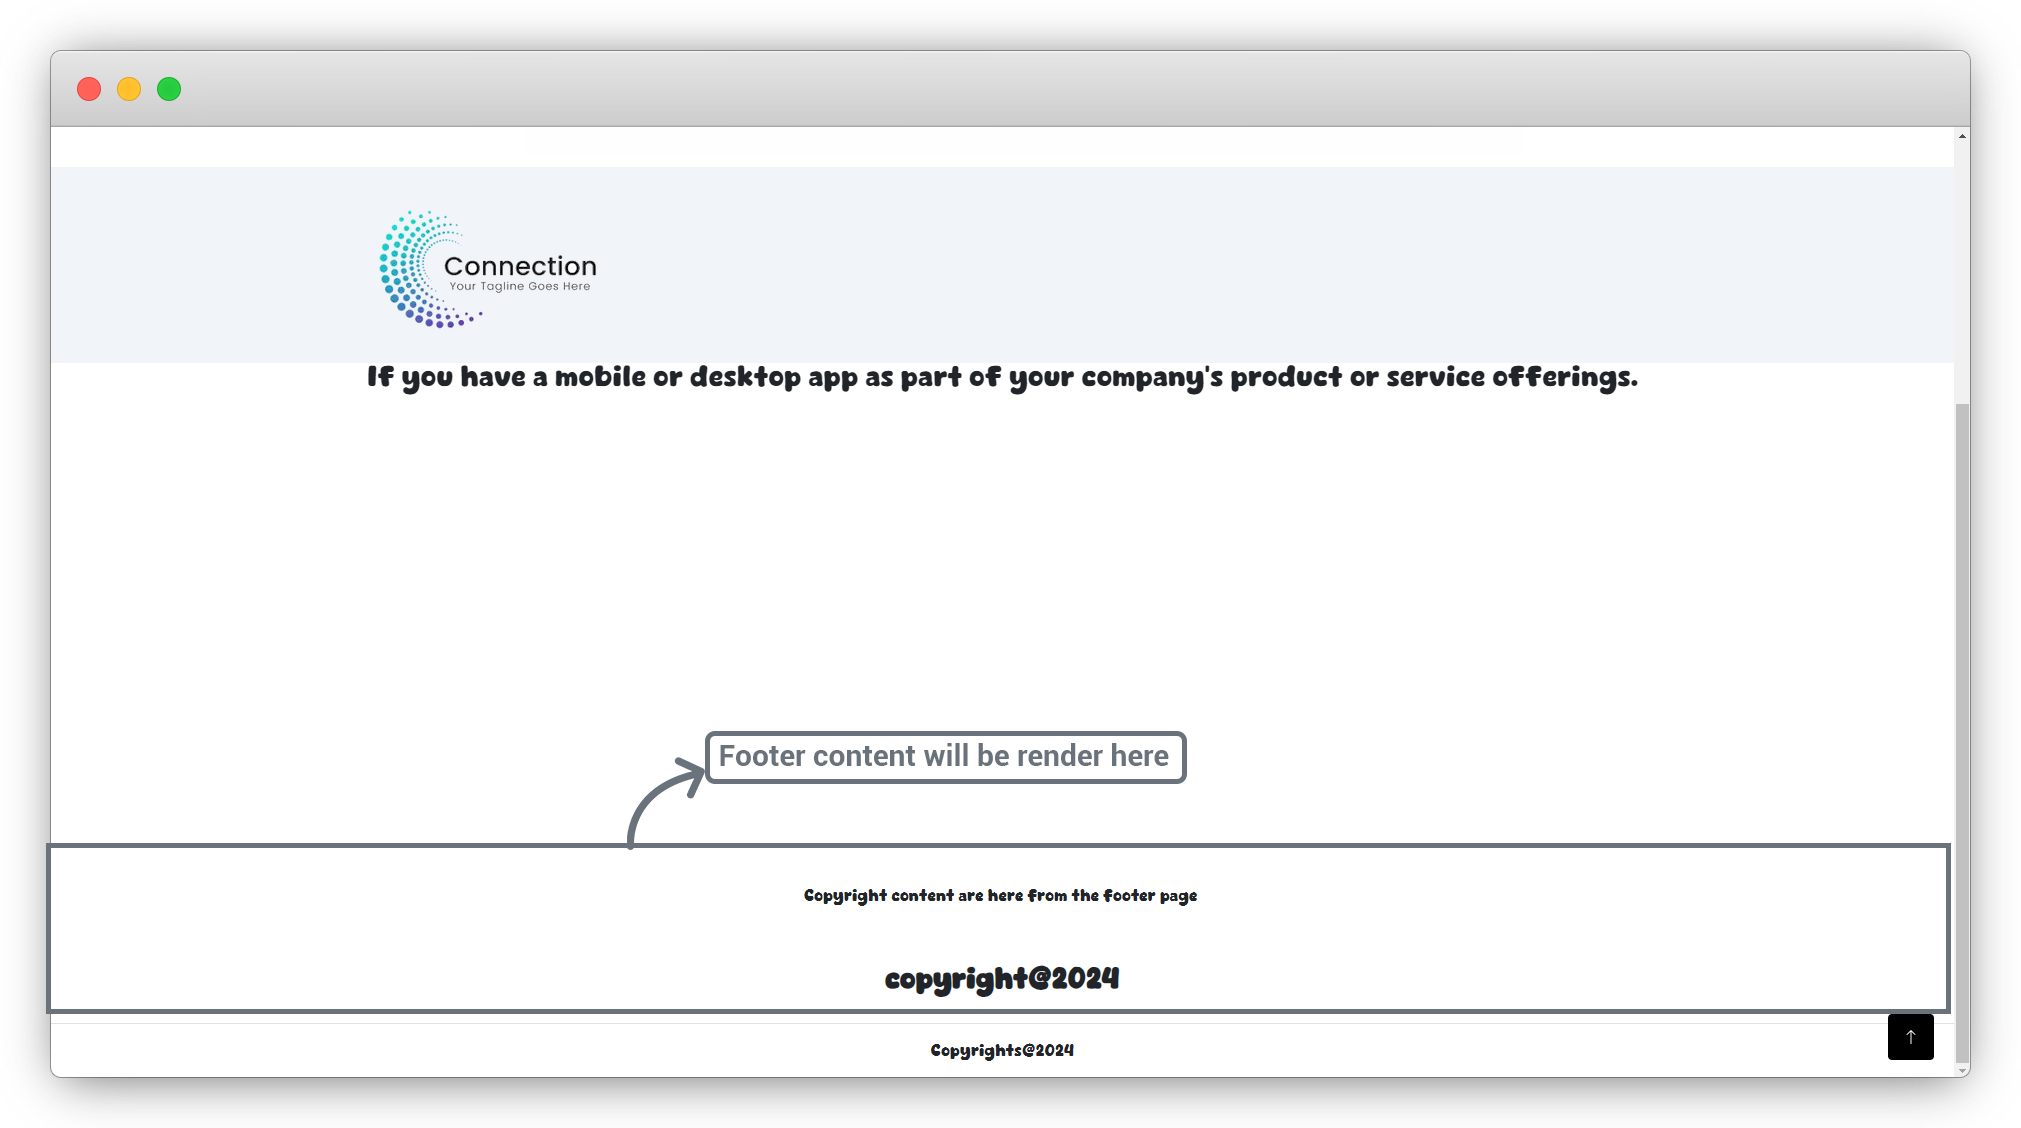
1.2. If you want to add more content in the footer, you can add a footer page and can call the page in “Footer page” dropdown.

Once you select the Footer page, it’s content will be seen as the footer.
If you don’t want to add a default footer and just want the footer page to render as a footer, then you can remove the default footer by removing the copyright text from the footer and the default footer will disappear.
5. Add CSS/JS
1. Head > Inline : Here you can add custom CSS and custom JS of header without uploading any CSS or JS files.
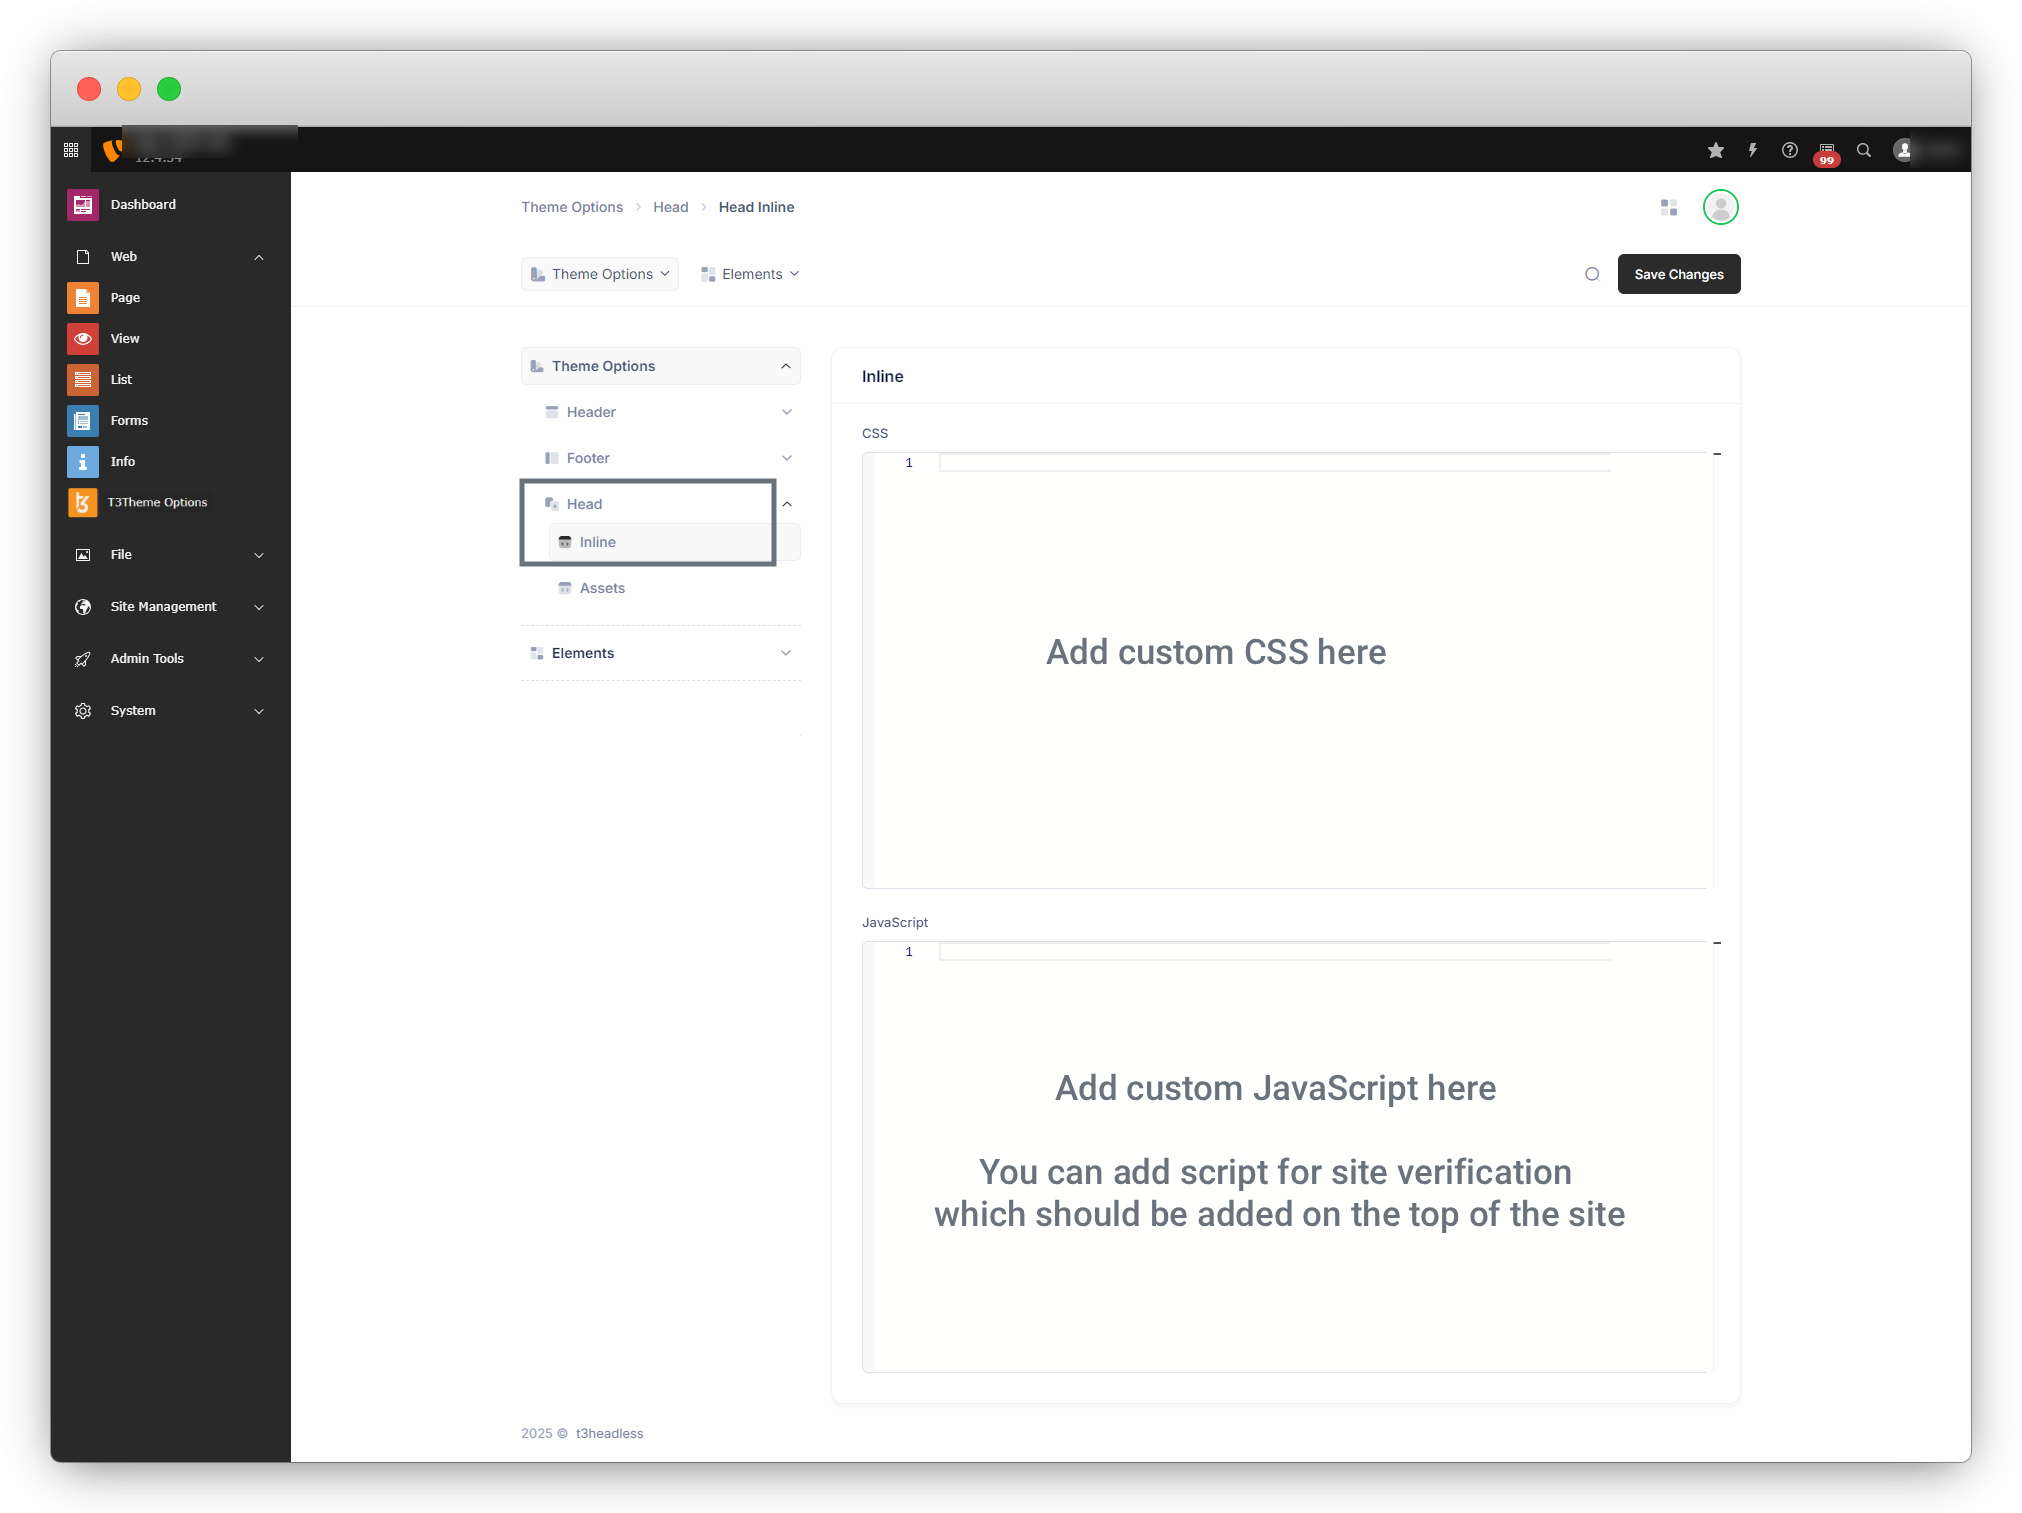
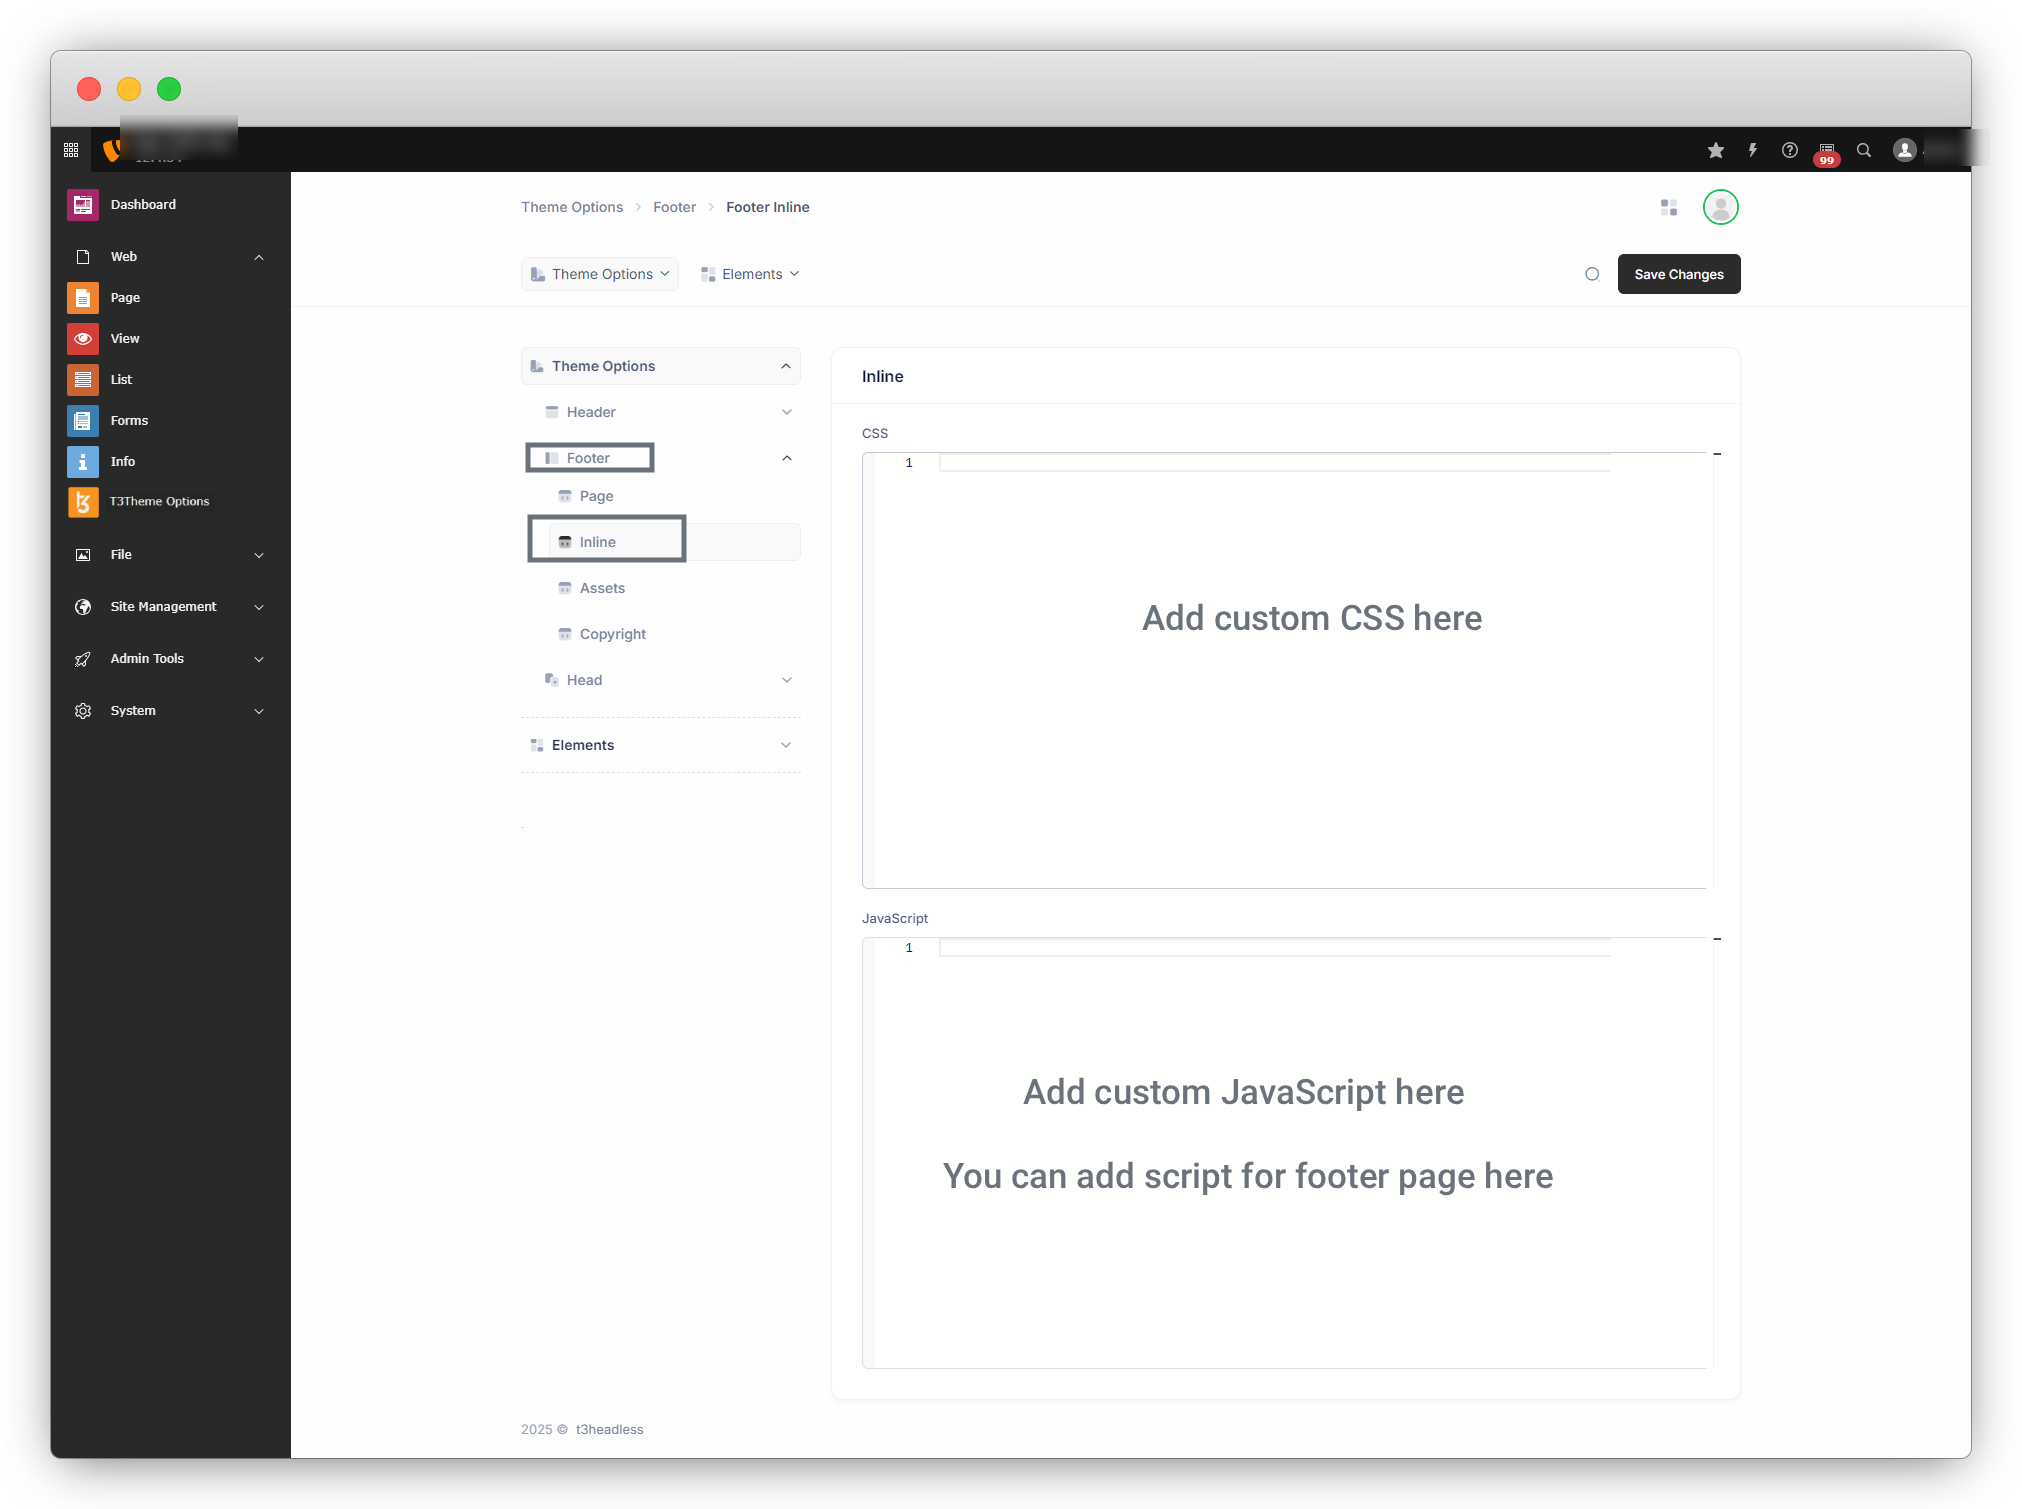
2. Footer > Inline : Here you can add custom CSS and custom JS of Footer without uploading any CSS or JS files.
6. Menu
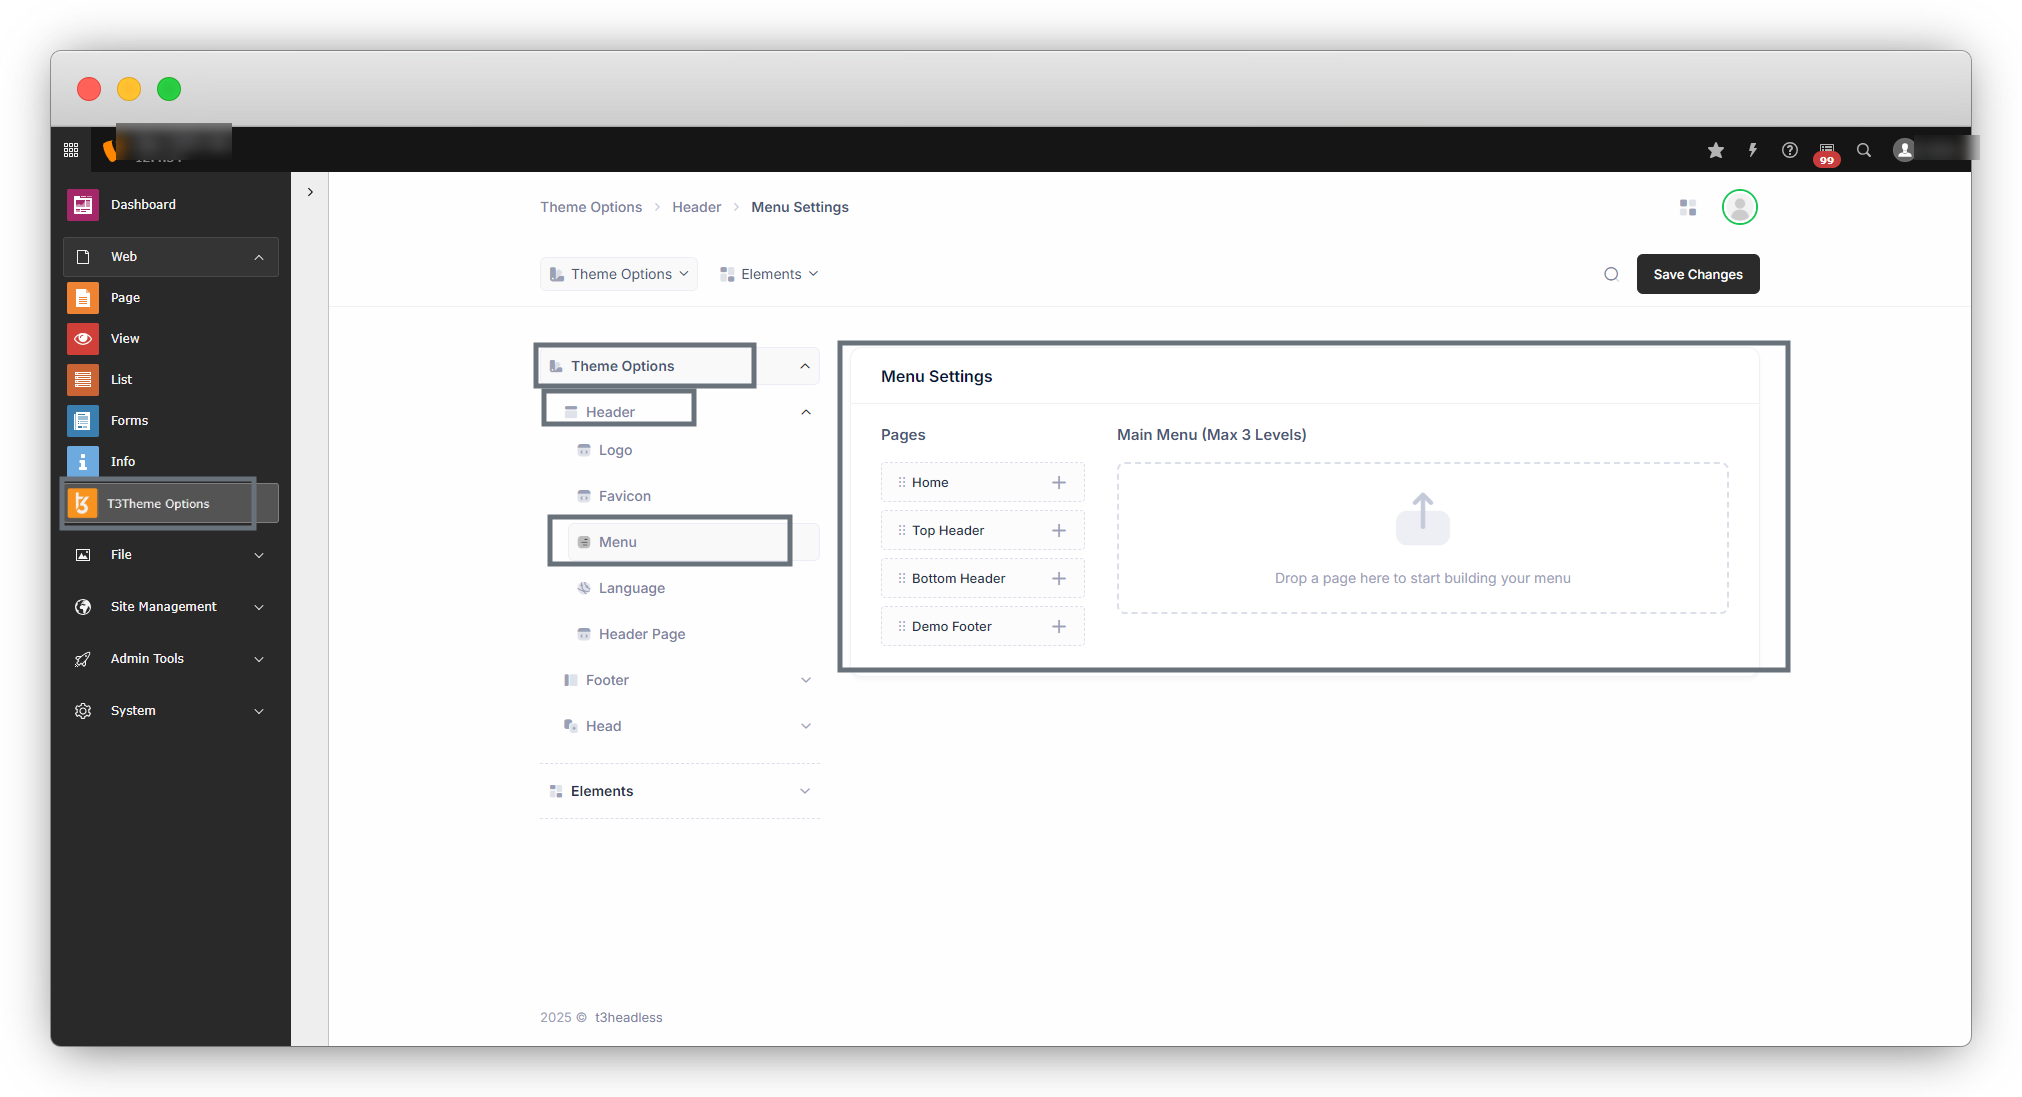
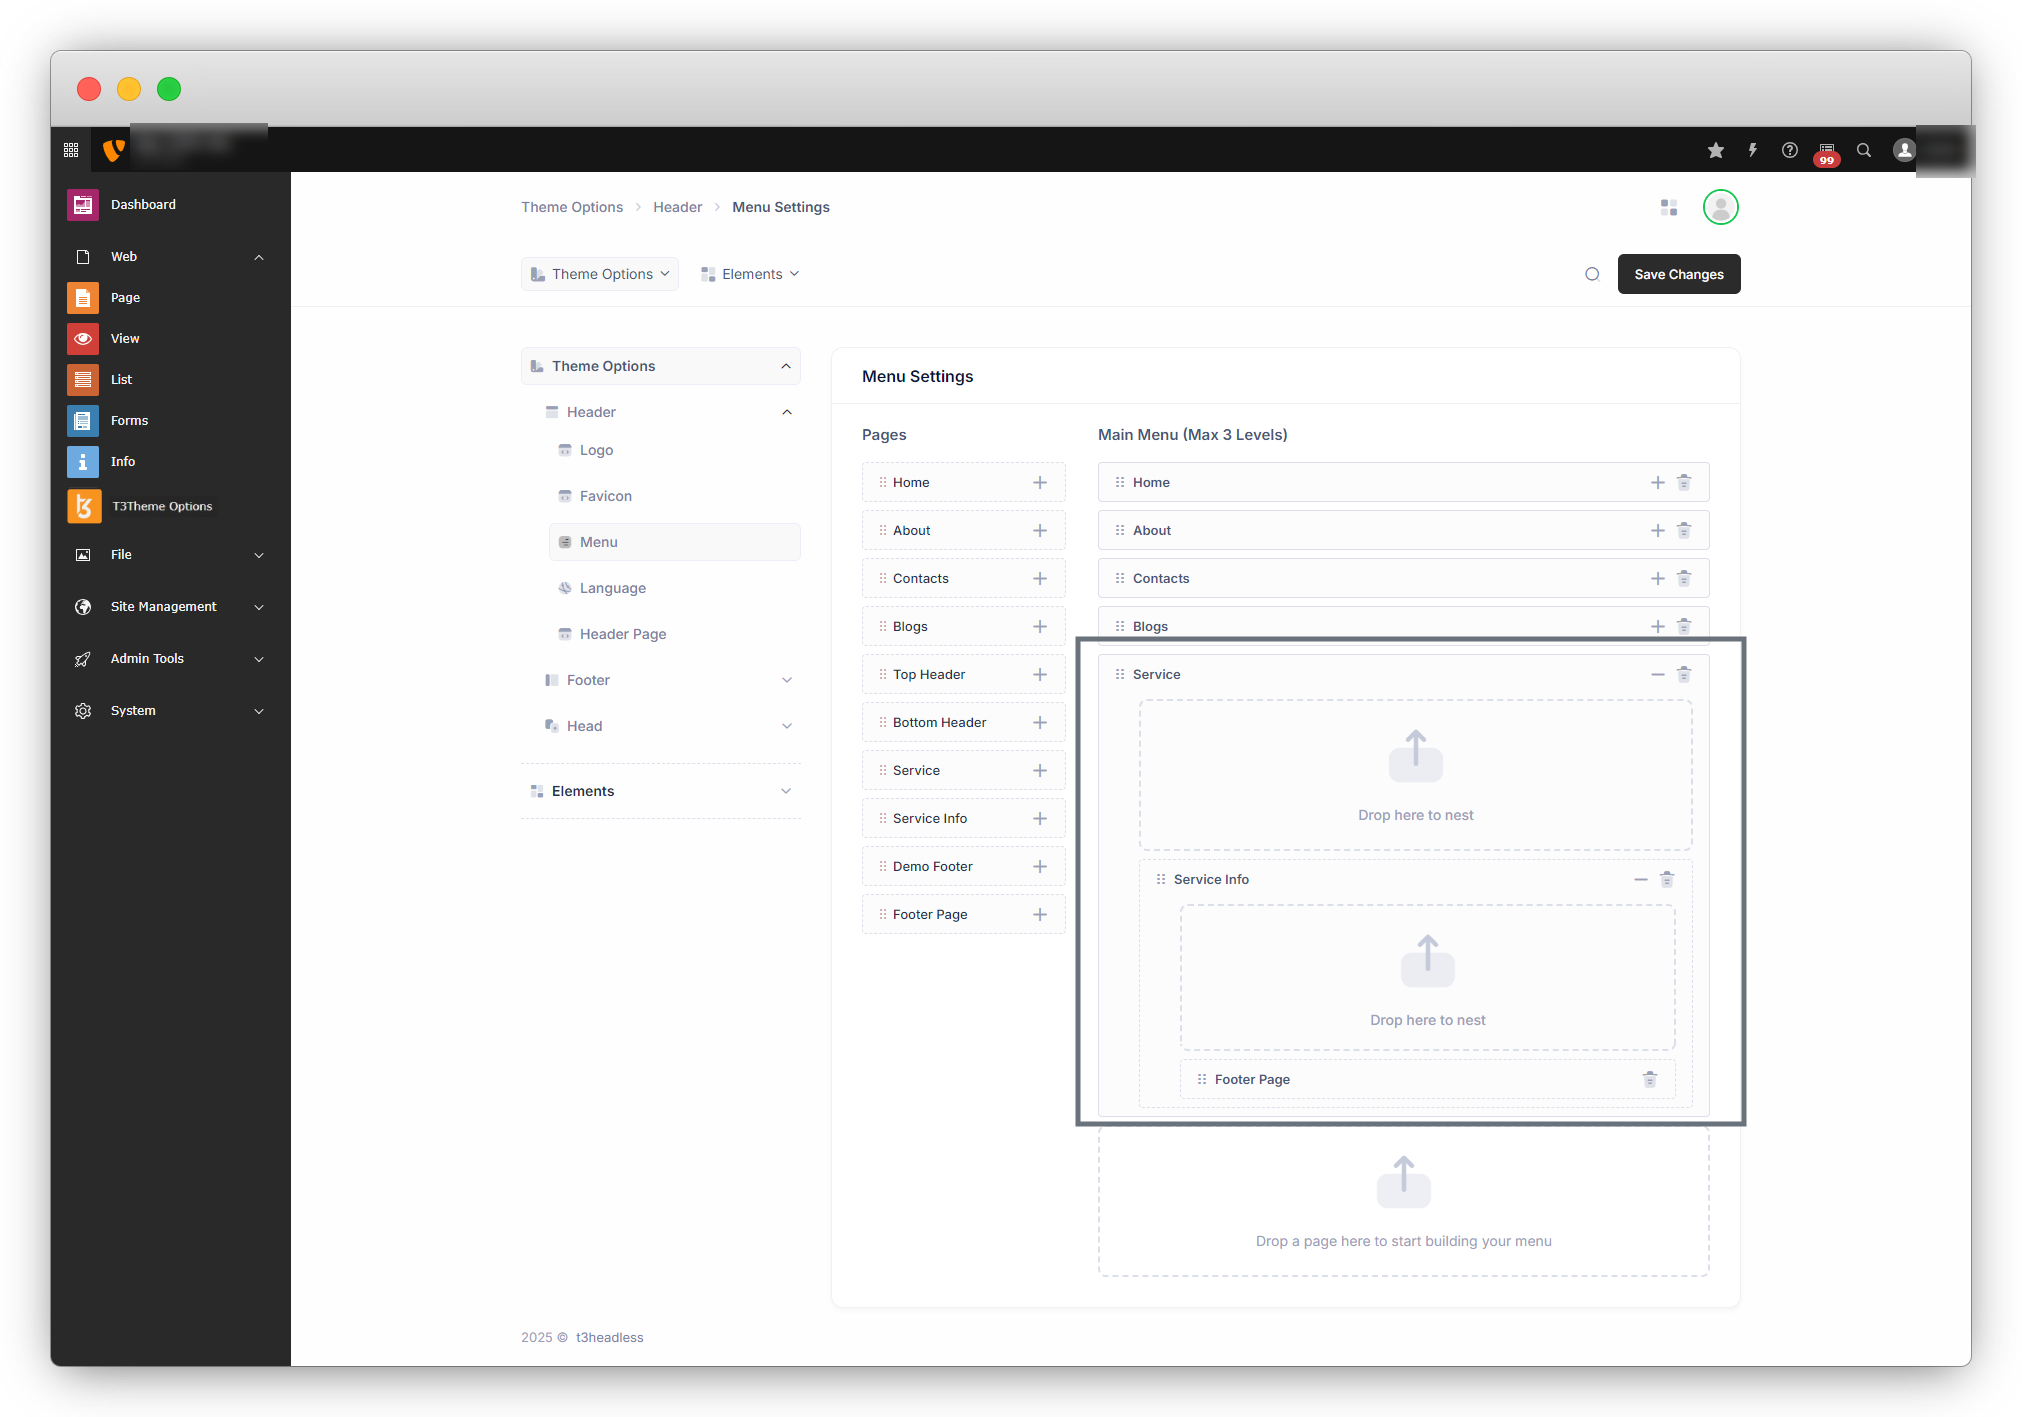
1. To set the header menu for the t3theme go to the Theme options > Header > Menu and you will see the screen as seen in the screenshot below:
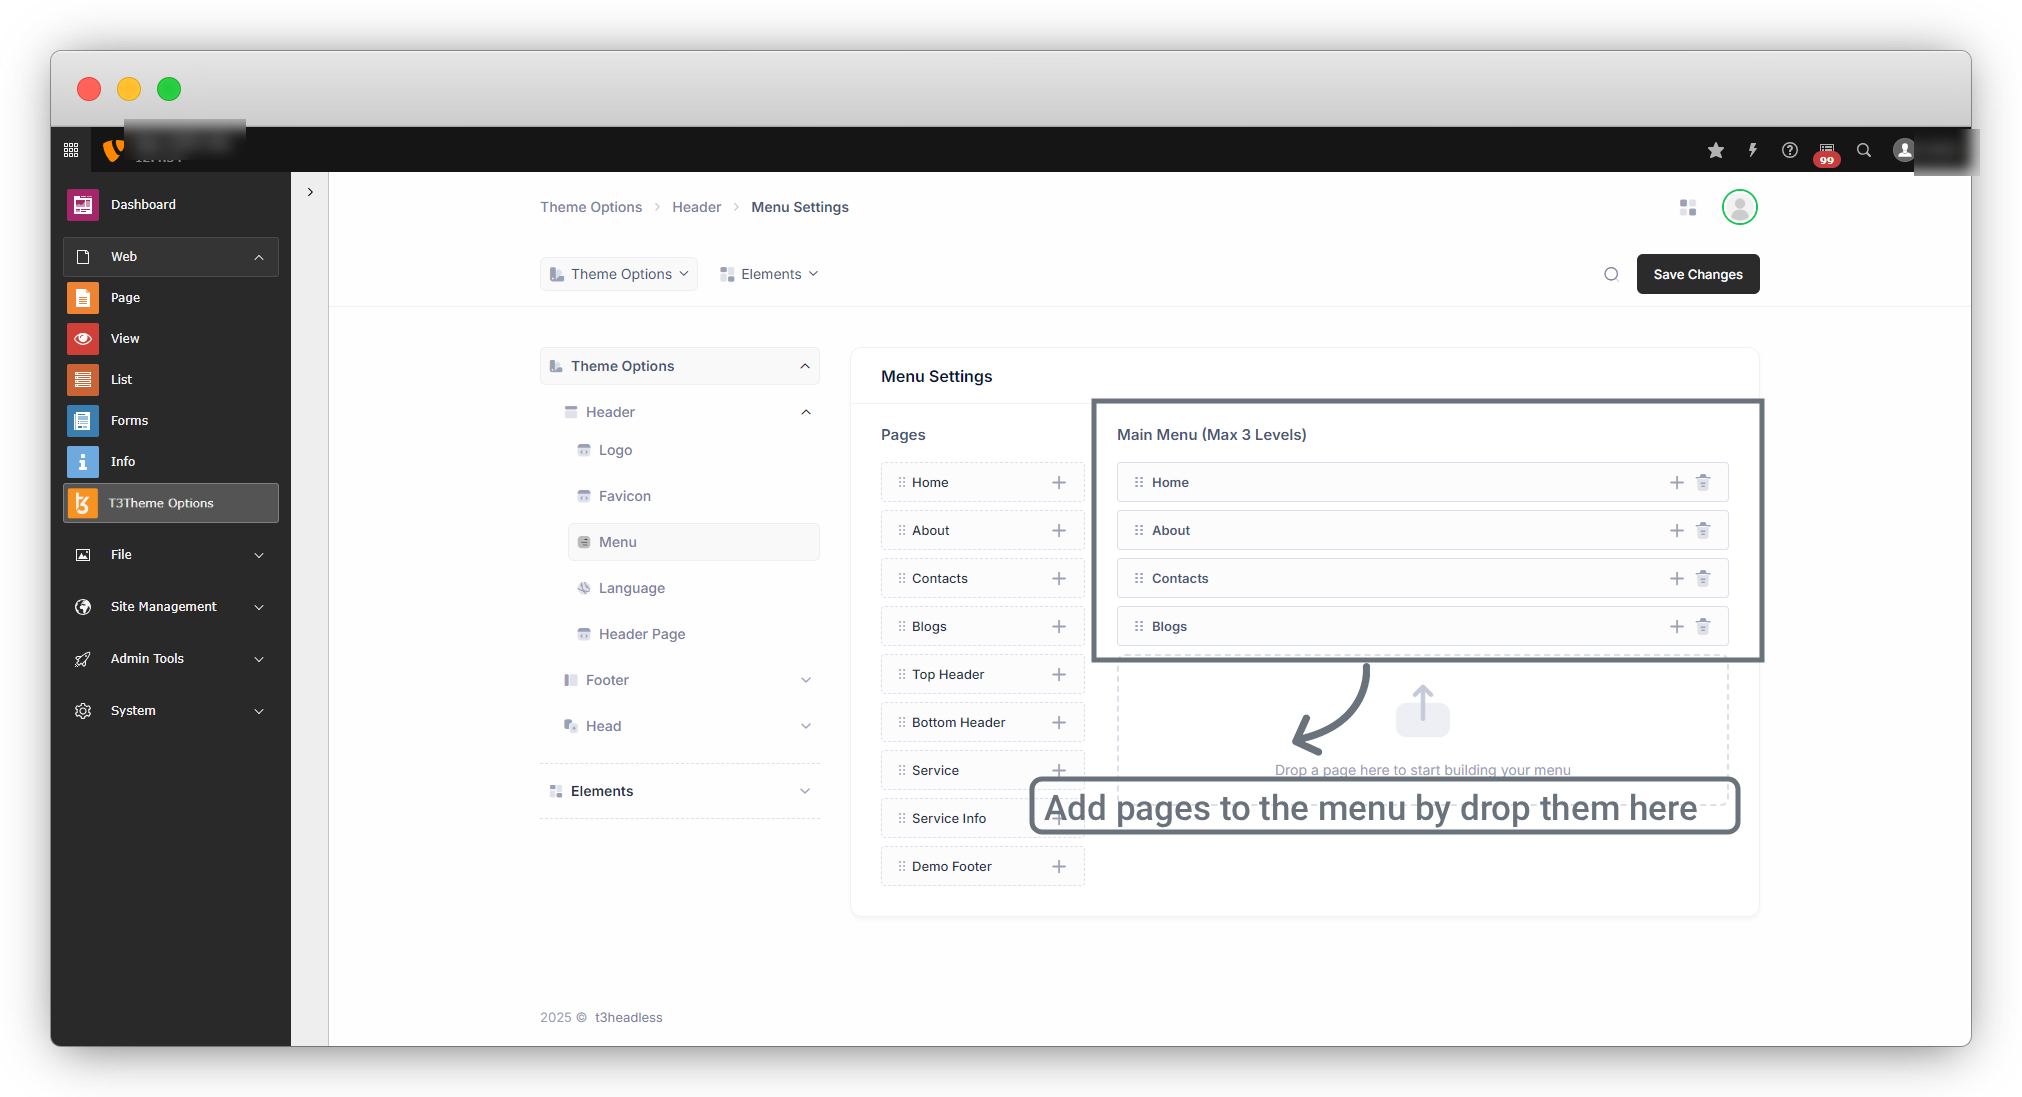
2. On the left side there is a list of pages and you can add the pages to the menu by drag them from the list and drop into the box on the left below the “Main Menu” text.
3. Submenu
3.1. To add submenu items in the main menu item, just click on the Plus Icon far right on the menu item and expand the main menu item by clicking on that Plus Icon, and you will see a box on the right to drop the submenu item for that particular main menu item.

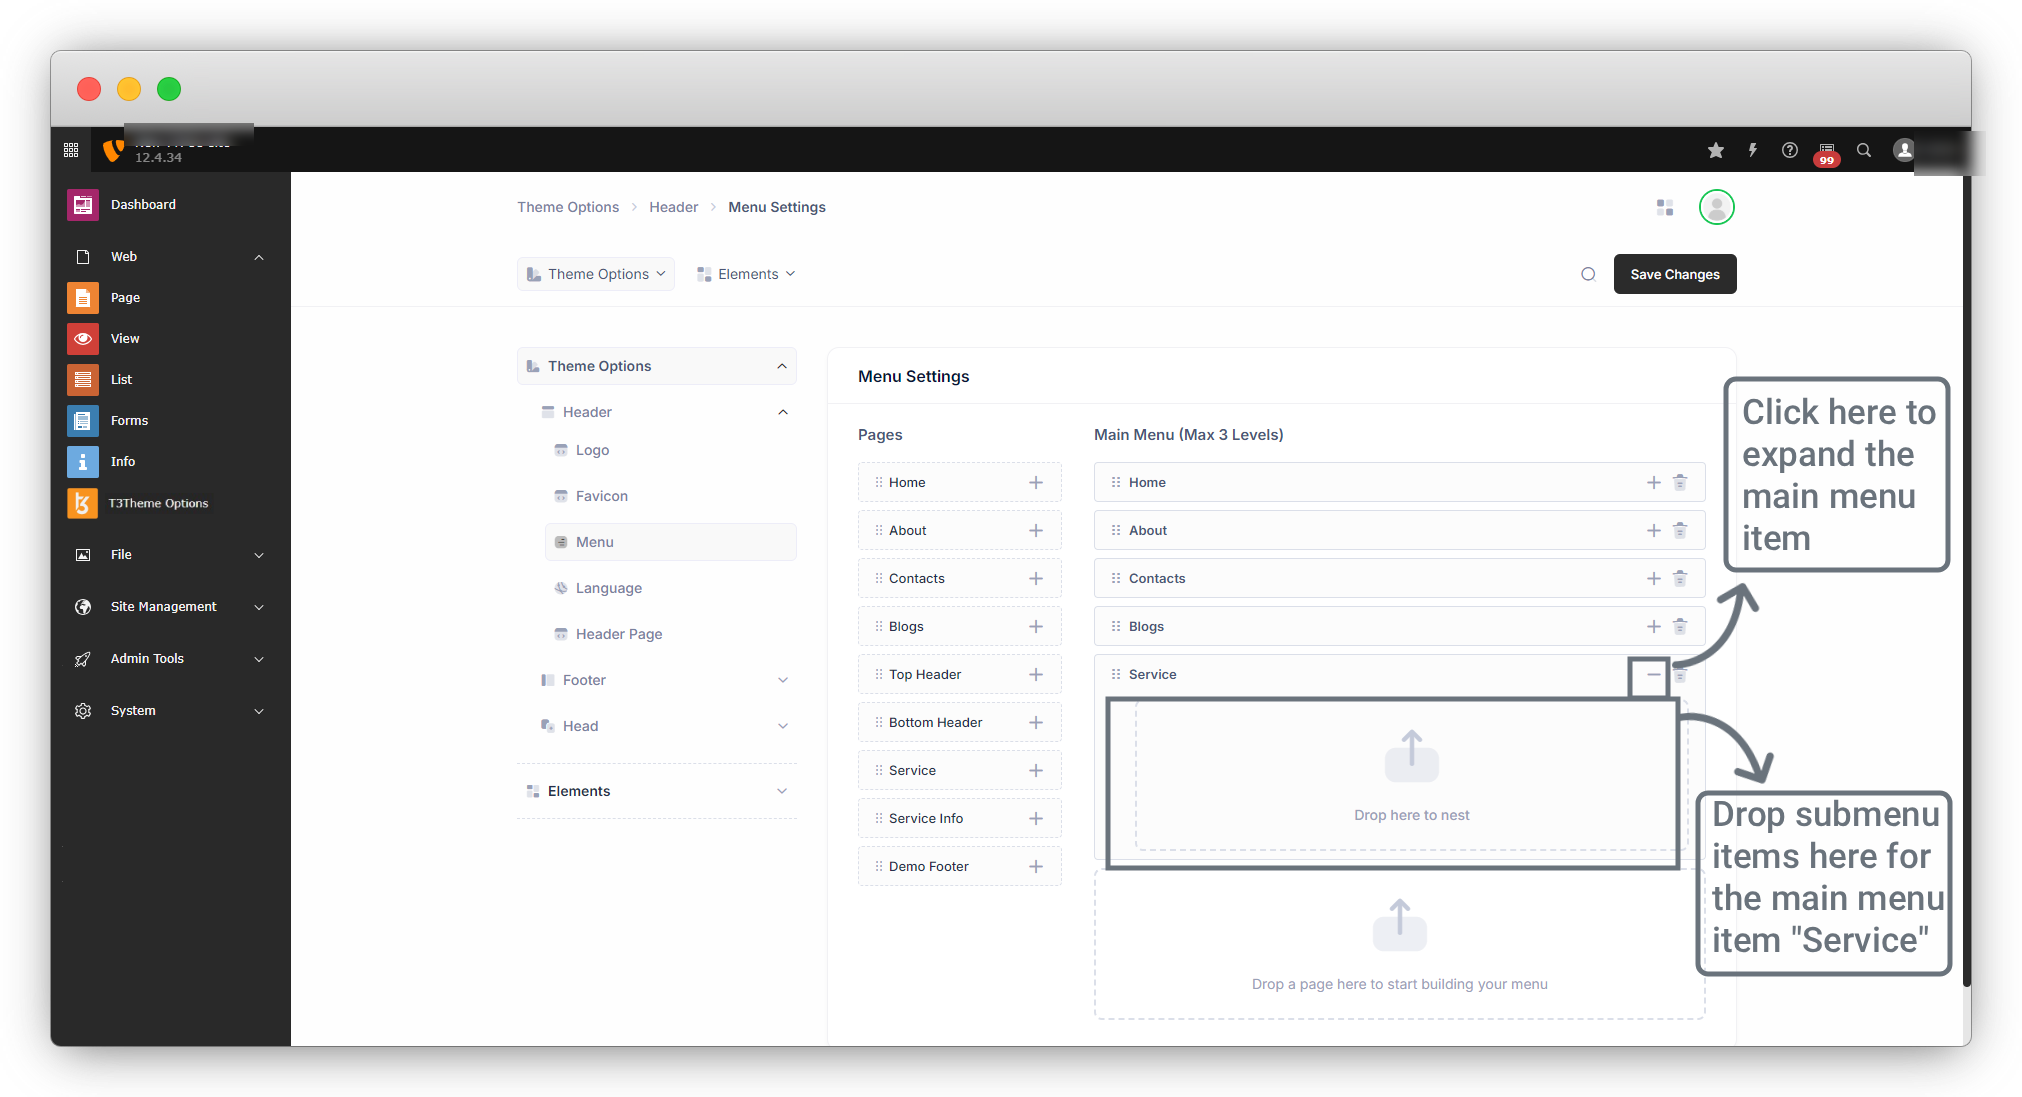
3.2. If you want to add sub of submenu, then also you can add by the same way we added above submenu item.
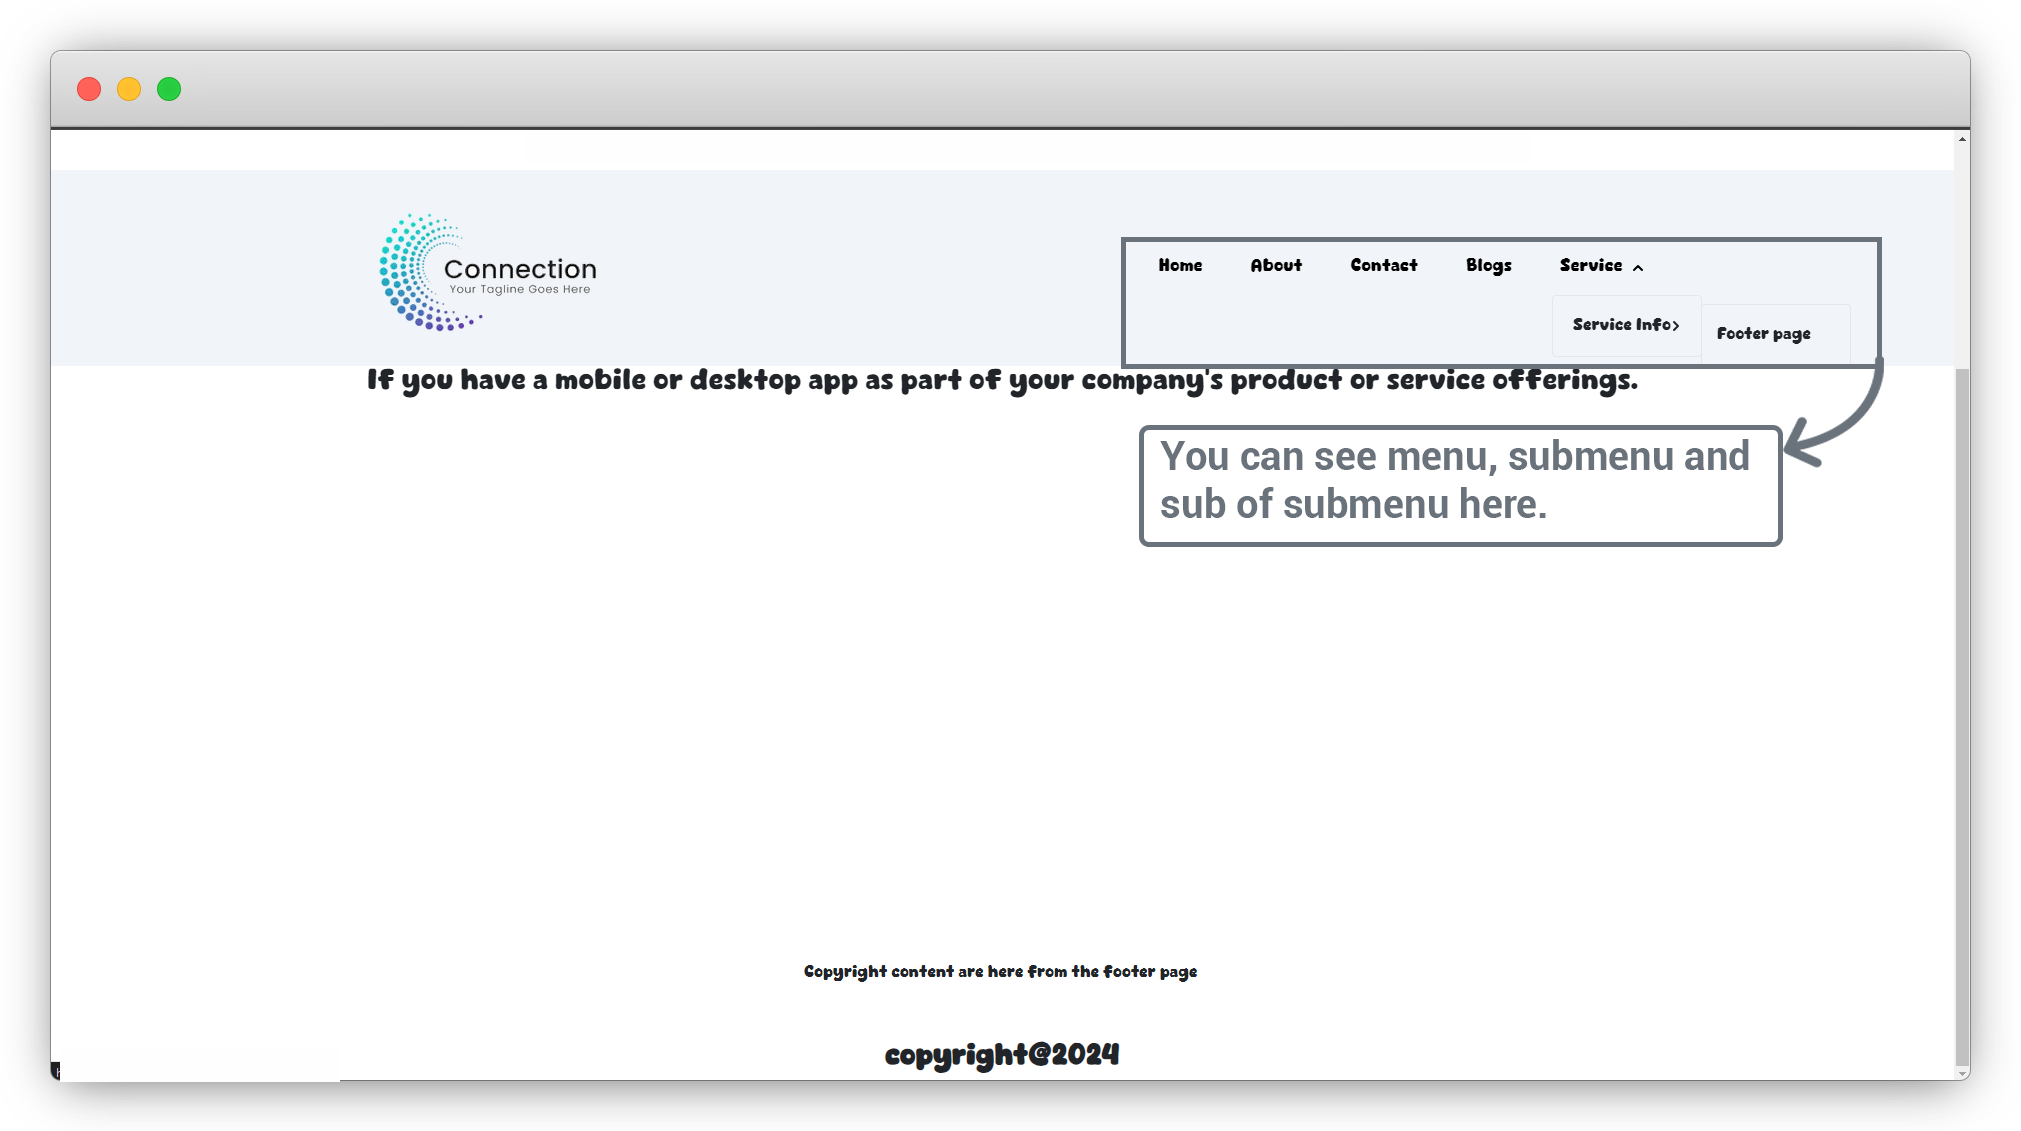
4. Now refresh the front-end and you will see the menu.
7. Language menu
1. To add a language menu to your website, go to Theme options > Header > Language.
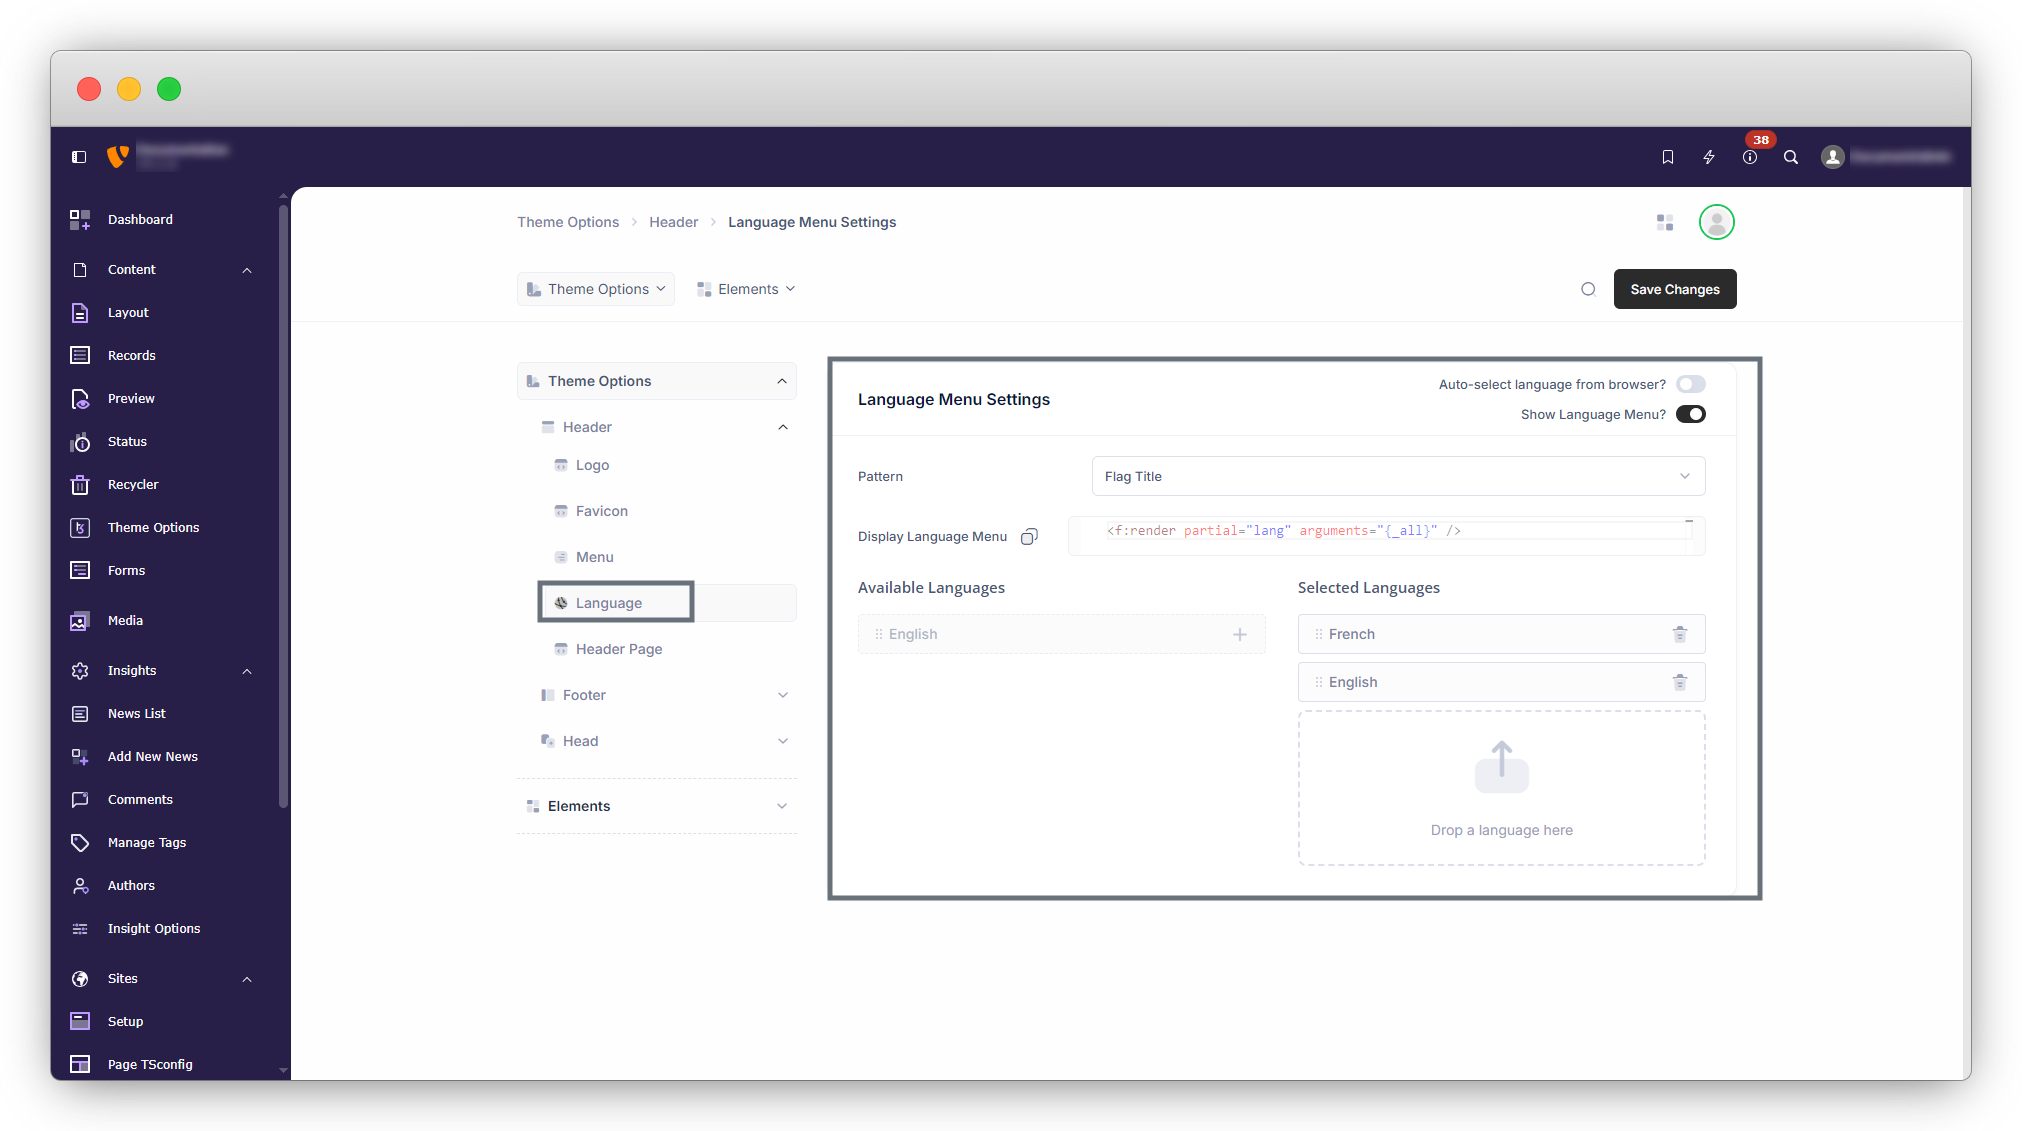
2. As you can see in the above screenshot, we do have “Drag Language” box, from there you can drag the languages and drop them into the Language menu.
3. Display Language Menu : This option provides the code for the language menu. You can copy the code by clicking the copy icon and paste it into your template or code wherever you want the language menu to appear.
4. Auto-select Language from Browser : This is a toggle option (On/Off). When enabled, the website automatically detects the user’s browser language and displays the site content accordingly.
For example, if the browser language is set to English (US), the site will display content in English. If it is set to German, the site will be displayed in German.
3. Here in the below example some languages are defined, you can define languages in TYPO3 by following the documentation link – https://docs.typo3.org/m/typo3/tutorial-editors/12.4/en-us/Languages/Index.html

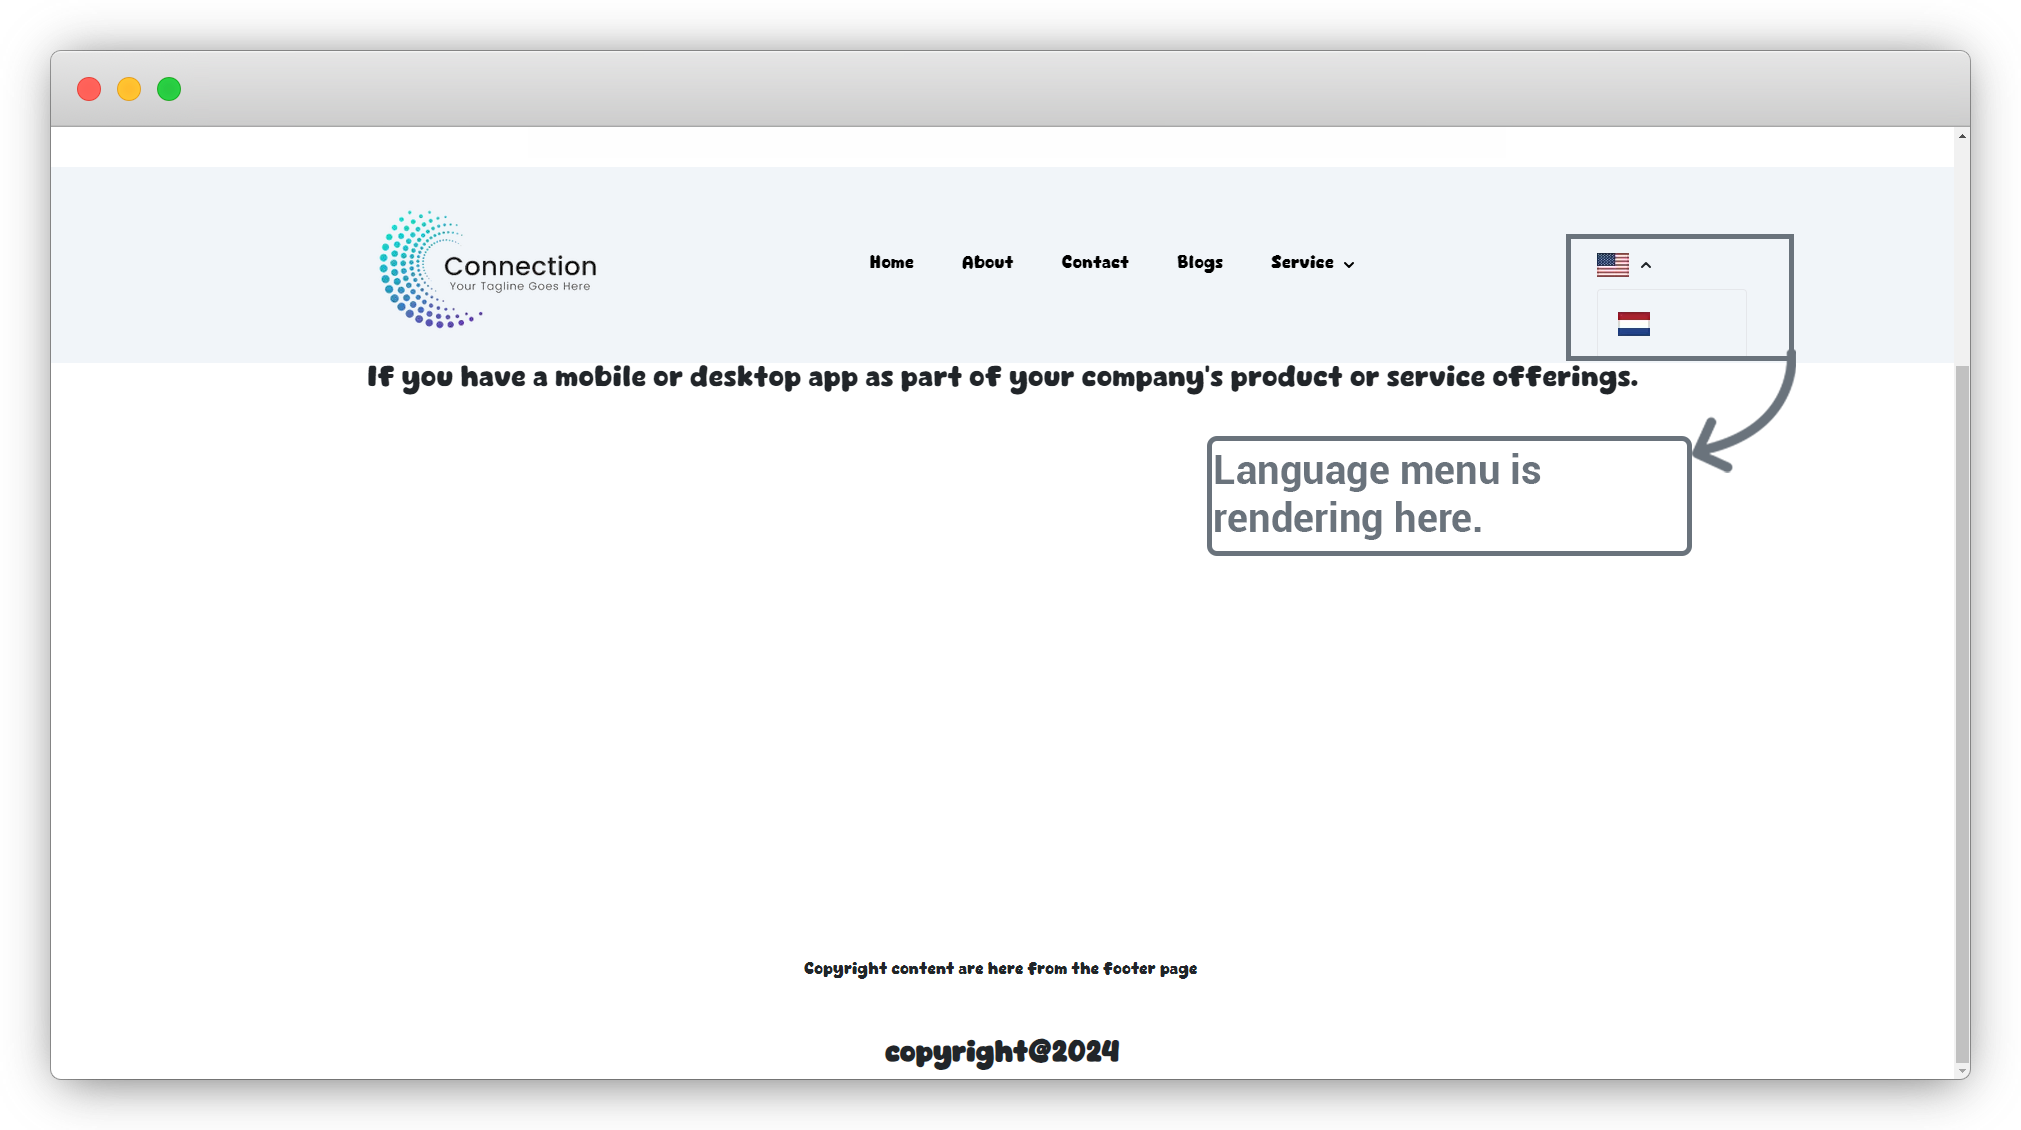
4. After adding the language from the “Drag language” box to the language menu, make sure you have checked the checkbox “Show Language Menu ?” and click on the “Save Changes” button and you will get the message of success and you will see the language menu in frontend and as we selected “Flag” in above screenshot, you will see flags in language menu, but you can try other options too like “Title”, “Title Flag” and “Flag Title” and check the frontend.
Share


