
URL copied to clipboard

7 views
__readtime__ Min
read
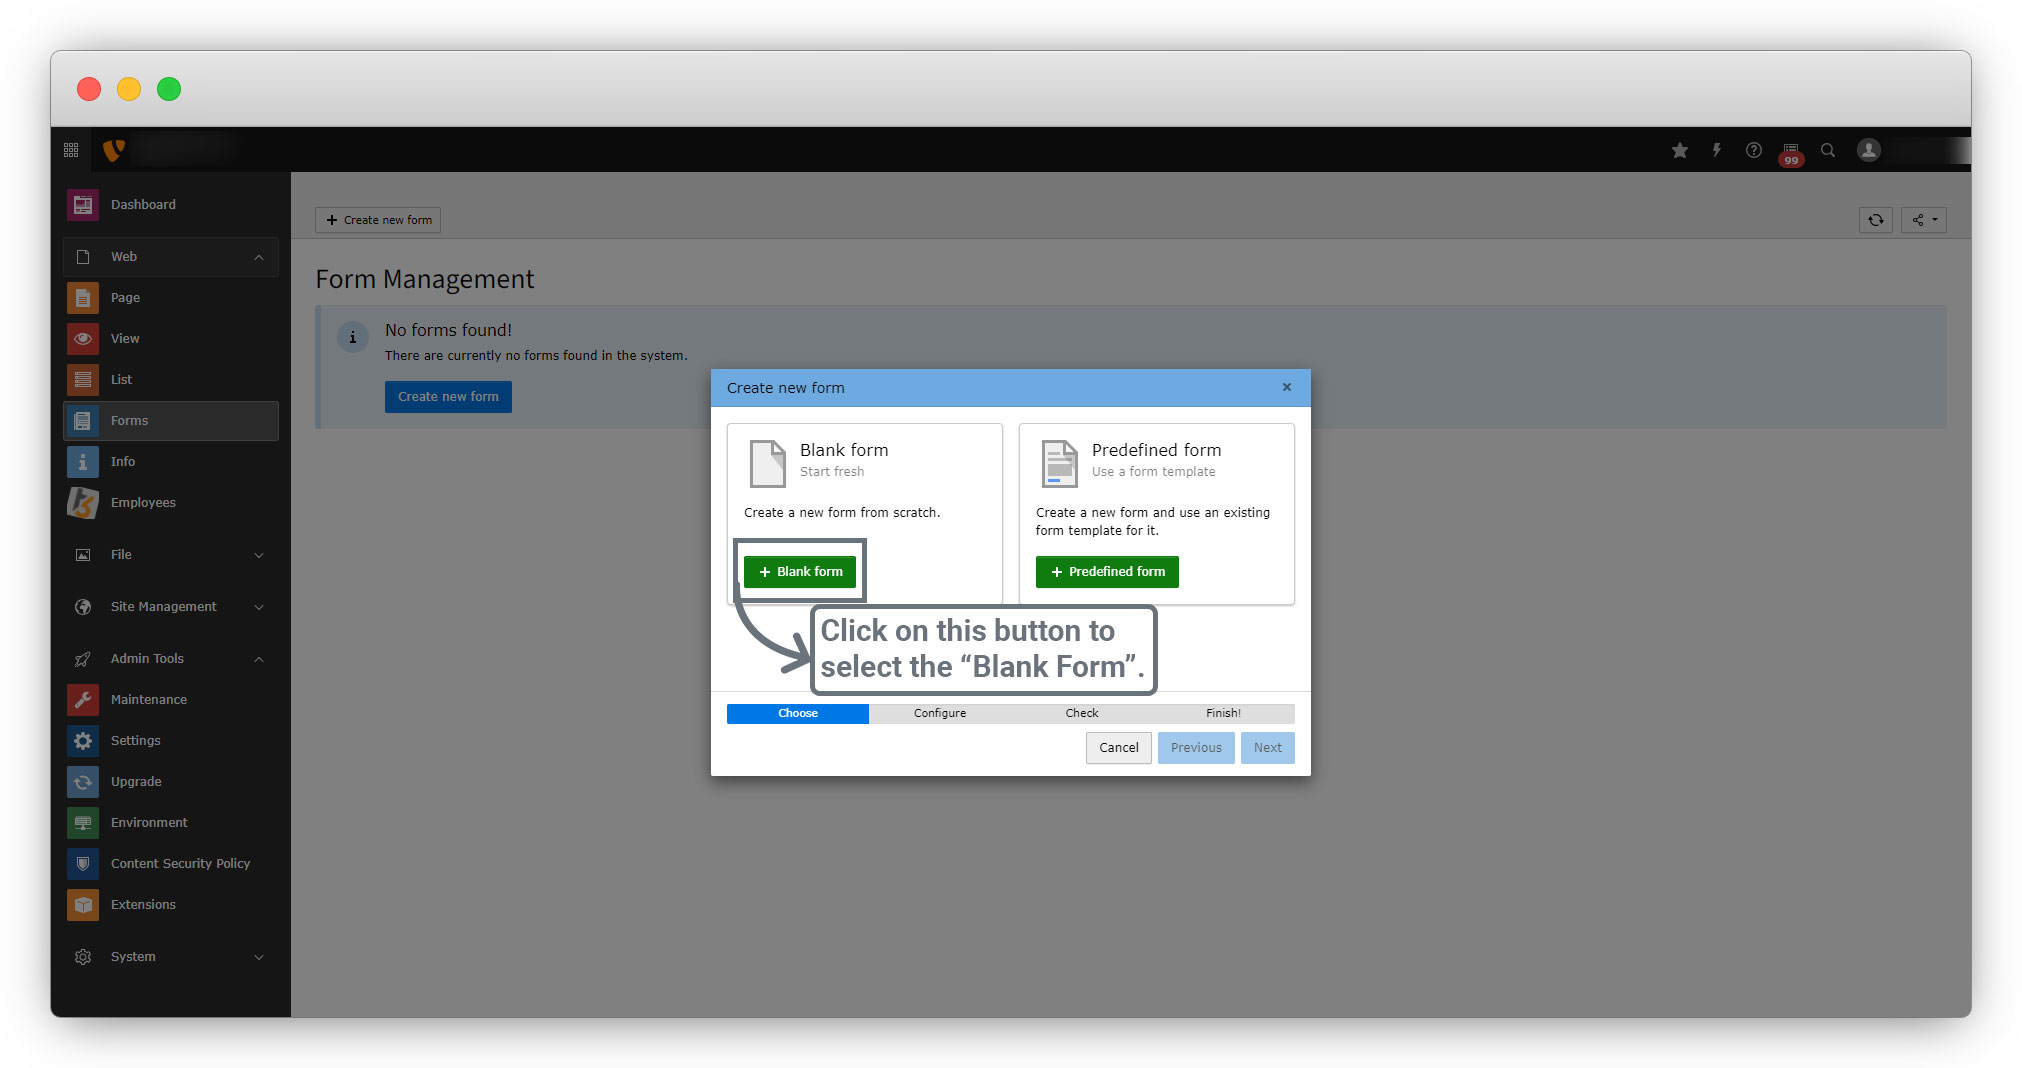
1. click on the blank form to select it.
2. After selecting the “Blank Form” you will get an option for configuration where you can set the name of the form.
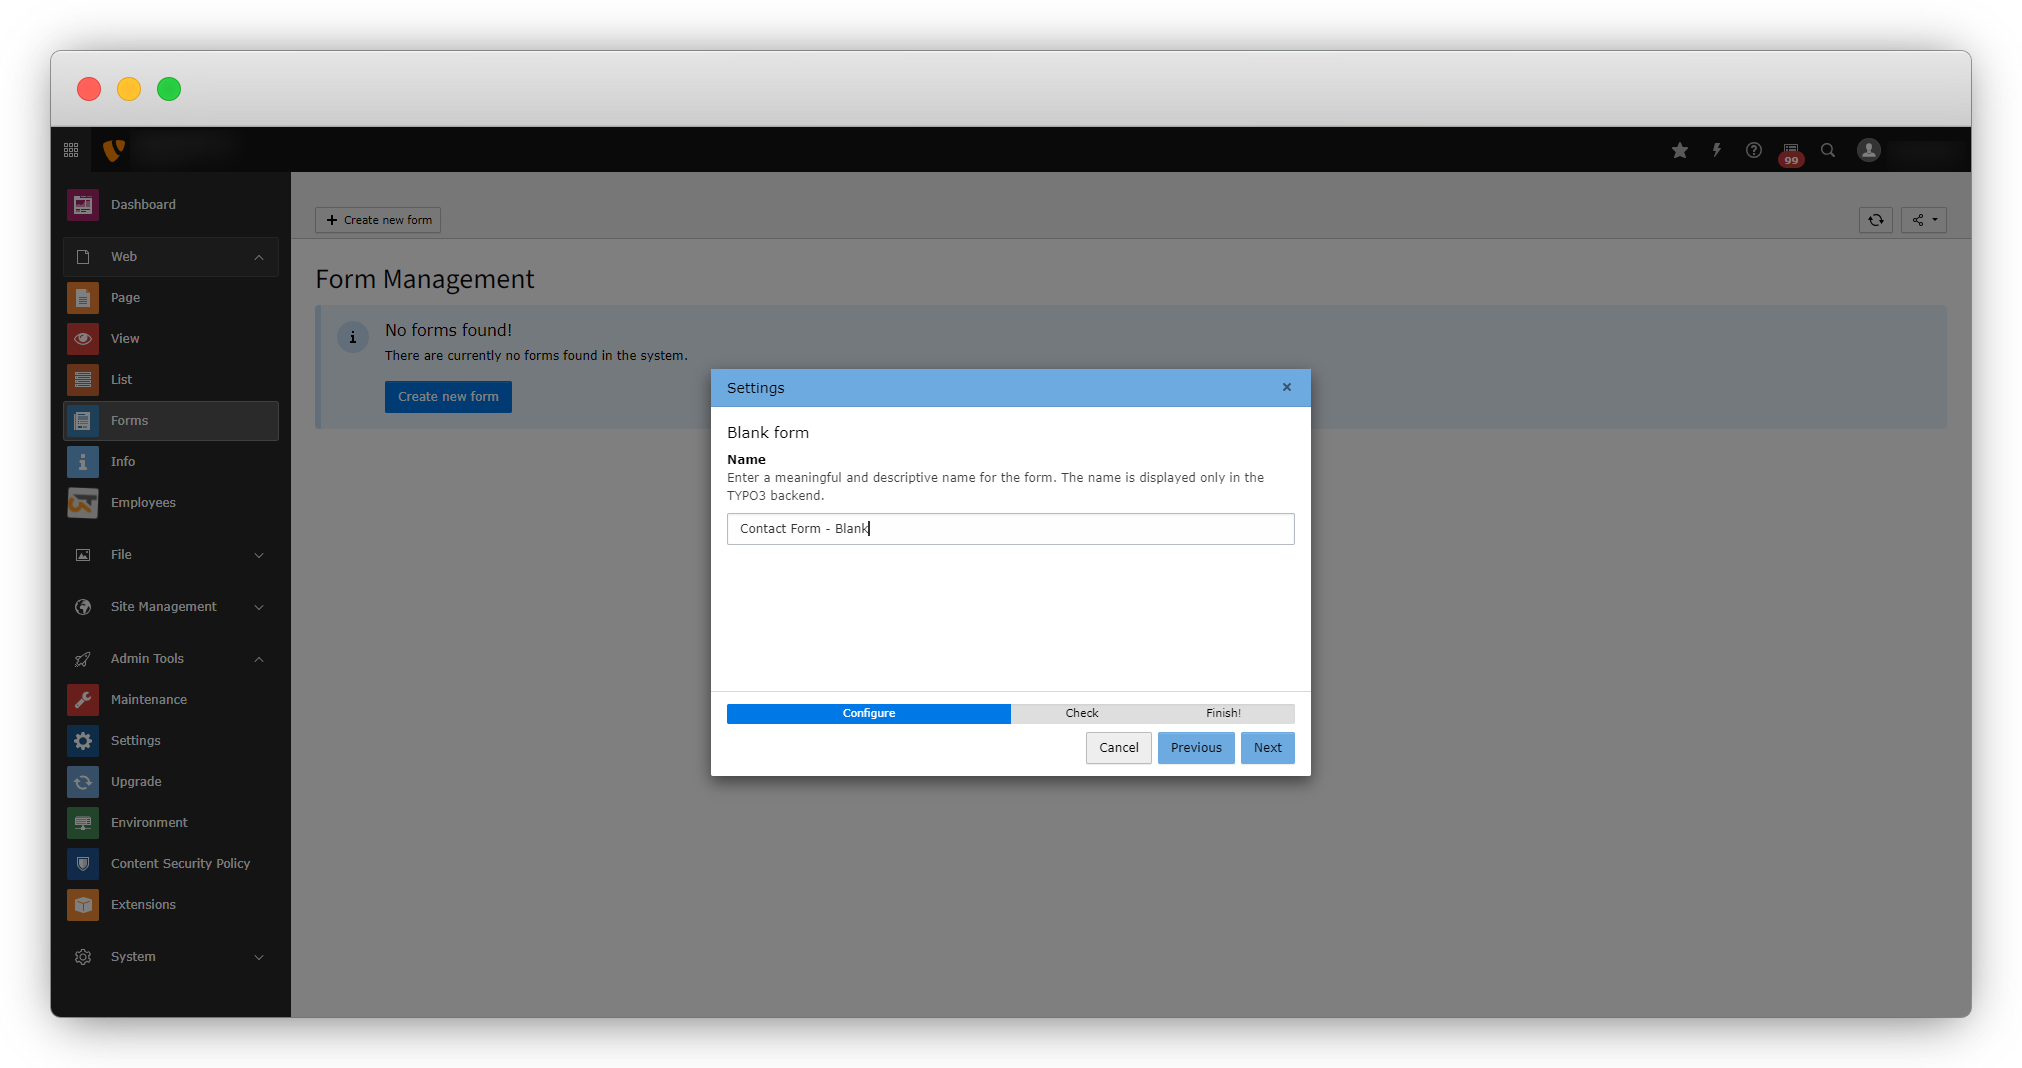
3. After adding the name, click on the “Next” button and you will see the below screen.
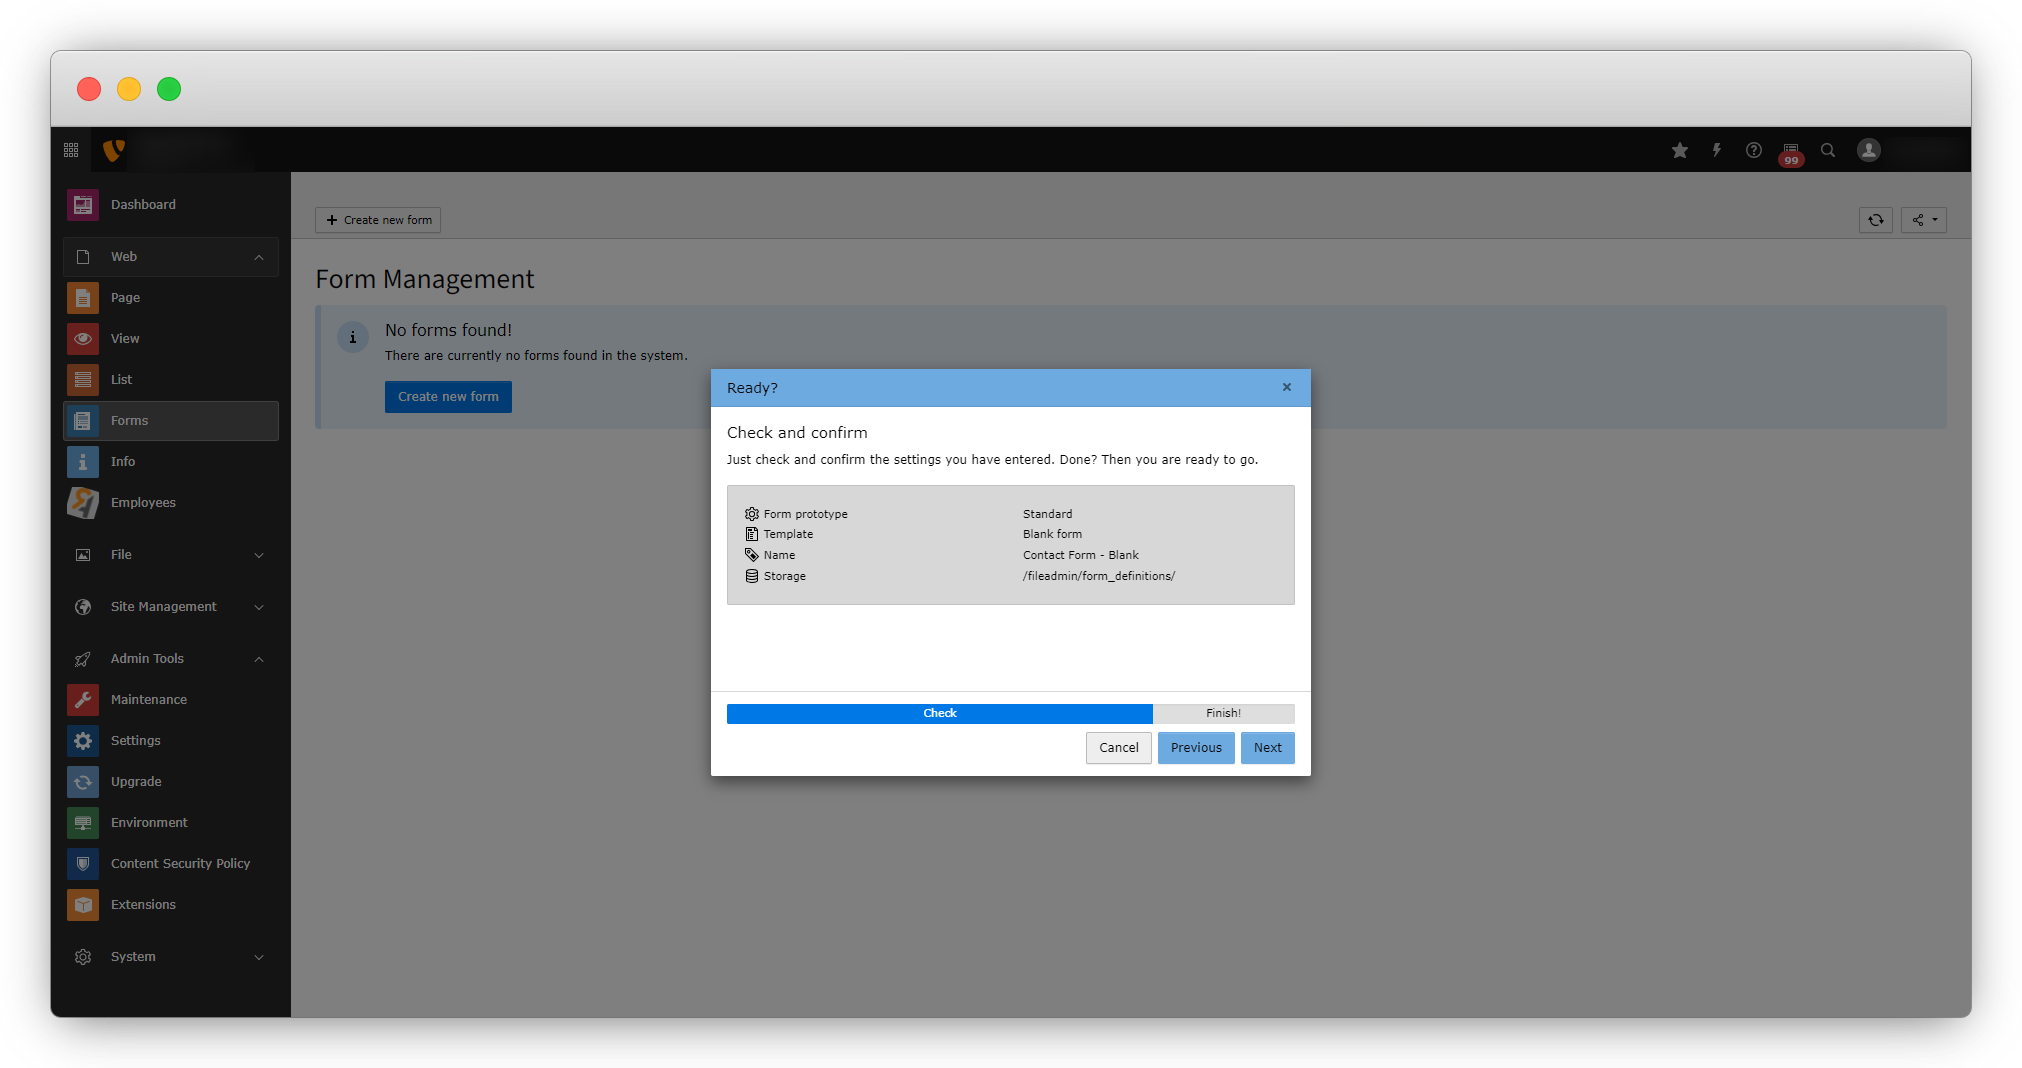
4. Click on the “Next” button and the form will be created and you will see the screen below:
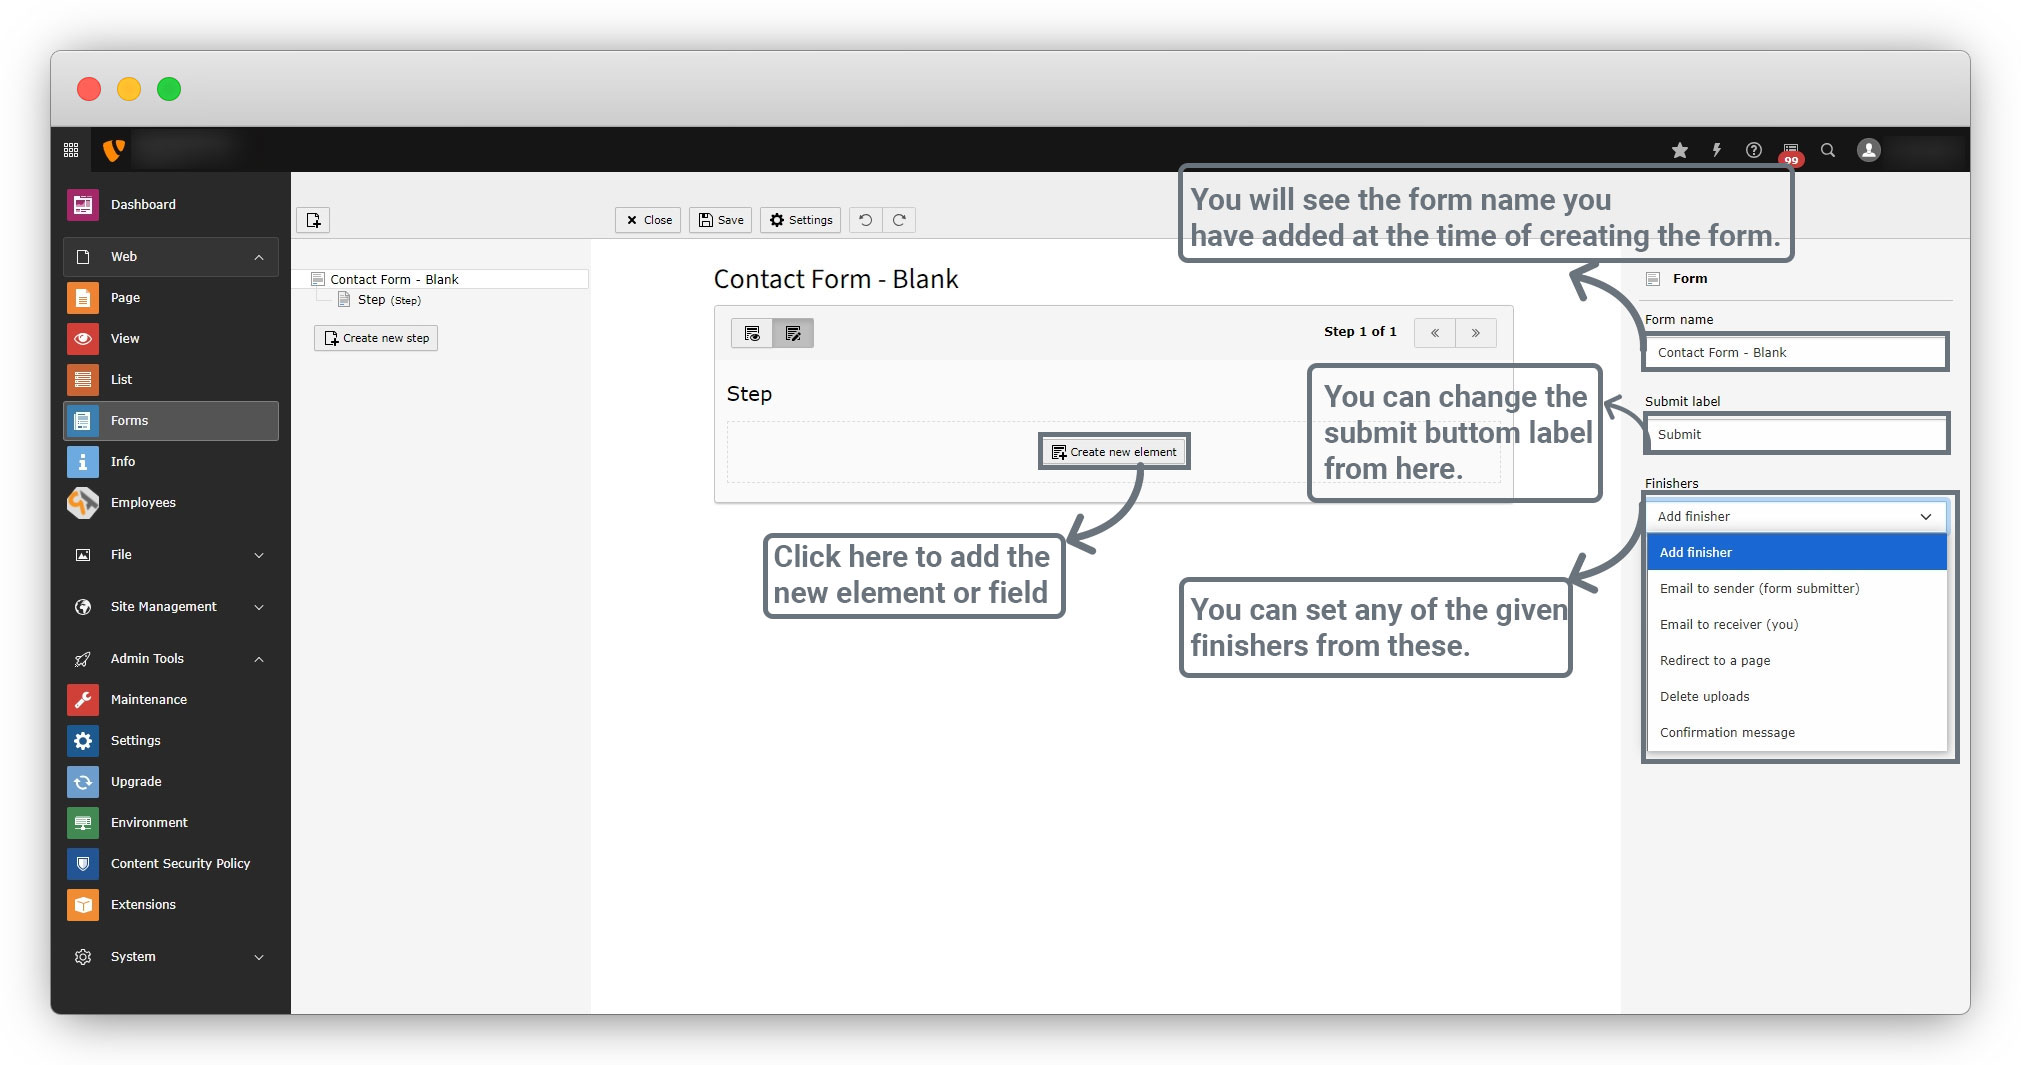
Let’s get an overview of how to create the new element. Reference link: https://docs.typo3.org/c/typo3/cms-form/main/en-us/E/FormElements/Index.html
4.1. By clicking on the “Create new element”, you can add a new field to the form. After clicking that button, you will see the popup with fields as seen in the screenshot below:

4.2. You can add as many fields as you want to add from the popup in the above screenshot. To create the form let’s add some fields step by step and see their explanation.
4.3. As you can see in the screenshot below, we have added the Text field from “Basic elements” and a Grid: Row field from “Container elements”.
4.3.1. Text:
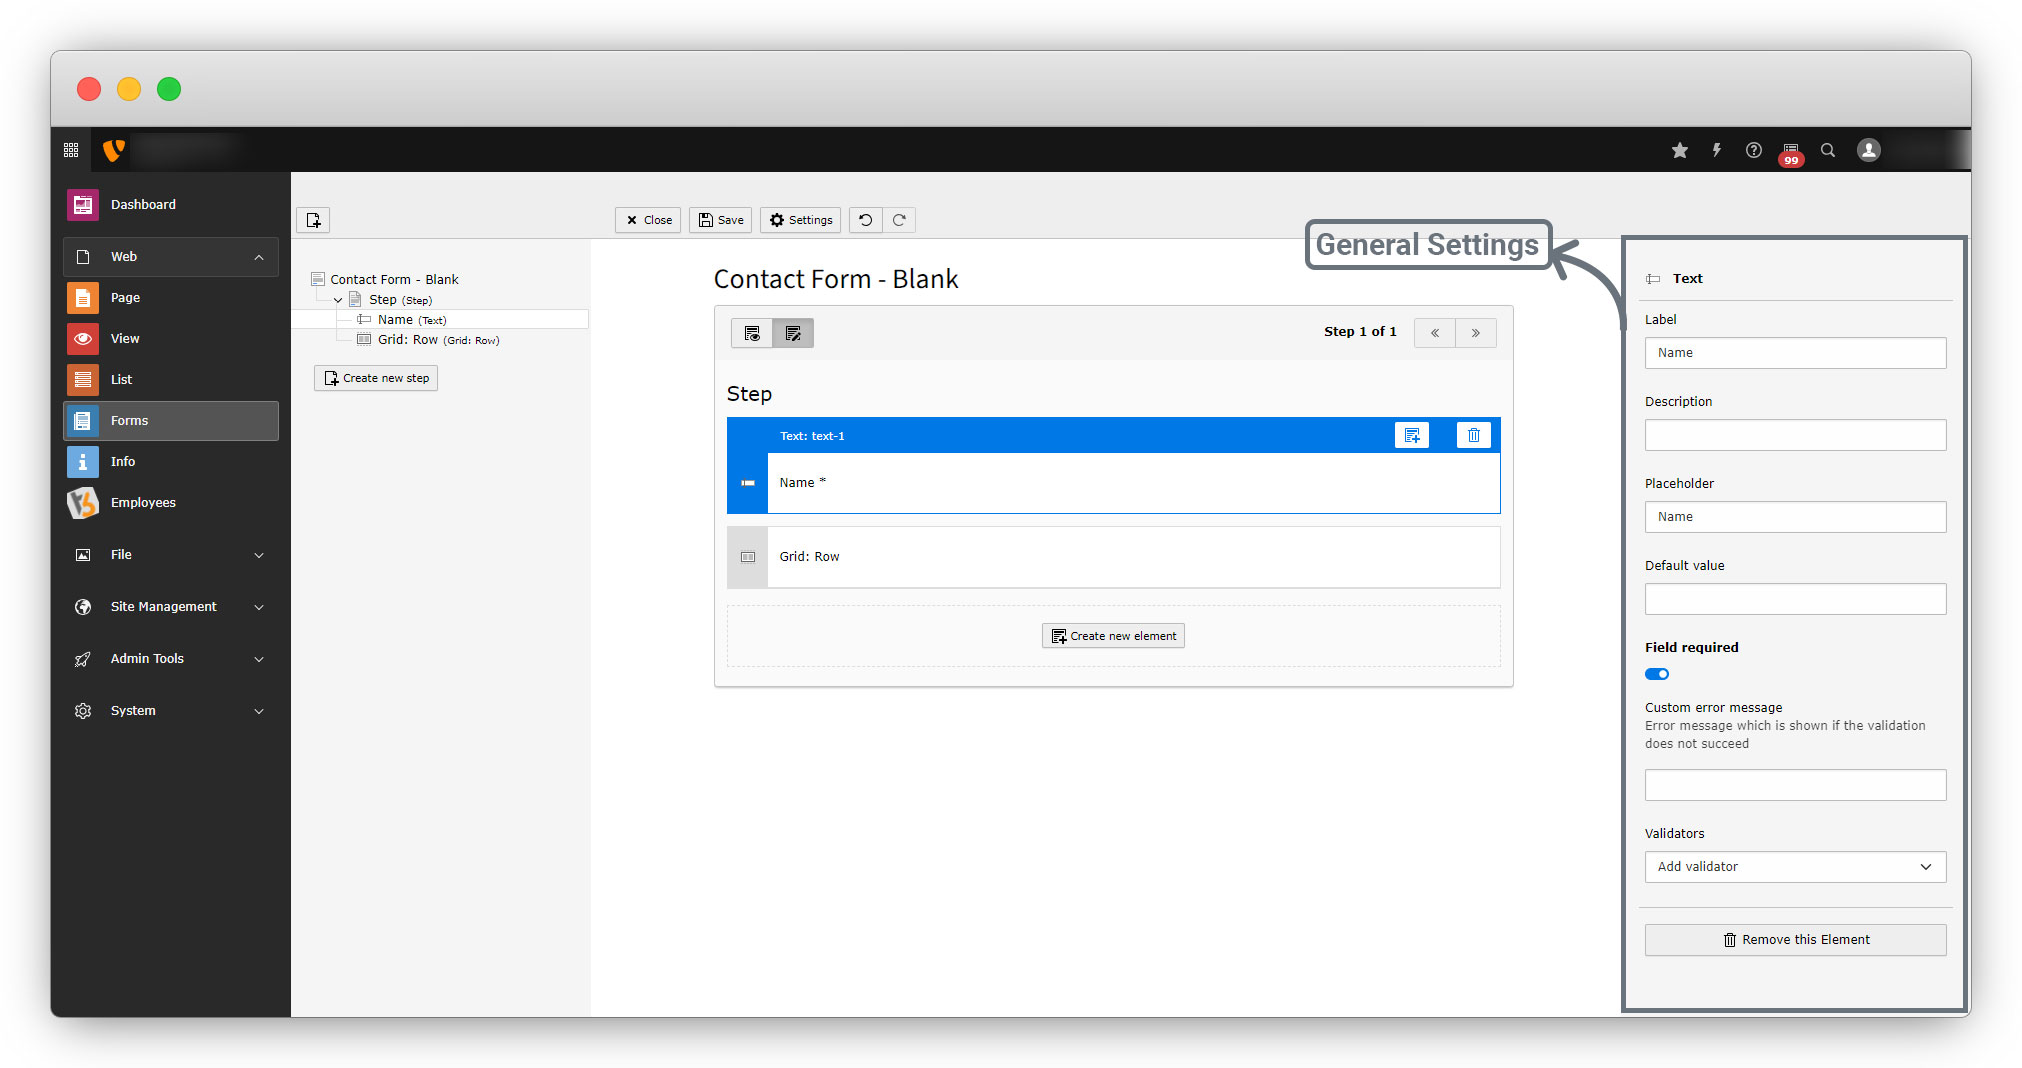
A single-line text field, e.g. for entering short information such as name, address, and location. You can see the settings in the screenshot below for the Text field
As you can see in the screenshot above, you can add the label, description, placeholder default value, etc. Also, you can set the Field required, custom message, and validations. Below is the explanation:
- Label: Set a label for your field, such as name, address, email, etc.
- Description: Add some description about the field that will be displayed below.
- Placeholder: Add a placeholder of the field.
- Default value: You can add any default value to the field, so if the user does not add any value to that field, the default value will be considered.
- Field required: You can set the field “required” by using this.
- Custom error message: You can add a custom error message that should appear if the user forgets to add the value for the required field.
- Validator: You can add validators for specific fields from here. You can see more details about validators in the section Validators.
4.3.2. Grid
You can use this container element to place fields next to each other. Obviously, this is a visual structuring.
1. Let’s add other fields to the grid and place them next to each other.
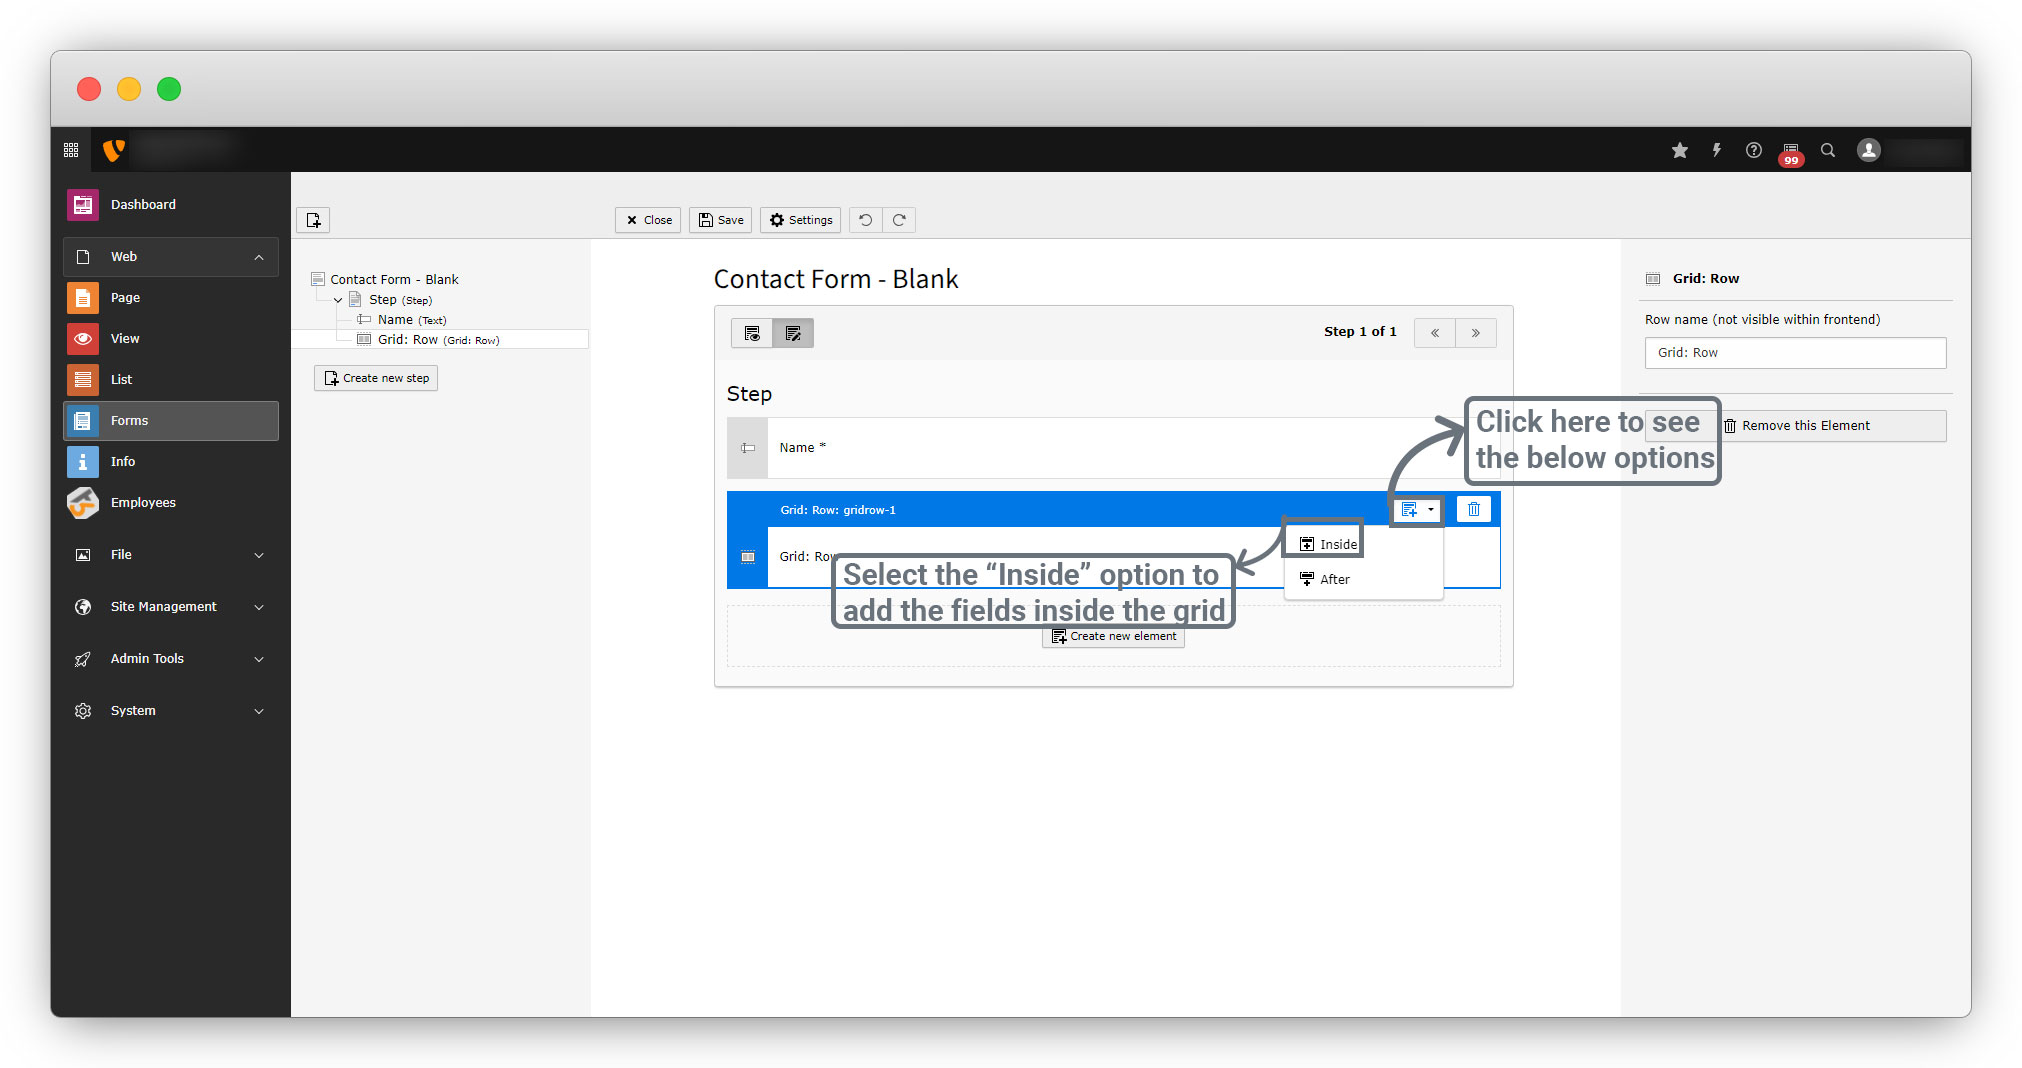
2. As indicated in the above screenshot, you can add fields in grid as seen in the screenshot below:
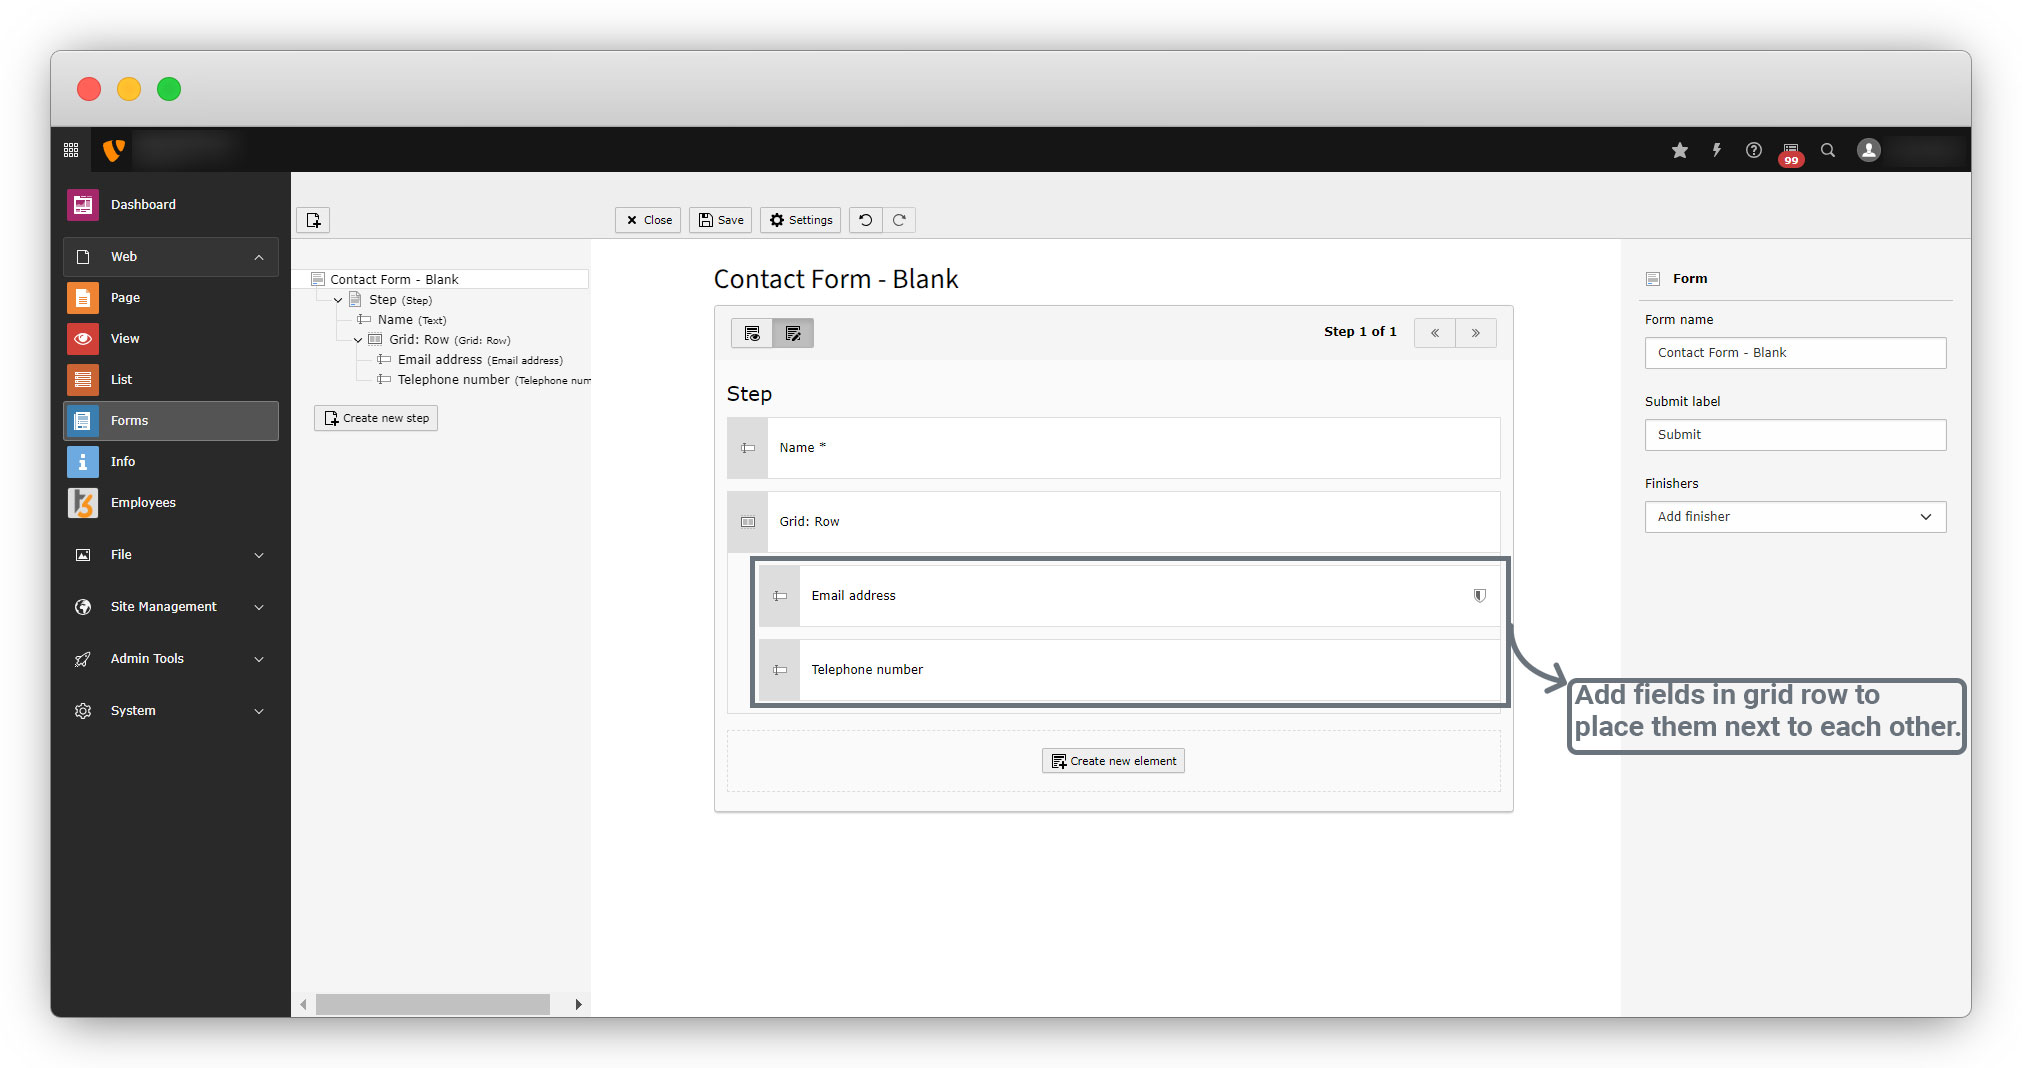
3. After adding the fields you can see the form by clicking the view icon on the top left of the form as seen in the screenshot below:
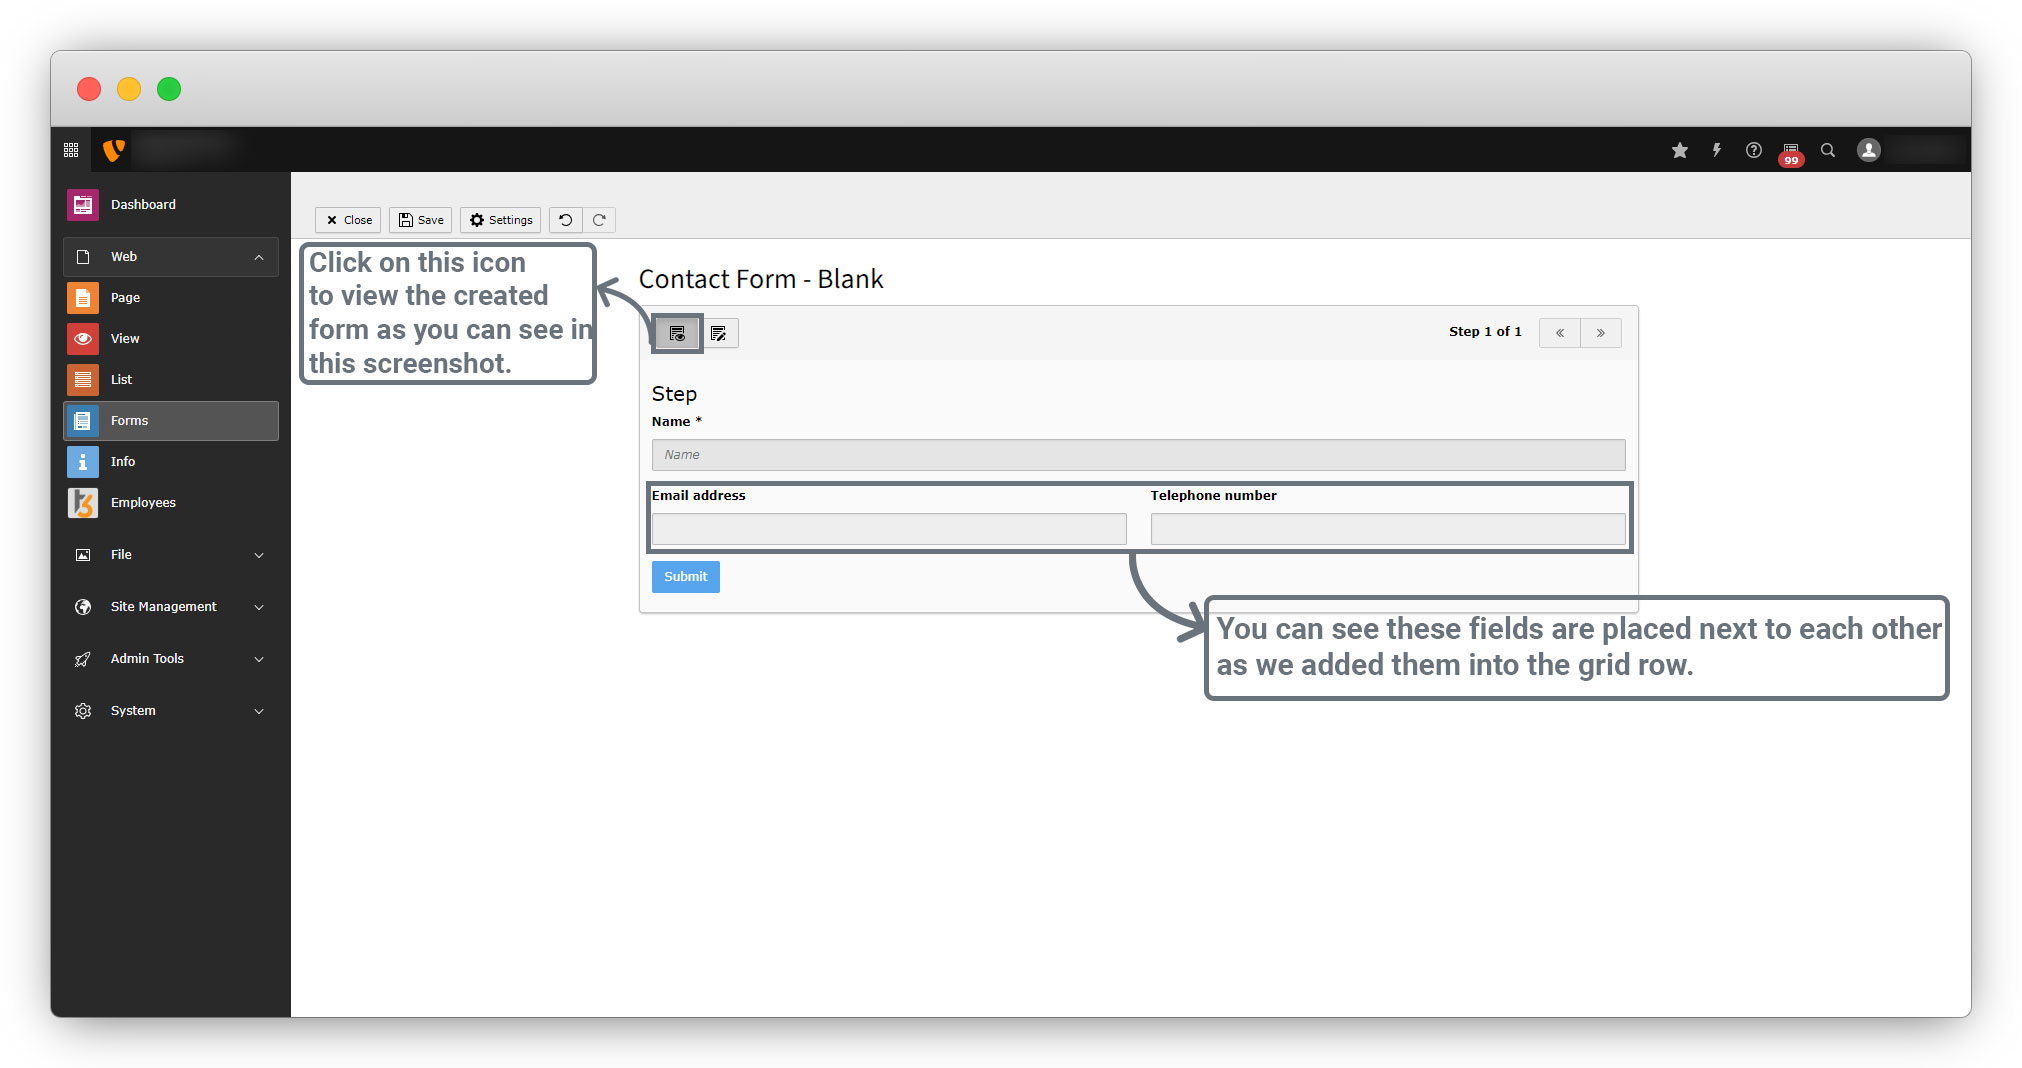
Click on the edit icon beside the view icon to see the form and to add more fields.
4.3.3. Fieldset:
You can use this container to group several elements in the form. This is a content-based structuring, i.e. you create a context content-wise. This is awarded by screen readers and helps you to improve the accessibility of your form. A typical fieldset would be, for example, “Address”. Within this fieldset you have form elements for the street, house number, postal code, and city. The settings for this element are:
1. Field group name: Heading for the field group, e.g. “Address”.
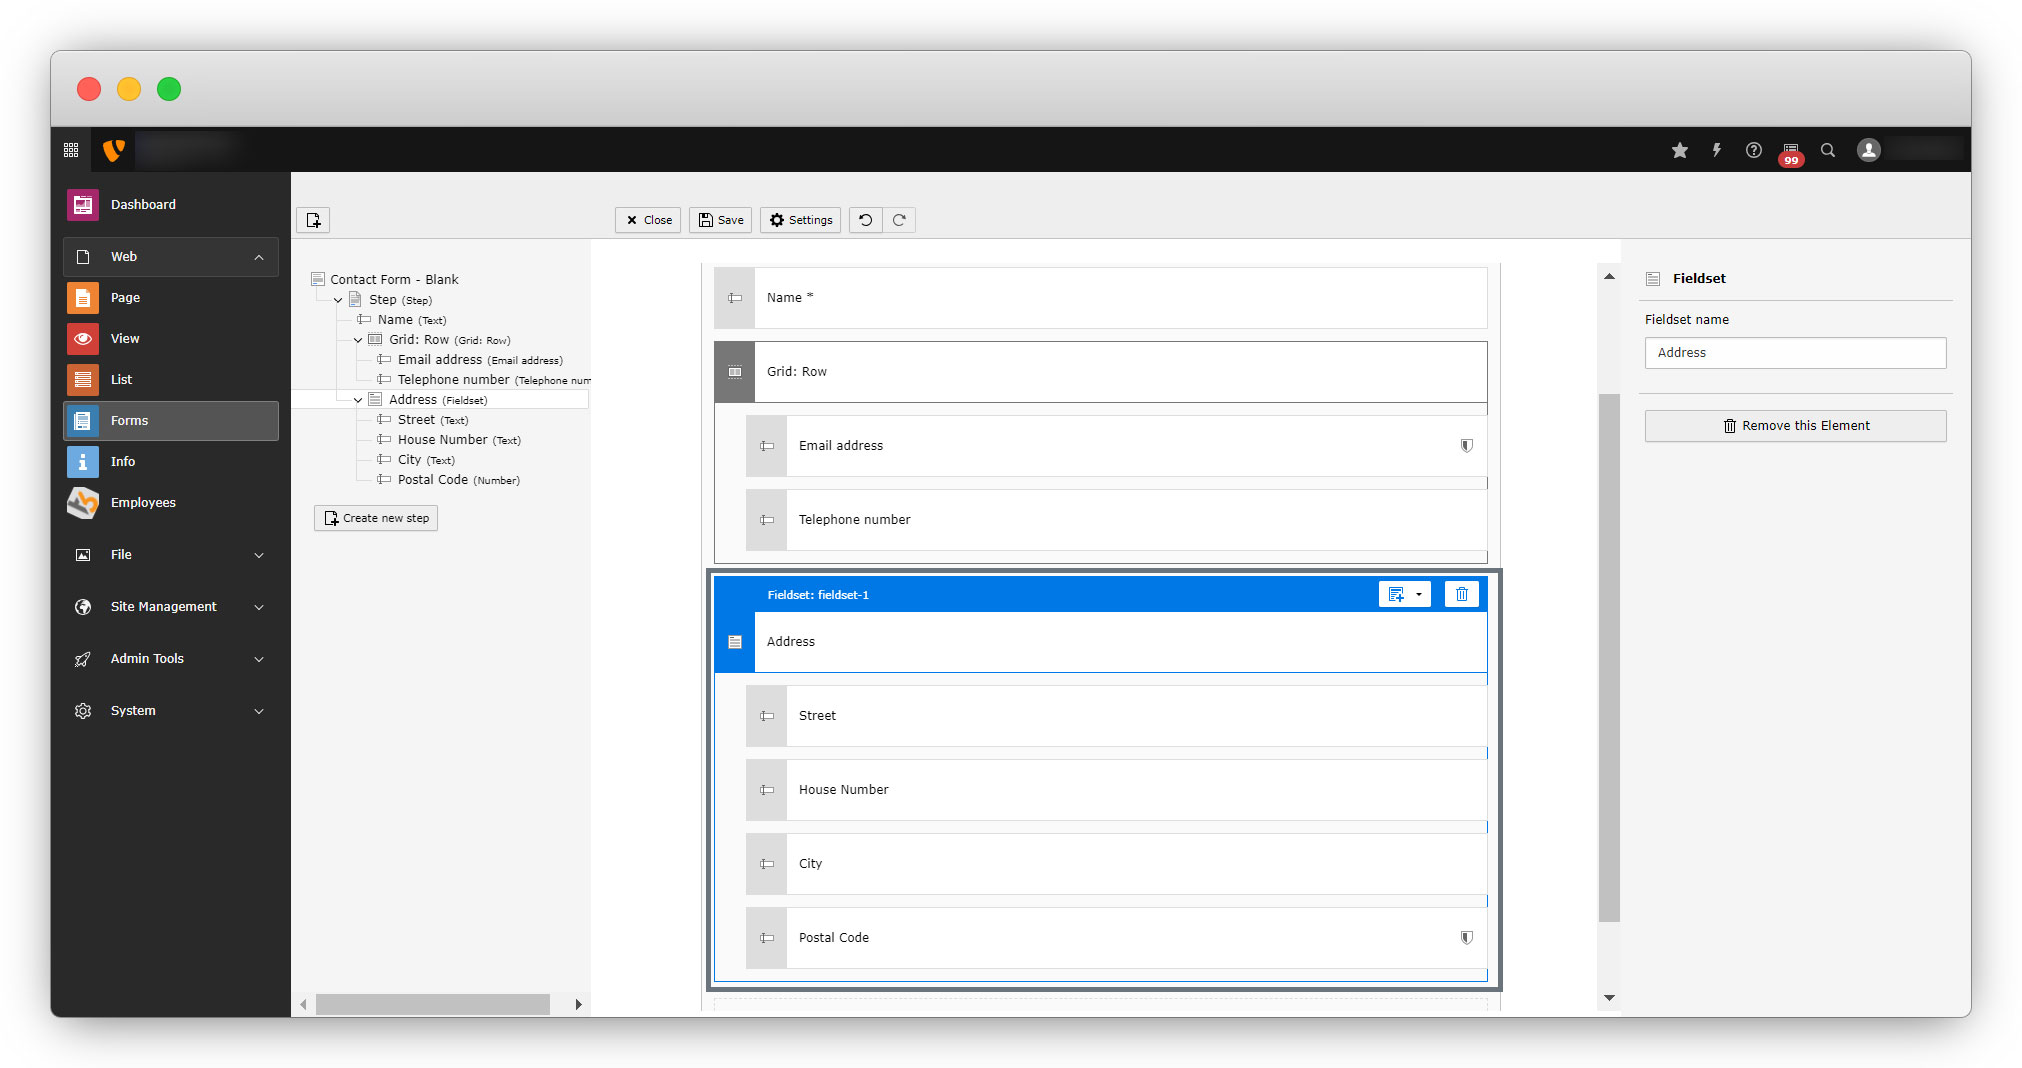
2. You can see in the above screenshot that the fieldset element has taken and labeled as “Address”, and that contains other fields like street, house number, city etc.
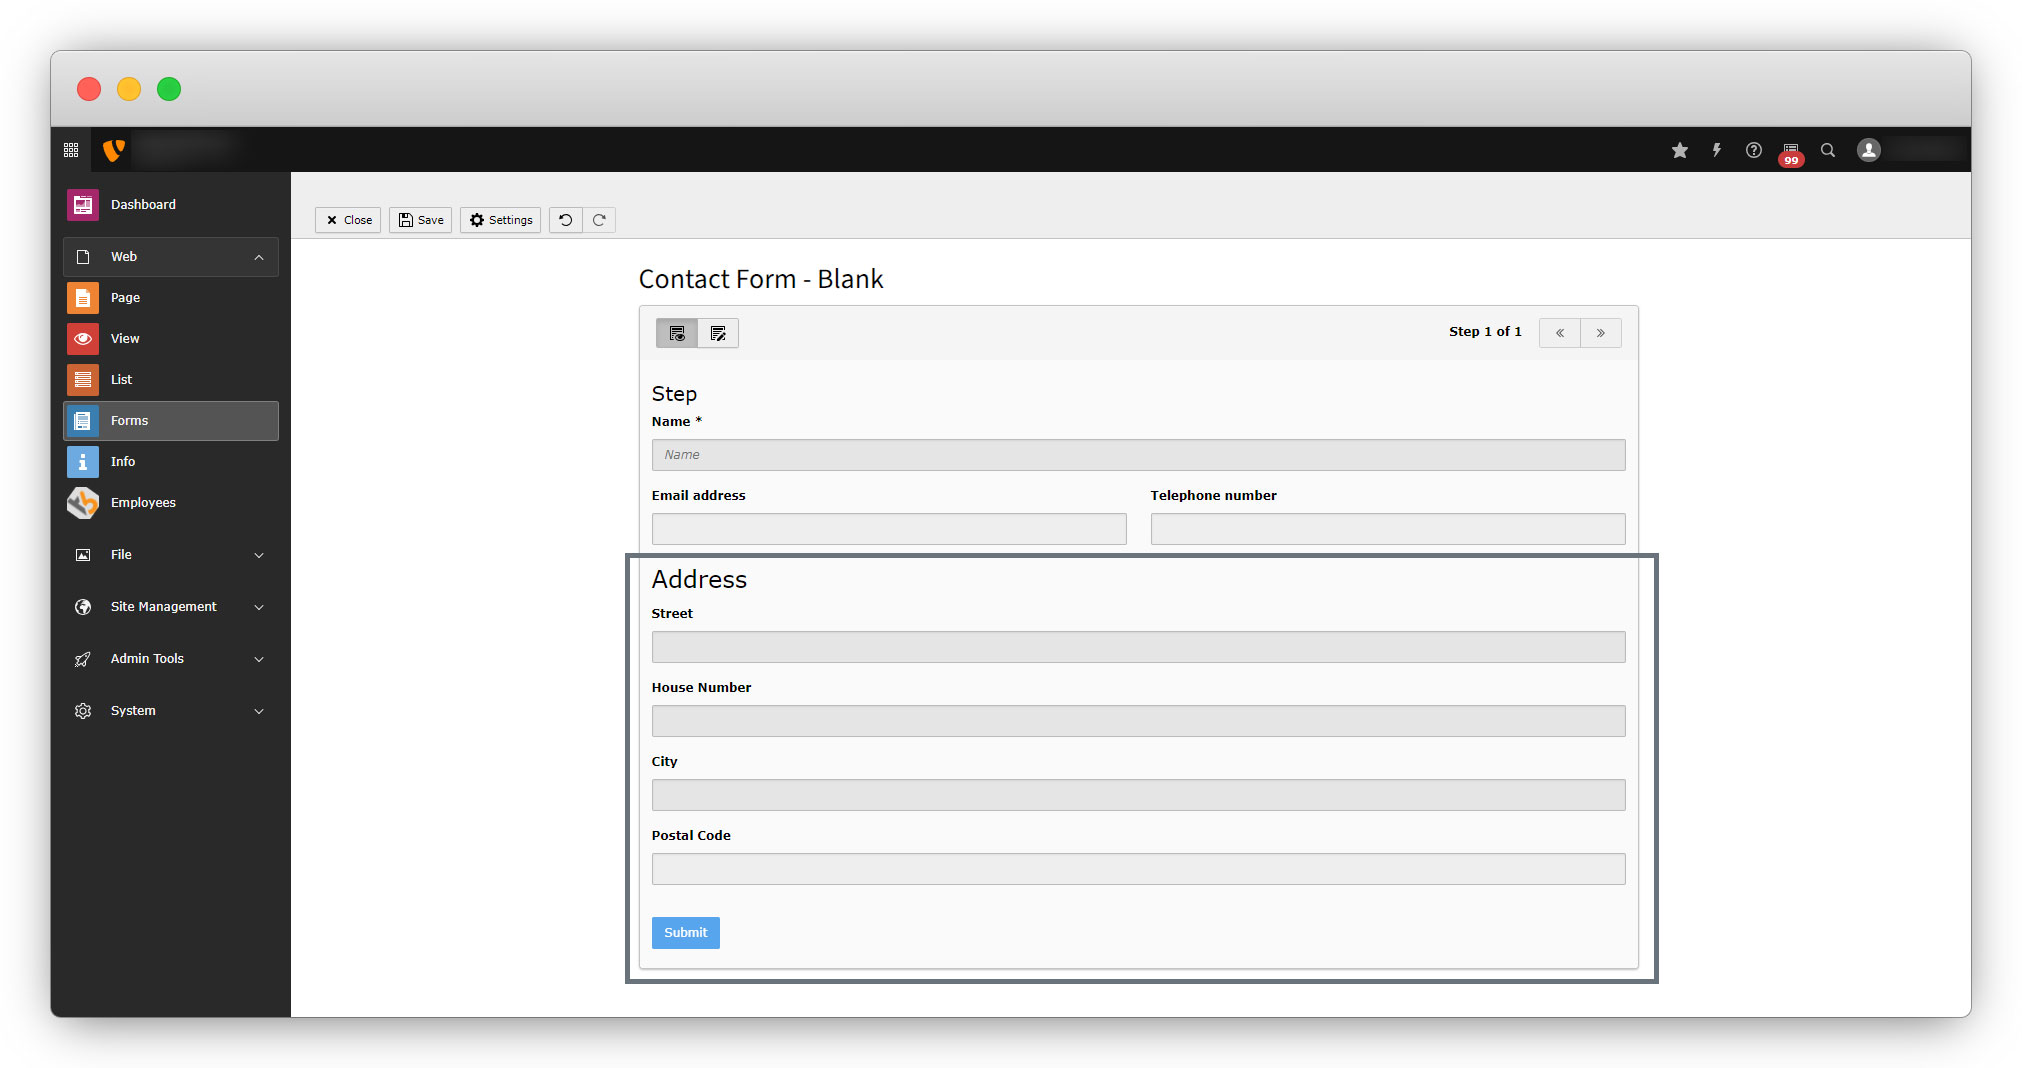
3. You can take fields as per your requirement as inner fields of address, here text and number fields are taken. The form will look like the below screenshot after adding the fieldset element.
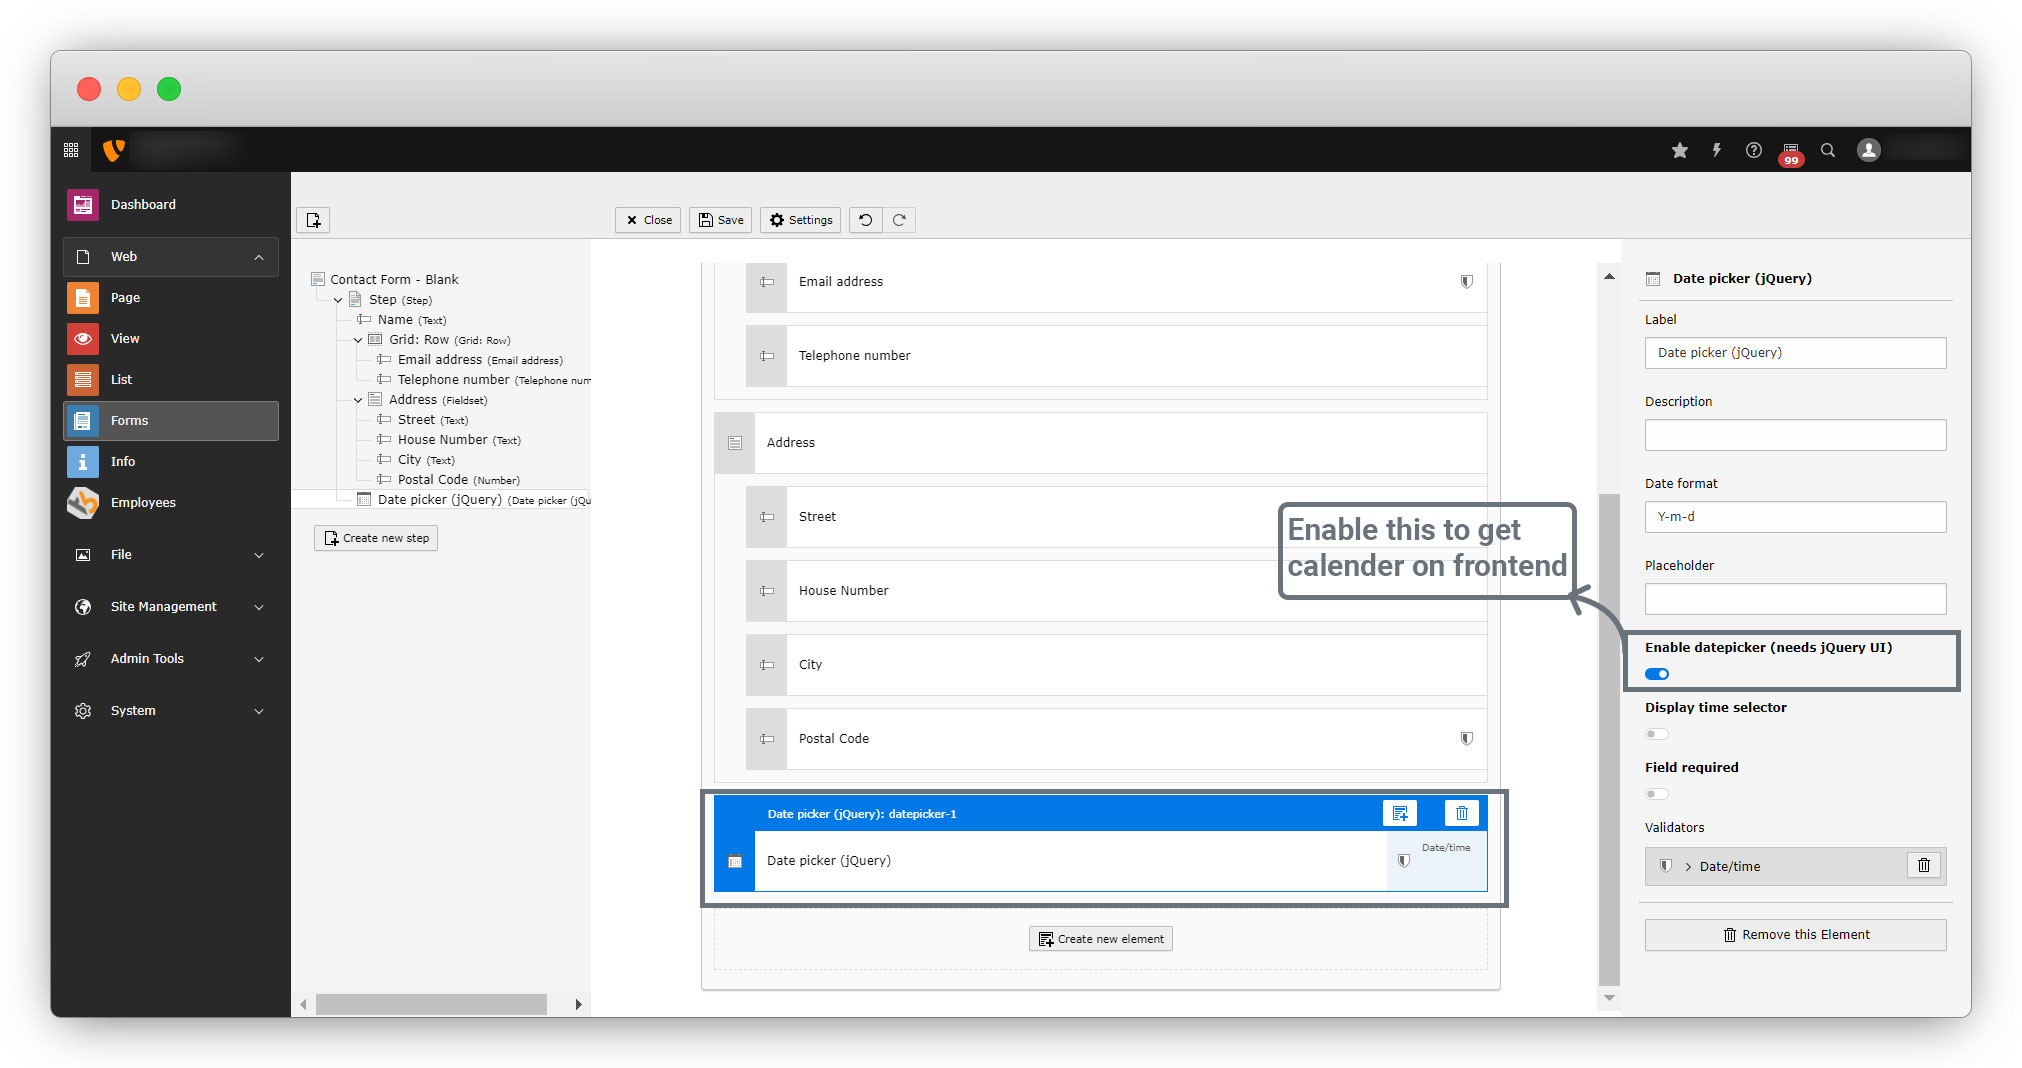
4.3.4. Datepicker:
A single-line text field to select a date using a calendar. A JavaScript library is used for this purpose. The settings for this element adhere to the default. Additional settings:
1. Date format: select date format (e.g. d.m.Y or Y-m-d or d-m-Y)
- d: stands for day
- m: stands for month
- Y: stands for year
2. Enable date selection: Check this to display a calendar.
3. Show time selection: Check this to display two drop downs for ‘Hour‘ and ‘Minute‘ respectively.
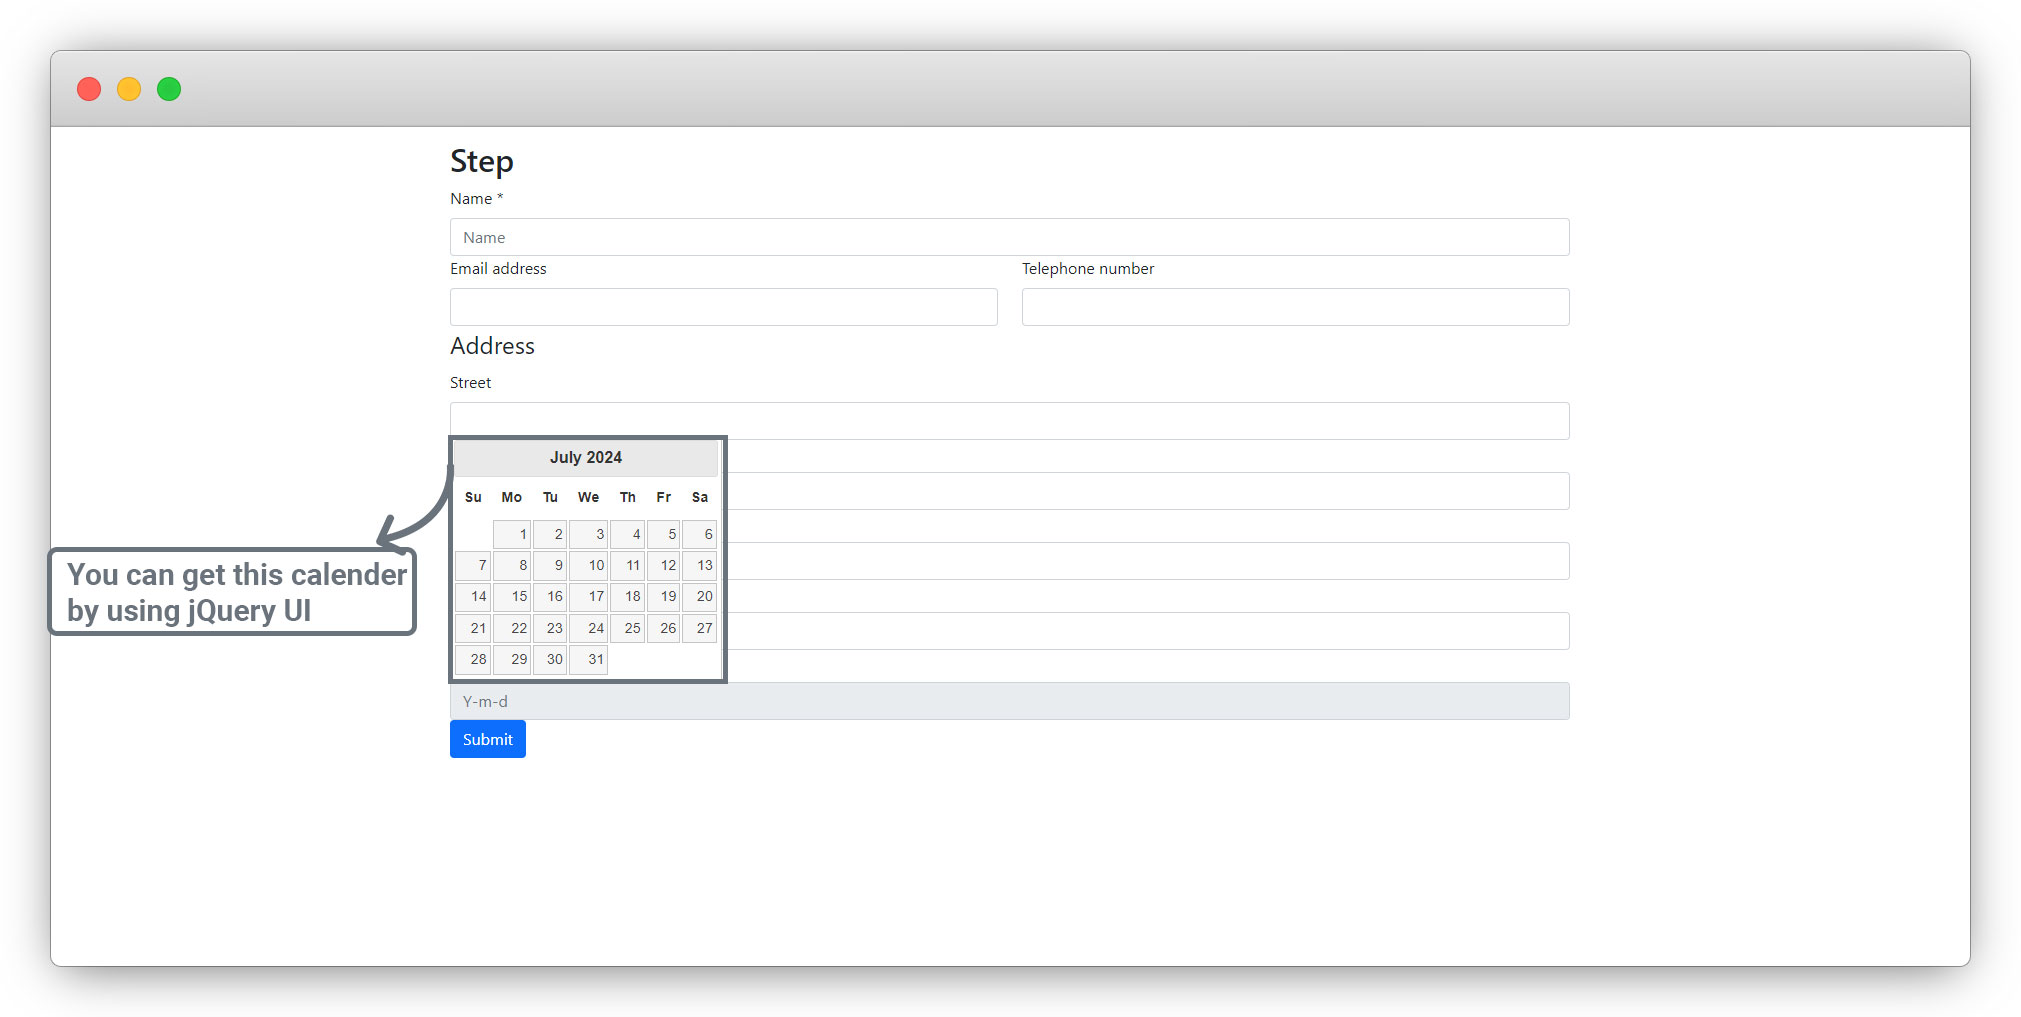
4. You will need to add the jQuery UI (download jQueryUI – https://releases.jquery.com/ui/) to get the calendar for the datepicker field in front-end as seen in the screenshot below:
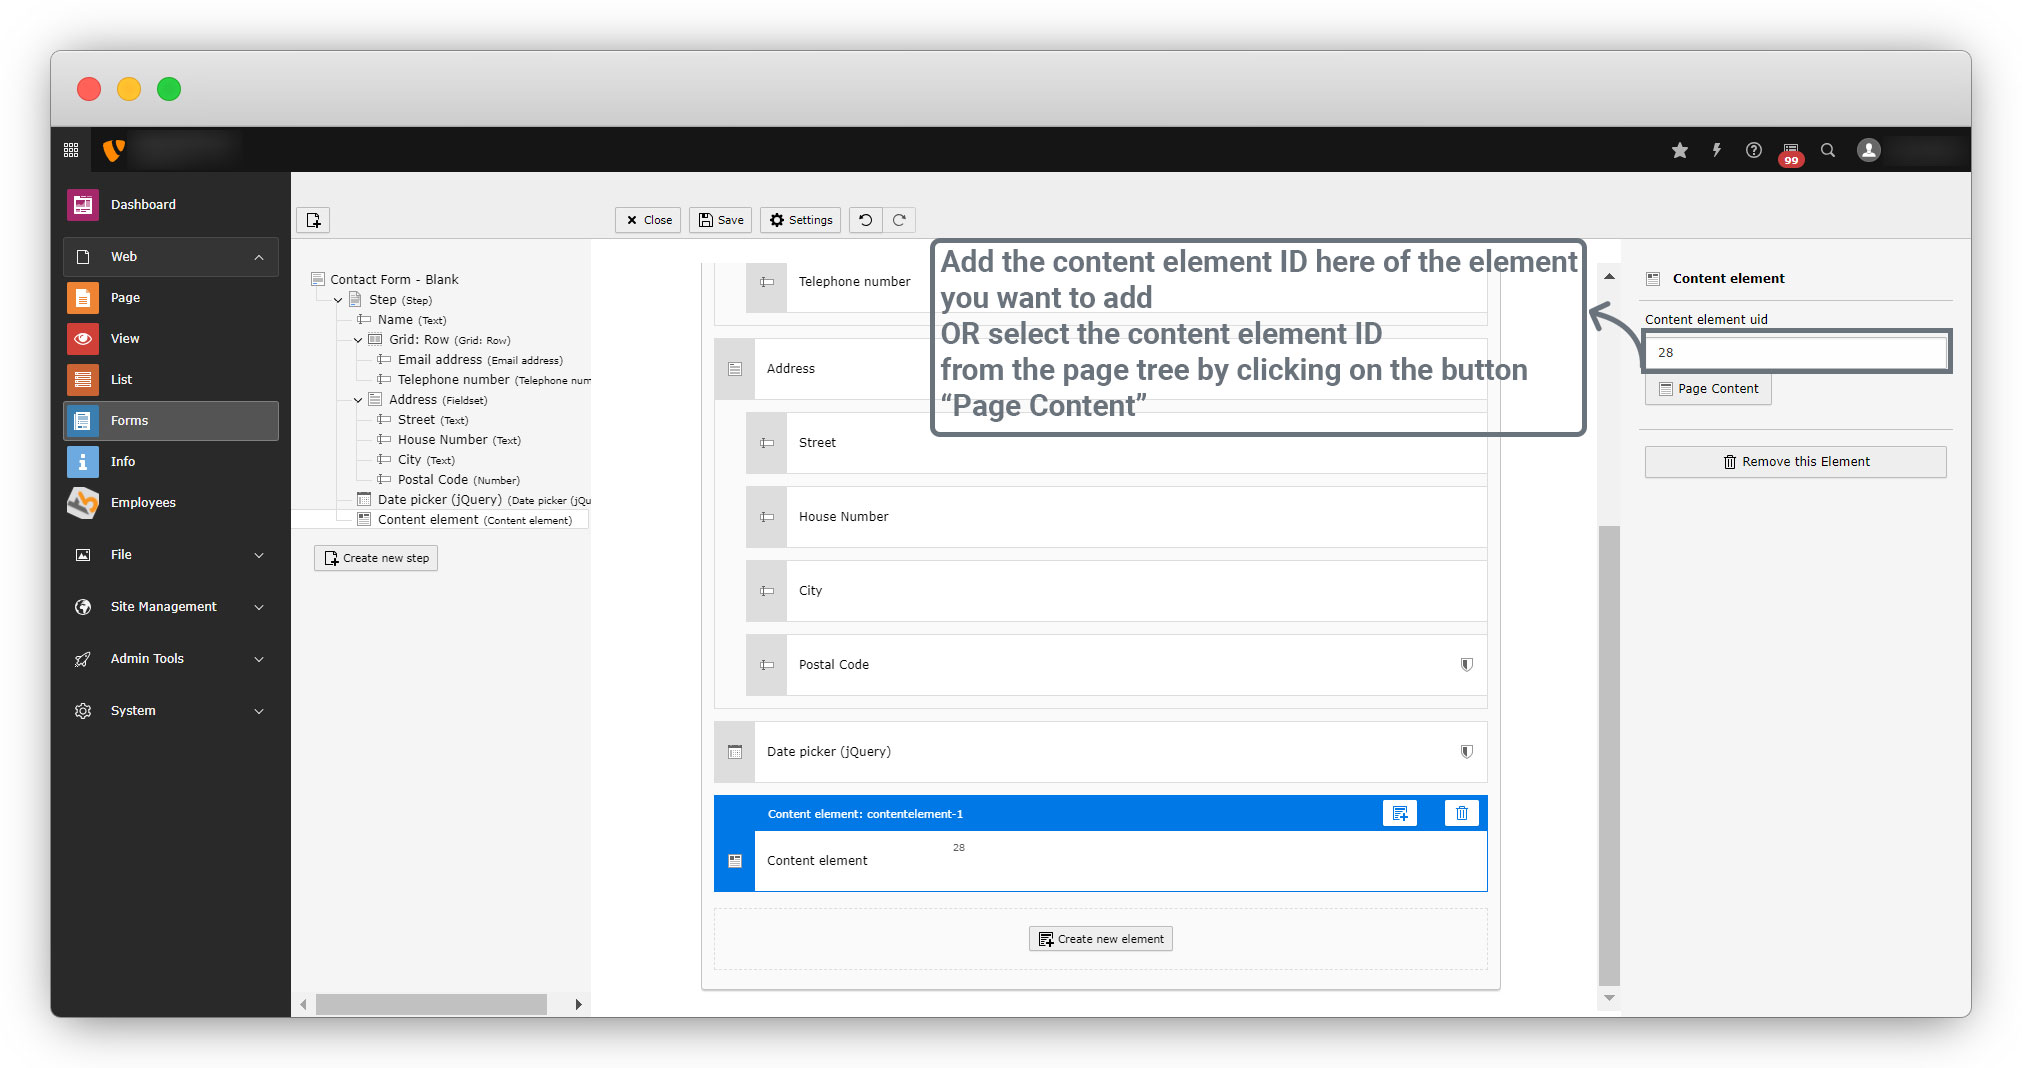
4.3.5. Content element:
You can display any content element of your website. The settings for this element are:
1. Content element uid: ID of the content element you want to display. You can either enter the ID manually or select it comfortably via the page tree. To do this, click on the “Page content” button.
2. [ Page content ]: Modal which displays the page tree. You can select a page and a corresponding content element. You can check the below screenshots for understanding.

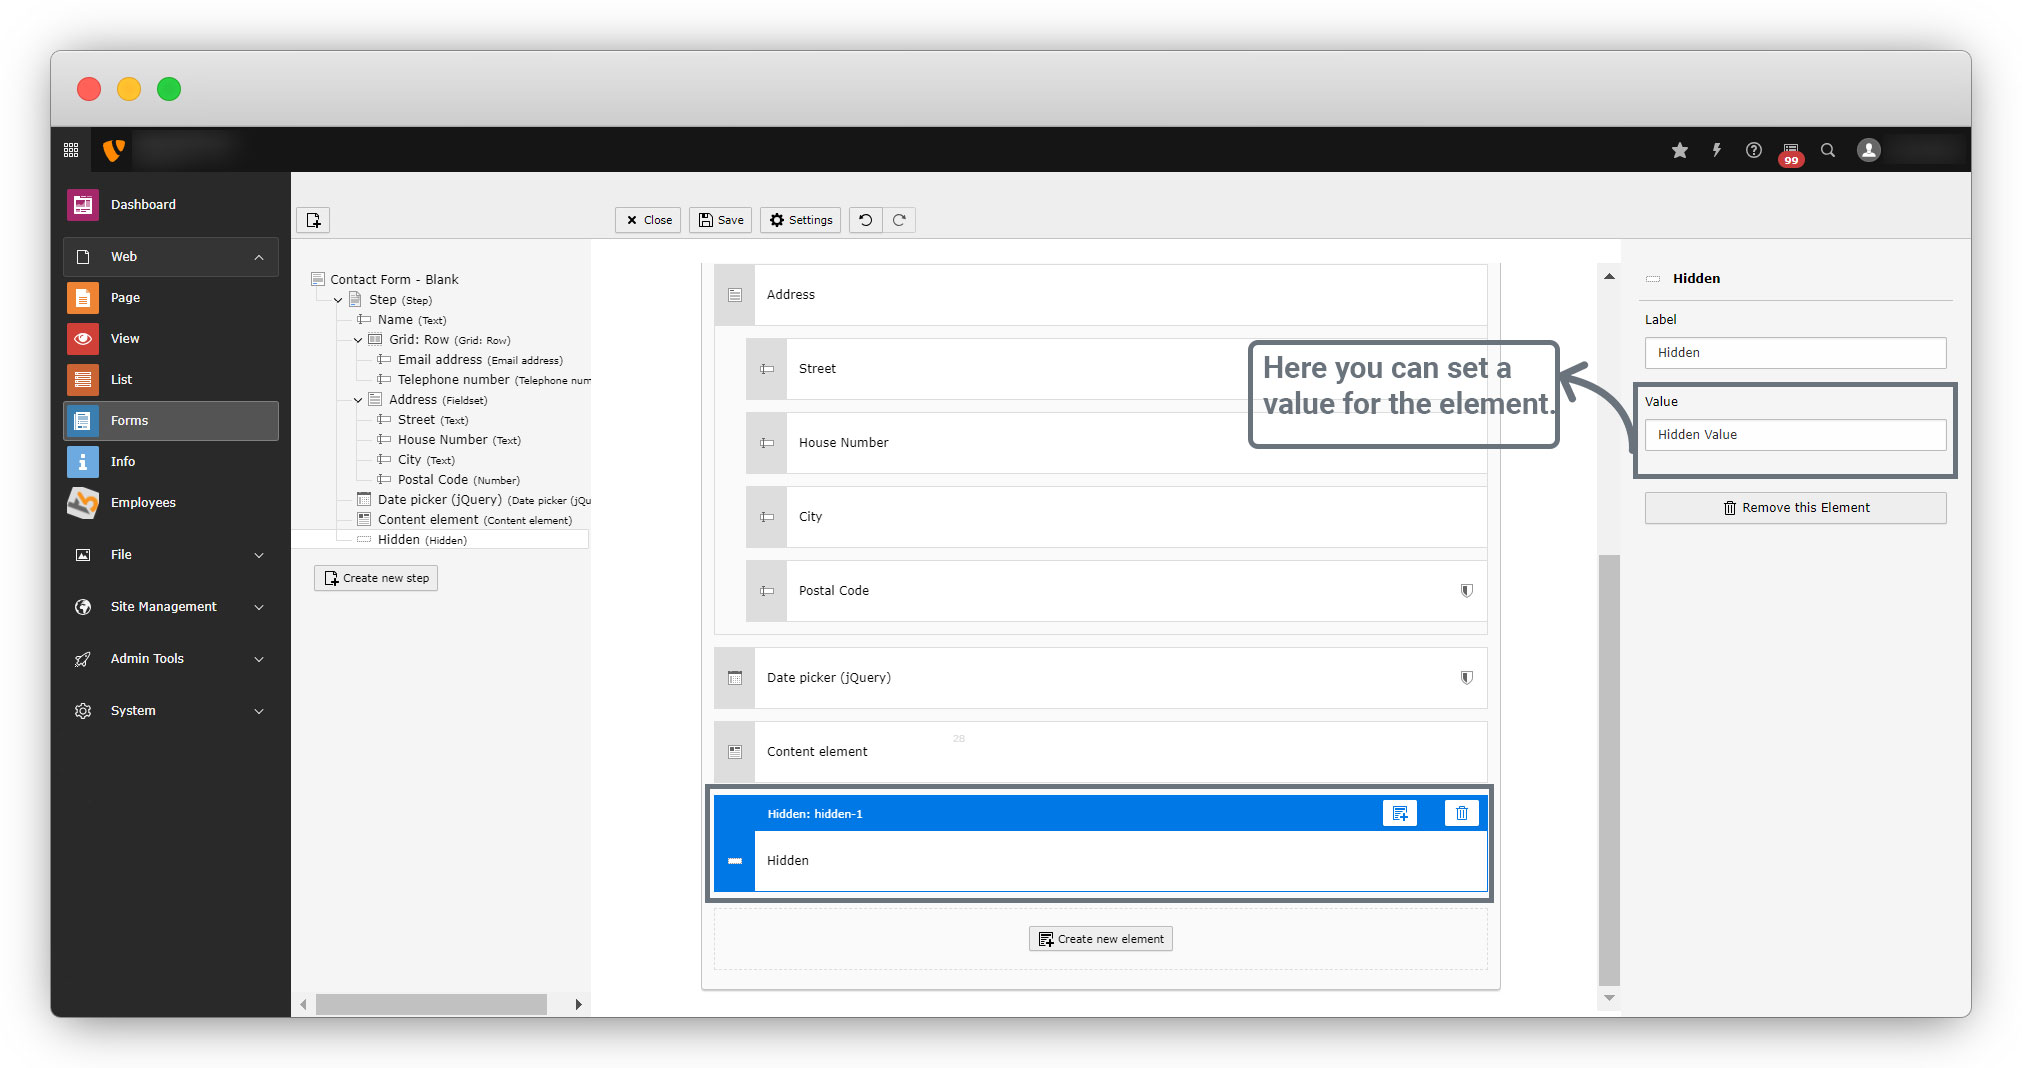
4.3.6. Hidden:
This field is not visible in the front-end. Such a field is usually needed for technical aspects, e.g. to add hidden values to the form. The settings for this element adhere to the default. Additional settings:
- Value: Here you can set a value for the element.
4.4. You can create steps for any form, it will be usable if you want to create a wizard which will have multiple steps.
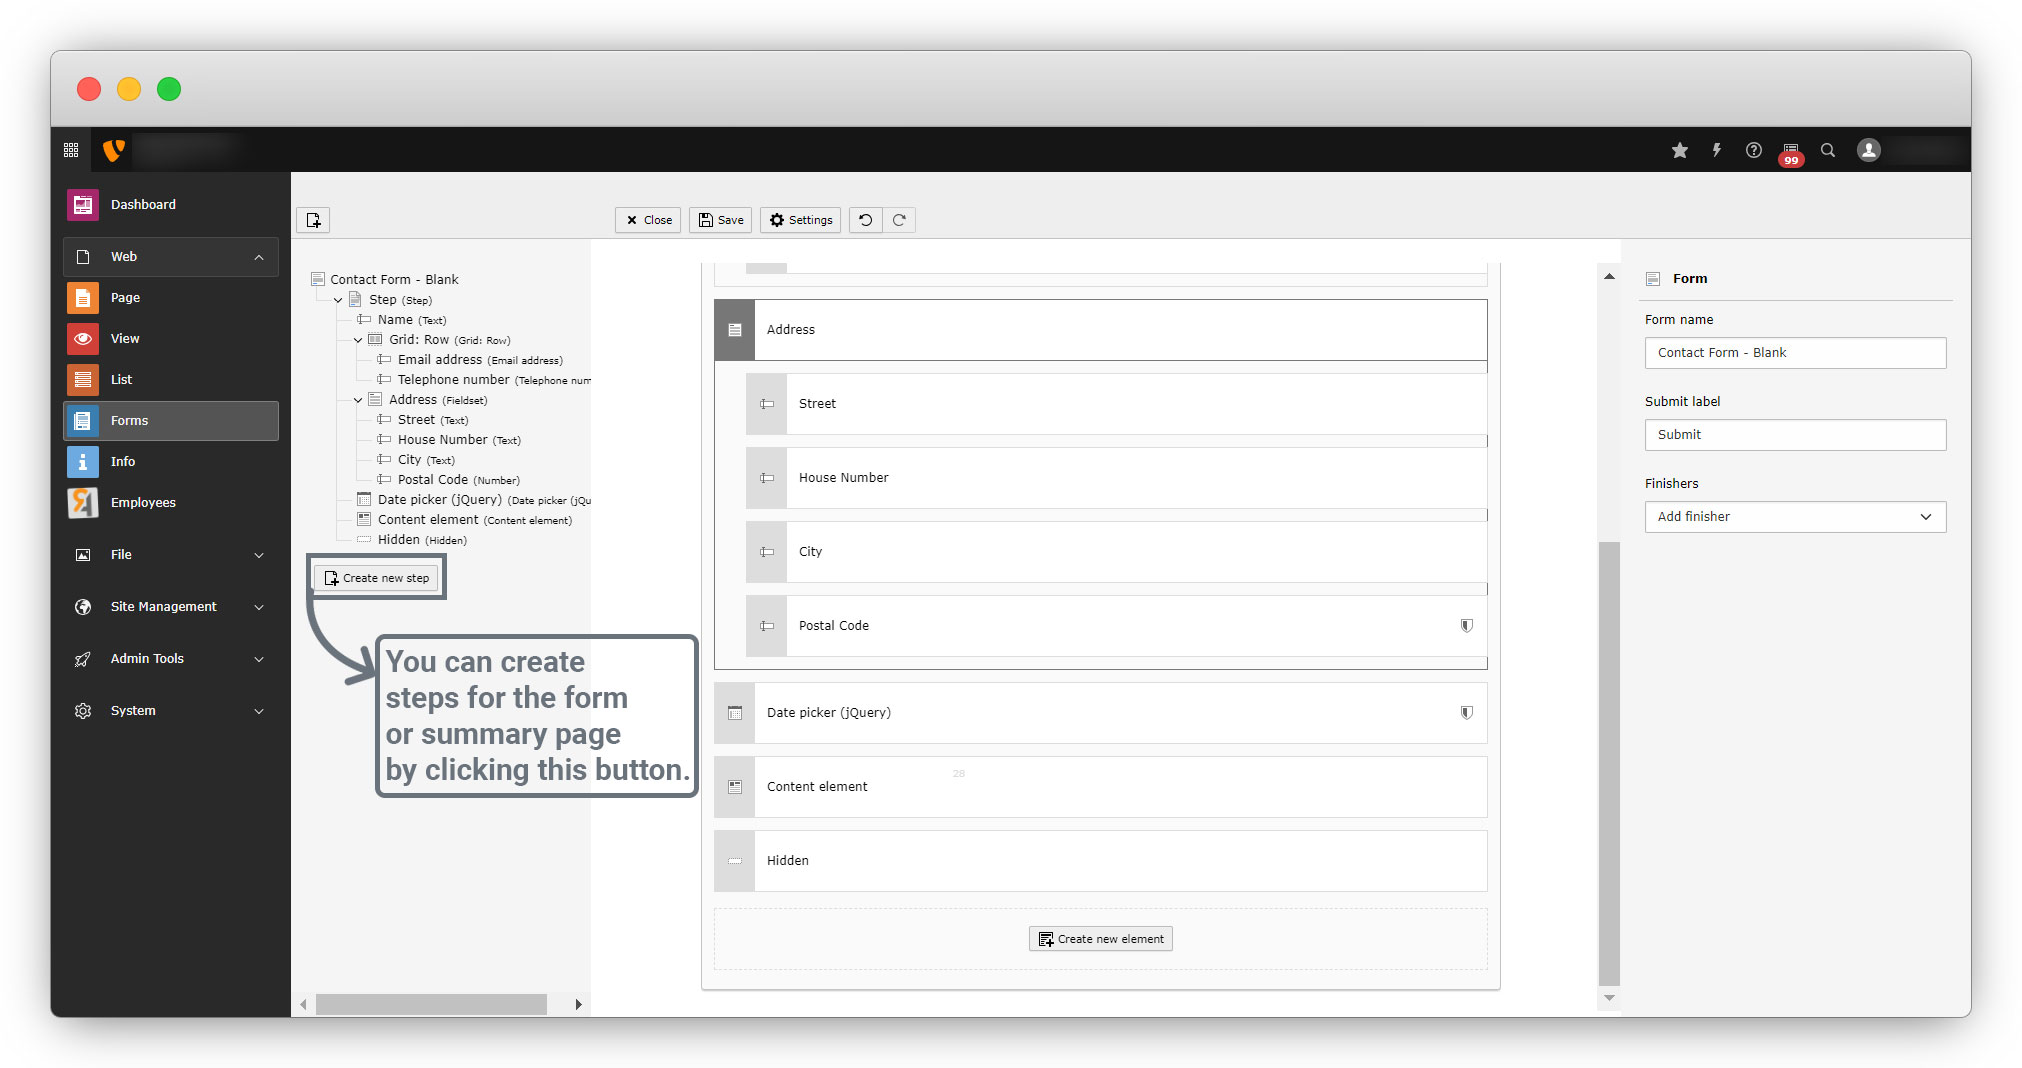
4.5. We are not creating the steps here in the blank form, but we will see about the steps in the predefined form.
4.6. Other fields are common and you can see the details of them in the reference link given here: https://docs.typo3.org/c/typo3/cms-form/main/en-us/E/FormElements/Index.html
5. Let’s put the form on a page to see how it will look on front-end. You can see the below screenshots to understand how to put the form on the page.
5.1. Create a new page or select the existing page, the page name is “Contact” here, but you can assign any name to the page.
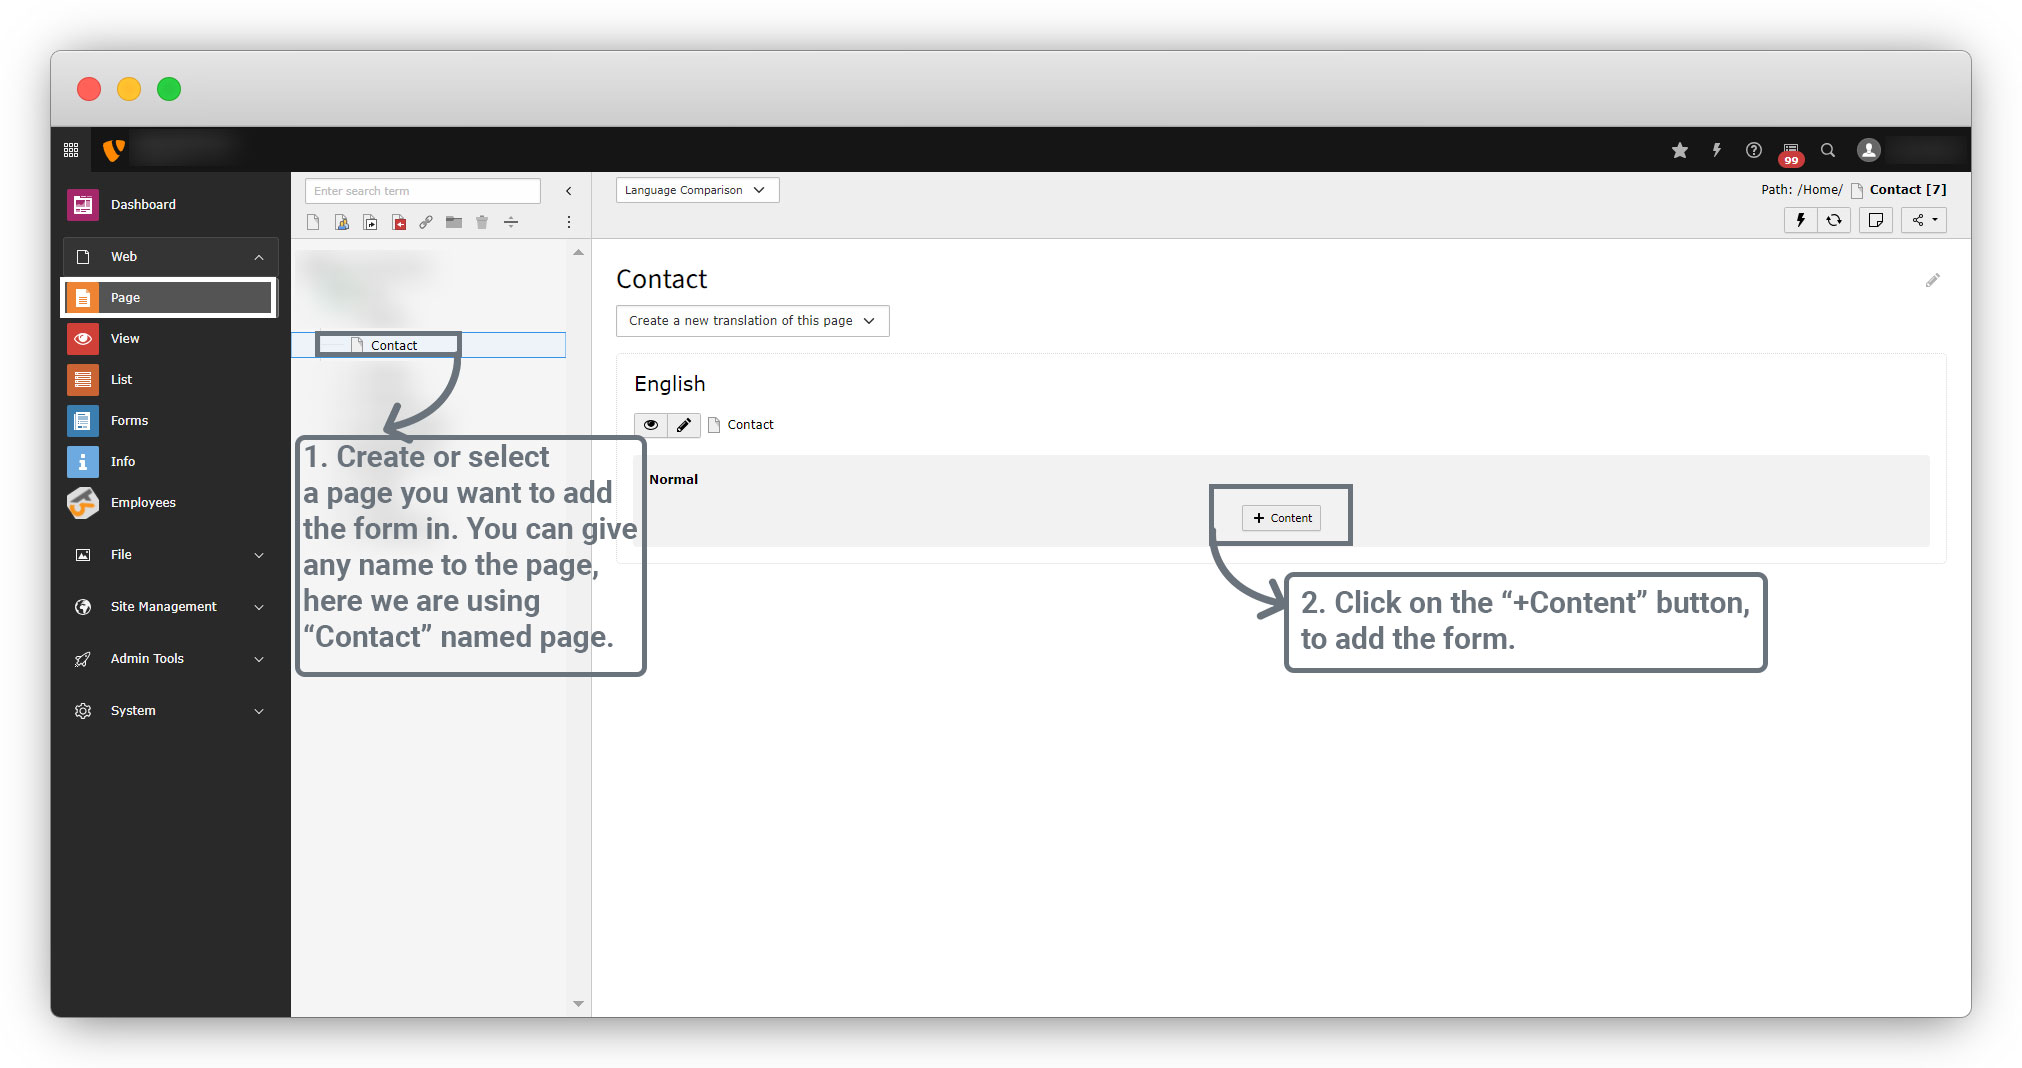
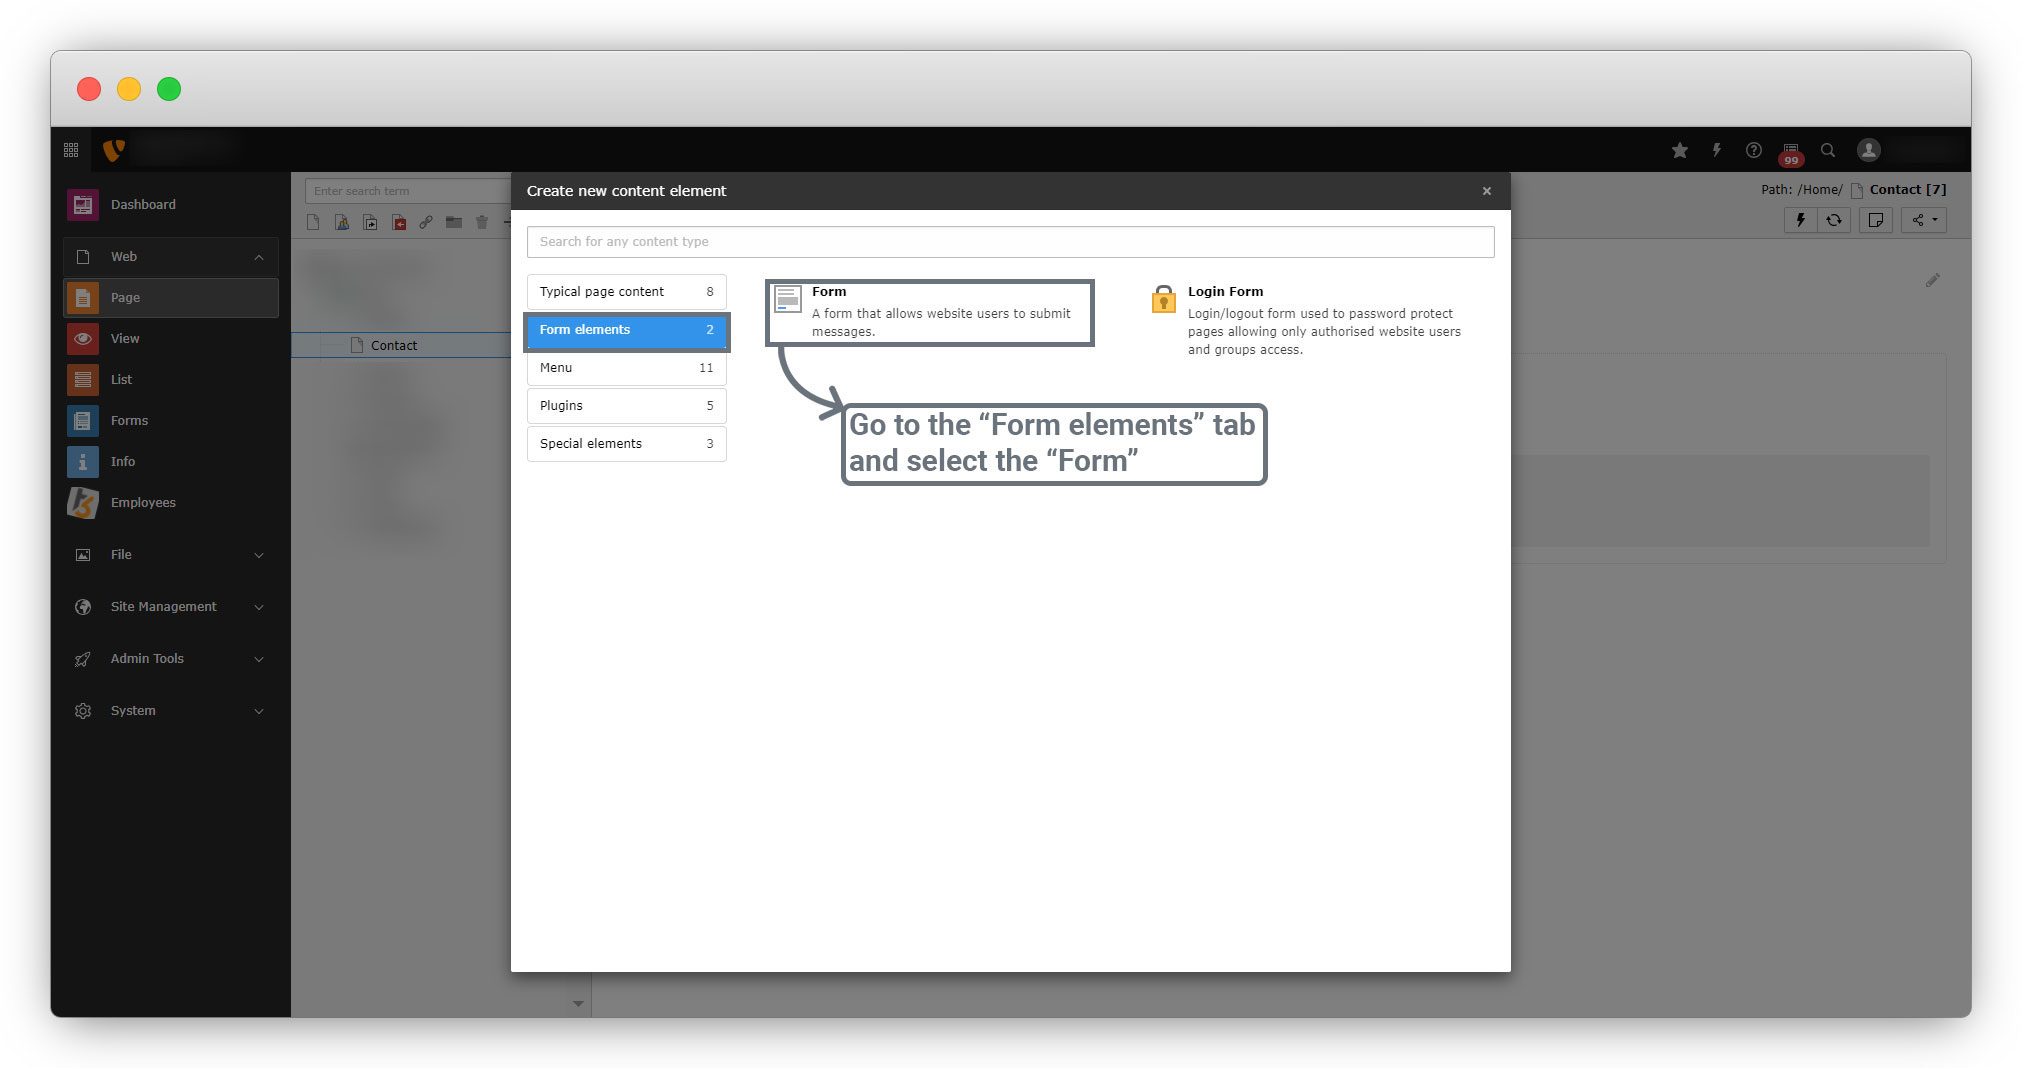
5.2. Click on the “+Content” button, select the “Form elements” tab, and select “Form” and you will see the plugin is added to your page.
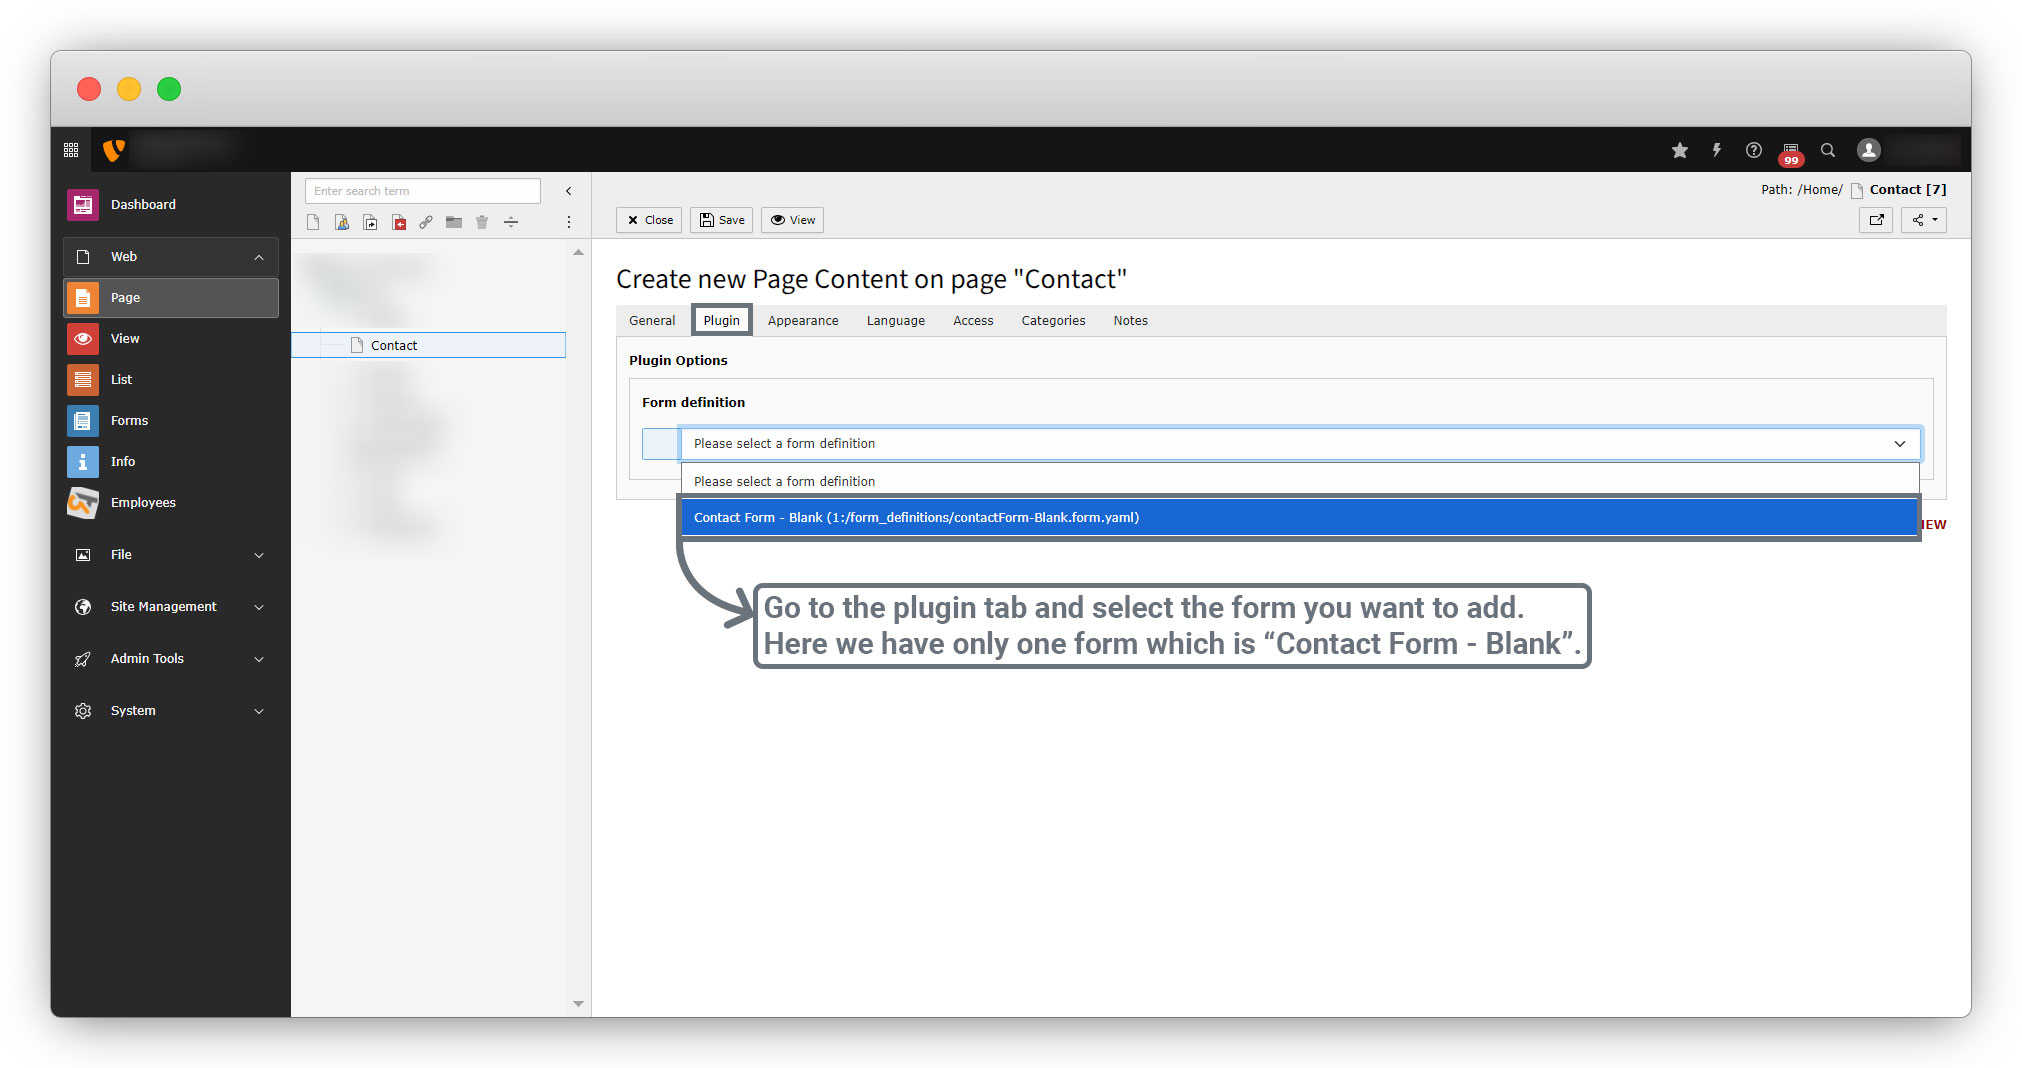
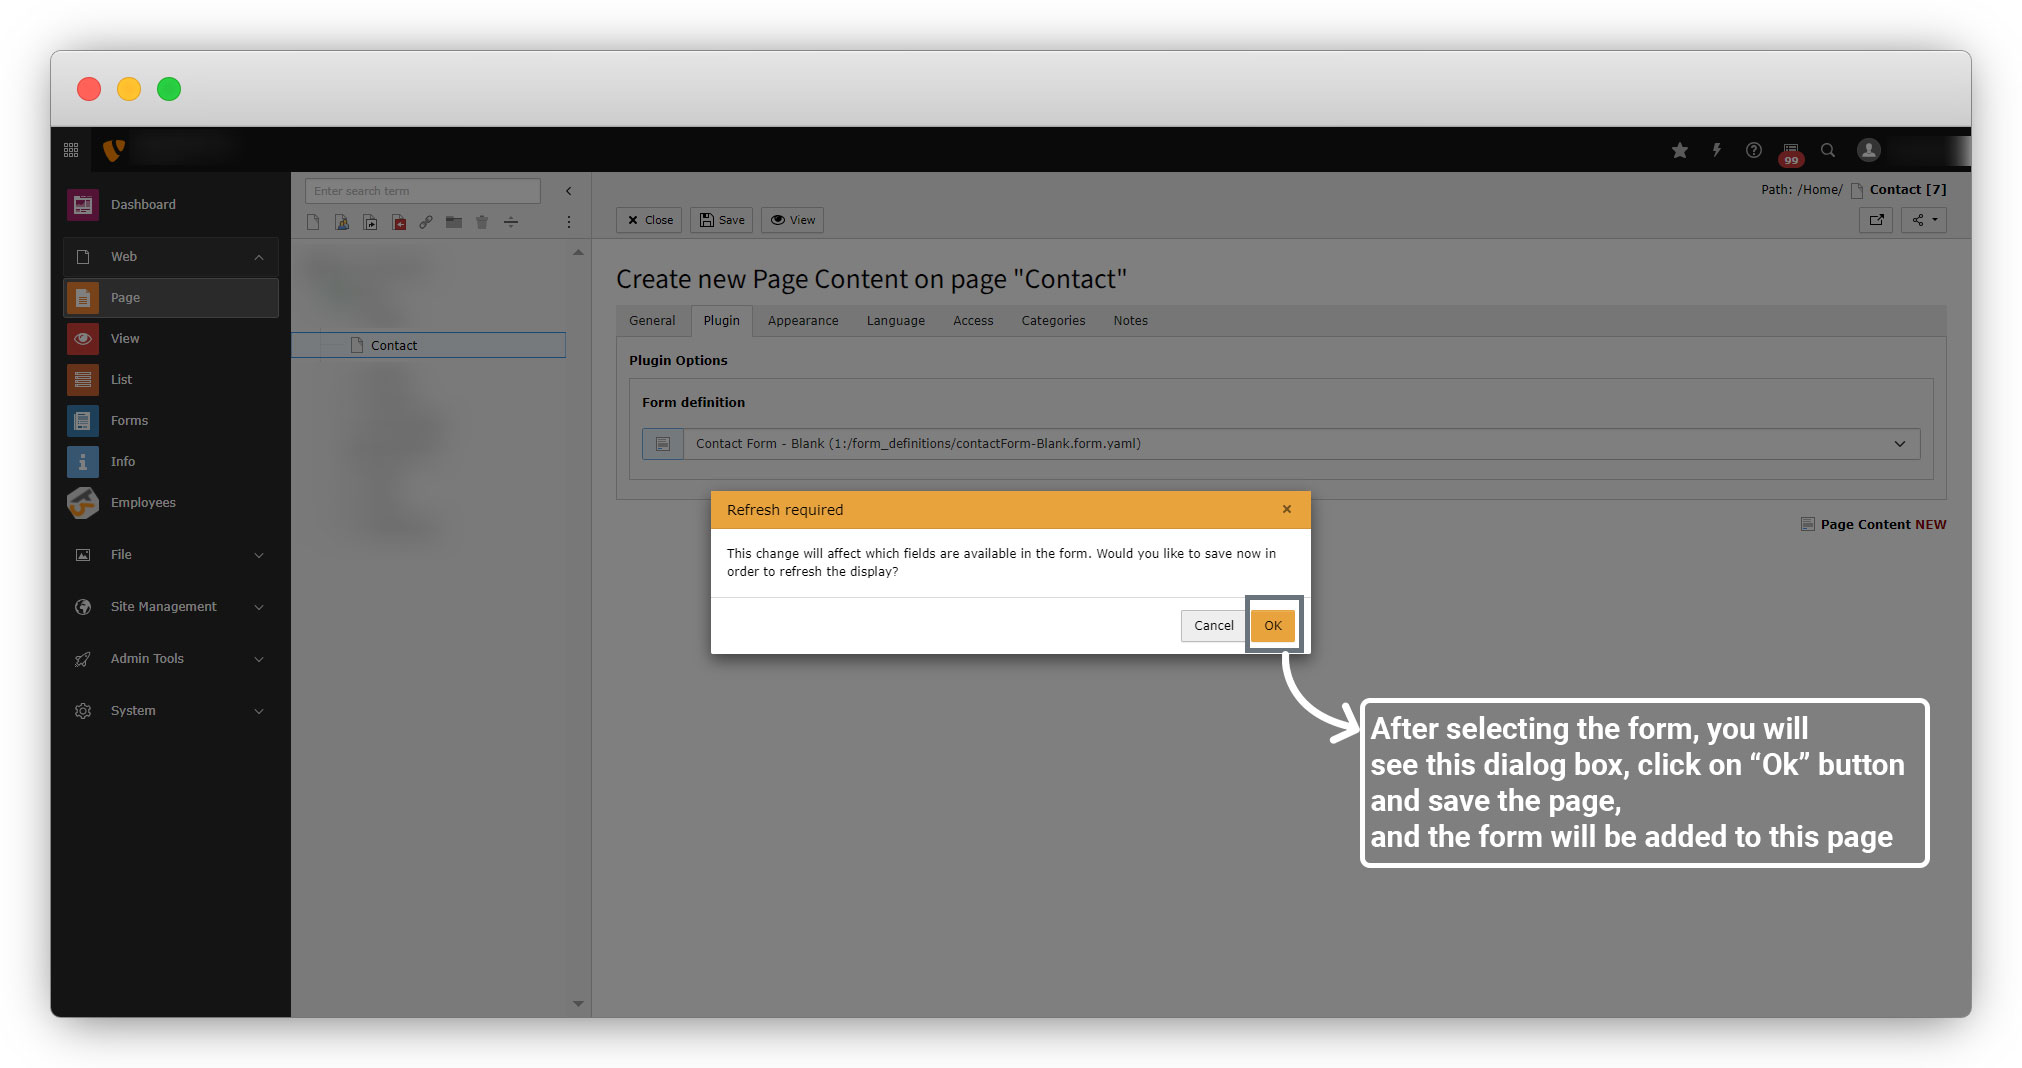
5.3. Then go to the plugin tab and select the form you want to add to the page, you will see a dialog box, click on the “ok” button and save the page.
5.4. Then click on the view button to see the page on front-end.
Below is the screenshot of the form in front-end with the field explanation.
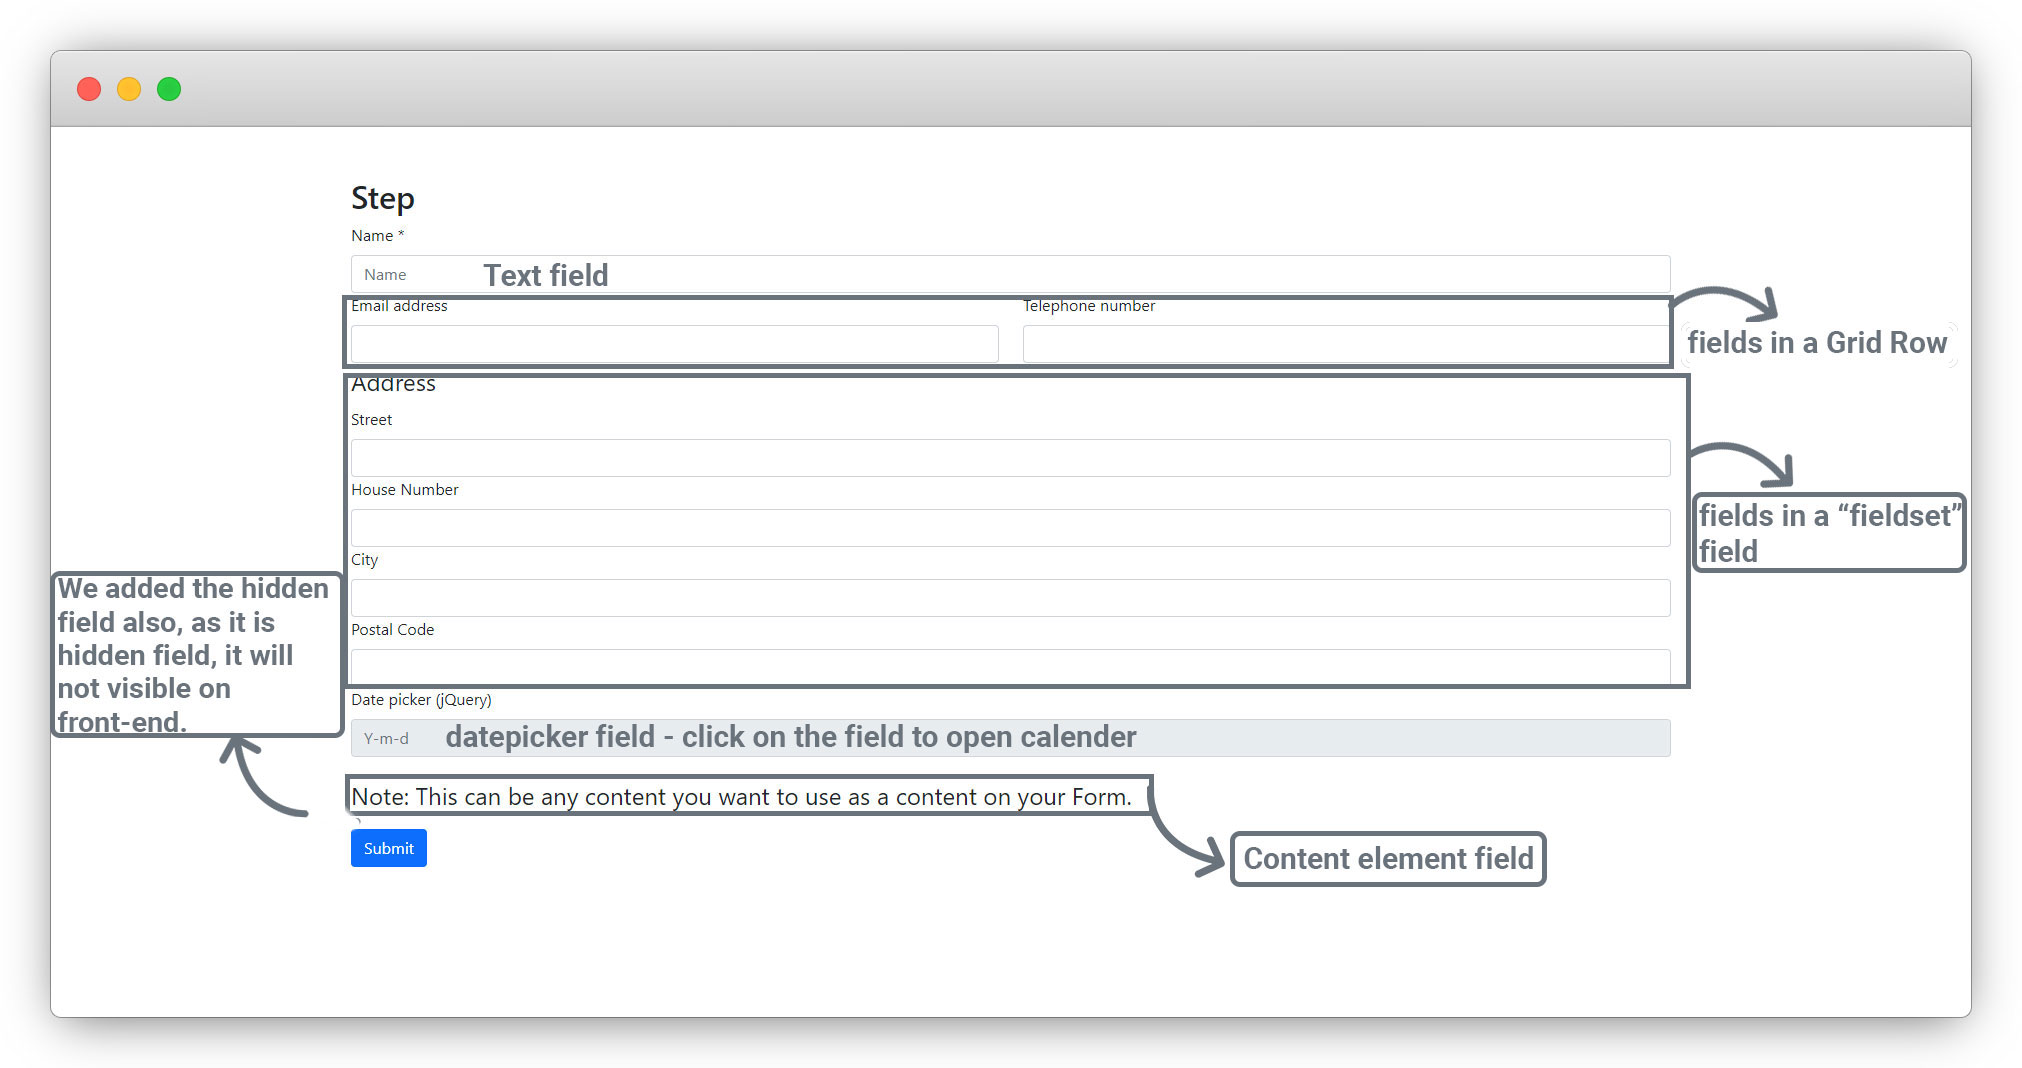
5.5. Here please note that we don’t need to add the submit button, that button will be added by default, we can change the label of the submit button if we want to change it.
Share


