
URL copied to clipboard

Predefined Form
6 views
__readtime__ Min
read
1. Click on the “Predefined form” to select it.
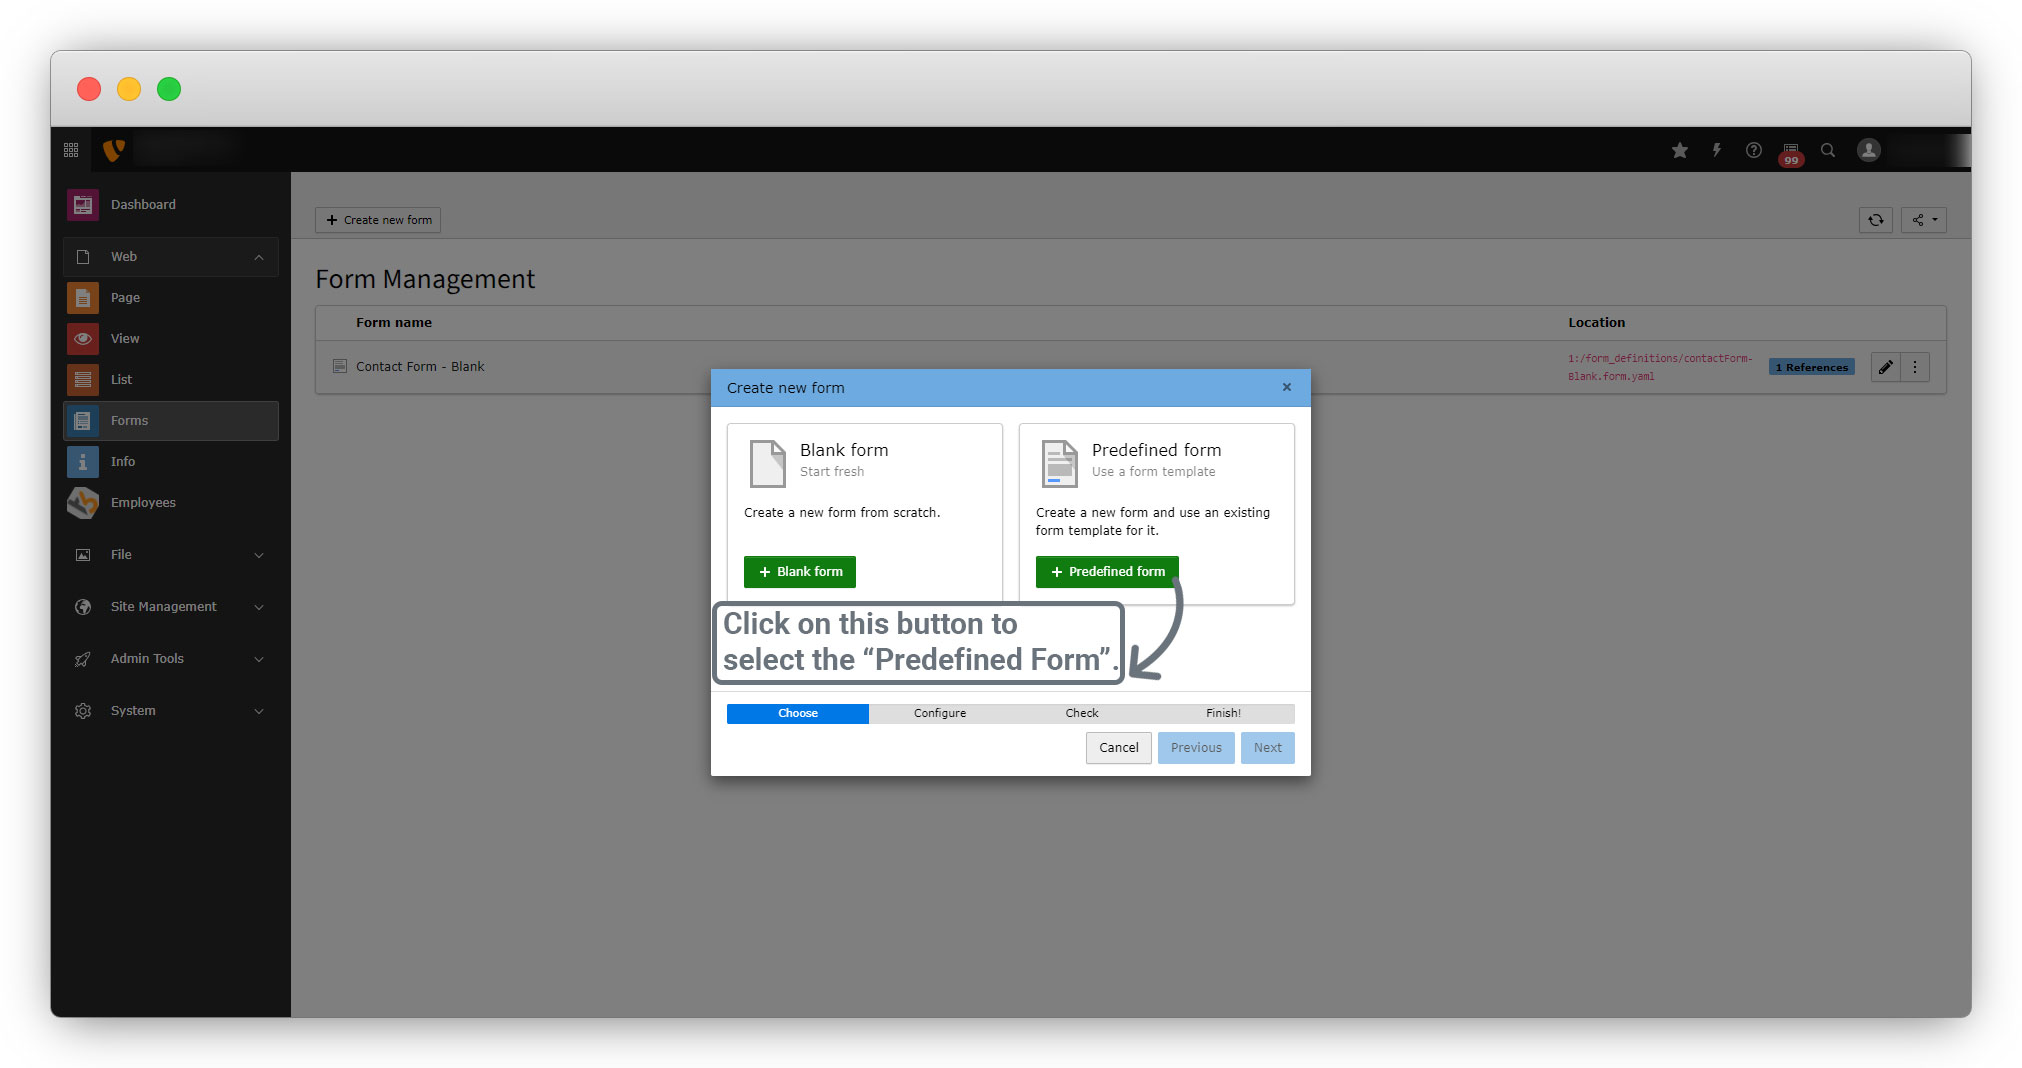
2. After selecting the predefined form, you will see there are 2 options for the form which are “Blank Form” and “Simple Contact Form”.

3. If you select the “Blank form”, the blank form will be created which we already have seen above. There is no difference between the normal blank form and the blank form from the predefined form.
4. Let’s select the “Simple contact form” and add the name of the form.
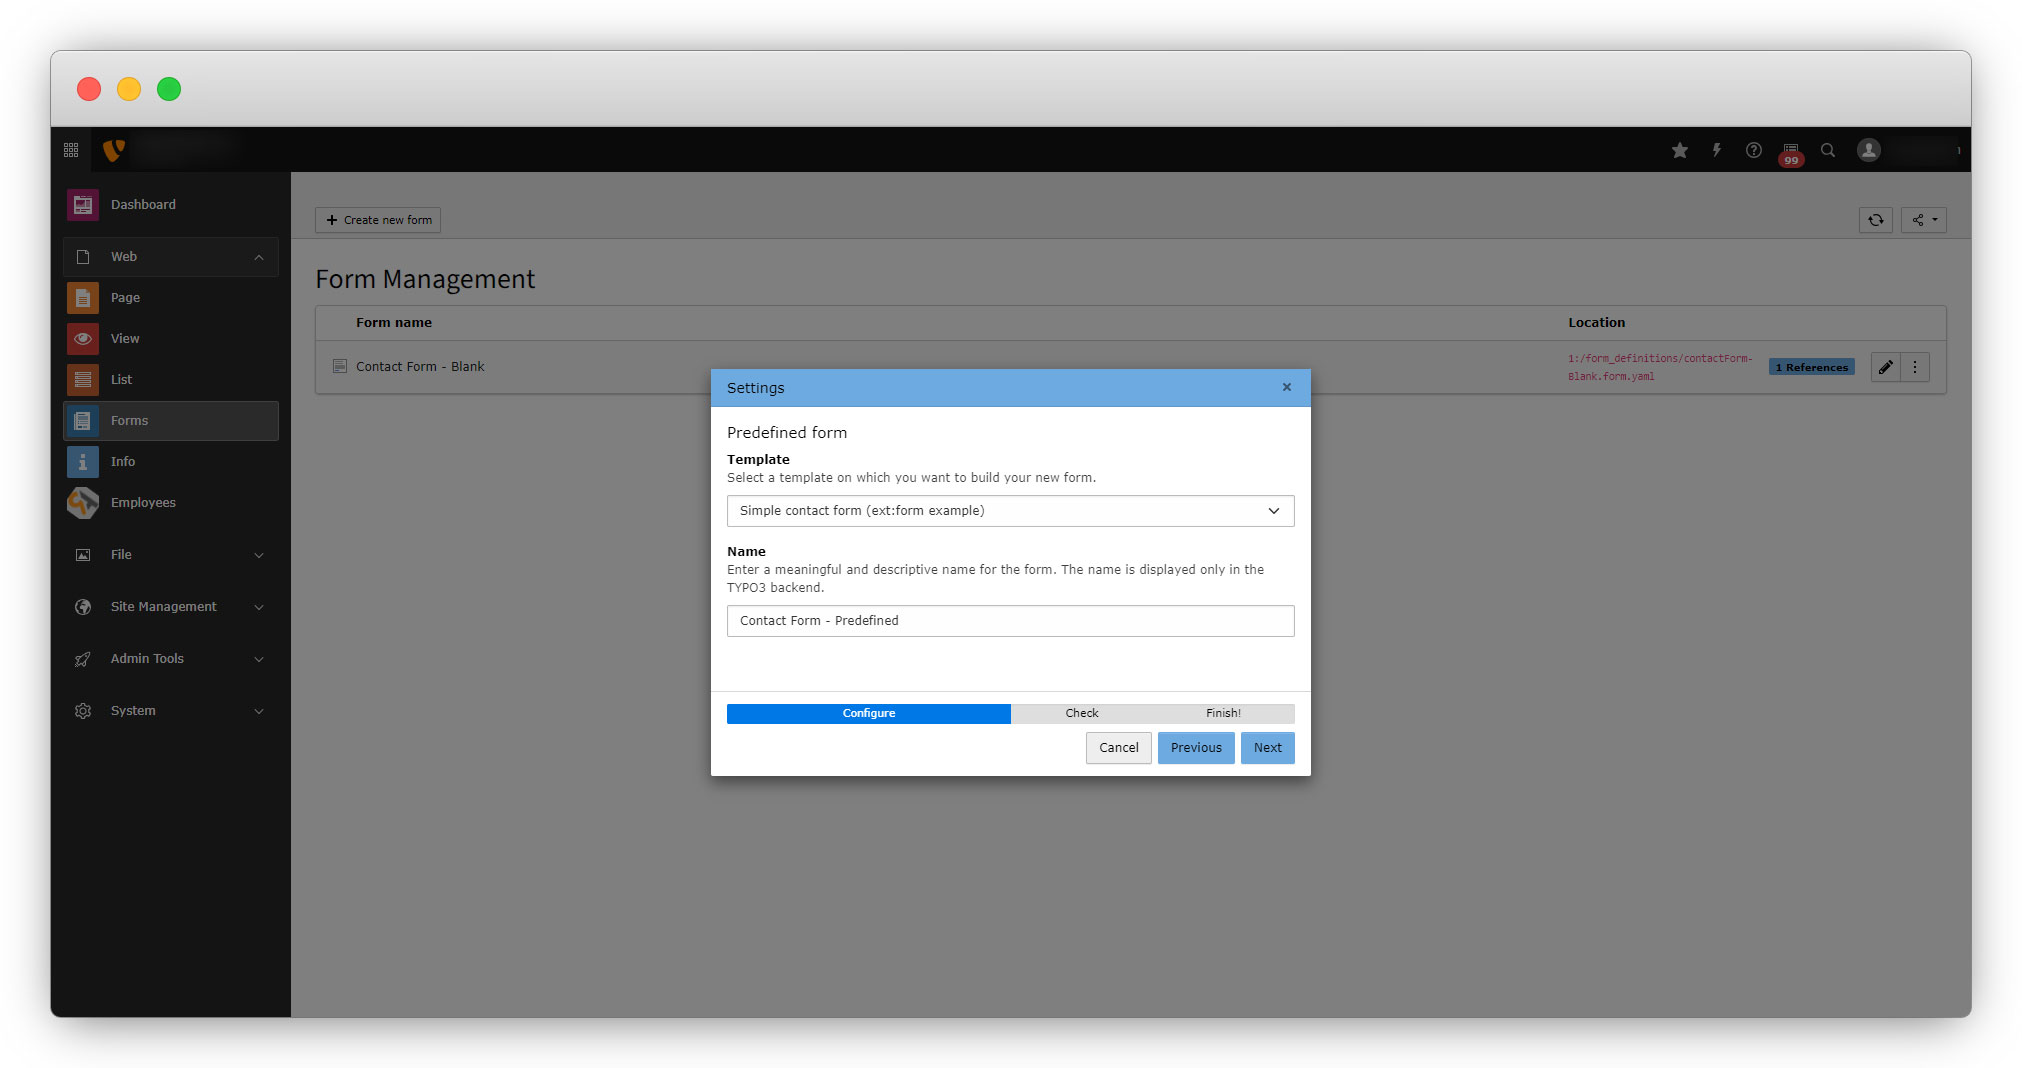
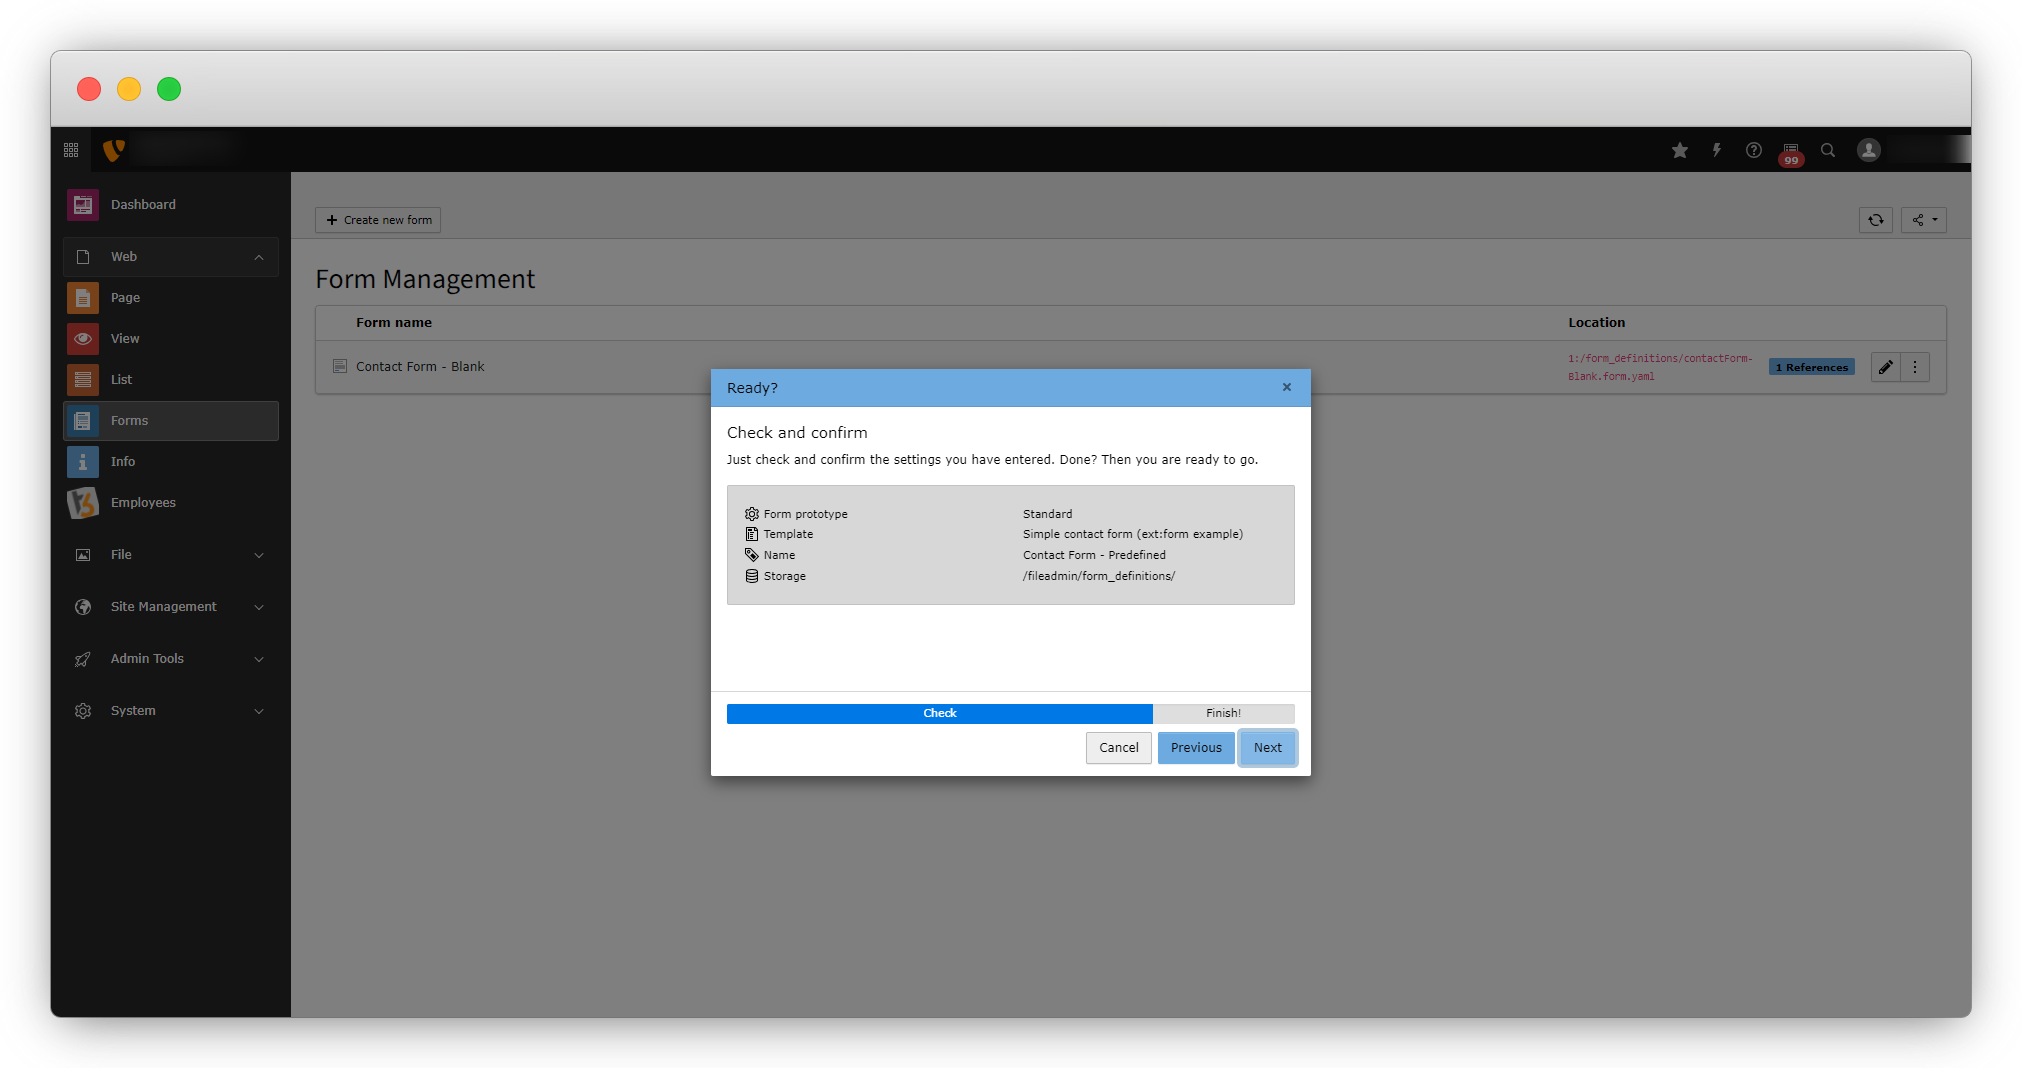
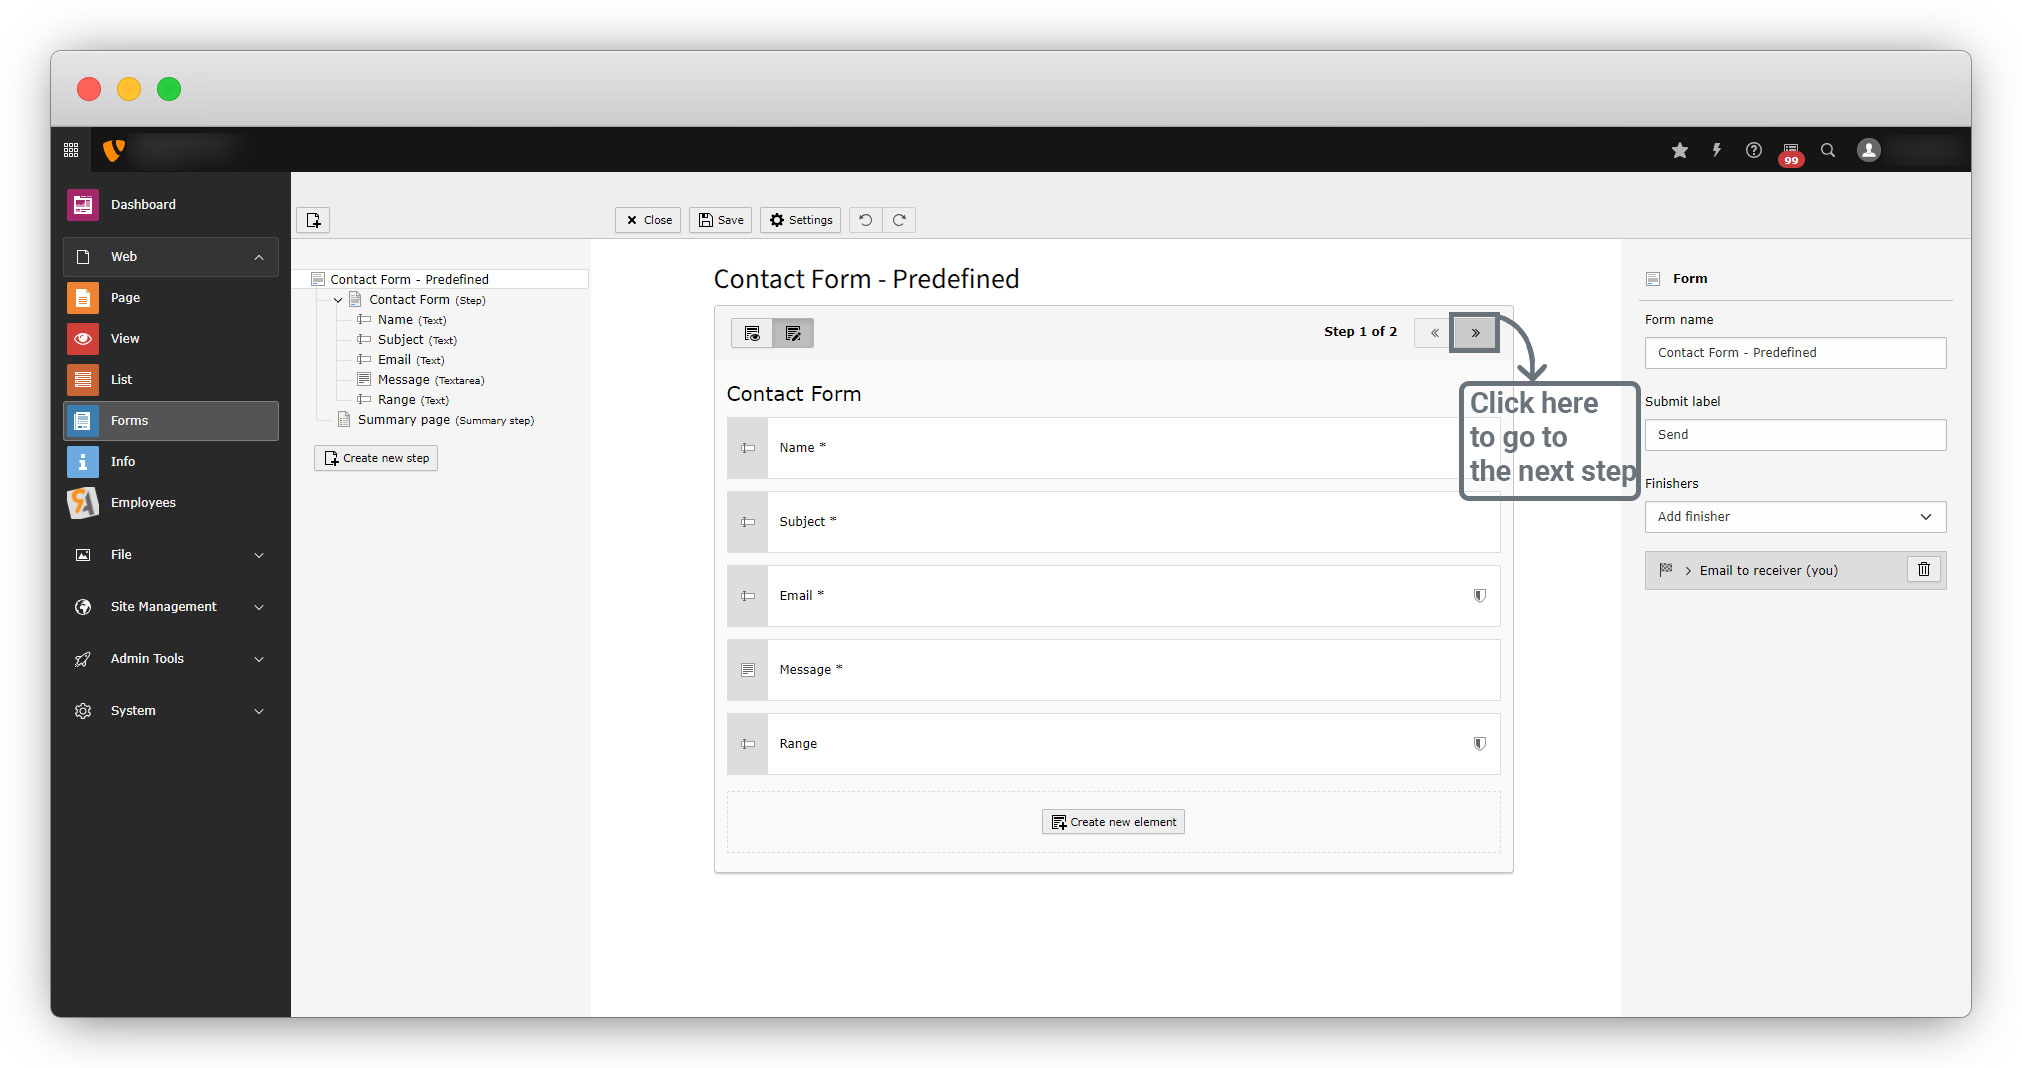
5. After selecting the predefined contact form click on the “Next” button and you will see the below screen.
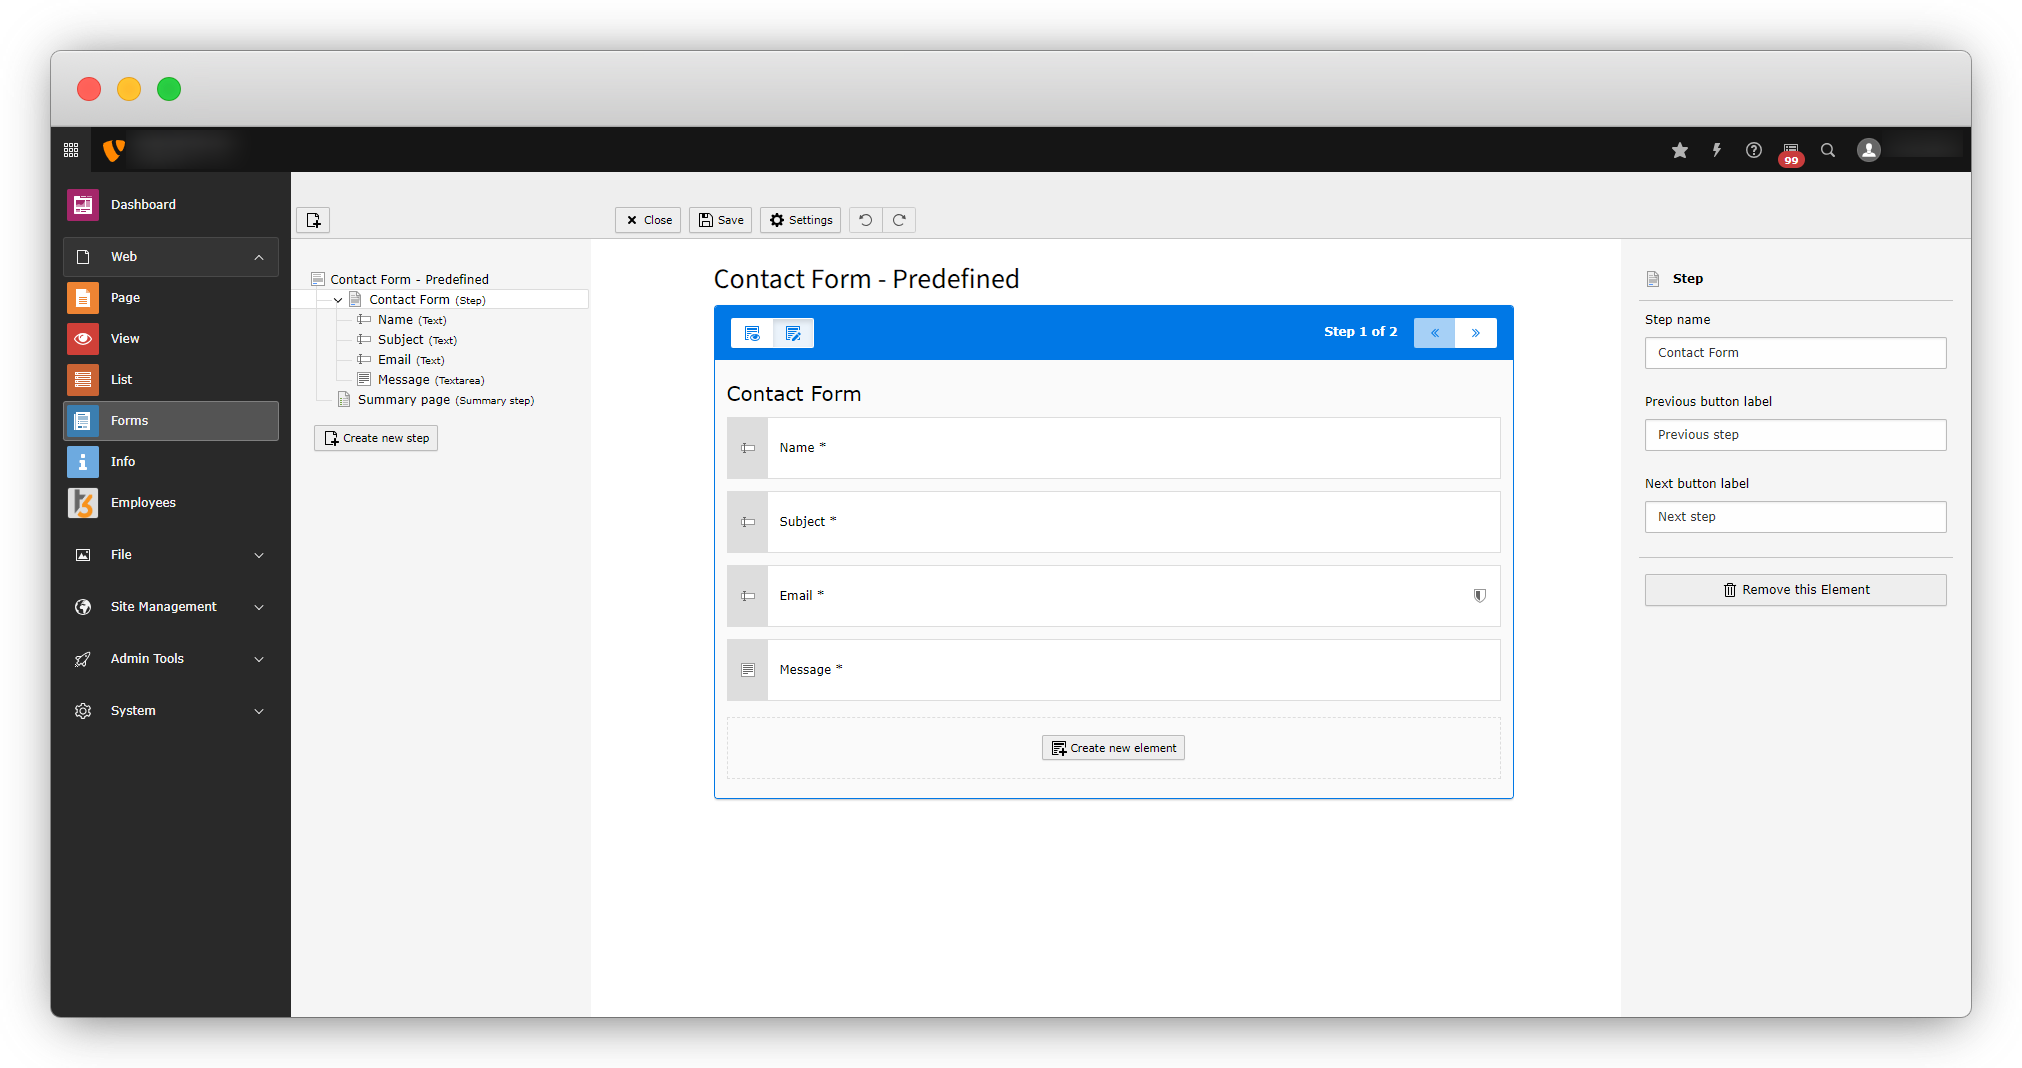
6. After clicking the next button, you will see the form with predefined fields as you can see in the screenshot below:
7. You can make updates to the predefined fields like you can remove any field you don’t need, or you can add a new field or update the name, validation, etc. You can see the updates in the screenshot below:
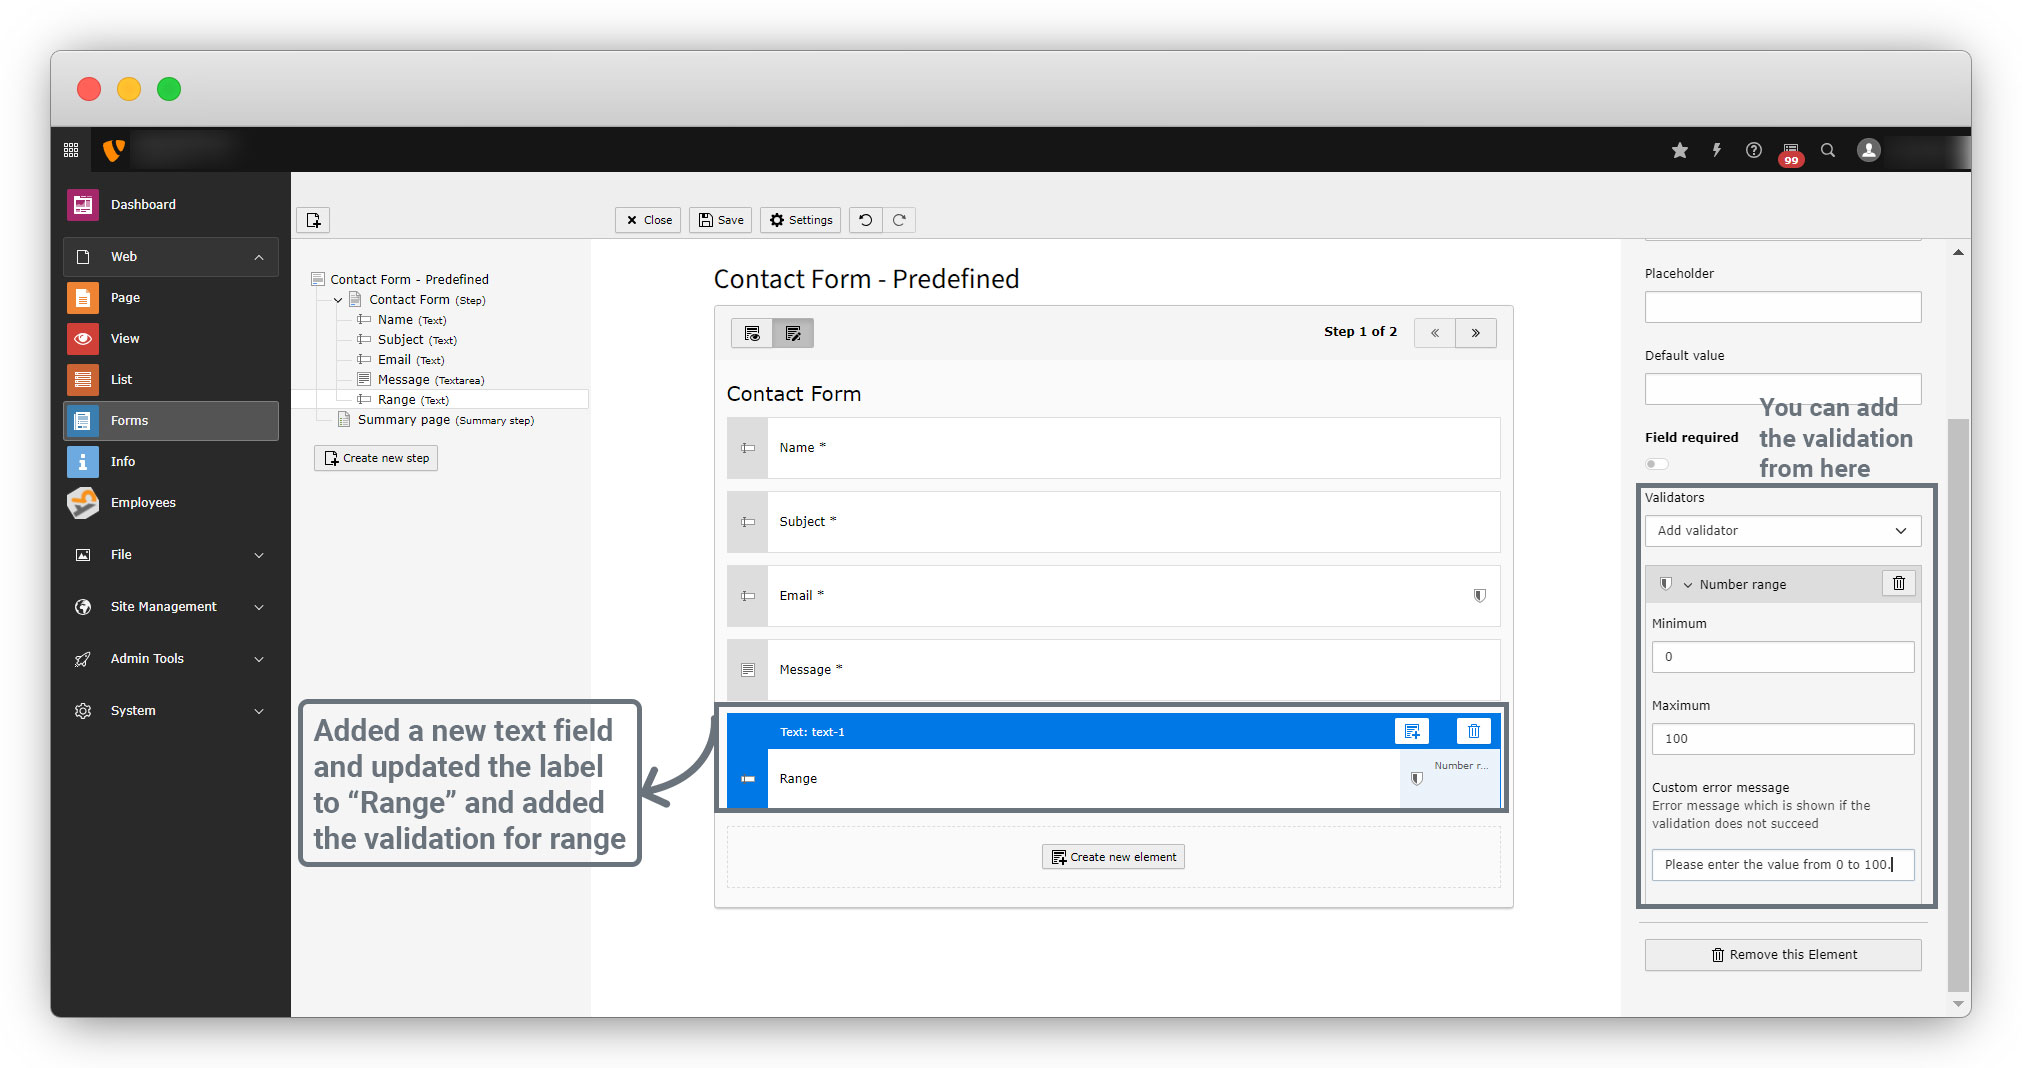
As you can see in the above screenshot, the range has been set from 0 to 100, so the value that will be added to the “Range” field, must be between 0 to 100. Other values will not be accepted by the field.
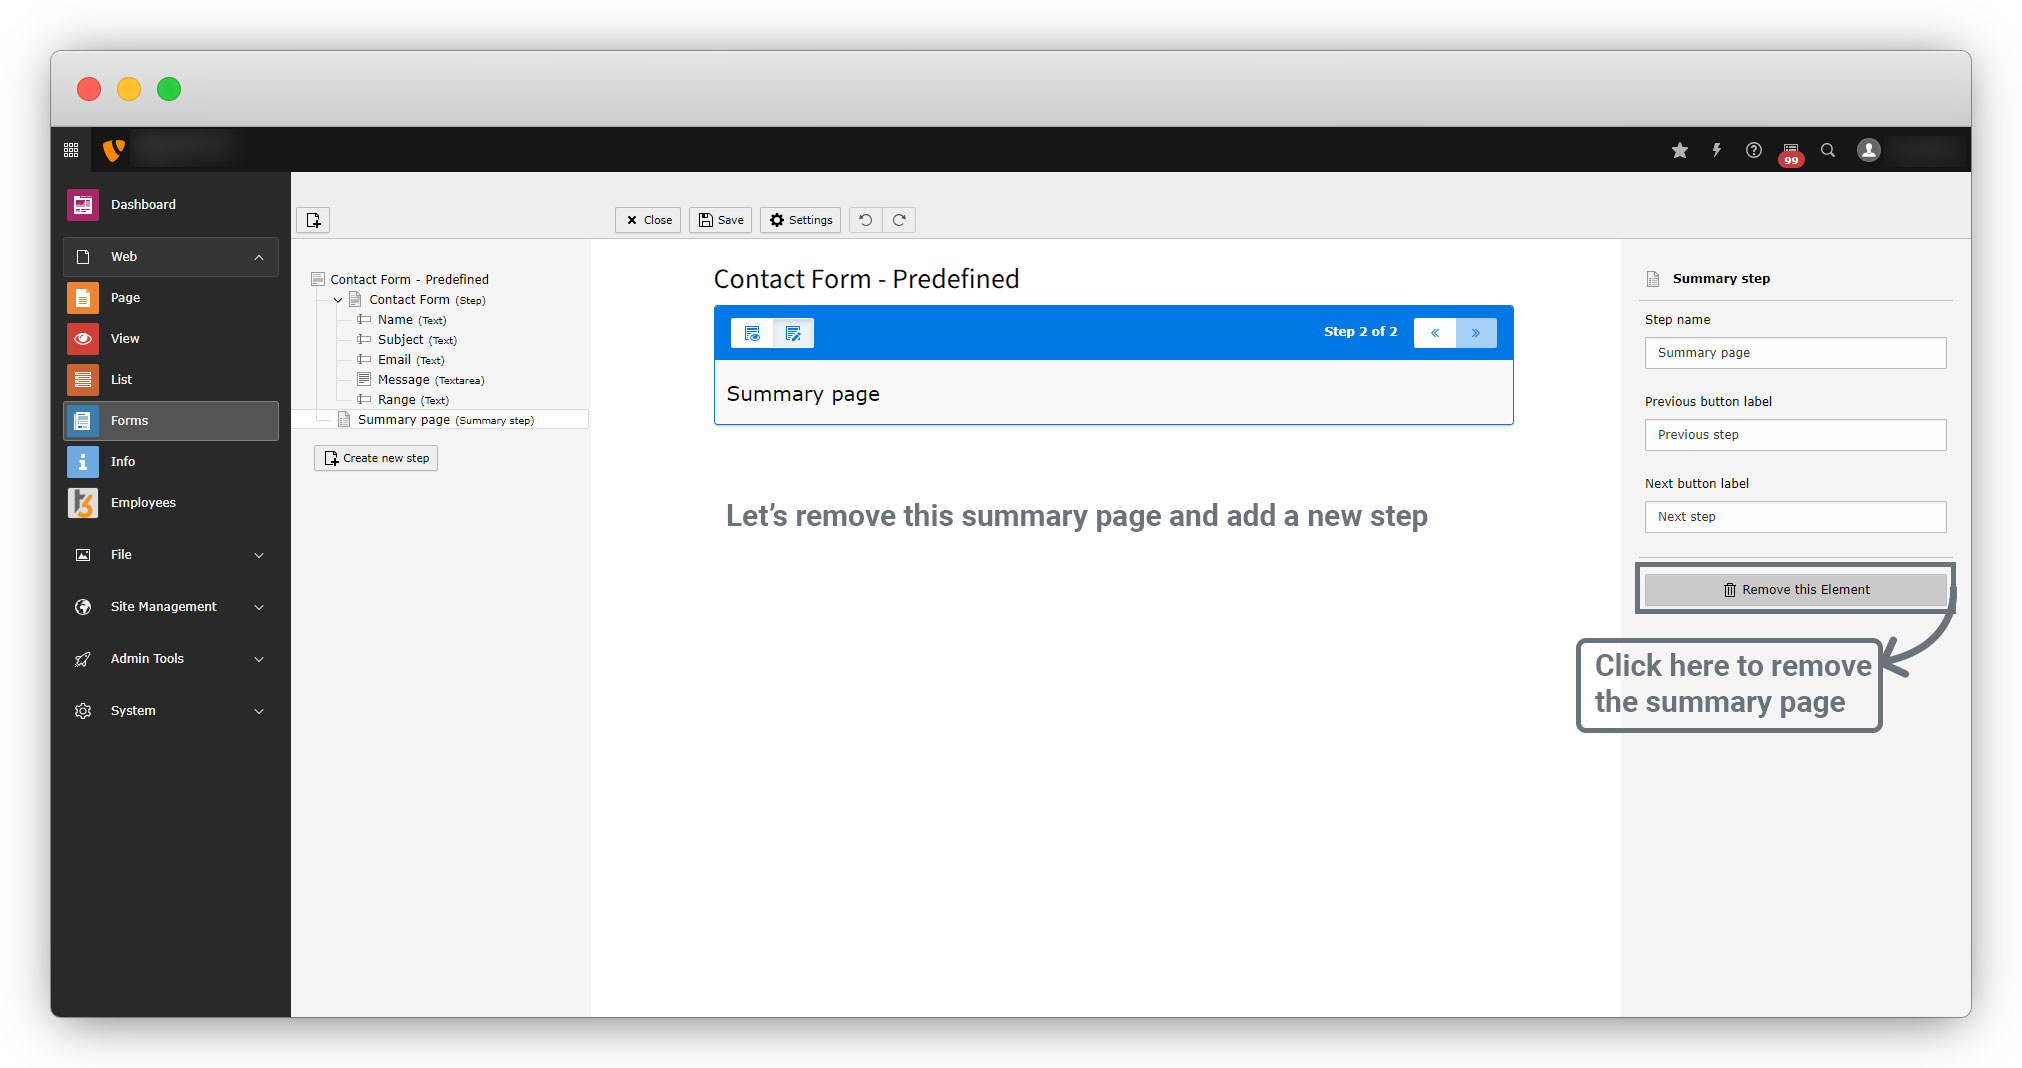
8. Here we have a summary page in the next step as you can see in the below screenshots.
Let’s remove the summary page.
9. After removing the summary page, let’s add a new step to the form.
Share


