
URL copied to clipboard

Configure the new plugin
6 views
__readtime__ Min
read
Let’s create a front-end plugin to create detail page for the employees in front-end.
Plugin Configuration
1. Configure the plugin in ext_localconf.php file at the root of the extension. (Path: employee/ext_localconf.php). Add the below code to the file ext_localconf.php you already have created at the time of creating the employee list plugin into the root directory.
ExtensionUtility::configurePlugin(
// extension key or extension name in UpperCamelCase (if the extension name is my products then the name here will be MyProducts)
'Employee',
// A unique identifier for your plugin in UpperCamelCase that will be the name of your plugin
'Employdetail',
// all actions
[EmployController::class => 'detail'],
// non-cacheable actions
[EmployController::class => 'detail'],
);
2. As you can see in the above screenshot, the defined action is “detail” and the defined controller is “EmployController” which has been created already at the time of the employee list plugin was created. Add the below code to define the detail action in the EmployController.php file.
/**
* action detail
*
* @return string|object|null|void
*/
public function detailAction(): ResponseInterface
{
$this->view->assign('employee details');
return $this->htmlResponse();
}
In the above code, the detail action has been defined only and not fetching any records for now. Will do that at the time of templating.
Plugin Registration
1. Register the plugin by adding it to the tt_content file to make the plugin available in cType (Dropdown). (file path: employee/Configuration/TCA/Overrides/tt_content.php)
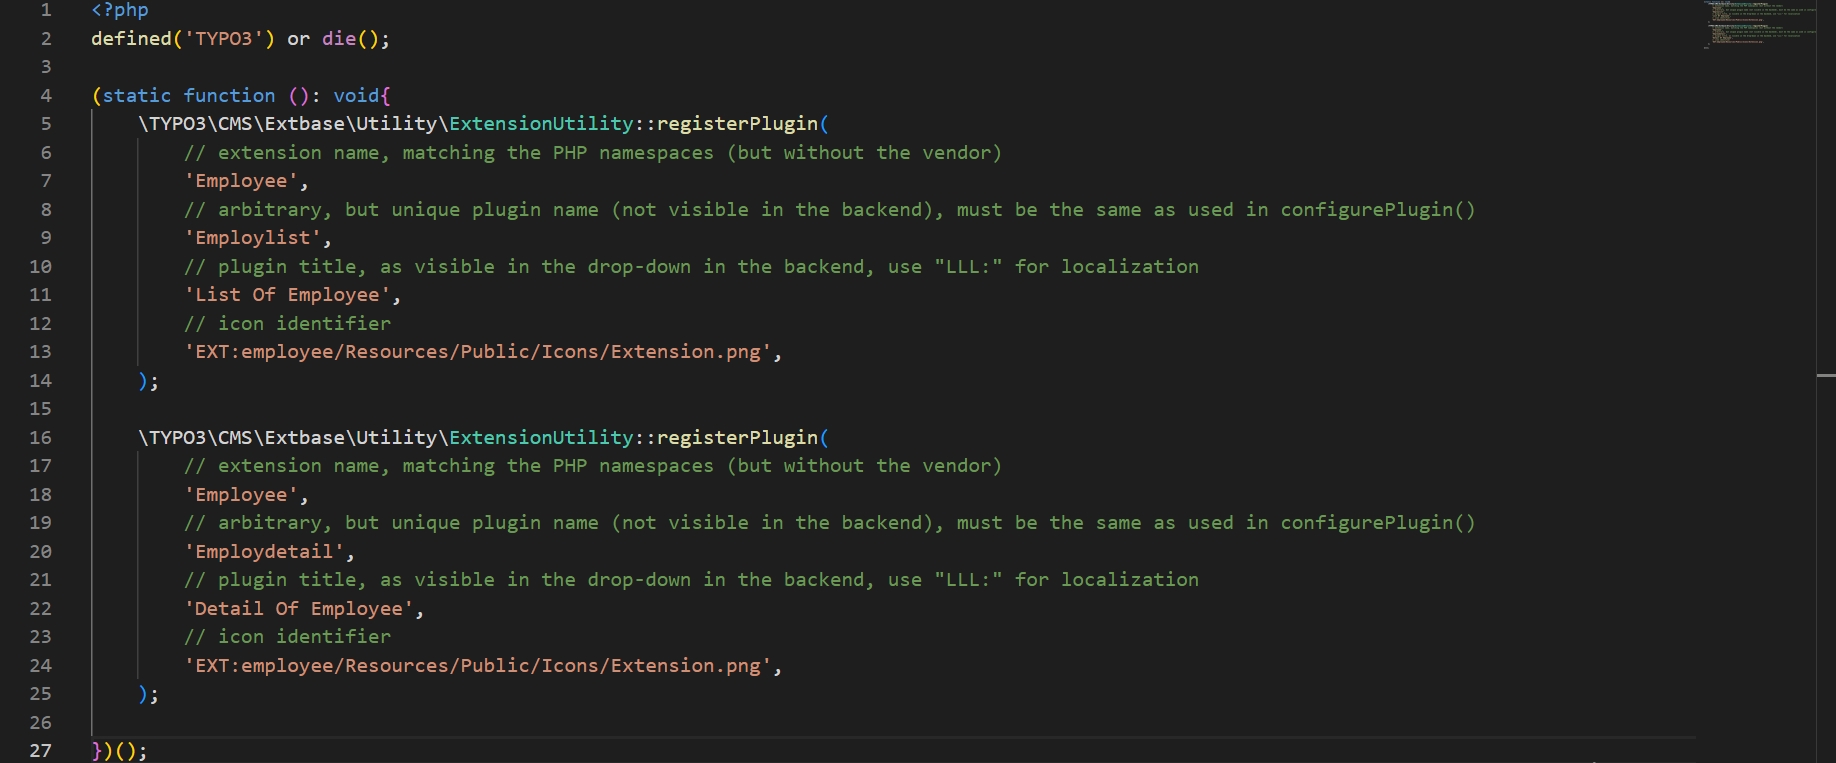
TYPO3CMSExtbaseUtilityExtensionUtility::registerPlugin( // extension name, matching the PHP namespaces (but without the vendor) 'Employee', // arbitrary, but unique plugin name (not visible in the backend), must be the same as used in configurePlugin() 'Employdetail', // plugin title, as visible in the drop-down in the backend, use "LLL:" for localization 'Detail Of Employee', // icon identifier 'EXT:employee/Resources/Public/Icons/Extension.png', );
2. Below is the screenshot of the final code of the tt_content file after adding the employee list and employee-detail plugin as described above.
Make the plugin available to the content wizard.
1. Add code in tsconfig file to make the plugin available to the wizard.
2. We already have created the tsconfig file on path: employee/Configuration/page.tsconfig, replace the existing code with the below code.
mod.wizards.newContentElement.wizardItems {
plugins {
elements {
// plugin signature: It is the extension name in lowercase without underscores, followed by one underscore, followed by the plugin identifier in lowercase without underscores.
employee_employlist {
// icon identifier: It will load the icon that is identified write the icon identifier for this extension (the explanation of this topic is below, please continue to follow the doc.)
iconIdentifier = employee
// title: It will be rendered as the title of the plugin in the wizard.
title = Emplyees List
// description: It will rendered as the description of the plugin in the wizard.
description = List of Employees
tt_content_defValues {
CType = list
// list_type: It will use the same plugin identifier.
list_type = employee_employlist
}
}
// Employee detail plugin
employee_employdetail {
iconIdentifier = employee
title = Emplyees Detail
description = Detail of Employees
tt_content_defValues {
CType = list
list_type = employee_employdetail
}
}
// To add the plugin to the list add the code as seen in the below line
show := addToList(employee_employlist, employee_employdetail)
}
}
}
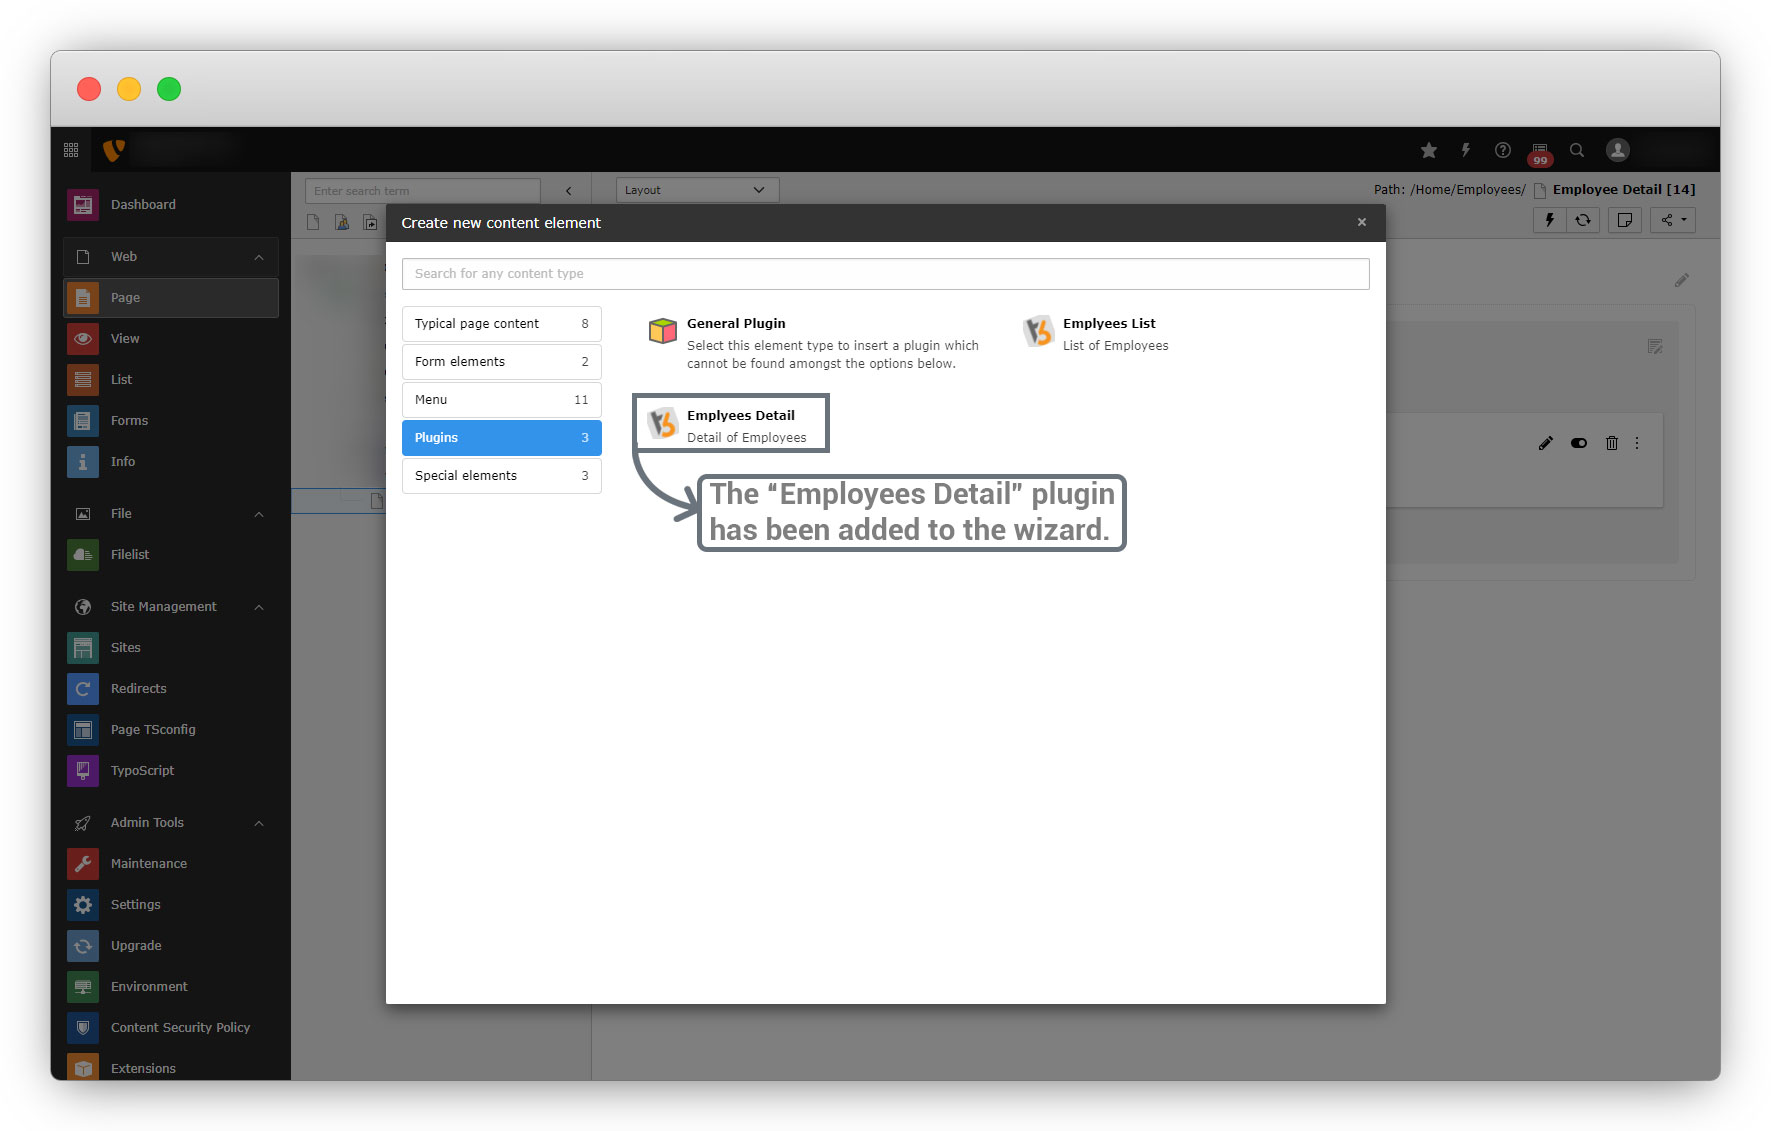
3. Now clean the cache and open wizard and you will find the plugin is available in wizard now.
4. If you want to add a different icon for the employee detail plugin, then you can define the icon in employee/Configuration/Icons.php file, upload the icon image to the path before define it.
<?php
declare(strict_types=1);
use TYPO3CMSCoreImagingIconProviderBitmapIconProvider;

return [
    'employee' => [
        'provider' => BitmapIconProvider::class,
        'source' => 'EXT:employee/Resources/Public/Icons/Extension.png',
        'spinning' => true,
    ],

    // define a different icon for the Employee list plugin
    'employee list' => [
        'provider' => BitmapIconProvider::class,
        'source' => 'EXT:employee/Resources/Public/Icons/EmployeeList.png',
        'spinning' => true,
    ],

];
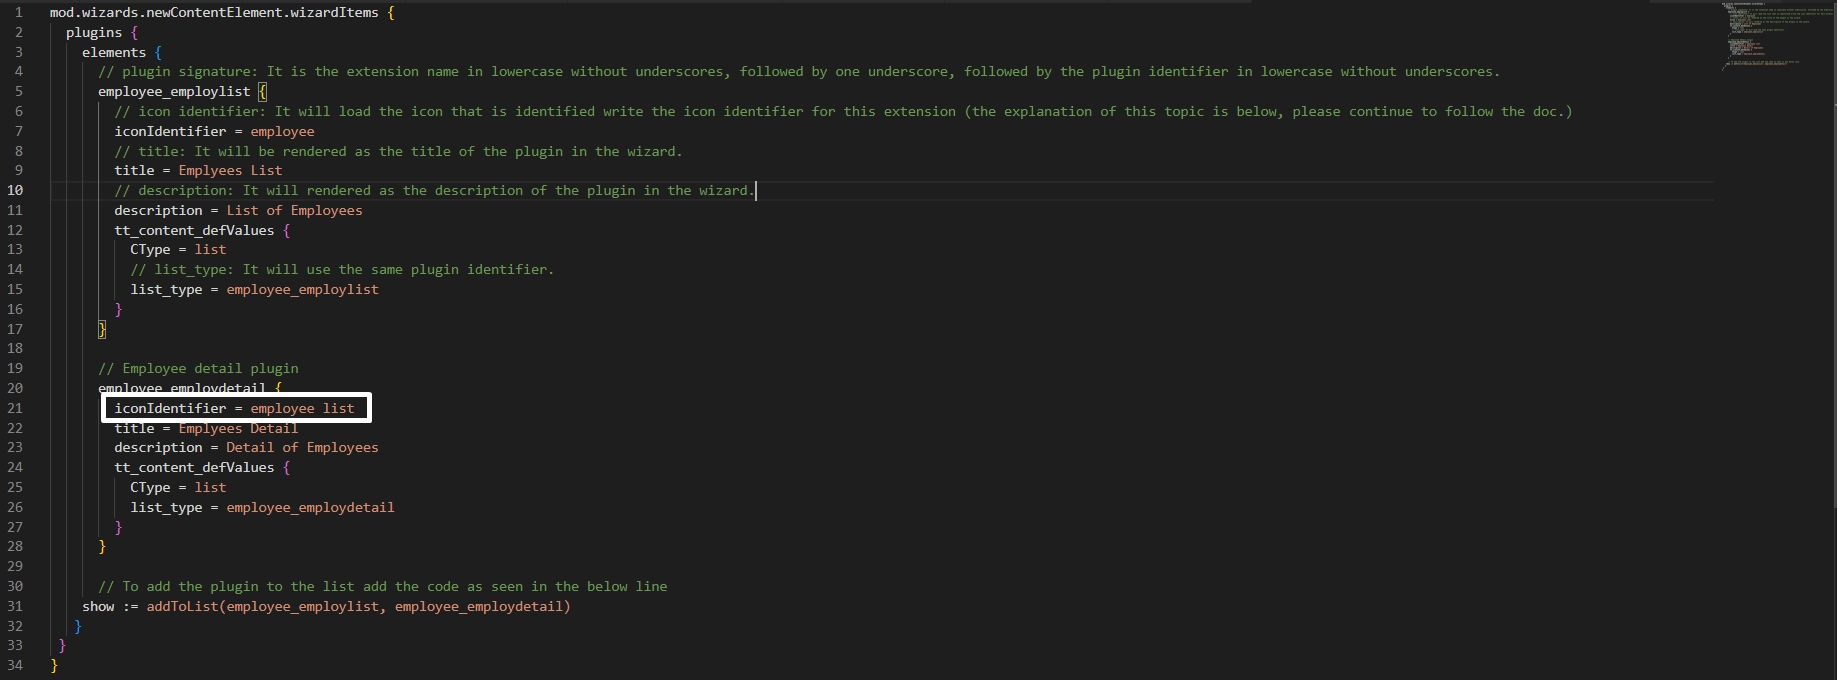
And assign that icon to the “iconIdentifier” in the tsconfig file that is already added in above step, (employeeConfigurationpage.tsconfig) as highlighted in the below screenshot.
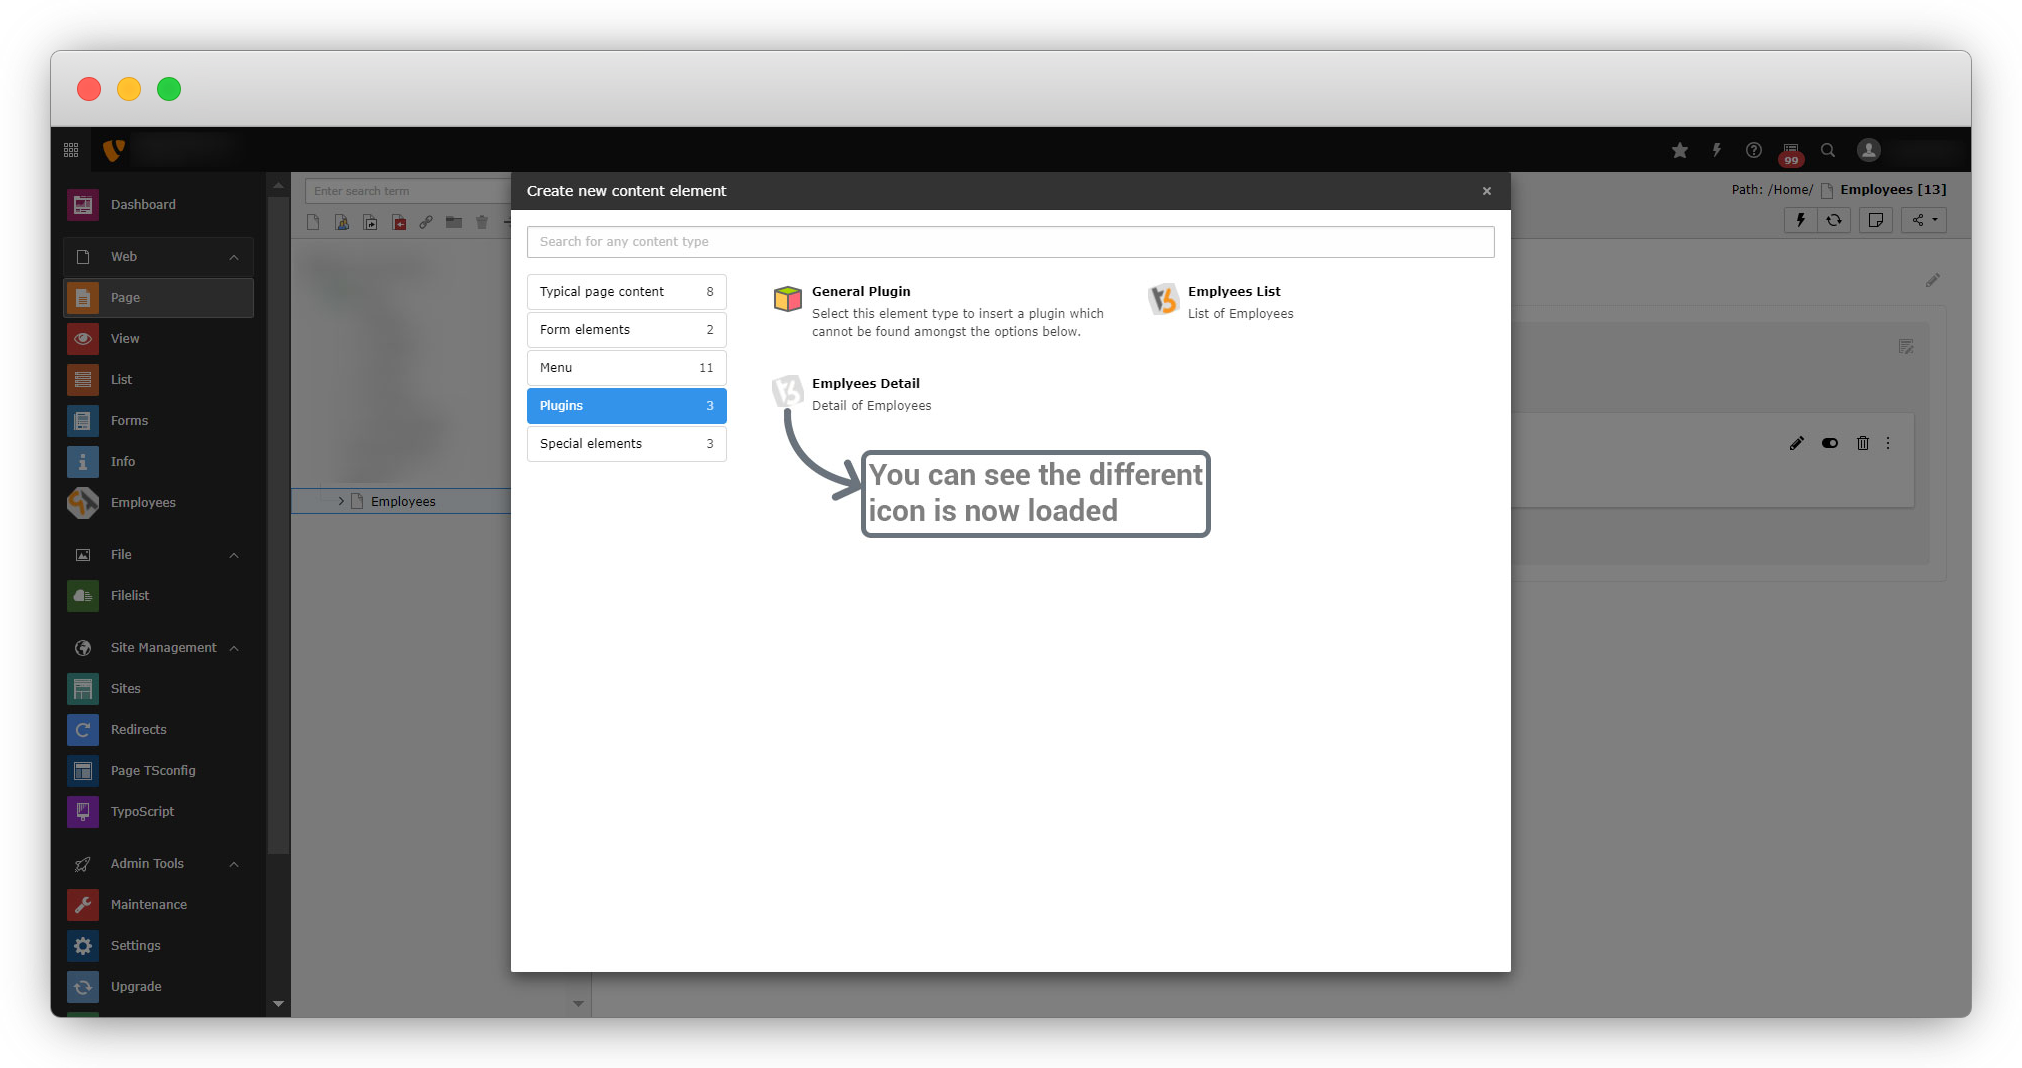
5. You will see the icon is now loaded on the wizard for the particular plugin as seen in the screenshot below
Share


