
URL copied to clipboard

How to use the plugin in the front-end?
3 views
__readtime__ Min
read
Create a new page for the “Employee detail” under the “Employee” page, click on the “+Content” button and you will see the wizard, go to Plugins > select the Employees Detail plugin and you will be redirected to the screen as seen in the screenshot below.
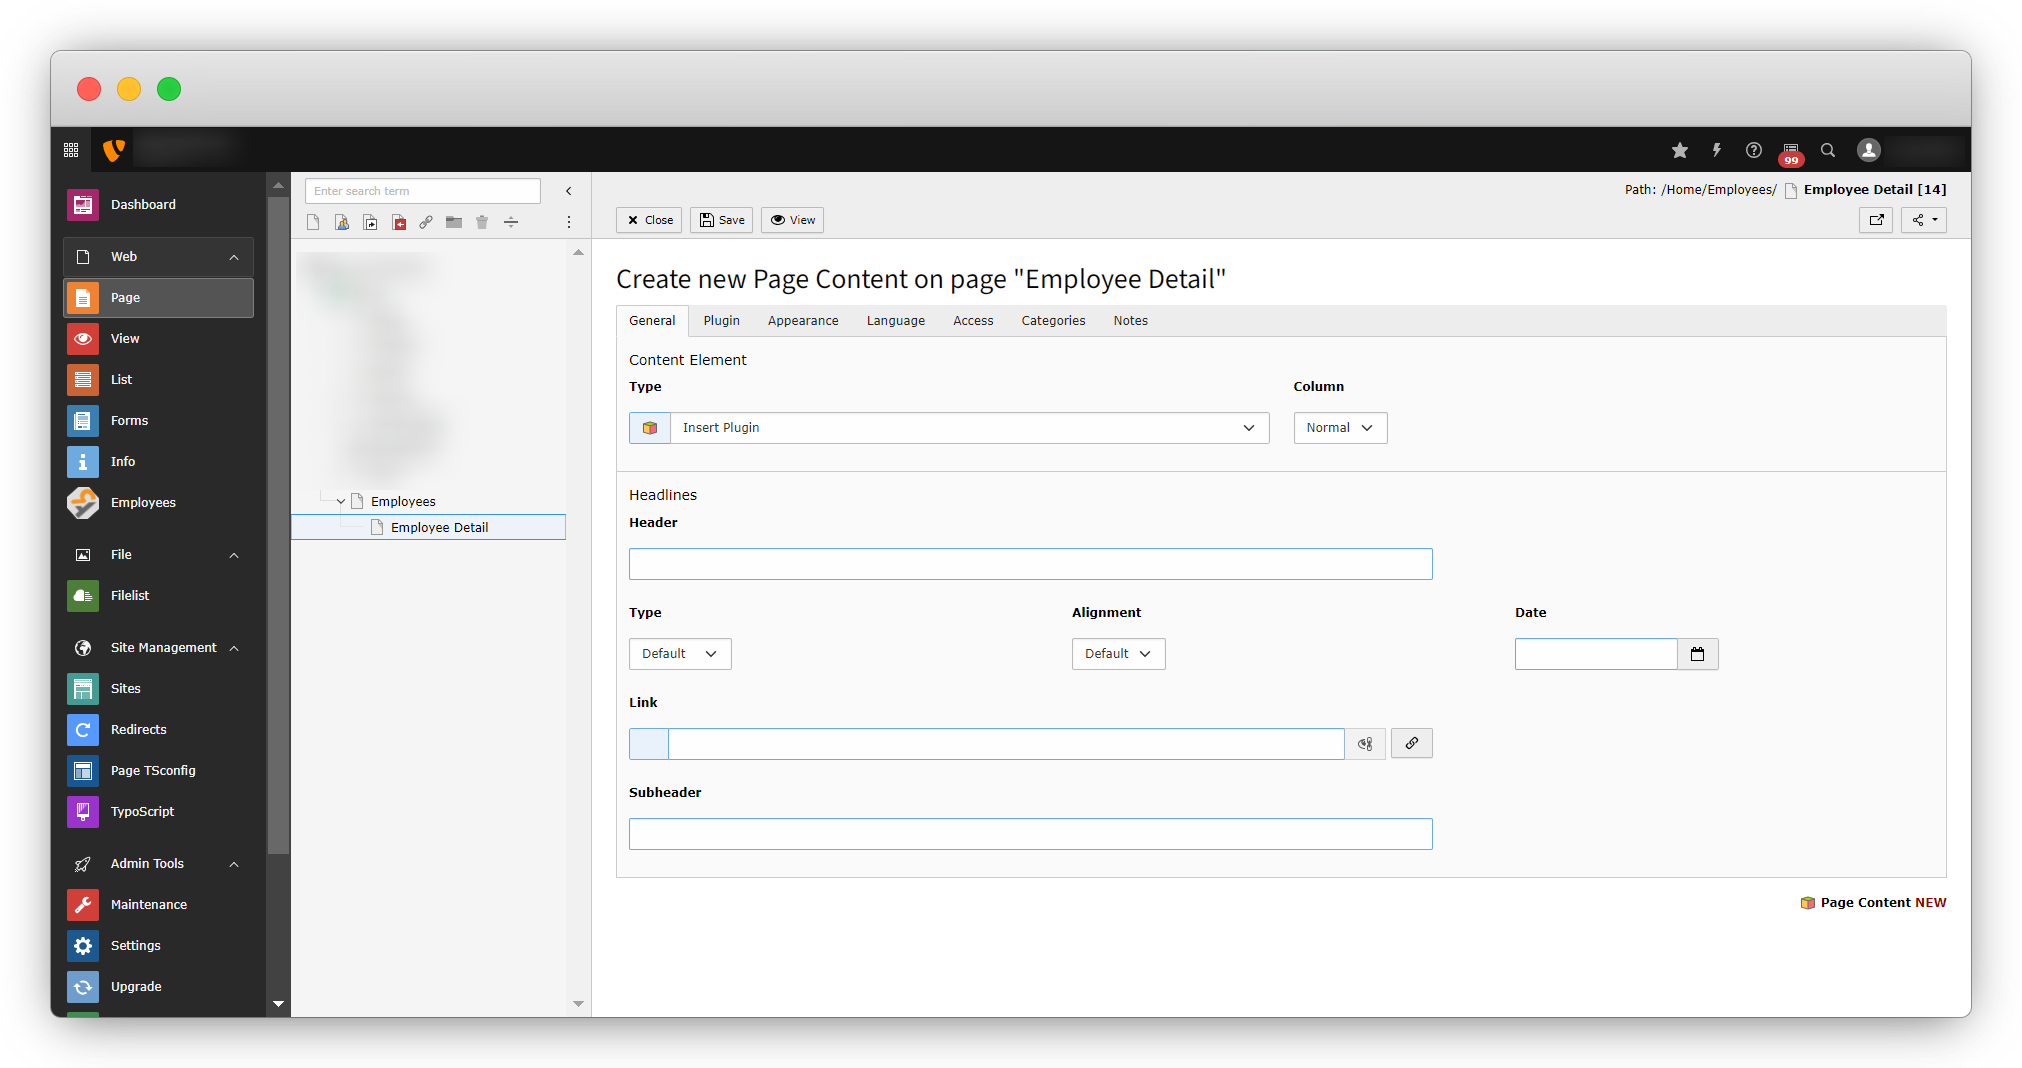
just save the page.
Add the link in the list page to open the detail page
1. Open the template file for the employee (file path: employeeResourcesPrivateTemplatesEmployIndex.html).
2. Add the below code in the template file after the “bio” section to provide a link for each of the employees to open their corresponding detail page.
<div>
<f:link.page pageUid="14" additionalParams="{uid: emp.uid}">Read More</f:link.page>
</div>
3. Below is the screenshot of the template file after adding the above code:
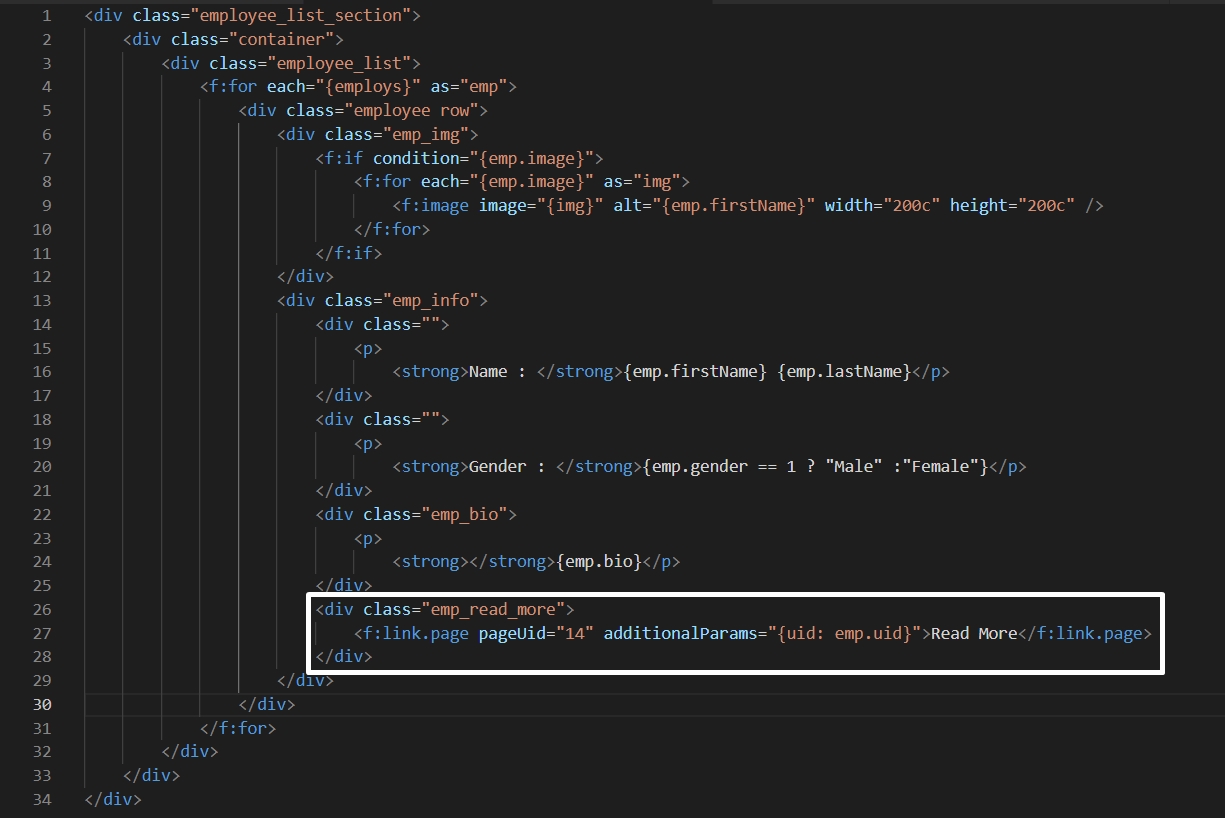
4. In additionalParams attribute the uid of the employee table has been passed to fetch the data of the employee by that uid.
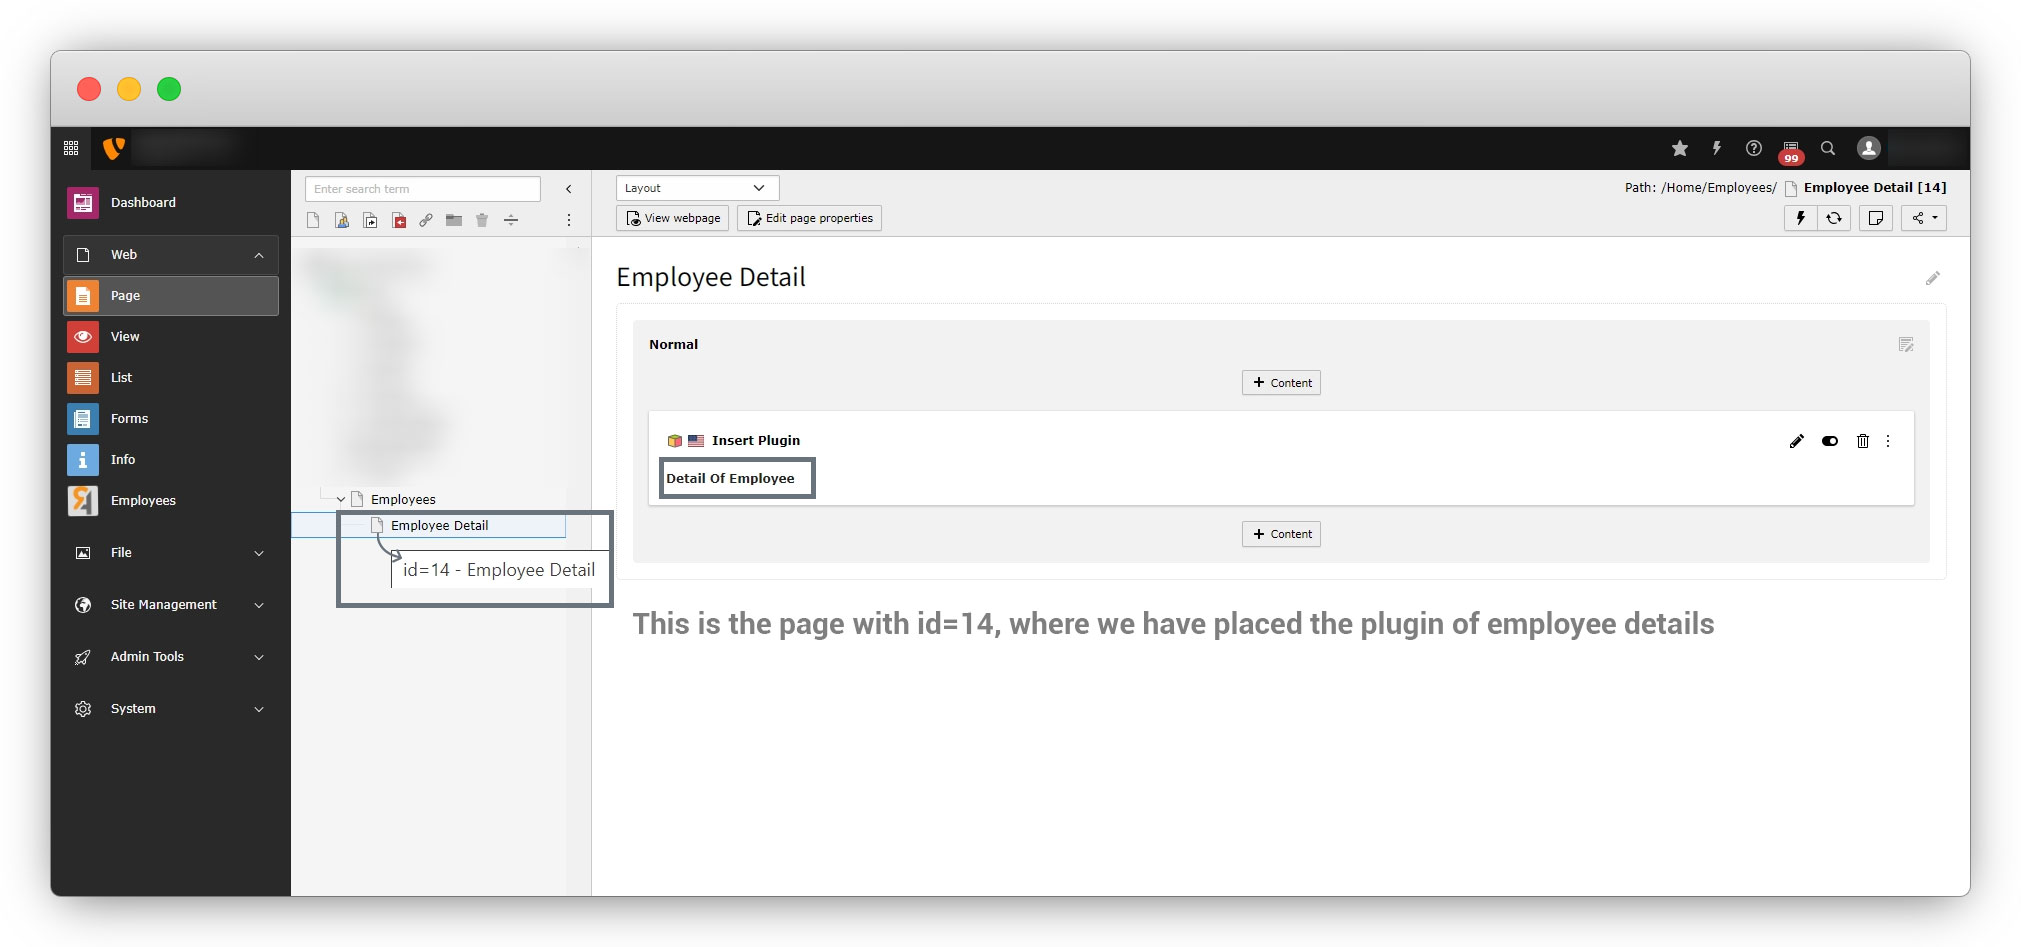
5. As you can see in the above screenshot, the pageUid is 14 which has been put static for now. That is the ID of the page on which the details will be rendered, the page “Employee Detail” as you can see in the below screenshot.
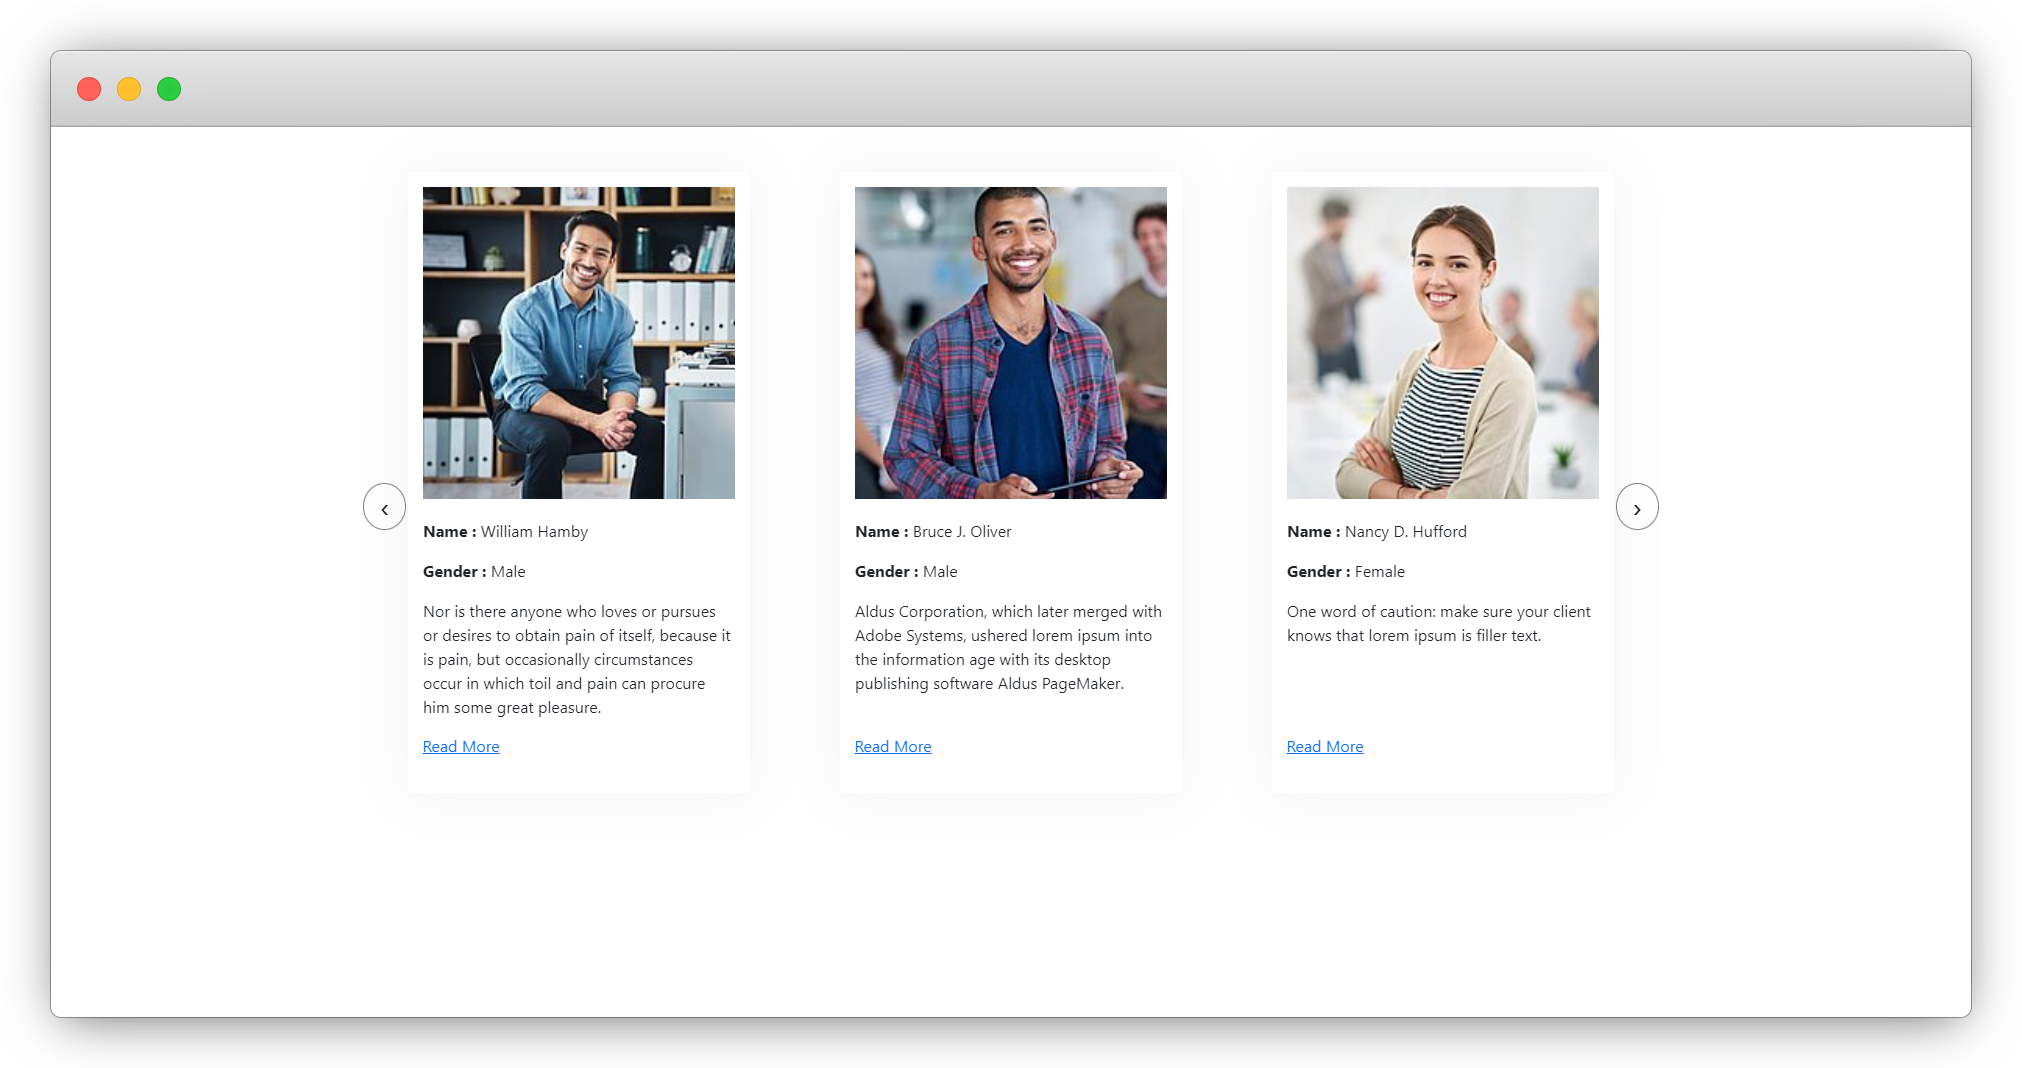
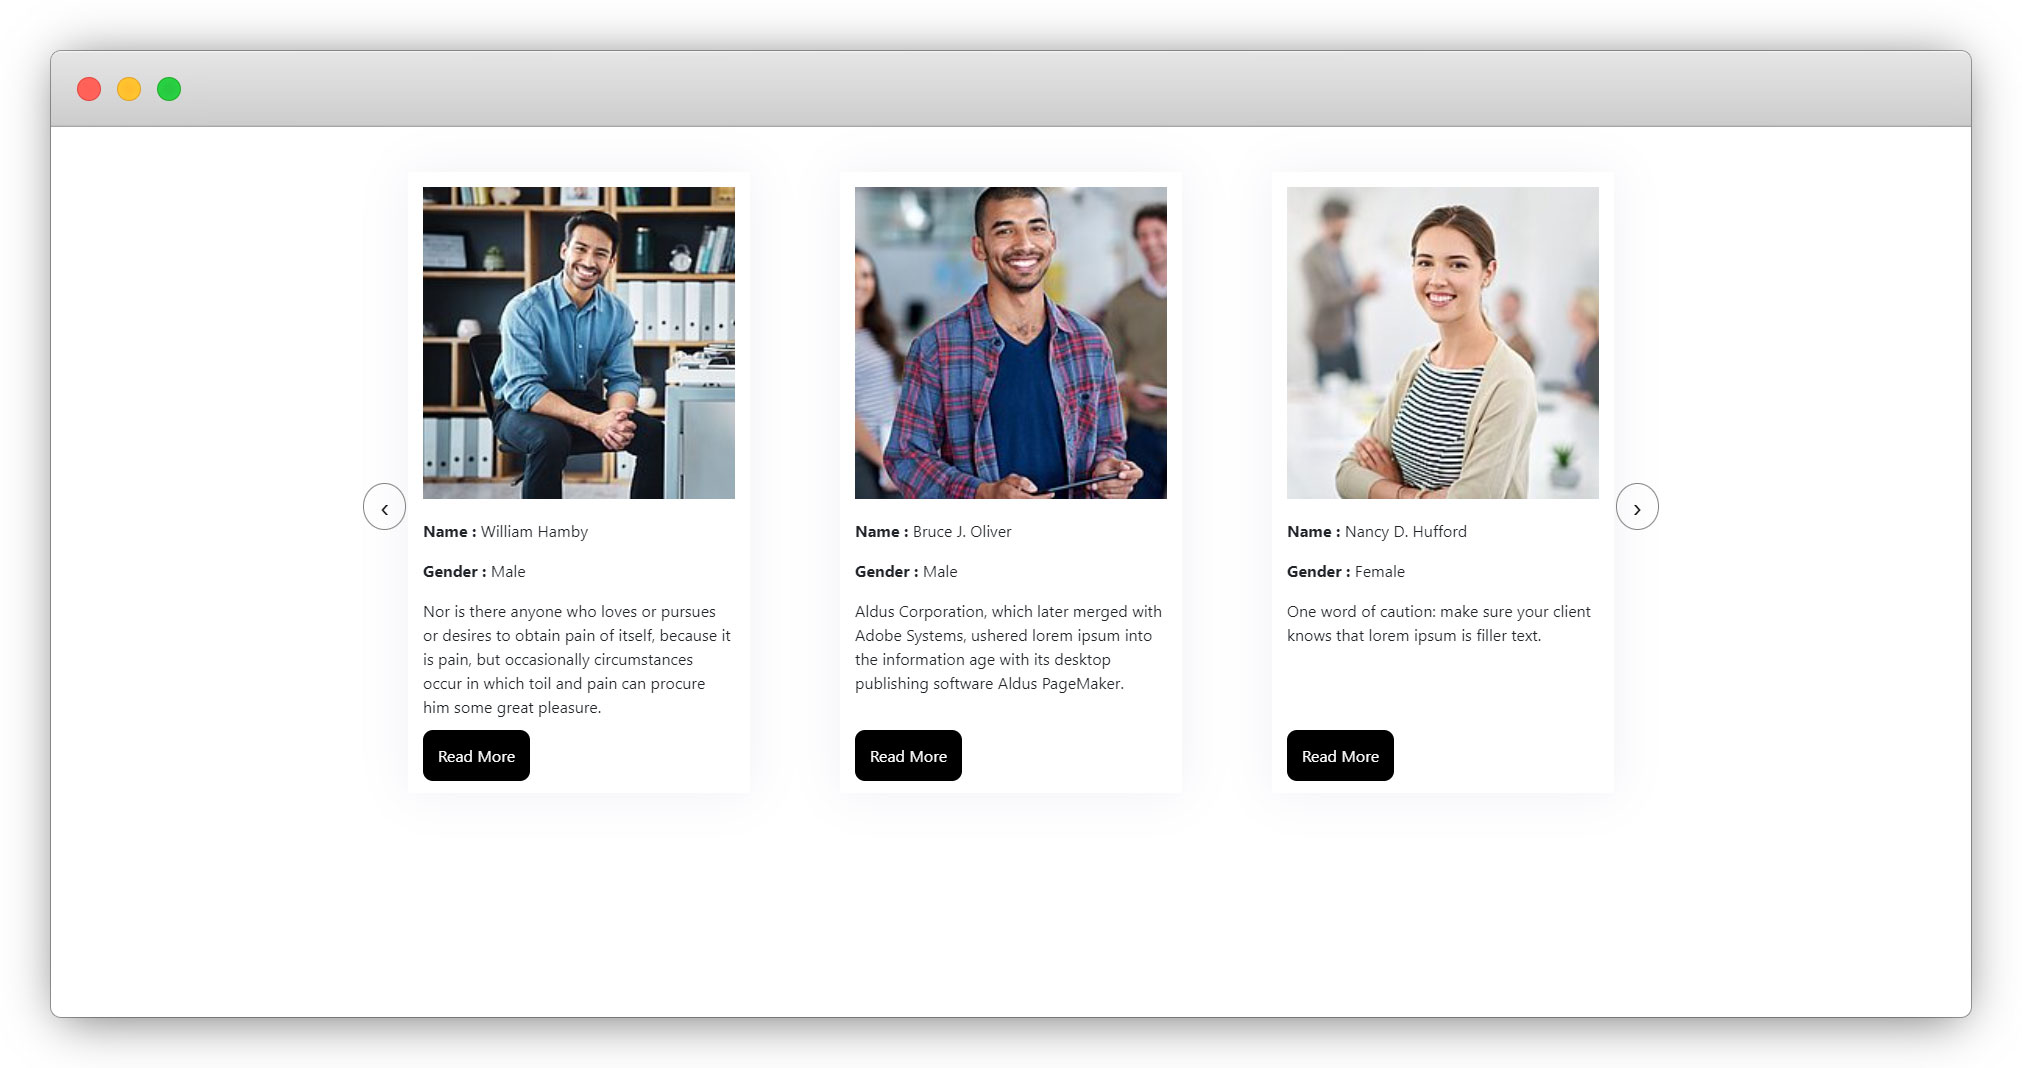
6. Now go to the employee list in your browser and you will see the “Read More” link as seen in the screenshot below
7. Let’s add the below CSS for the Read More button in the file employeeResourcesPubliccsscustom.css
  .employee_list .emp_read_more{
    margin-bottom: 10px;
    margin-top: 10px;
    display: inline-block;
  }
  .emp_read_more a {
    background: #000;
    color: #fff;
    padding: 15px;
    border-radius: 10px;
    margin-bottom: 10px;
    text-decoration: none;
}
8. After adding the above CSS, the employee slider will look like this
Template of the employee detail page
1. The repository is already injected in the controller as we injected it at the time when the list plugin was created, so there is no need to inject it again to fetch the records from the table to the template.
2. Use the injected repository to fetch all the records of the employ table in detail action by writing the code below in the EmployController.php file (employeeClassesControllerEmployController.php)
/**
     * action detail
     *
     * @return string|object|null|void
     */
    public function detailAction(): ResponseInterface
    {
        $uid = GeneralUtility::_GP('uid');
        if ($uid) {
            $details = $this->employRepository->findByUid($uid);
            $this->view->assign('details', $details);
        } else {
            $this->view->assign('details', null);
        }
        return $this->htmlResponse();
    }
The details variable will be used in the template to render the data of employee details.
3. Here the GeneralUtility has been used to fetch the uid from the detail. You will need to import the GeneralUtility in the controller file to use it as you can see in the below code:
use TYPO3CMSCoreUtilityGeneralUtility;
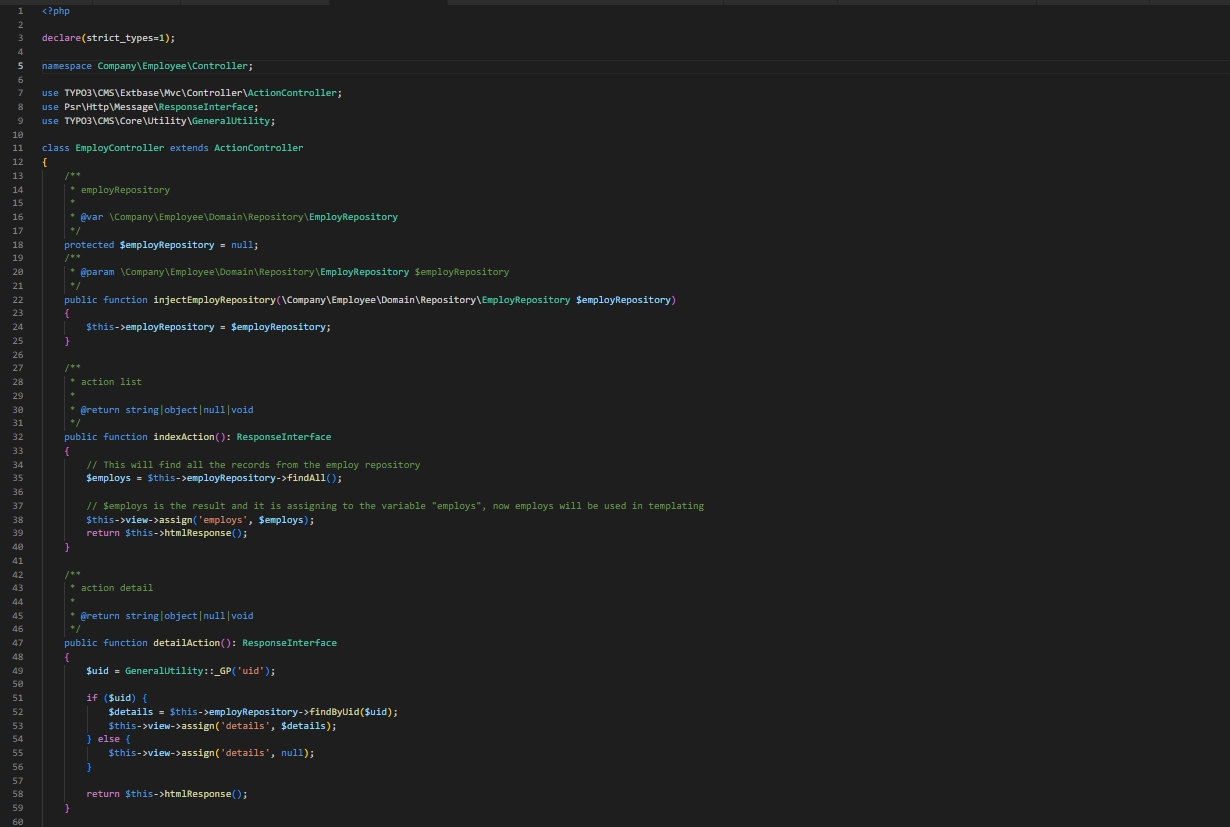
4. You can see the final code of the controller file in the below screenshot after adding the GeneralUtility and the detail action.
5. Let’s do templating and render the details of the employees in the front-end.
6. Here the detailAction() of the EmployController.php has been used, so the template that should be altered is the template of the EmployController.php’s detailAction.
7. Create a template file and the template file path is: employeeResourcesPrivateTemplatesEmployDetail.html
8. Below is the code of the detail.html template file
<div>
    <div>
        <div>
            <f:if condition="{details}">
                <f:then>
                    <h1>{details.firstName} {details.lastName}</h1>
                    <f:if condition="{details.image}">
                        <f:for each="{details.image}" as="img">
                            <div>
                                <f:image image="{img}" alt="{details.firstName}" />
                            </div>
                        </f:for>
                    </f:if>
                    <div>
                        <div>
                            <h3>Basic Details</h3>
                            <div>
                                <div>
                                    <strong>First name </strong>
                                </div>
                                <div>
                                    <p>{details.firstName}</p>
                                </div>
                            </div>
                            <div>
                                <div>
                                    <strong>Last name </strong>
                                </div>
                                <div>
                                    <p>{details.lastName}</p>
                                </div>
                            </div>
                            <div>
                                <div>
                                    <strong>Gender </strong>
                                </div>
                                <div>
                                    <p>{details.gender == 1 ? "Male":"Female"}</p>
                                </div>
                            </div>
                            <div>
                                <div>
                                    <strong>Birth Date </strong>
                                </div>
                                <div>
                                    <p>
                                        <f:format.date>{details.birthDate}</f:format.date>
                                    </p>
                                </div>
                            </div>
                            <div>
                                <div>
                                    <strong>Joining Date </strong>
                                </div>
                                <div>
                                    <p>
                                        <f:format.date>{details.joiningDate}</f:format.date>
                                    </p>
                                </div>
                            </div>
                            <div>
                                <div>
                                    <strong>Salary </strong>
                                </div>
                                <div>
                                    <p>{details.salary}</p>
                                </div>
                            </div>
                            <div>
                                <div>
                                    <strong>Country </strong>
                                </div>
                                <div>
                                    <p>{details.country}</p>
                                </div>
                            </div>
                            <div>
                                <div>
                                    <strong>Languages </strong>
                                </div>
                                <div>
                                    <p>{details.languages}</p>
                                </div>
                            </div>
                            <div>
                                <div>
                                    <strong>Bio</strong>
                                </div>
                                <div>
                                    <p>{details.bio}</p>
                                </div>
                            </div>
                            <div>
                                <div>
                                    <strong>Experiance</strong>
                                </div>
                                <div>
                                    <p>
                                        <f:format.html>{details.experiance}</f:format.html>
                                    </p>
                                </div>
                            </div>
                        </div>
                        <div>
                            <h3>Educations</h3>
                            <f:if condition="{details.educations}">
                                <div>
                                    <div><strong>Title</strong></div>
                                    <div><strong>Roll Number</strong></div>
                                    <div><strong>CGPA</strong></div>
                                    <div><strong>University</strong></div>
                                    <div><strong>Start Date</strong></div>
                                    <div><strong>End Date</strong></div>
                                </div>
                                <f:for each="{details.educations}" as="edu">
                                    <div>
                                        <div>
                                            <p>{edu.title}</p>
                                        </div>
                                        <div>
                                            <p>{edu.rollNumber}</p>
                                        </div>
                                        <div>
                                            <p>{edu.cgpa}</p>
                                        </div>
                                        <div>
                                            <p>{edu.university}</p>
                                        </div>
                                        <div>
                                            <p>
                                                <f:format.date>{edu.startDate}</f:format.date>
                                            </p>
                                        </div>
                                        <div>
                                            <p>
                                                <f:format.date>{edu.endDate}</f:format.date>
                                            </p>
                                        </div>
                                    </div>
                                </f:for>
                            </f:if>
                        </div>
                    </div>
                </f:then>
                <f:else>
                    <div>
                        Employee not found!!
                    </div>
                </f:else>
            </f:if>
        </div>
    </div>
</div>
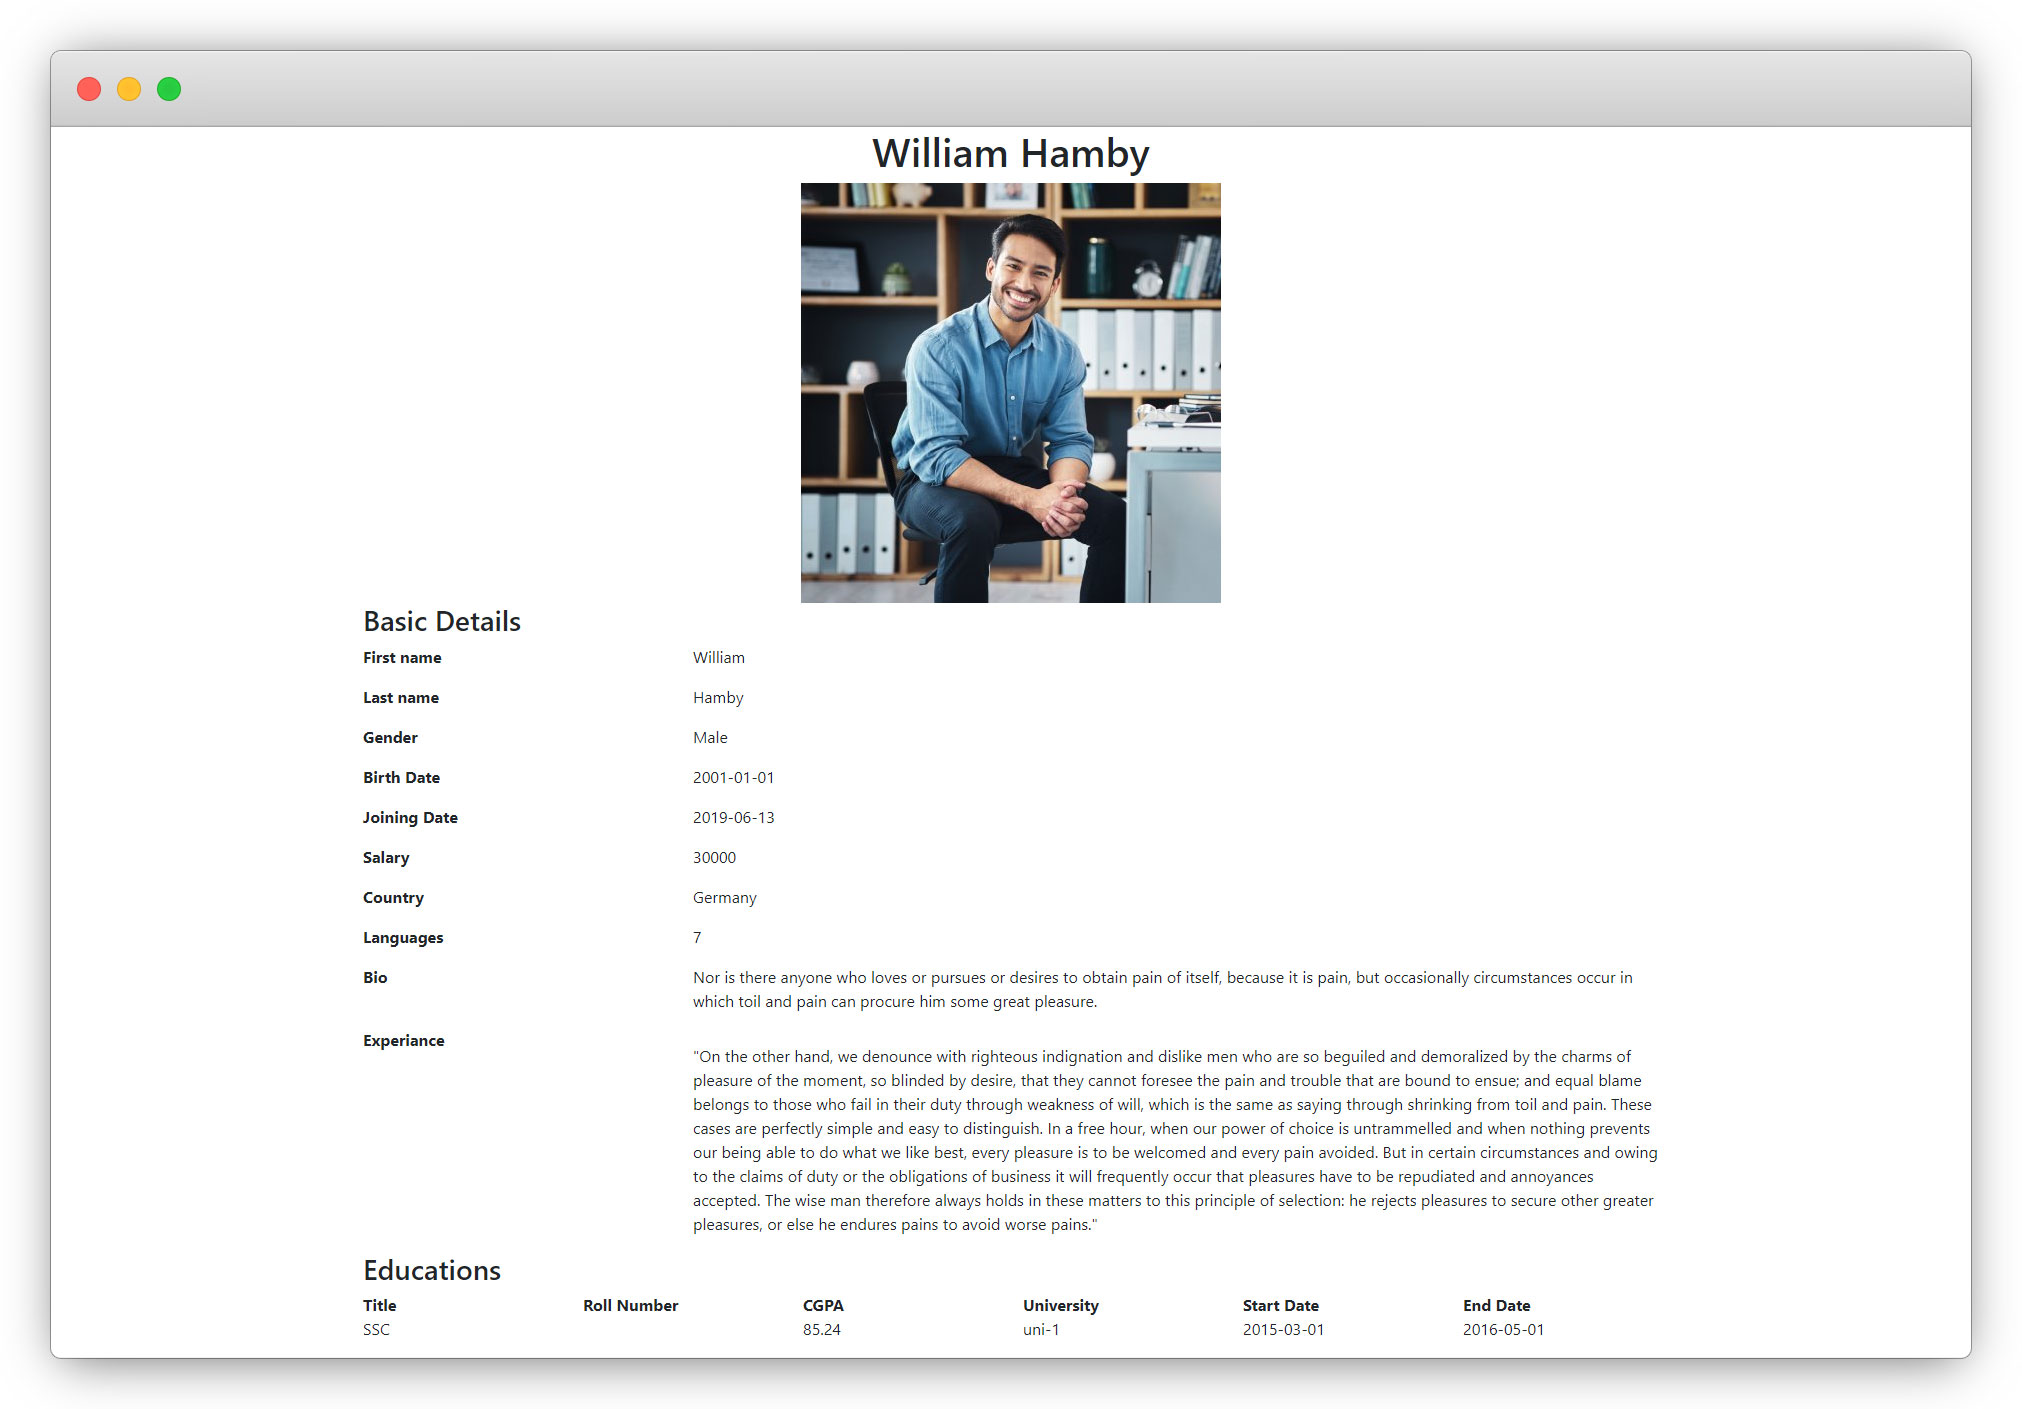
Save the template file, flush the cache, reload the page in the front-end, and click on the Read More button for any of the employees and you will be redirected to the details page of that particular employee as you can see in the below screenshot.
9. Now let’s make the pageUid to be dynamic in the file – employeeResourcesPrivateTemplatesEmployIndex.html. To make that pageUid dynamic, the Flexform should be added. In the below section, Flexform has been introduced.
Share


