
URL copied to clipboard

Create Container Element
31 views
__readtime__ Min
read
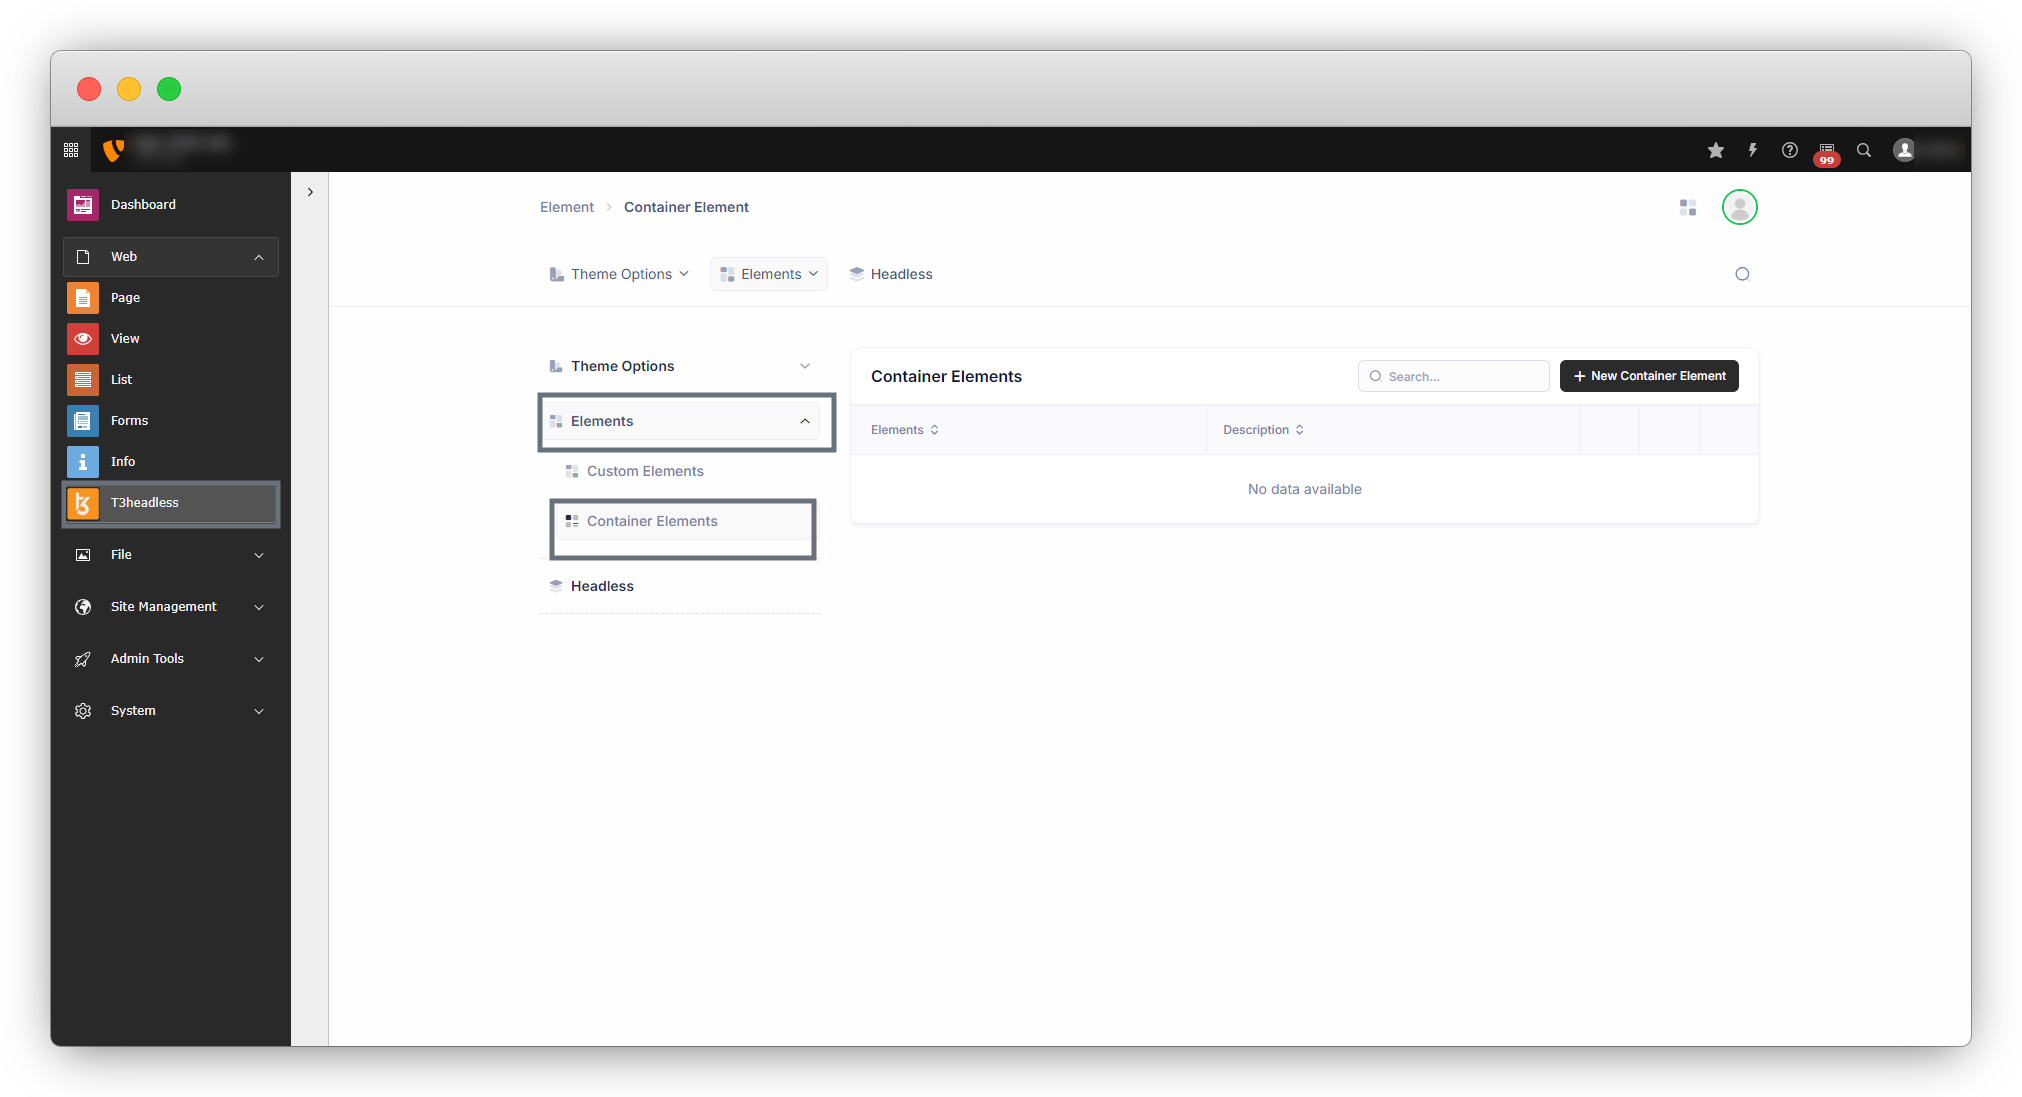
To create a container element, go to t3headless > Elements > Container Elements.
To Create a container element please follow the below steps:
1. Add Element: Create a container element by clicking on the button “New Container Element”.

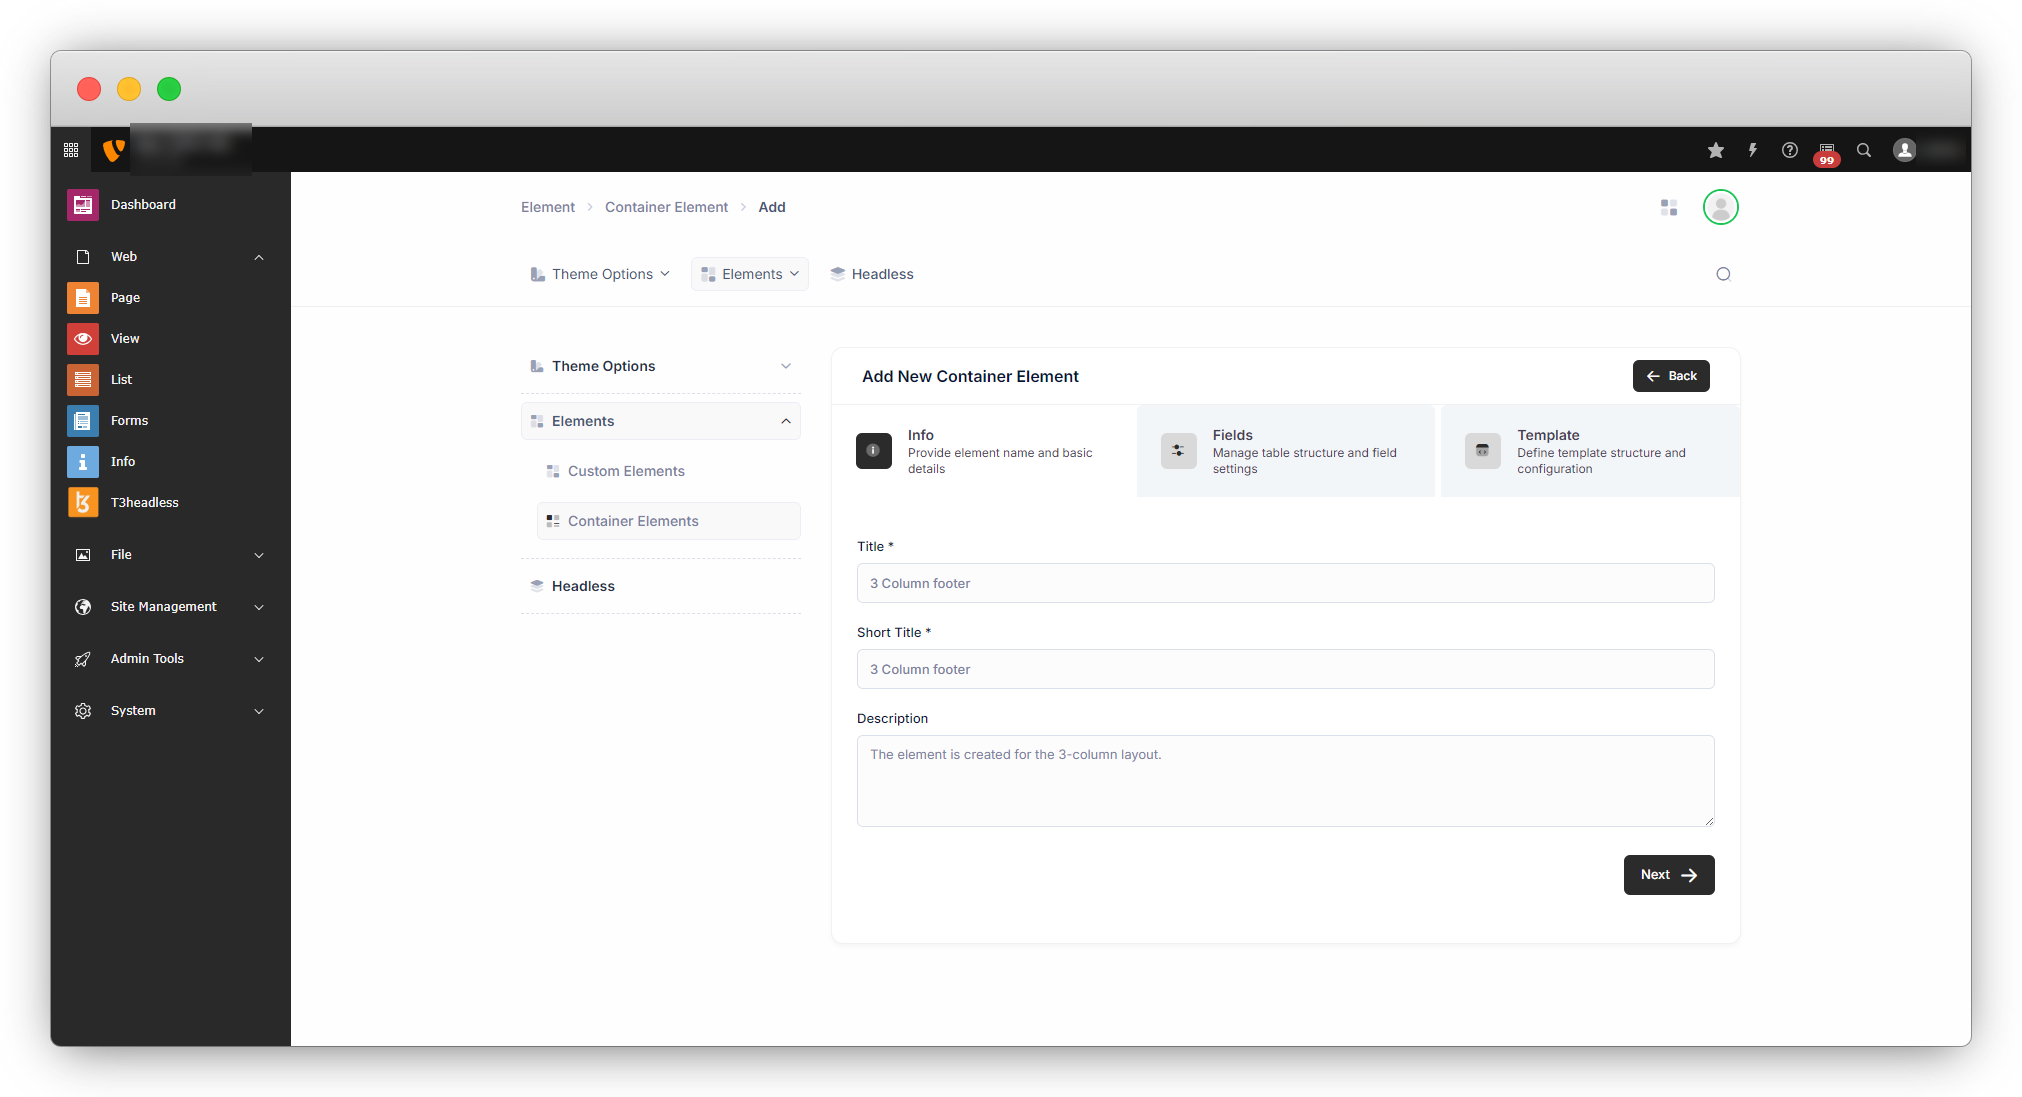
By clicking on the button, you will see 3 tabs there i) Info, ii) Fields, and iii) Template.
1. Info
The first tab that will open is “Info”, and you will have to add information like Title, Short Title, Description, etc., and click on the Next button.
2. Fields
1. You will be redirected to the “Fields” tab, and you can add a new column by clicking on the “+ Add Column” button.
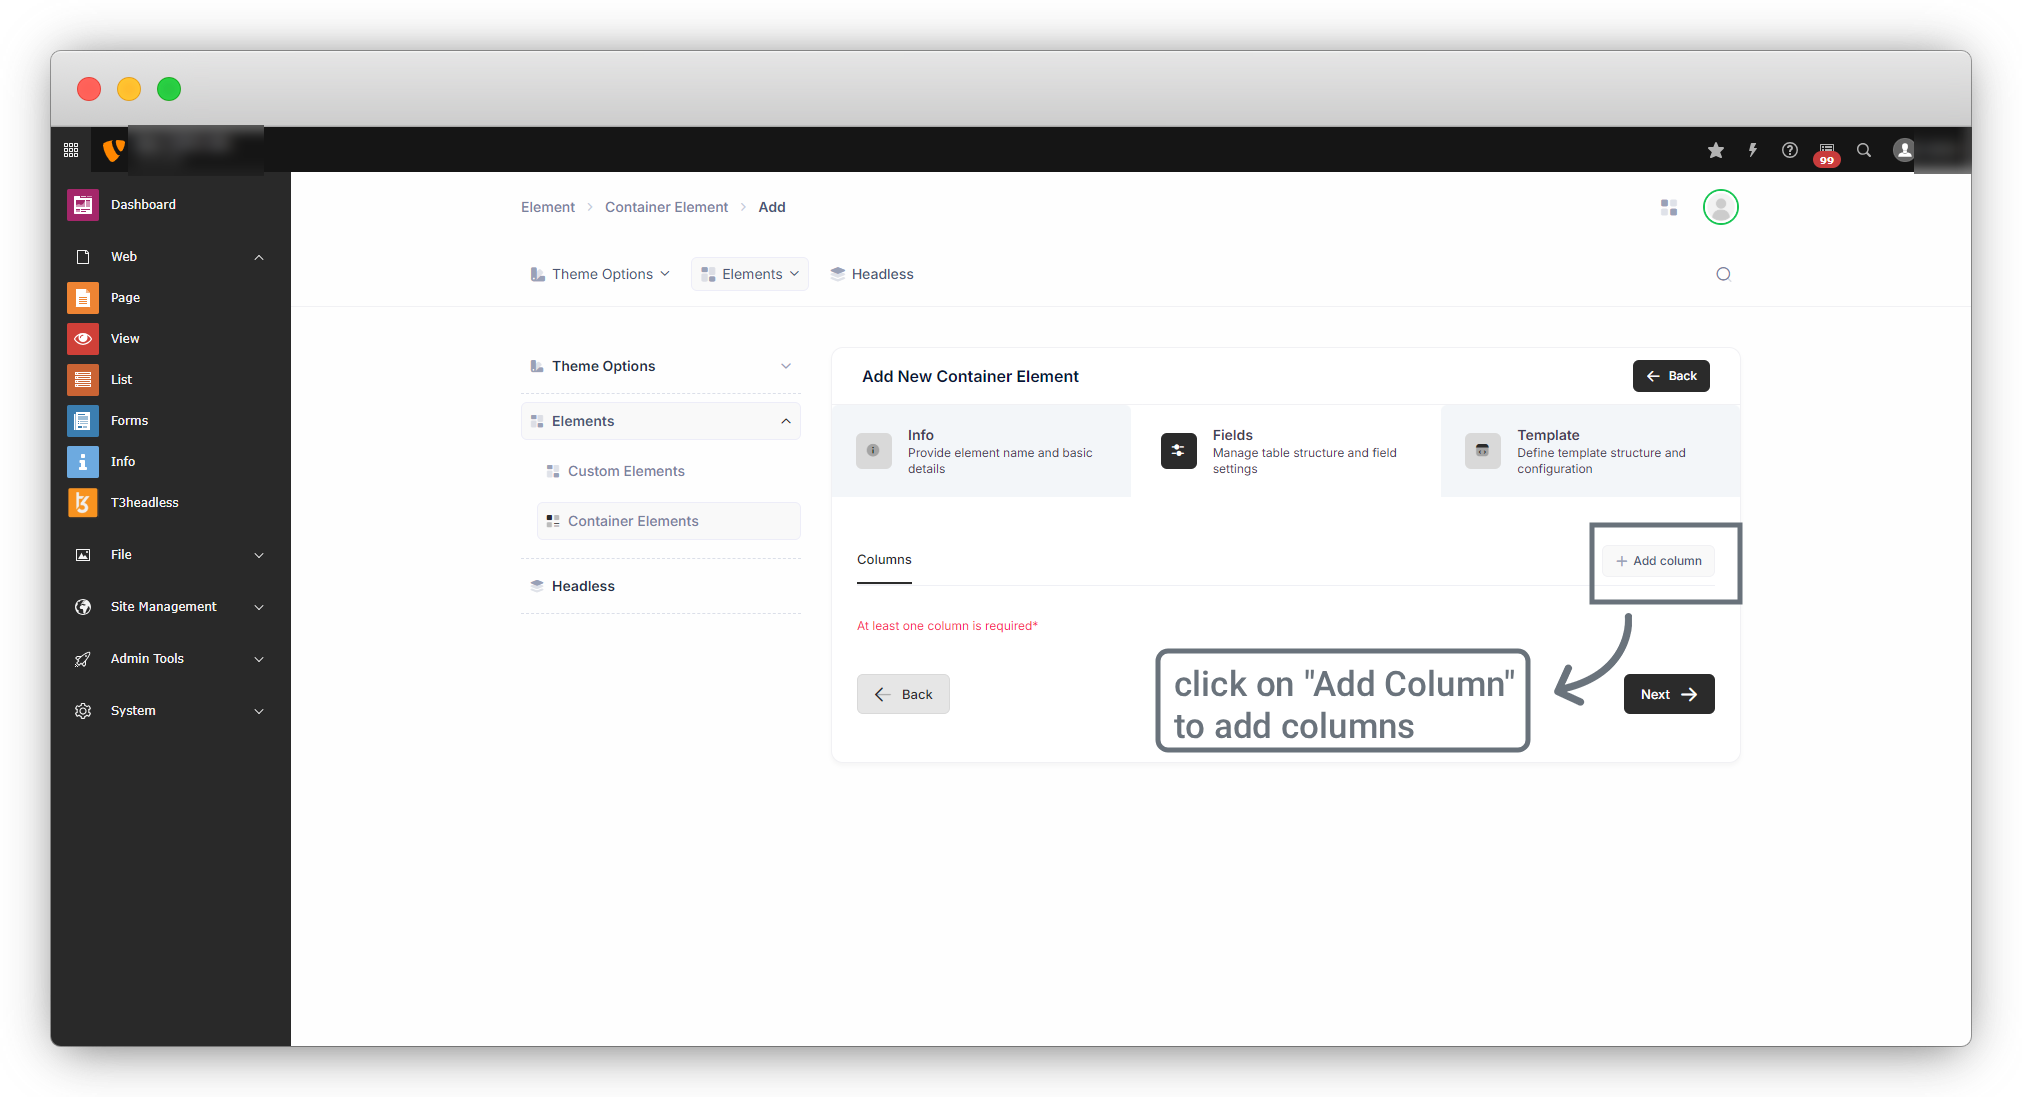
2. You can add a number of columns as per your requirement by clicking on the “+ Add Column” button, after adding the columns, add titles for the columns as seen in the screenshot below. You can delete the column from the delete icon placed at the far right.

3. Click on the “Next” button, and you will be redirected to the “Templates” tab.
3. Templates
1. You will see a basic template according to your fields/columns as seen in the screenshot below.
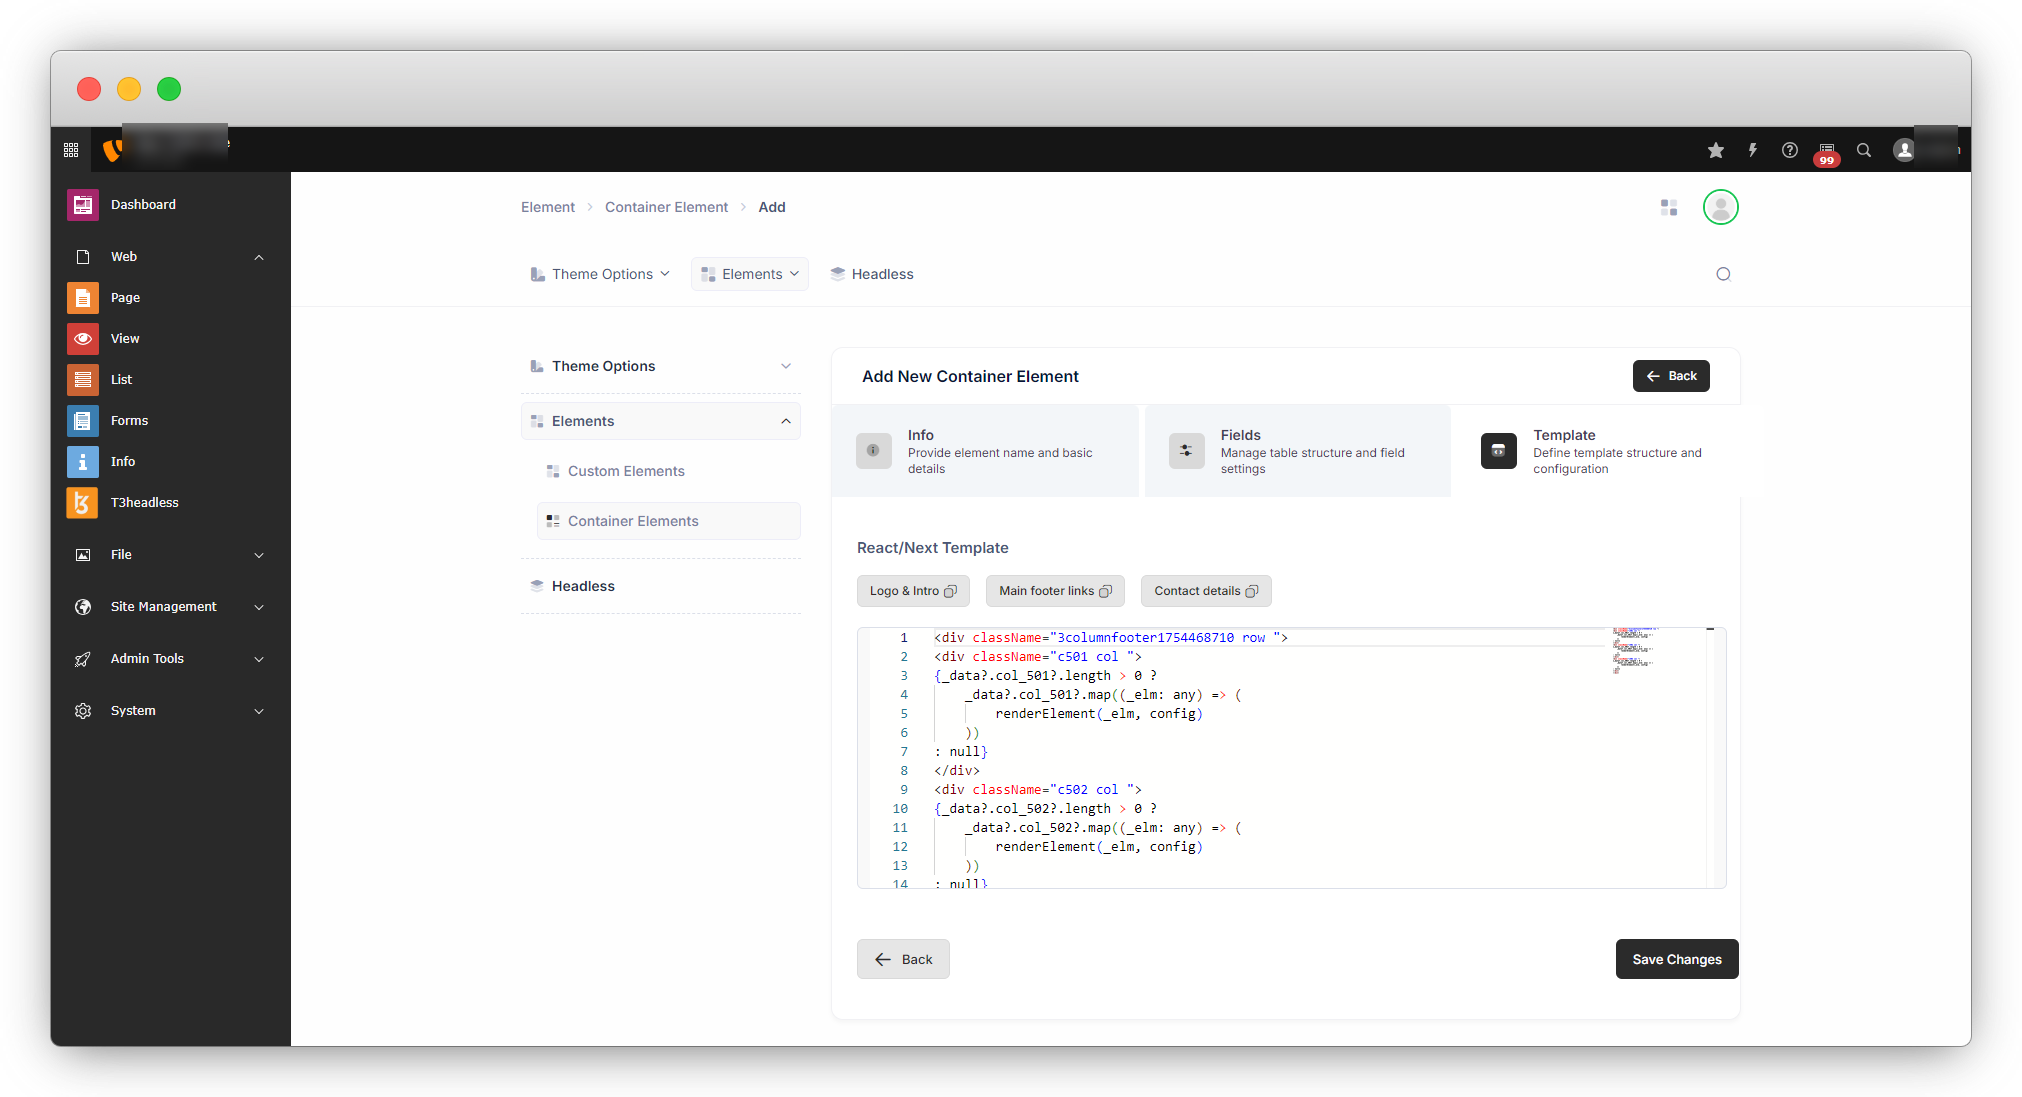
2. You can edit this template to add classes or any other attributes as seen in the screenshot below, but you should be careful while editing the template as it is the React/Next Template, not just a simple HTML, for example, we have to use the “className” attribute instead of “class”.

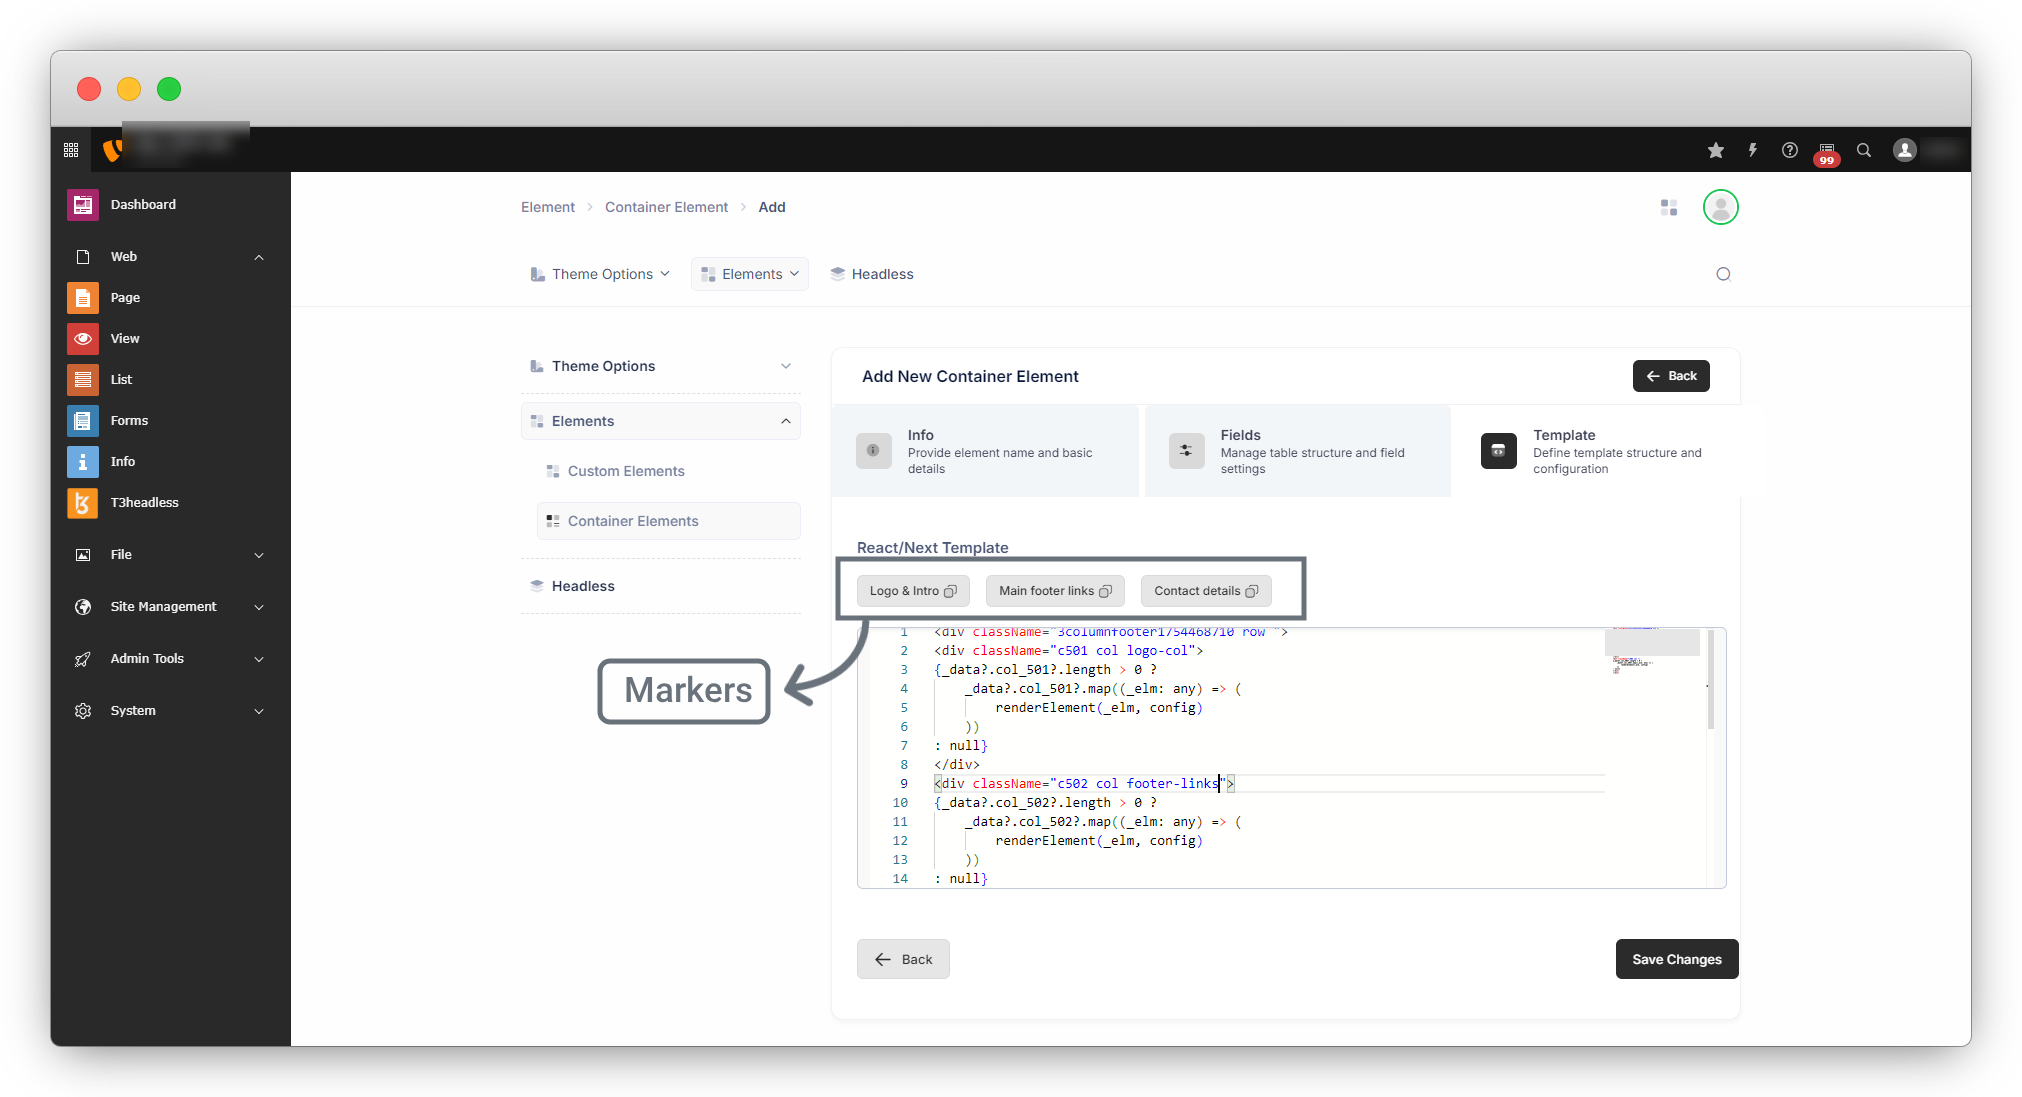
3. Markers
3.1. Above the template code, there are some markers from where you can copy the code for the specific field. E.g. If you want to add a completely new custom template, then you can use these markers to copy the code and paste it into your new template. You can try by just click on the marker and you will get the message “Marker Copied! Paste where you want to add”.
4. After clicking on the “Save Changes” button the template will be saved and you will see the element in the list of the element.

Share


