
URL copied to clipboard

Perform actions on the container Element
11 views
__readtime__ Min
read
You can perform some actions on the element. You can edit the element, delete the element, and also you can edit the template file directly.
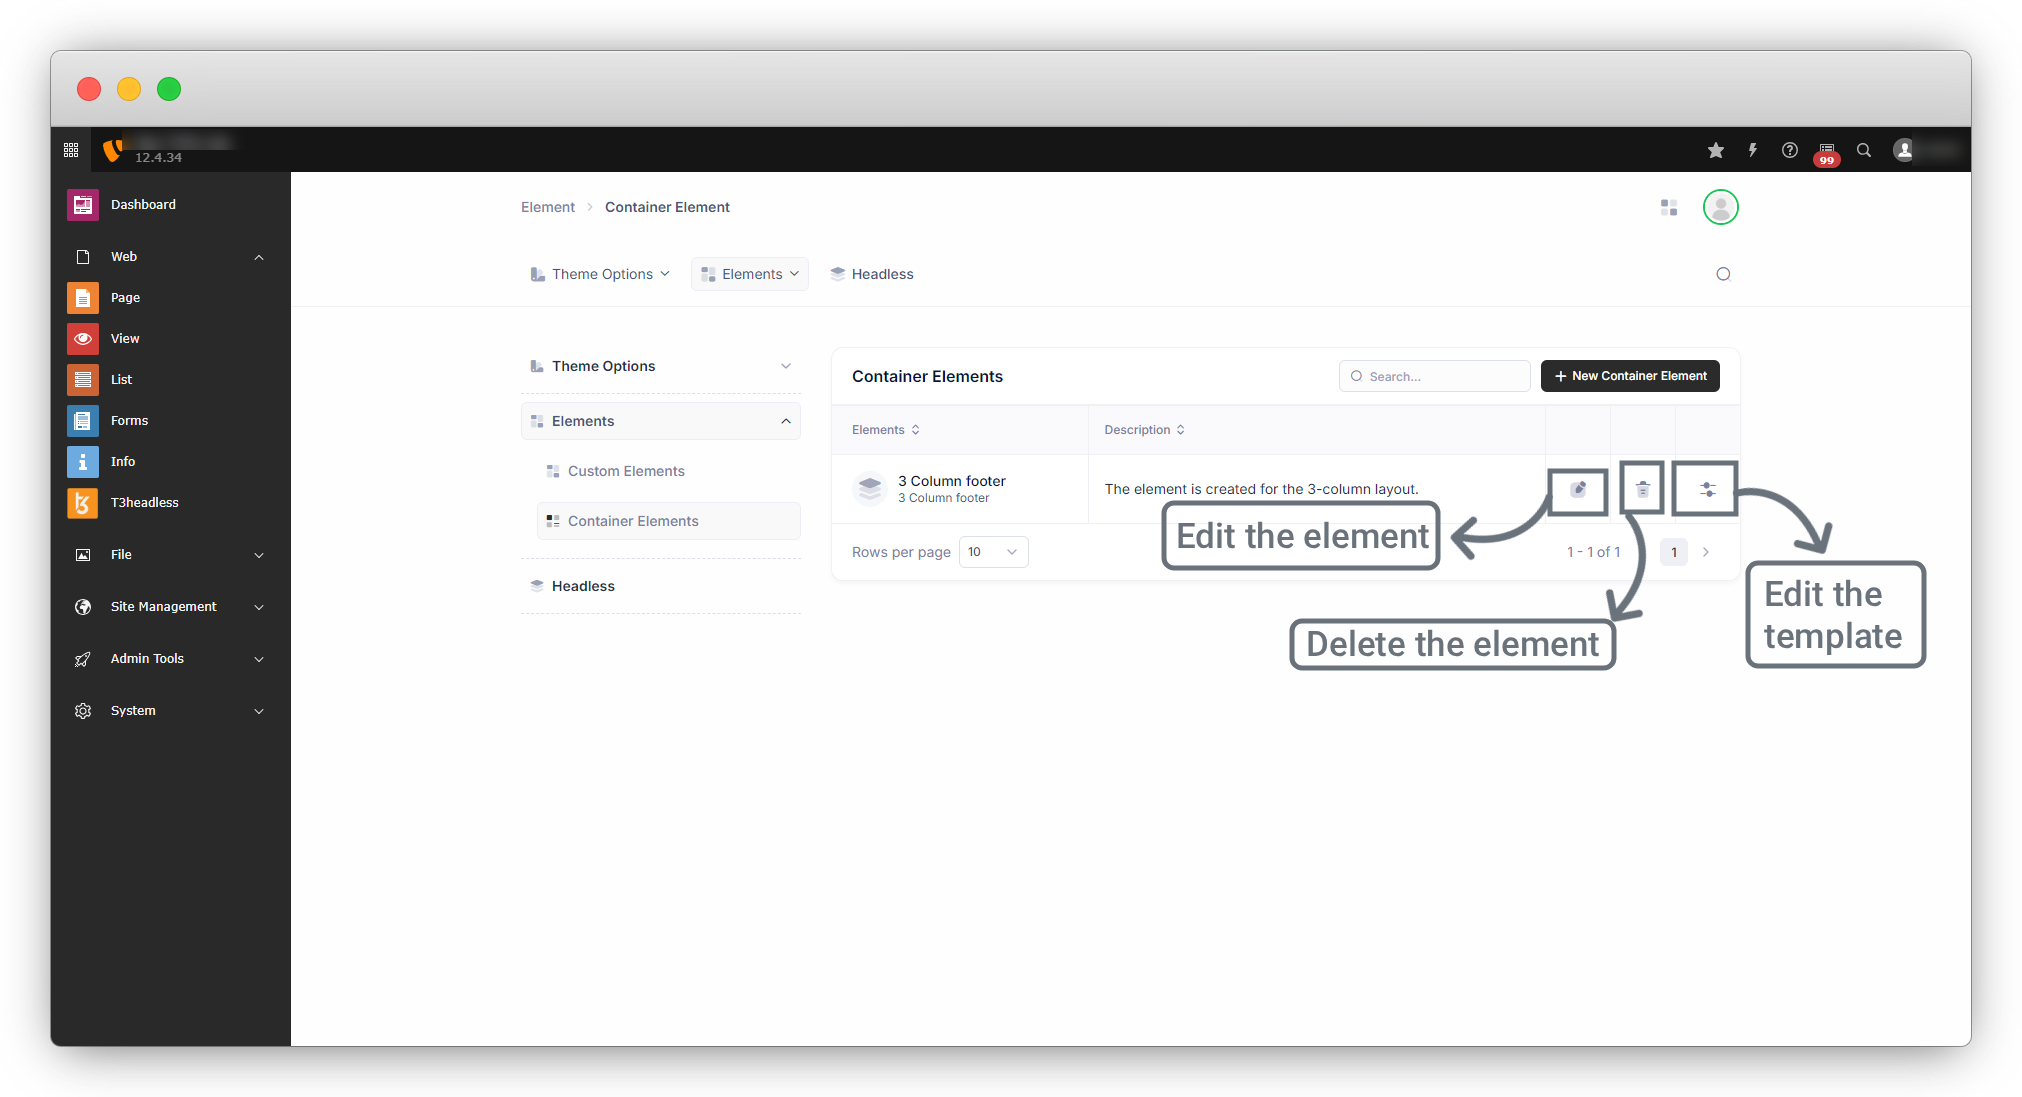
1. Edit the element:
1. After creating the element, you can edit the element you have added.
2. Click on the edit icon to edit the element as seen in the above screenshot.
3. You can Edit info, fields, and template code by this.
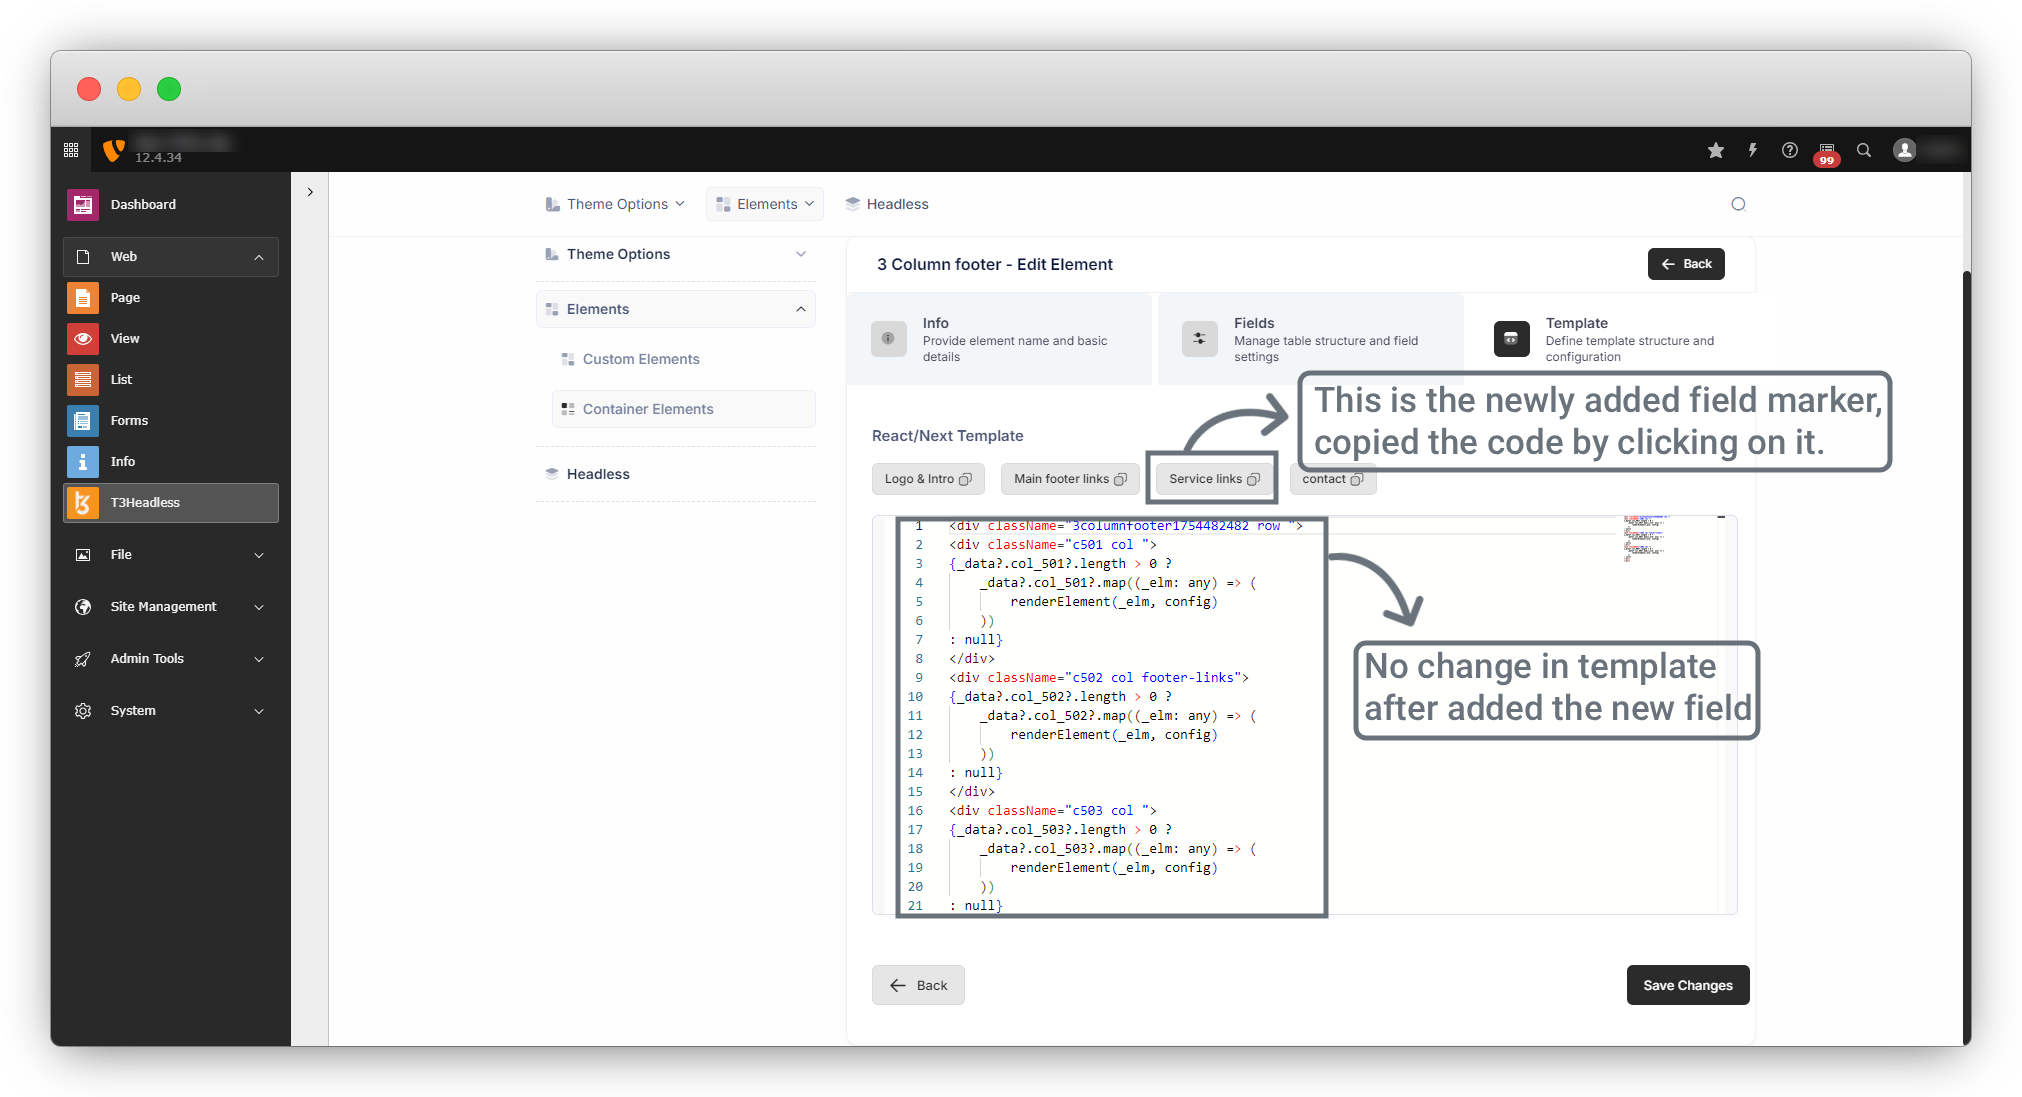
4. Here one important thing to note is; that if you have done your templating already and now you want to add a new field in your element, then you can add the field easily by edit the element, and it will not affect your template. But after adding a new field when you press on the “Next” button you will see that your template is as it is, but you will get a marker for the new field, you can copy the new field code by clicking on that marker and can paste in your template. Below is an example of template editing:
4.1. When you edit any element that is already in use, you will see a dialogue like this:
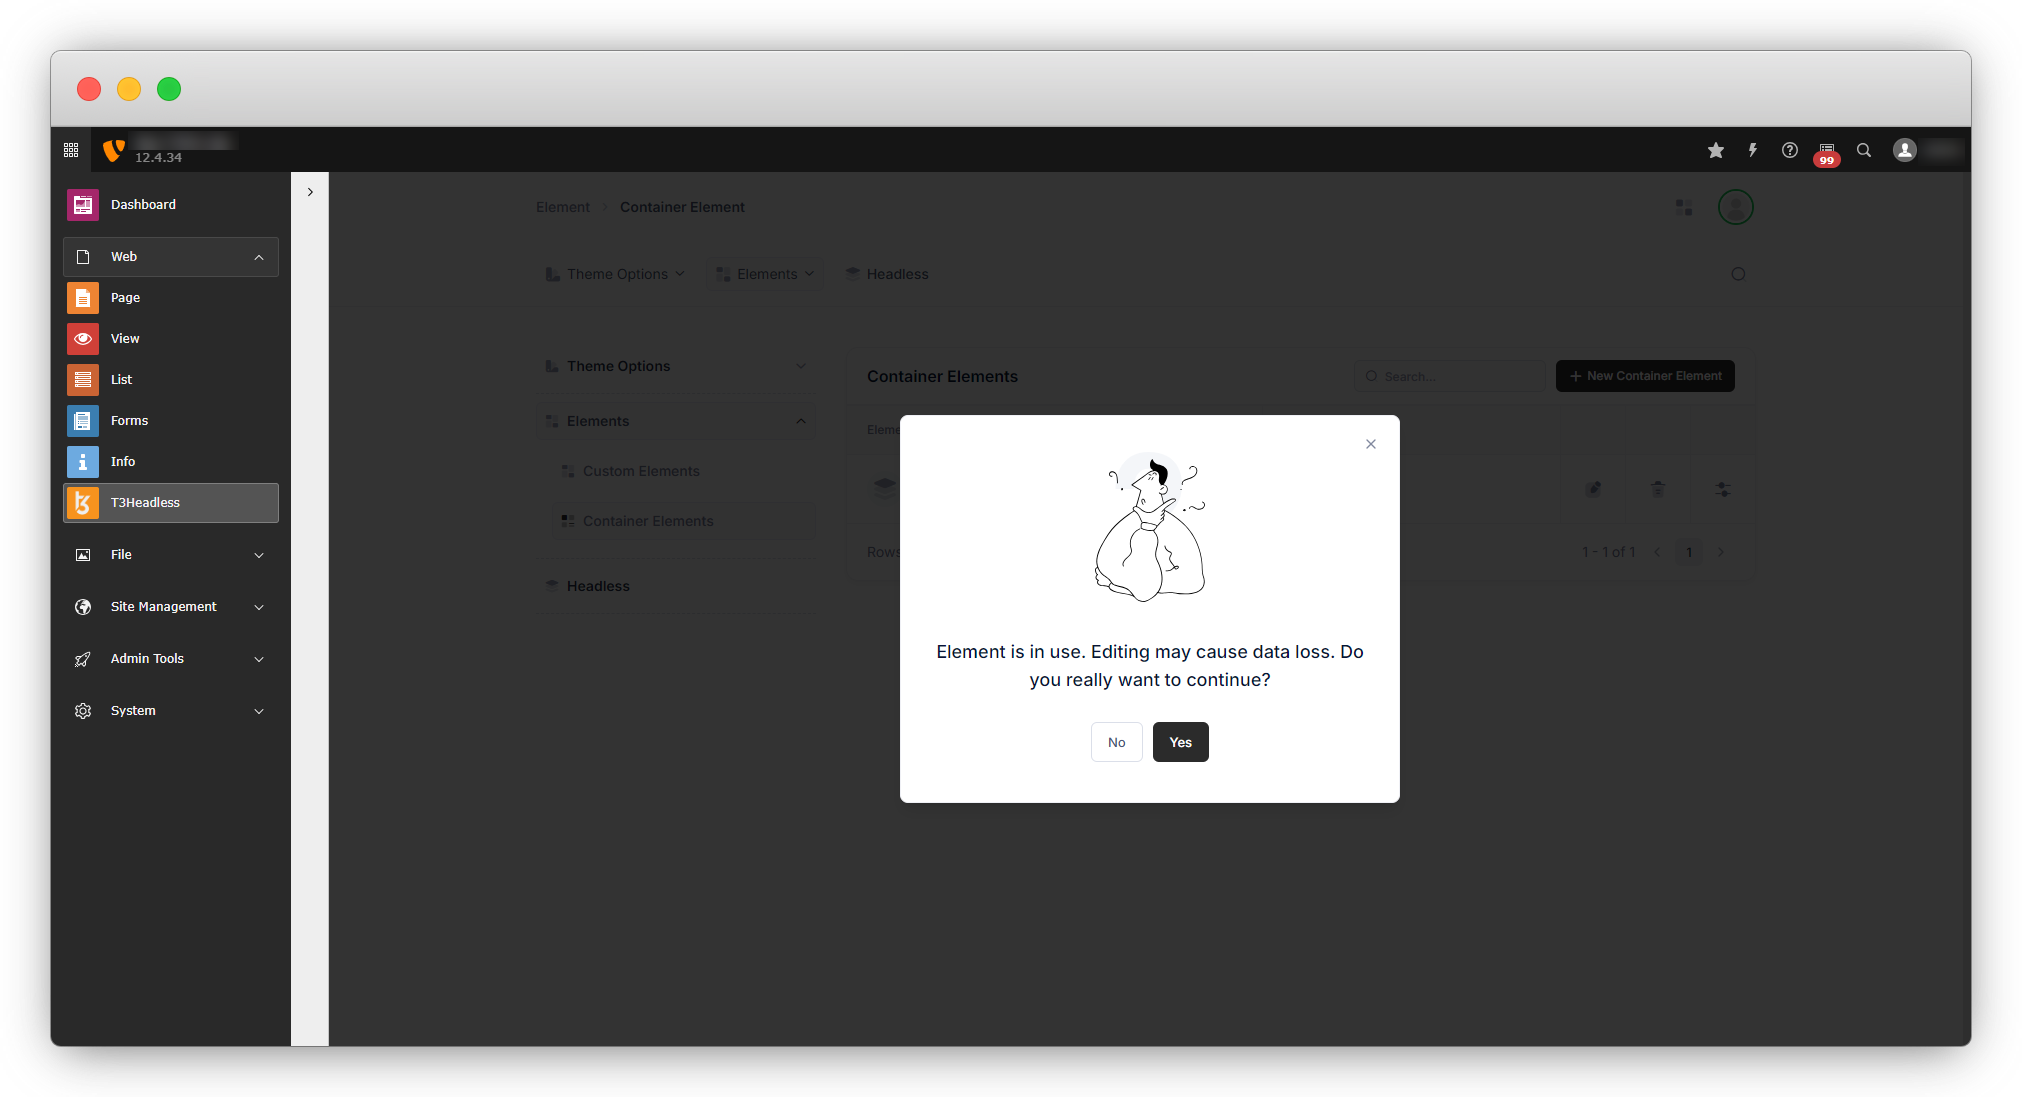
4.2. Go ahead by clicking on Yes, and you will see all the 3 tabs you saw at the time of element creation which are info, field, and template.
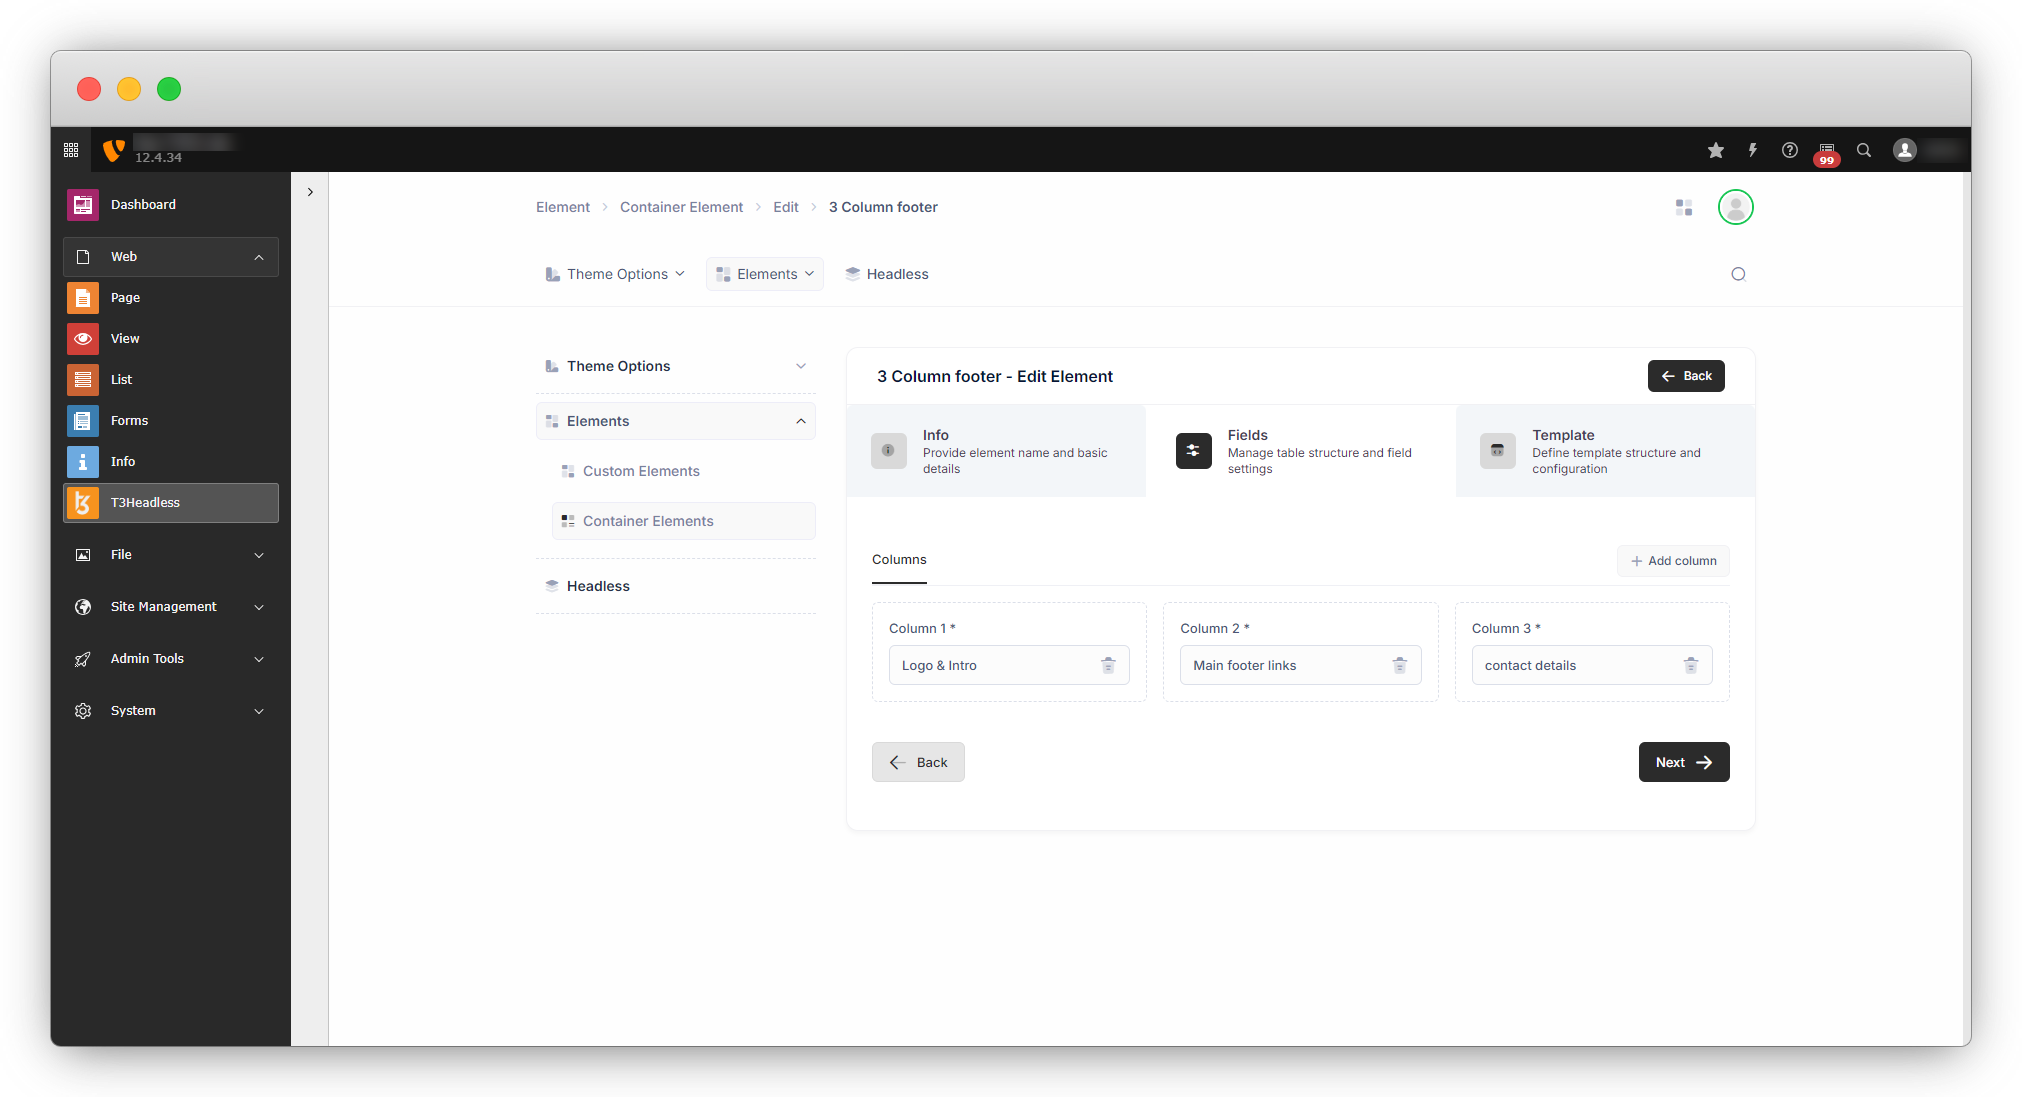
4.3. If you want to edit the title or short title or description, you can edit them and click on the “Next” button.
4.4. You will see the fields/columns we added at the time of the element creation.
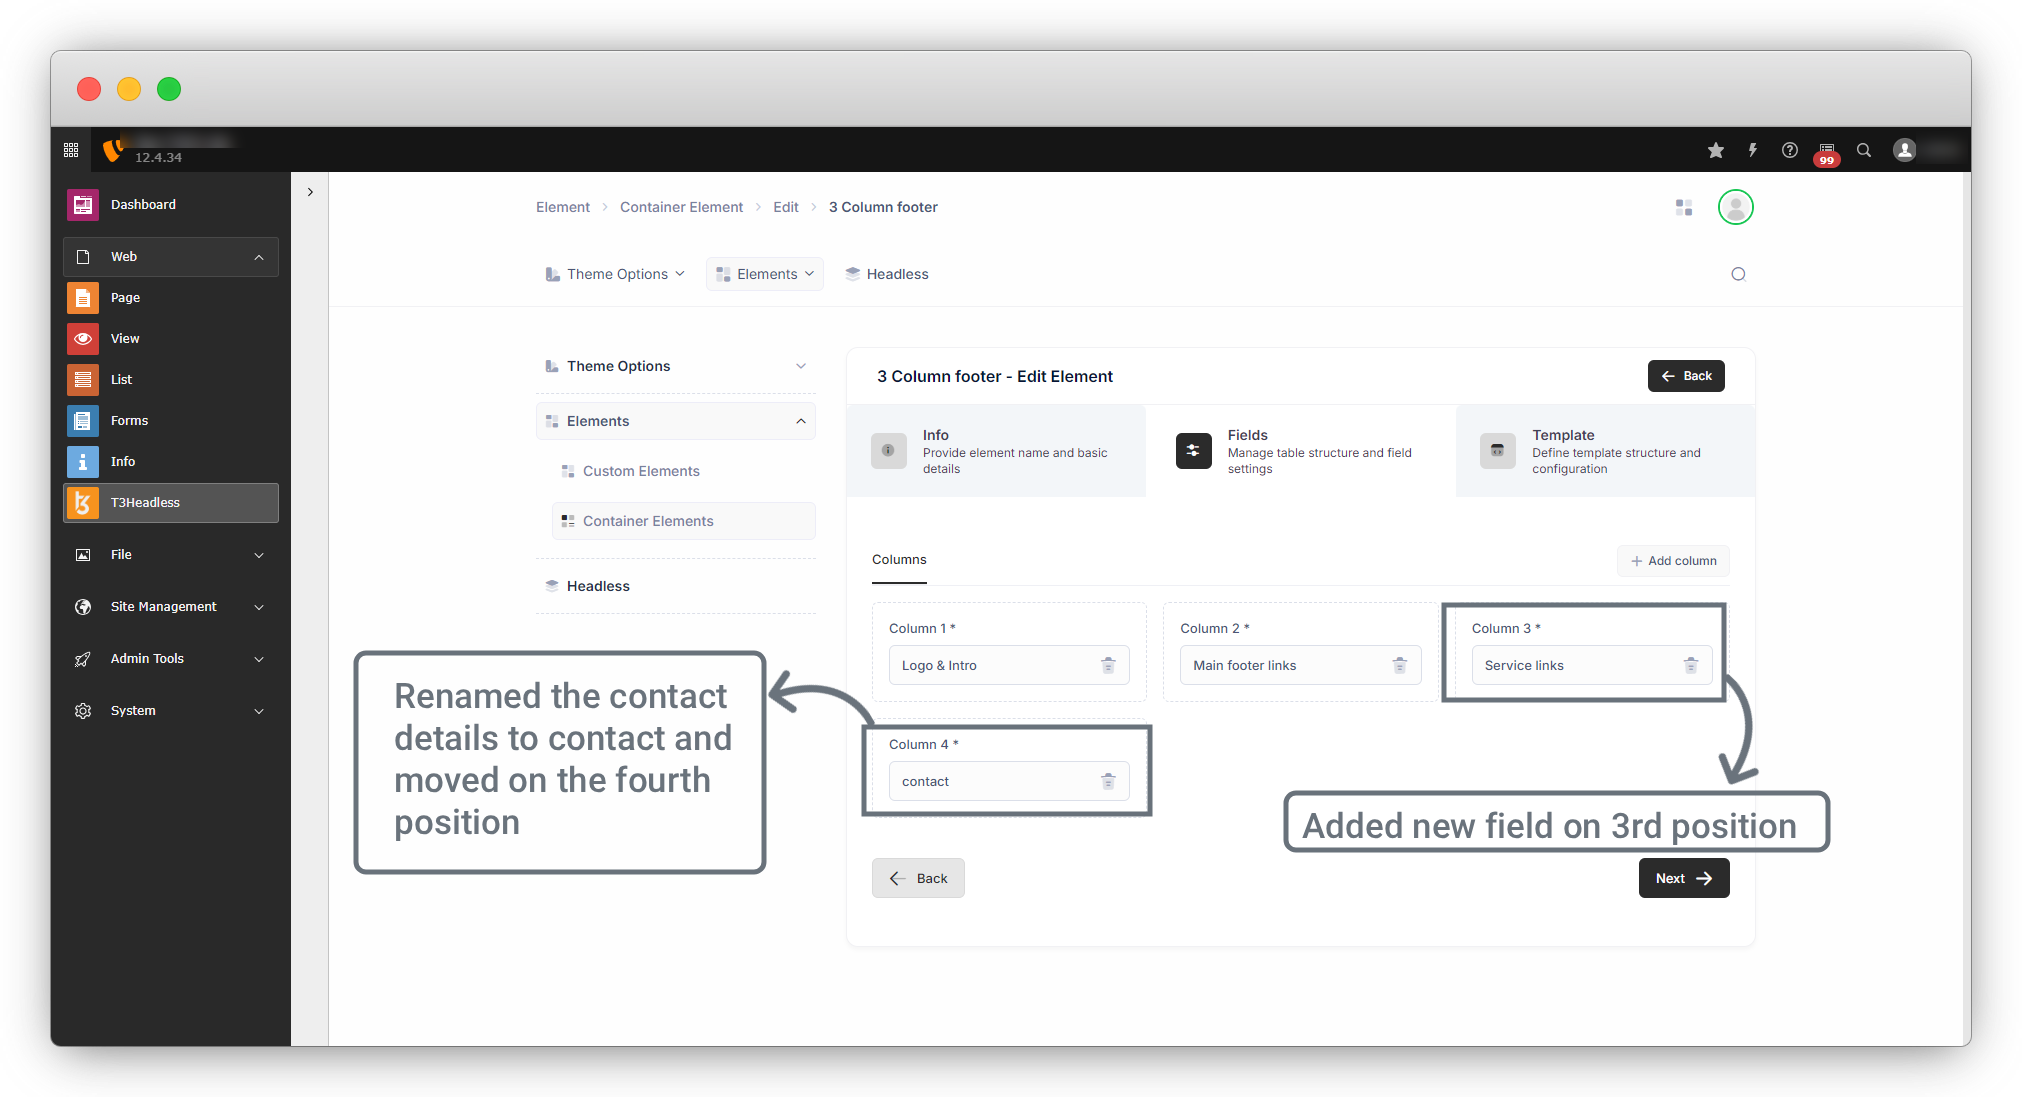
4.5. Now let’s add one new column named “Service links” and replace it with the “Contact Details” column and edit the name of the “Contact details” column too.
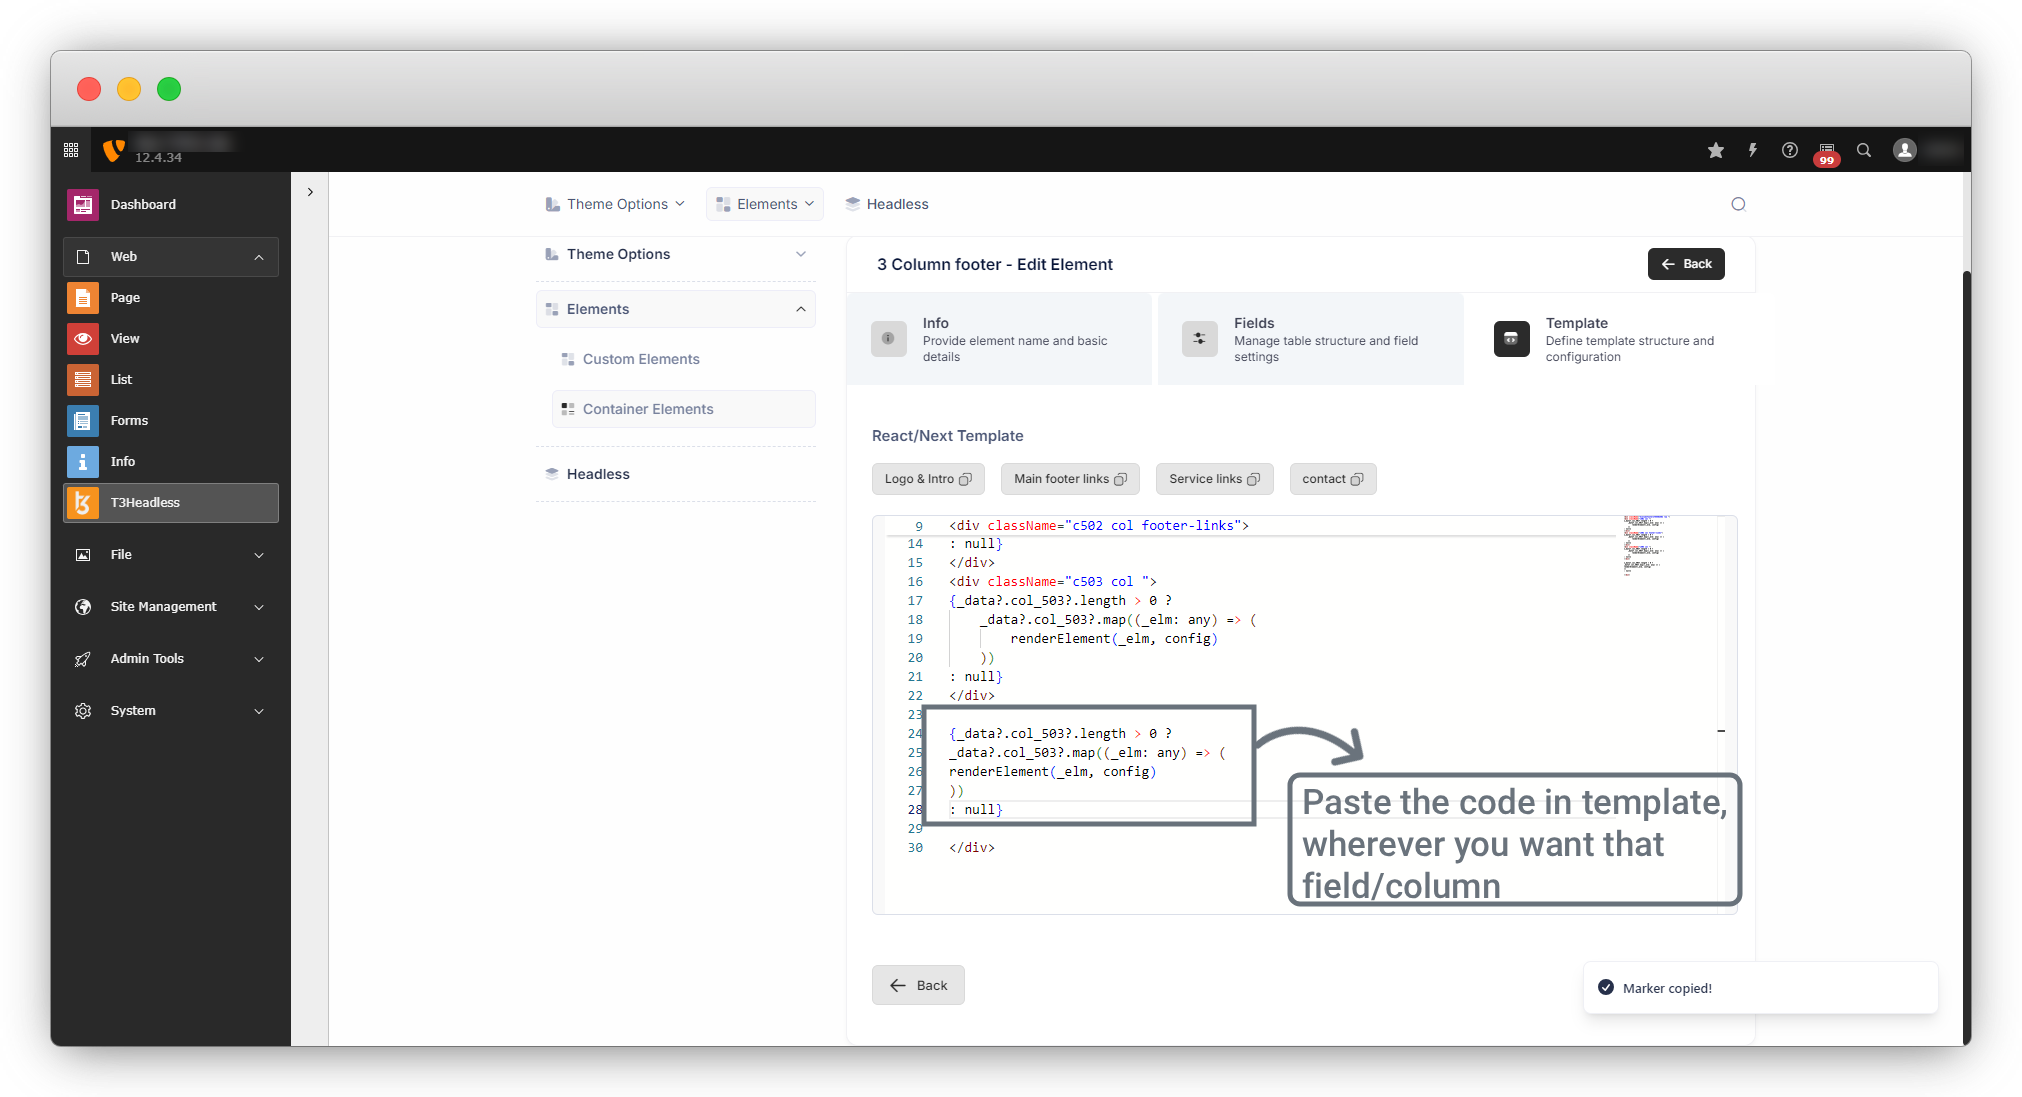
4.6. After clicking on the Next button the template below will open, there are no updates in the template file as you can see, but there is one marker on top, let’s copy the code of the new field by clicking on that marker and then set it in that template.
4.7. Now after copying the code, we can paste the code into the template.
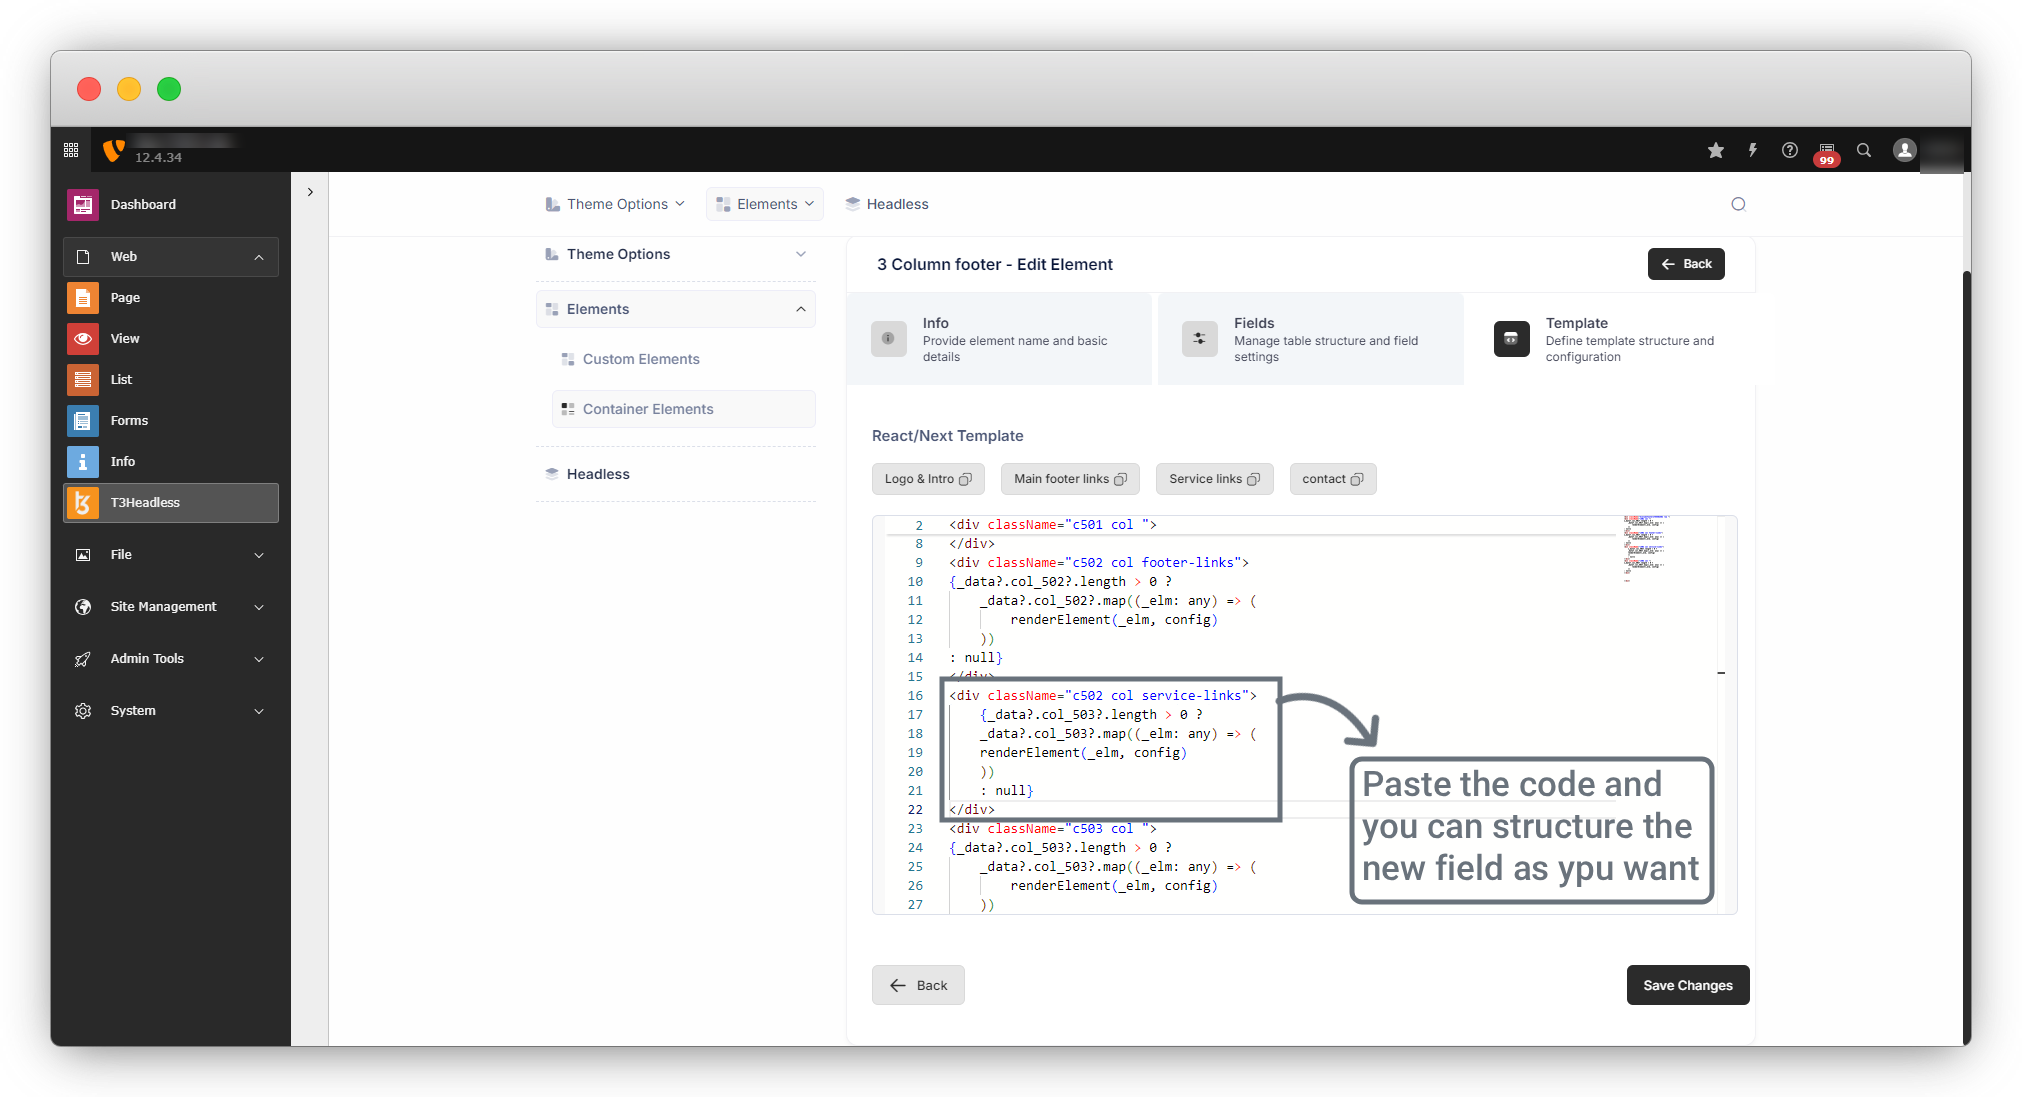
4.8. You can structure the code well, and then click on the “Save Changes” button to save the template
2. Edit the container template
1. If you want to just edit the template and not add any new field, then you can click on the 3rd and the last icon and you will be redirected to the template directly. You can edit the template and save it.
2. After edit the template, make sure to run the below command to synchronize the data with the headless theme.
Command : node src/themebuilder.js
3. Delete the element
1. If you want to delete any container element, you can delete it by clicking the 2nd icon which is a delete icon.
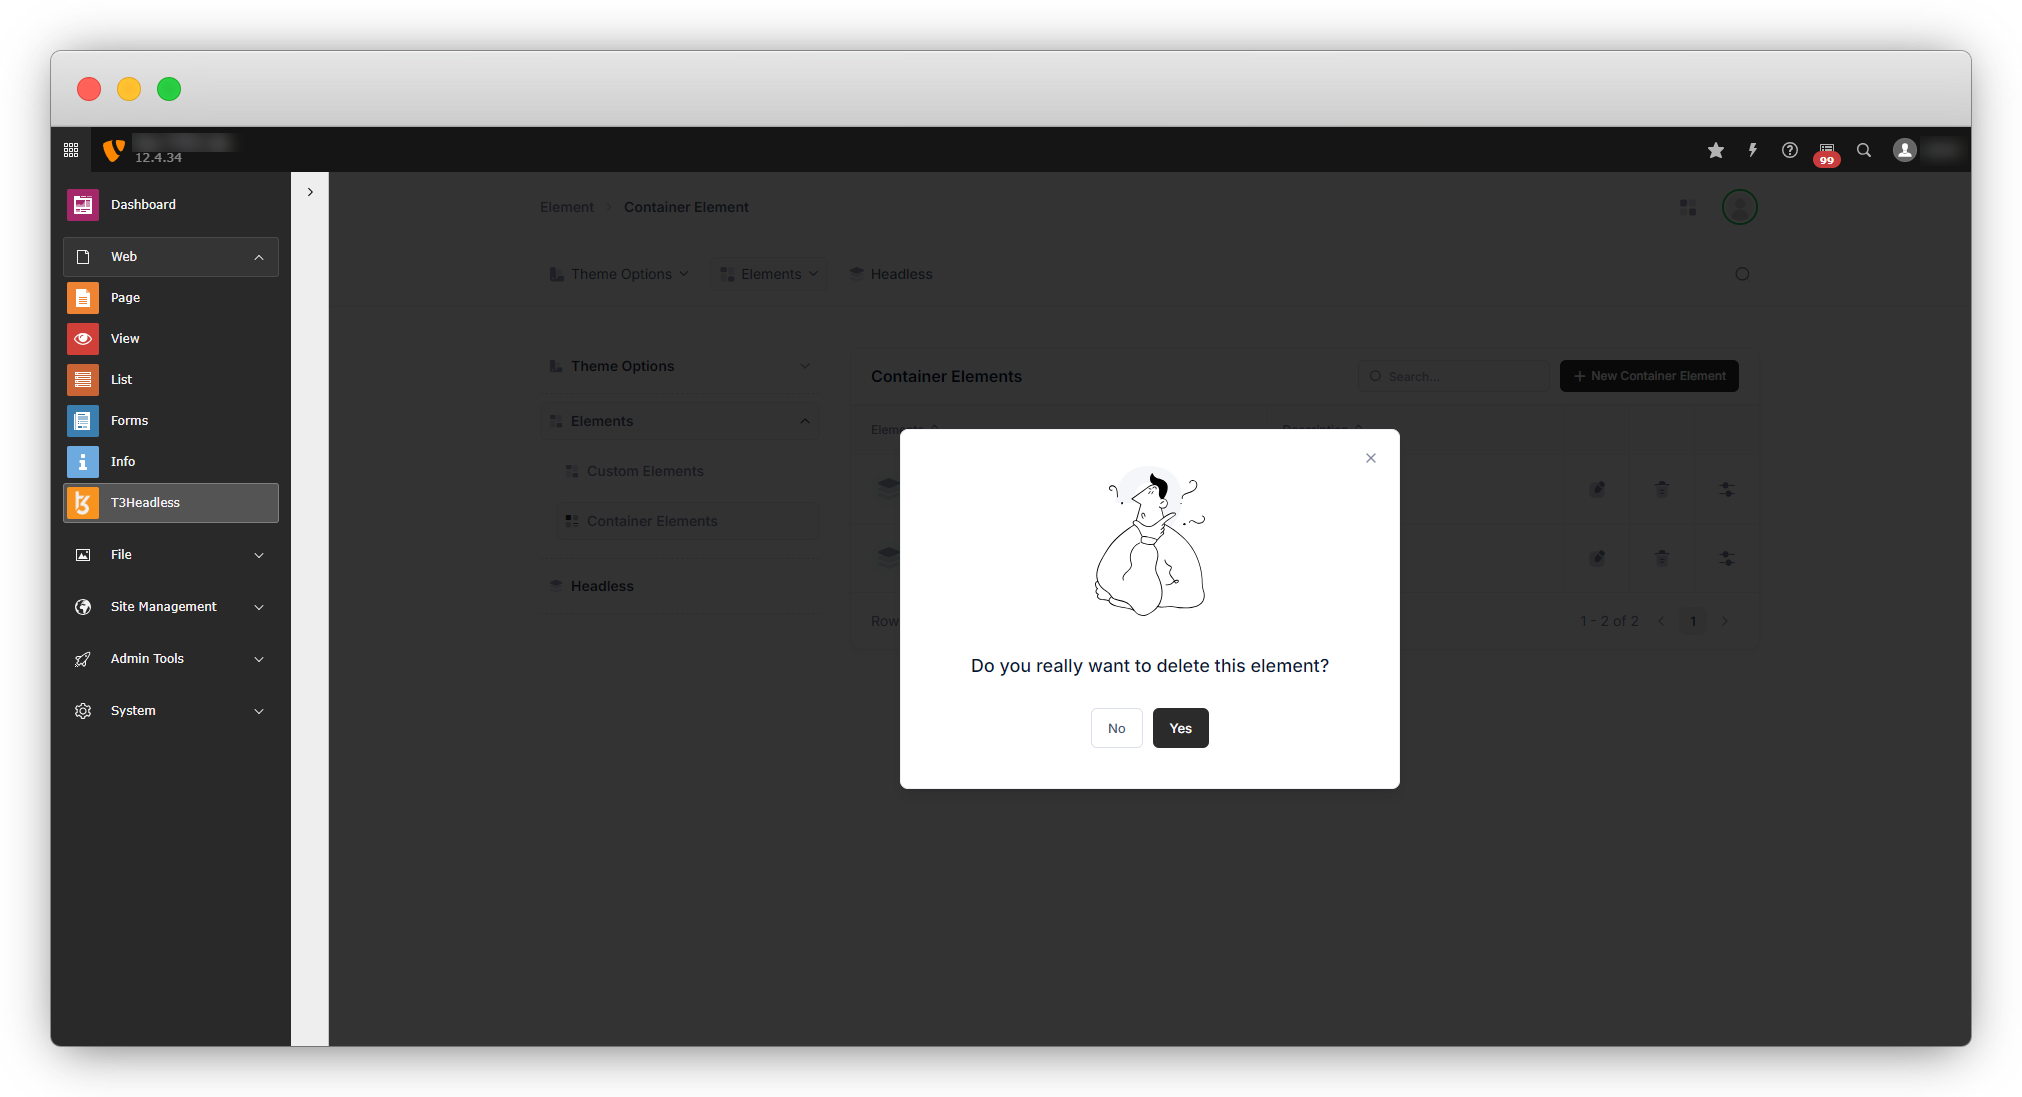
2. If you are going to delete any element that is already in use then you will get a warning like this.

3. But if you are going to delete any element that is not in use then you will get a dialogue with just a confirmation message.
4. And when you will give confirmation, the element will be deleted and you will see the message on the screen for “Element Deleted!!”
Share


