
URL copied to clipboard

Create page for Frontend view
4 views
__readtime__ Min
read
You need to create two pages to display news on the frontend:
- News List
- News Details
Let’s look at them one by one.
Create Page for “News List”
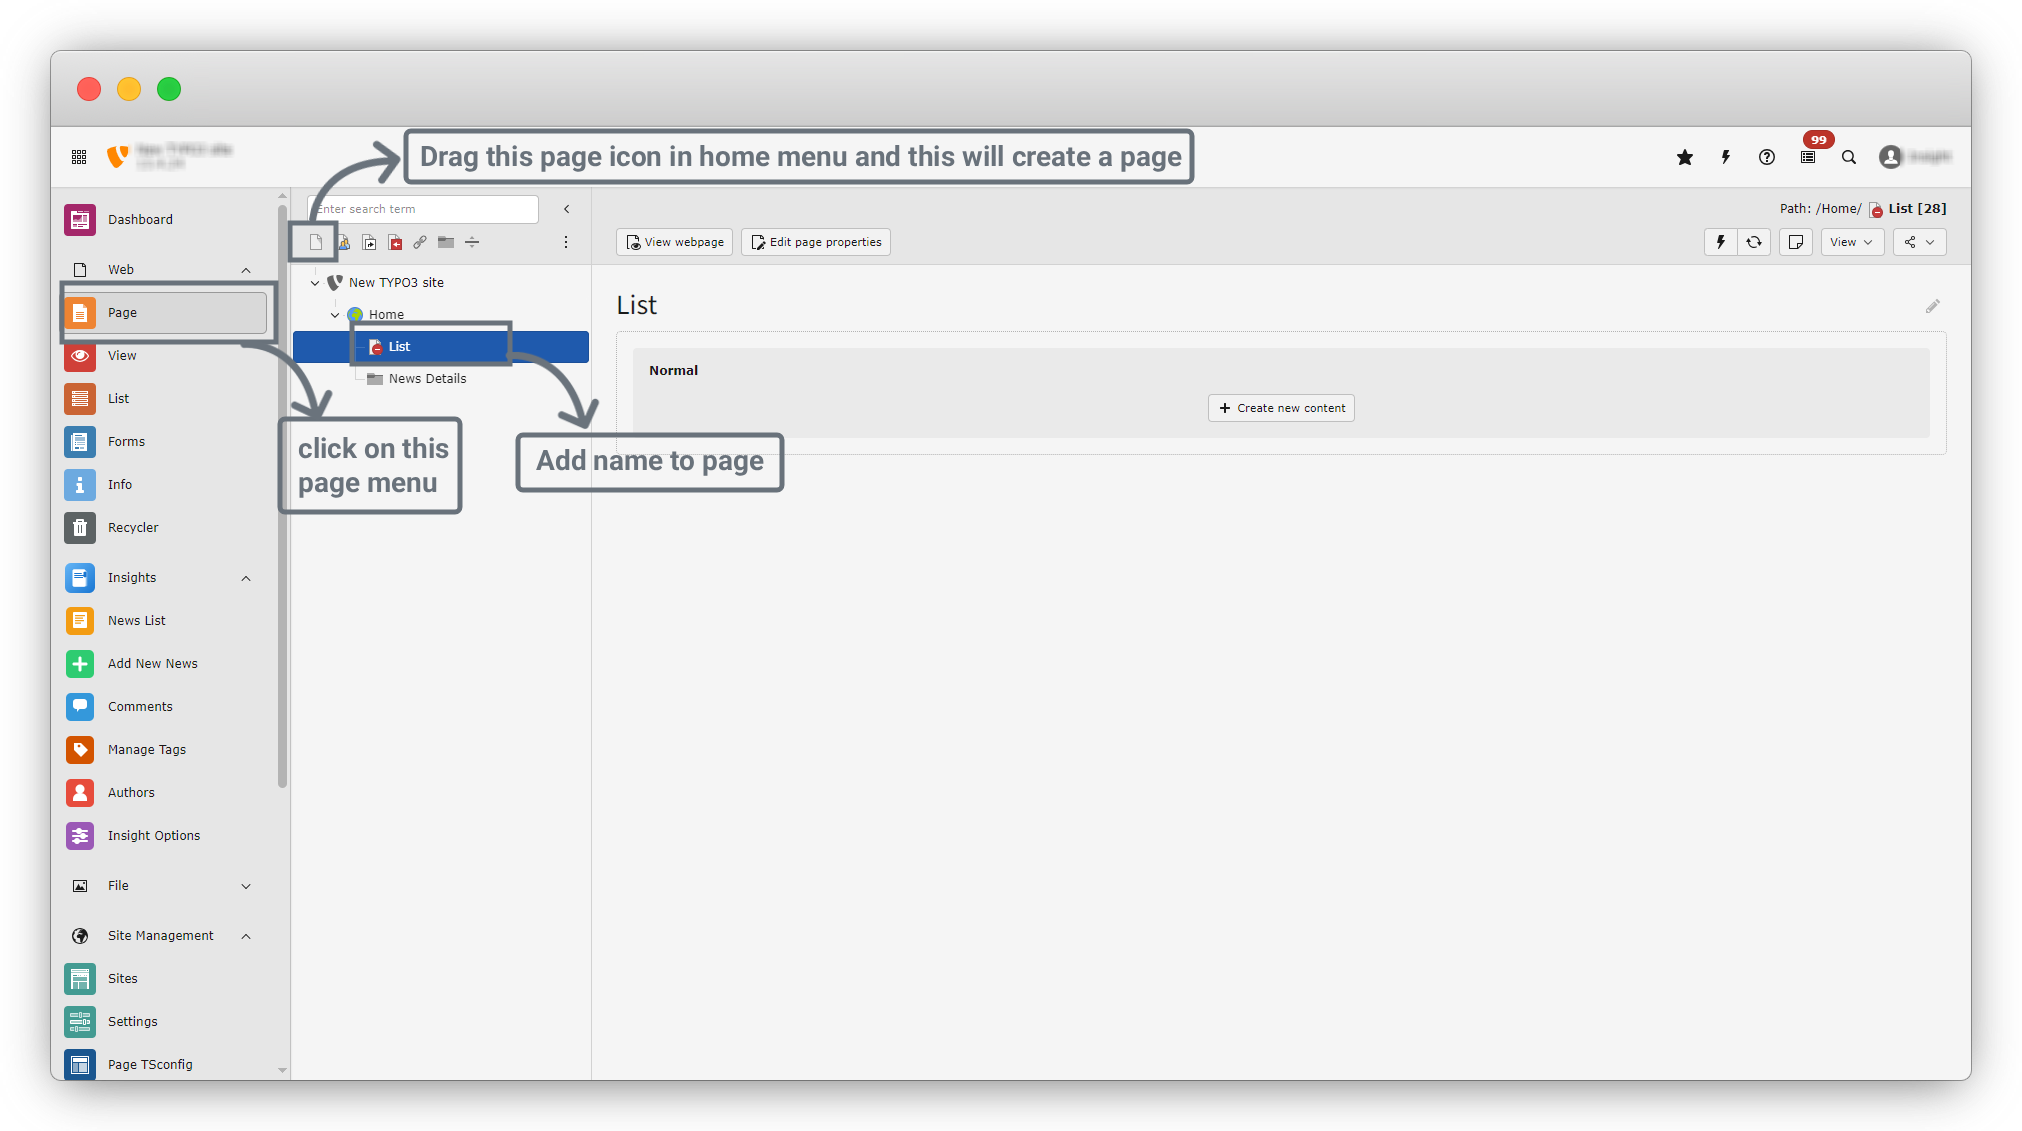
1. On the left sidebar, you will see the “Page” option. Click on Page.
2. Then, click on the page icon located on the left side below the search bar. Drag that icon and drop it inside the Home page. This will create a new page.
3. Rename the page to “List”. The List page is now created. See the screenshot below.
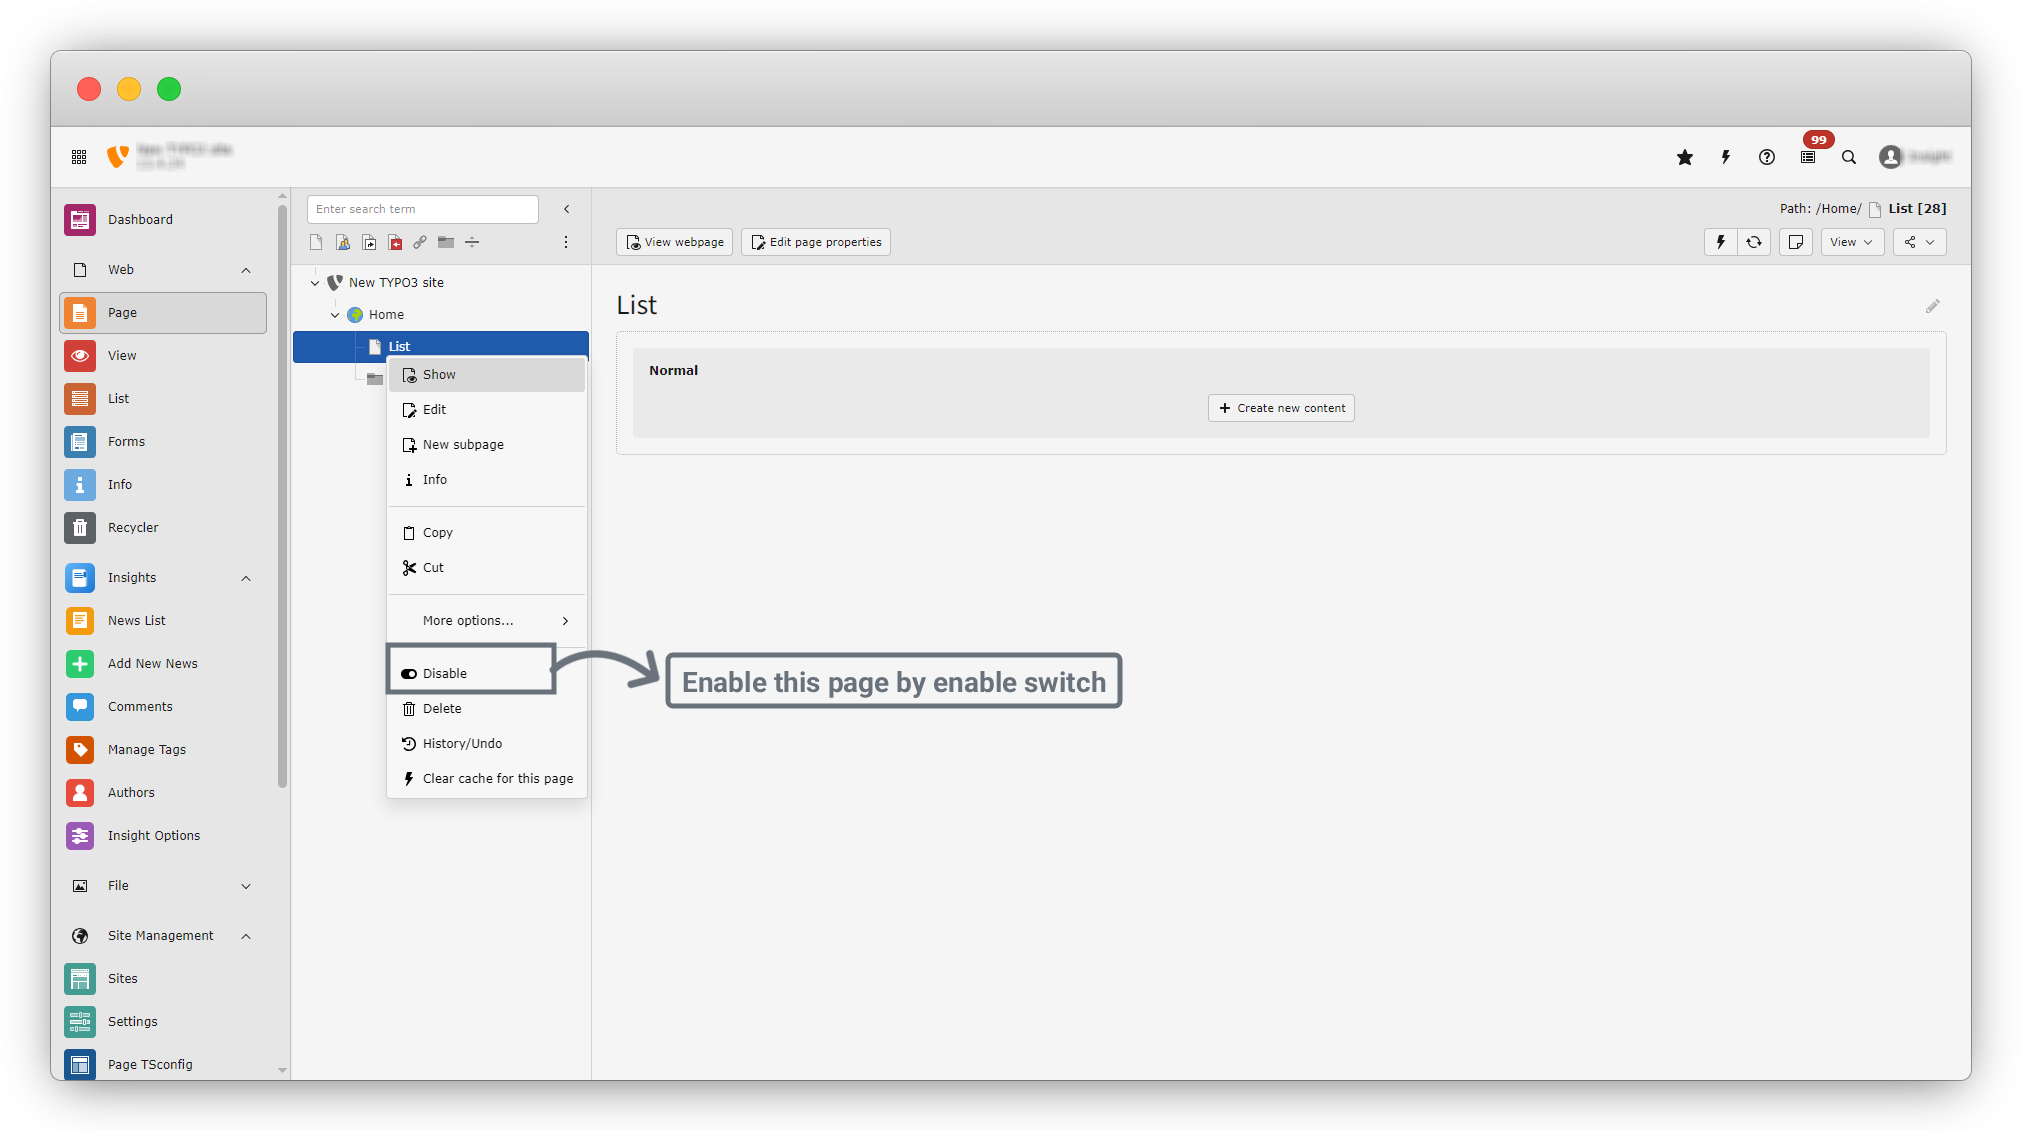
4. Now, right-click on the page and select Enable. If the page is disabled, it will not be displayed on the frontend.
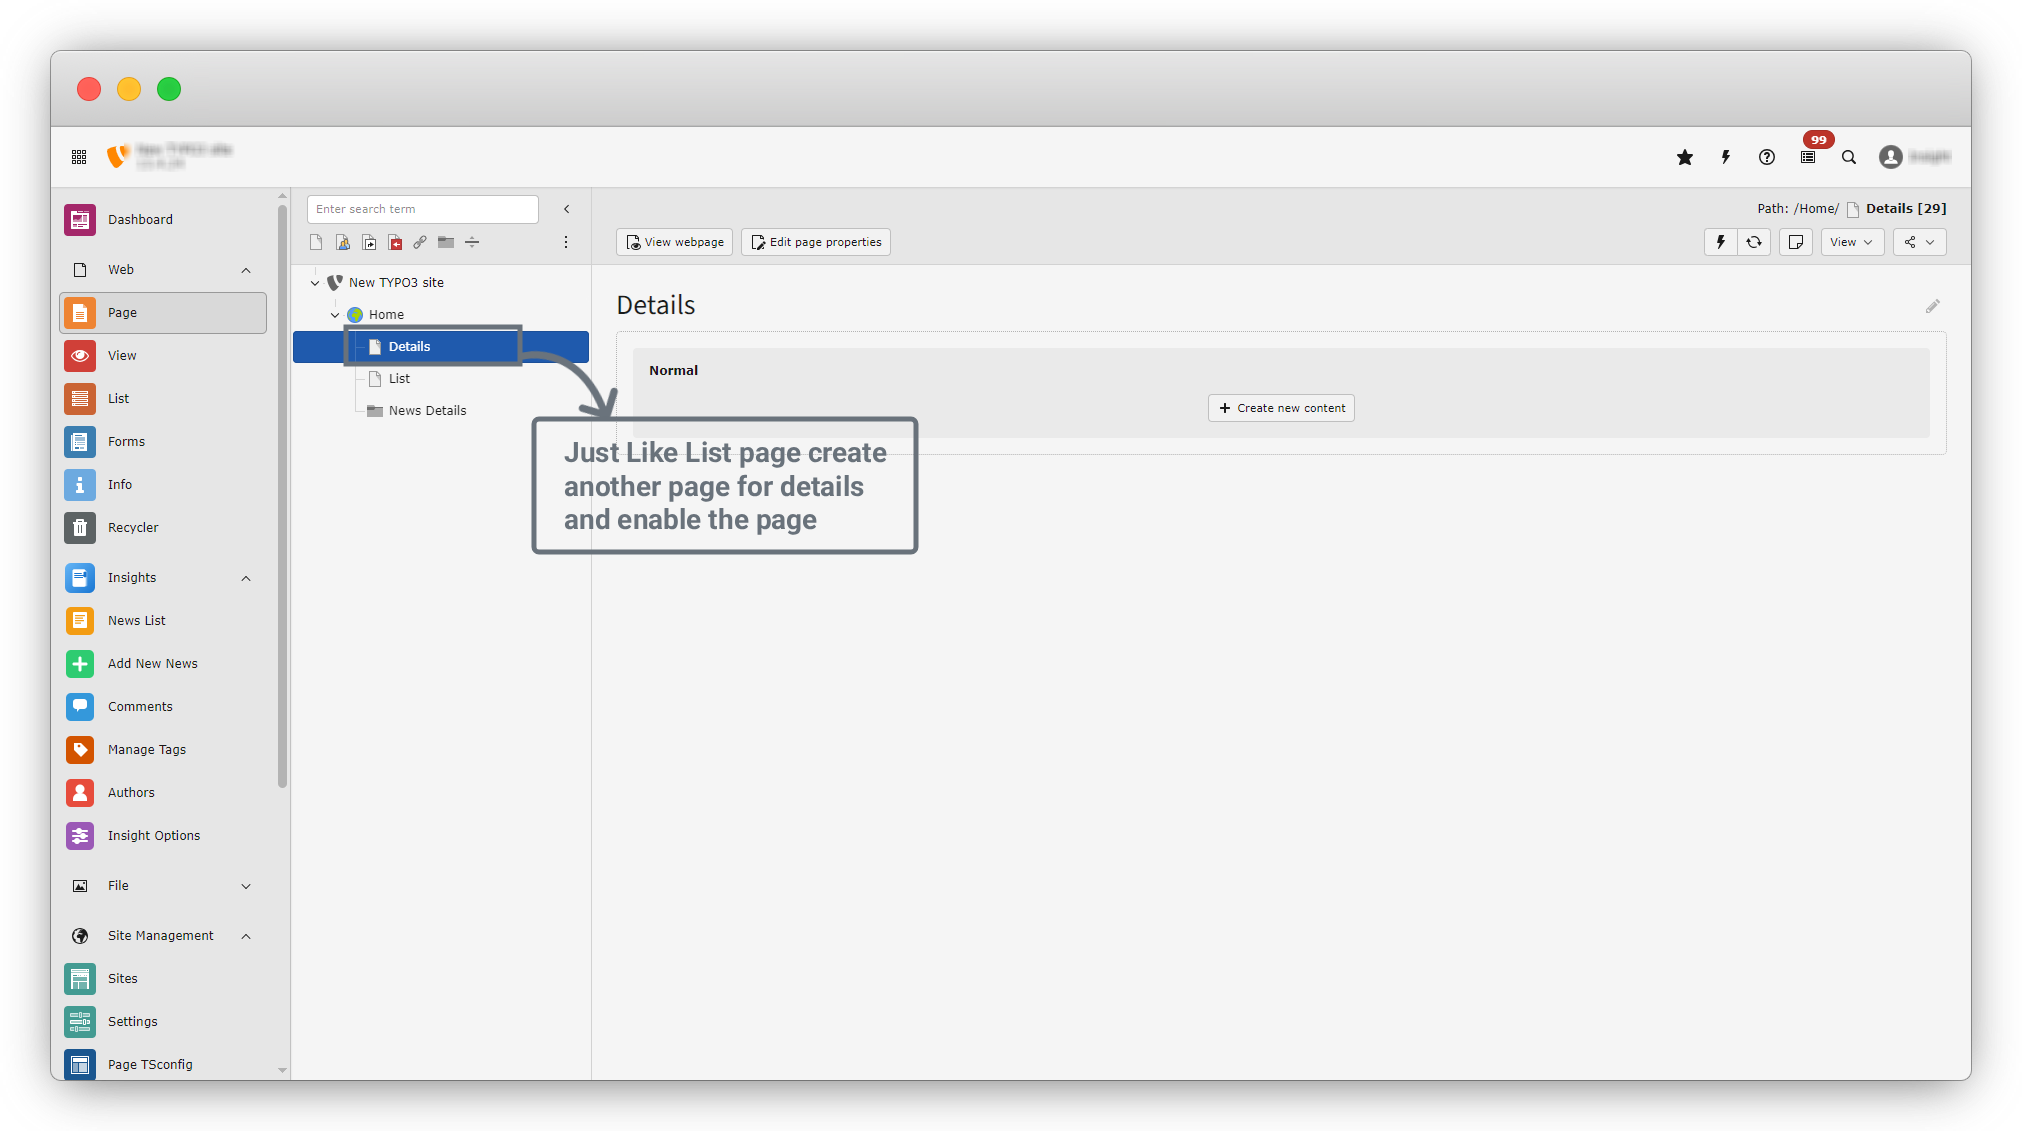
5. Just like we created the List page, now create the Details page in the same way. After creating it, make sure to enable the page so it can be displayed on the frontend. See the screenshot below.
6. Click on the List page again, and you will see the screen as shown in the screenshot below. Click on the “+ Create New Content” button to create a List plugin.
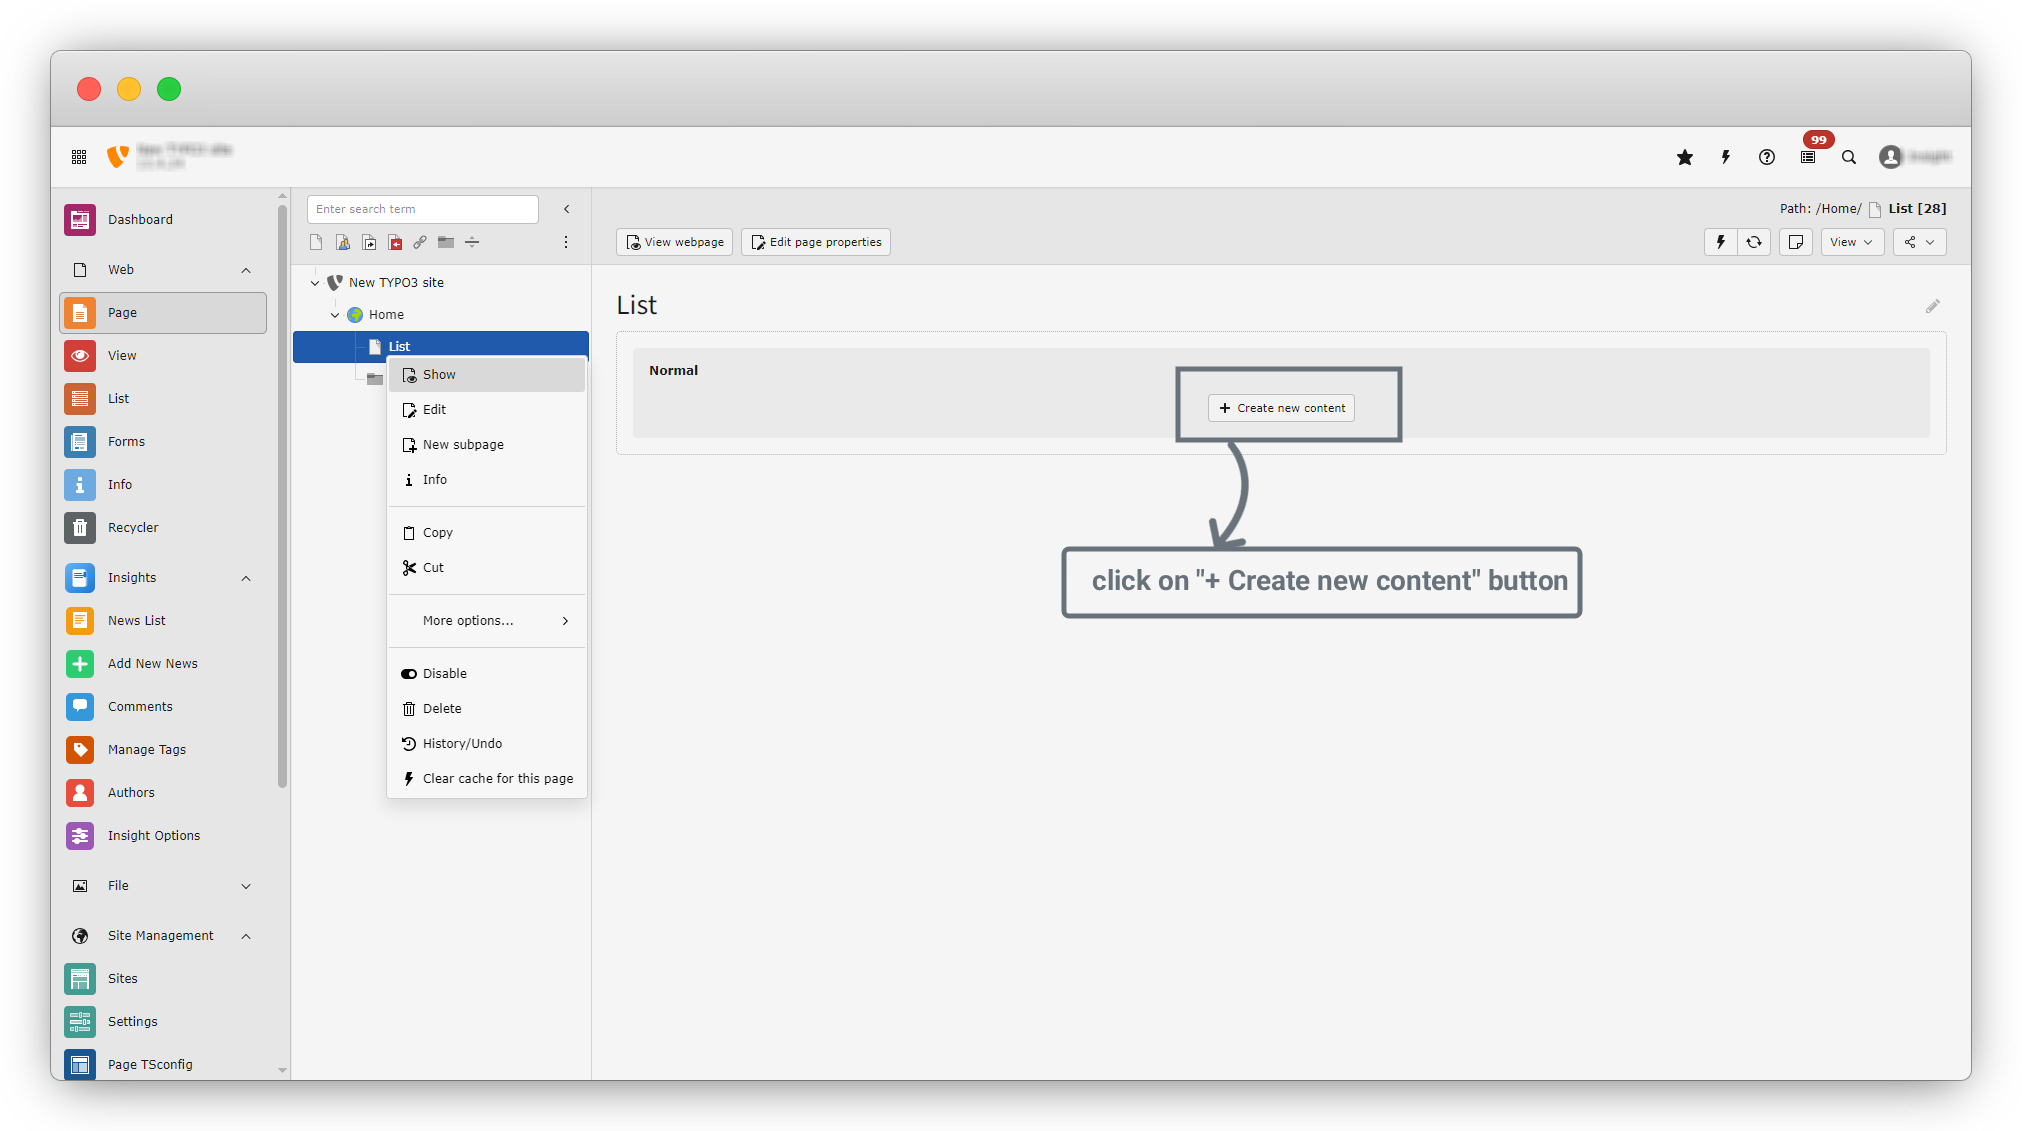
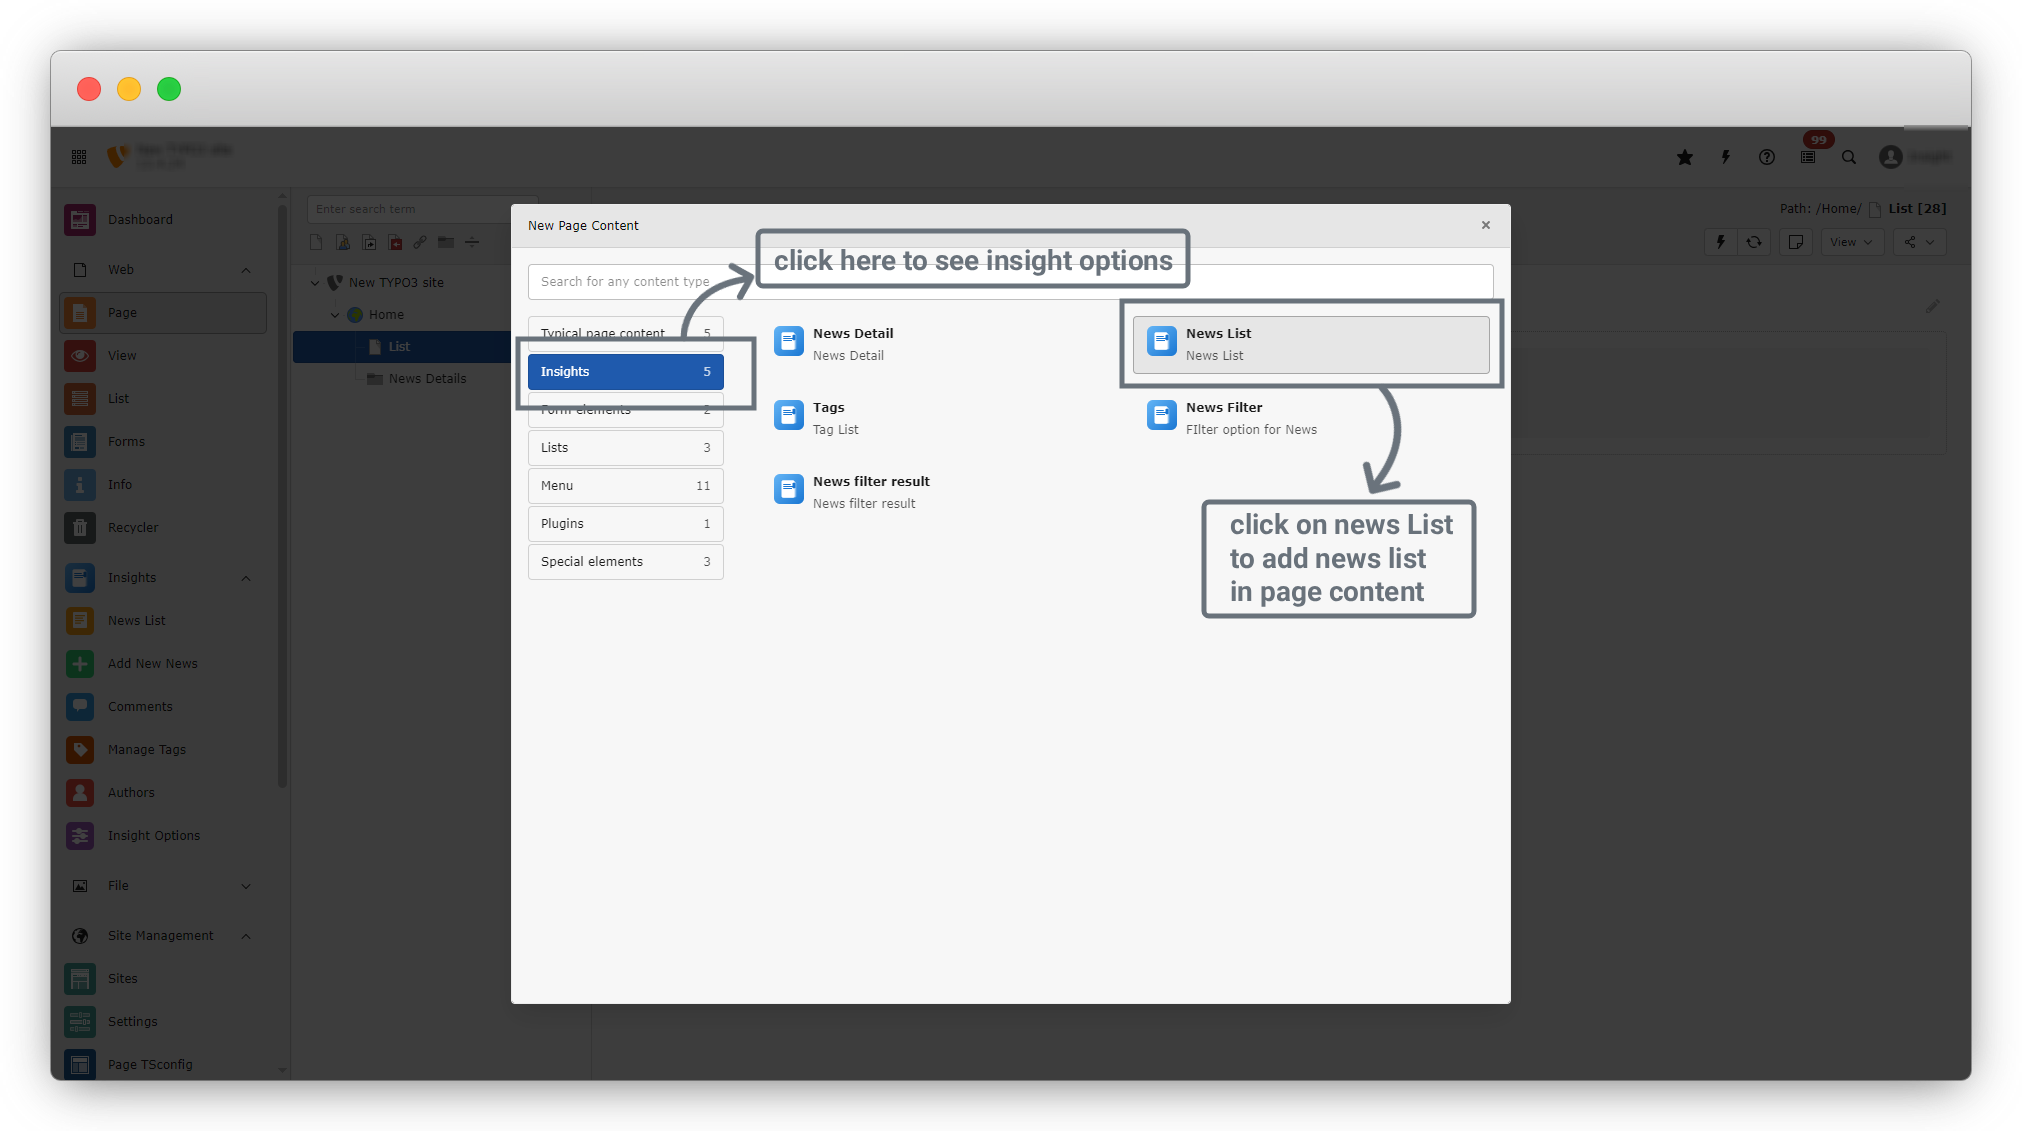
7. By clicking the “+ Create New Content” button, a dialog will appear.
8. Go to the Insight tab in the dialog, which shows five options:
- News Details
- News List
- Tags
- News Filter
- News Filter Result
9. Click on News List to display a list of news on the frontend page. See the screenshot below.
10. After clicking on News List, you will see the Page Content screen. This page has several tabs:
- General – Basic content element settings (headline, layout, etc.)
- Plugin – Main configuration for the list output
- Appearance – Visual layout and styling options
- Categories – Category-based filtering
- Language – Language visibility and translation behavior
- Access – Access restrictions (user groups, time-based visibility)
- Notes – Internal editor notes (not shown on frontend)
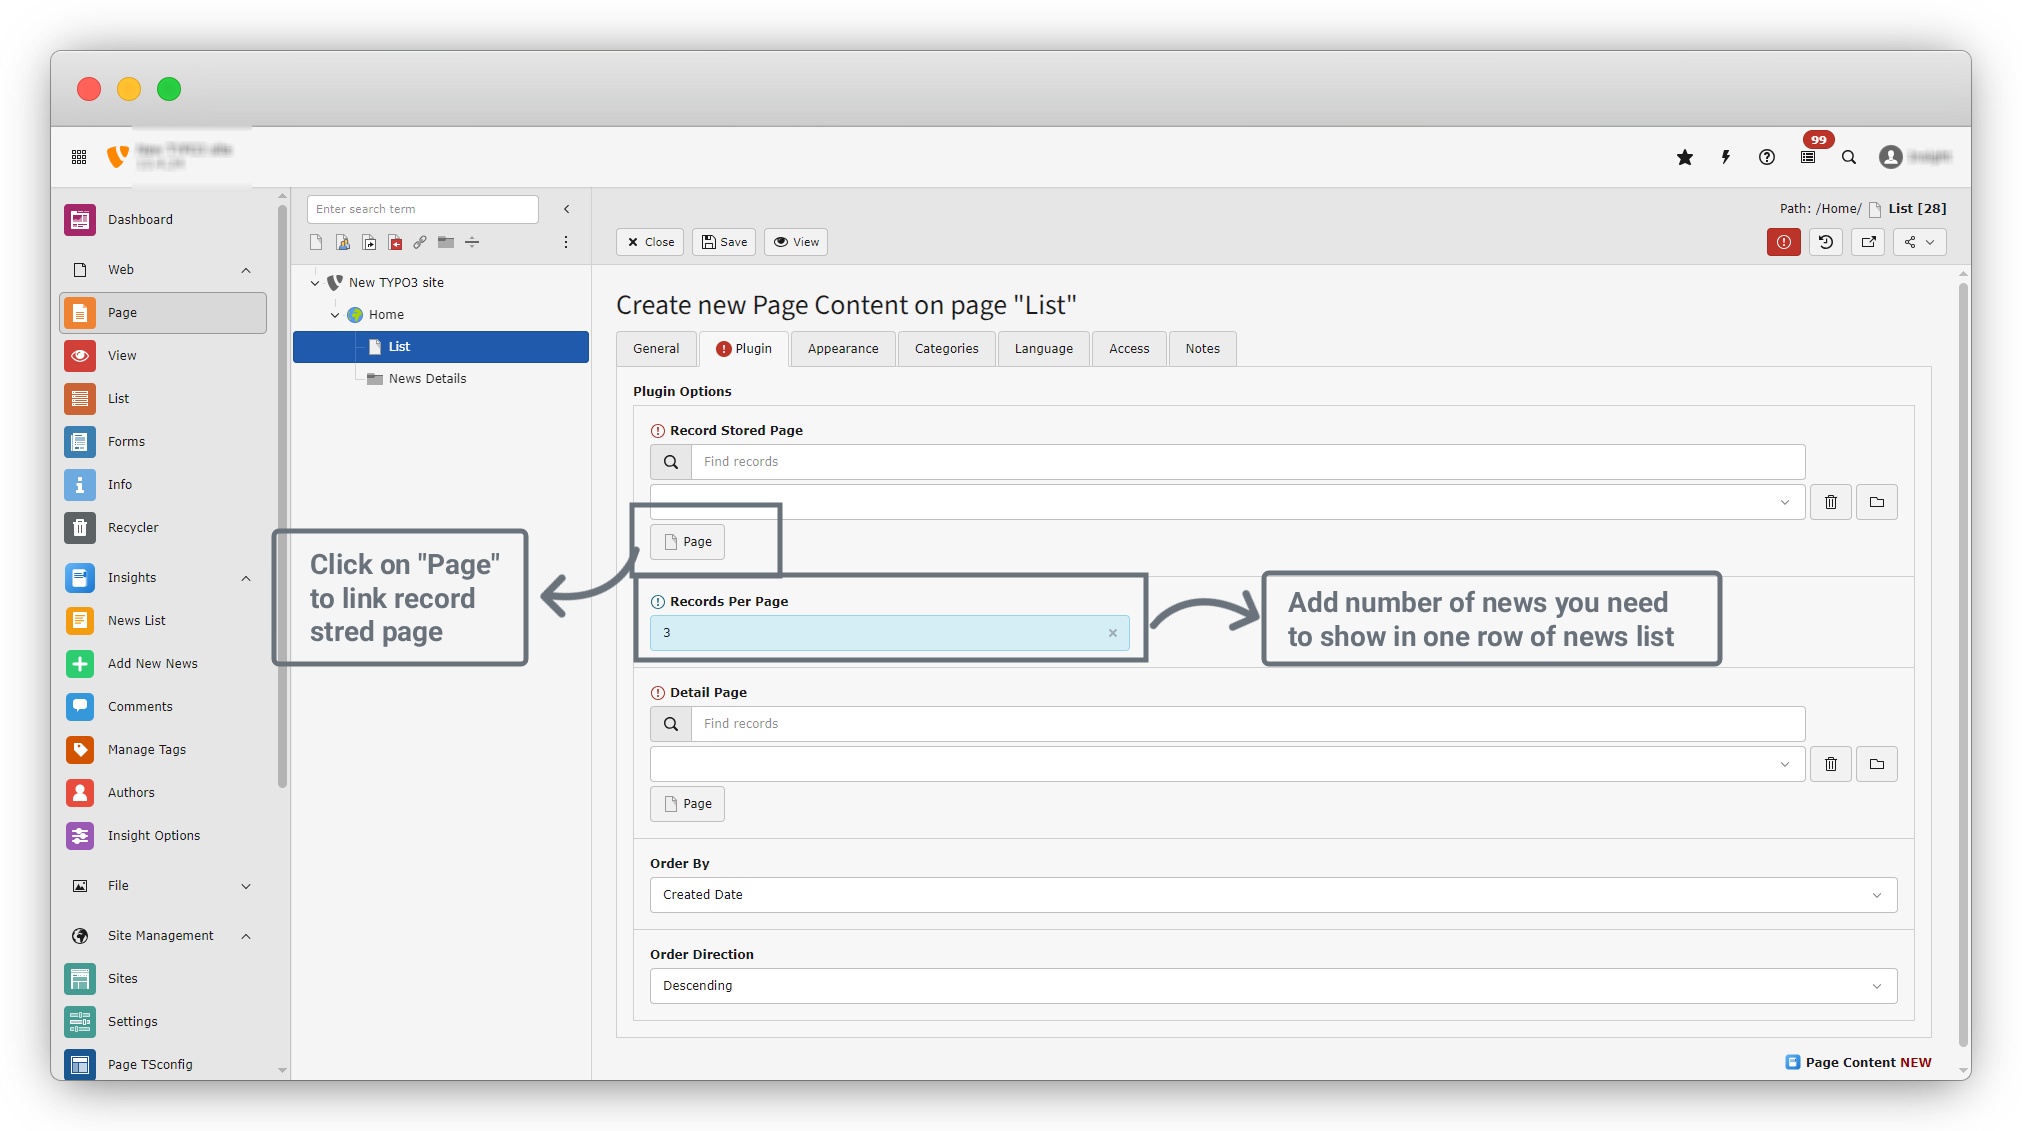
11. Click on the Plugin tab, as most of the configuration for the news list will be done here.

12. In the Plugin tab, you will see the following fields:
- Record Stored Page : Specifies from which page (folder) the records will be loaded.
- Records per page : Controls how many records are shown per page in the list view.
- Detail page : Specifies which page opens when a user clicks on a list item.
- Order By : Defines how the records are sorted.
- Order Direction: Defines the sorting direction.
13. Set Records per Page to 3 so that three news items will appear in one row.
14. In the Record Stored Page field, click on the Page button to select the folder from which the news will be loaded.
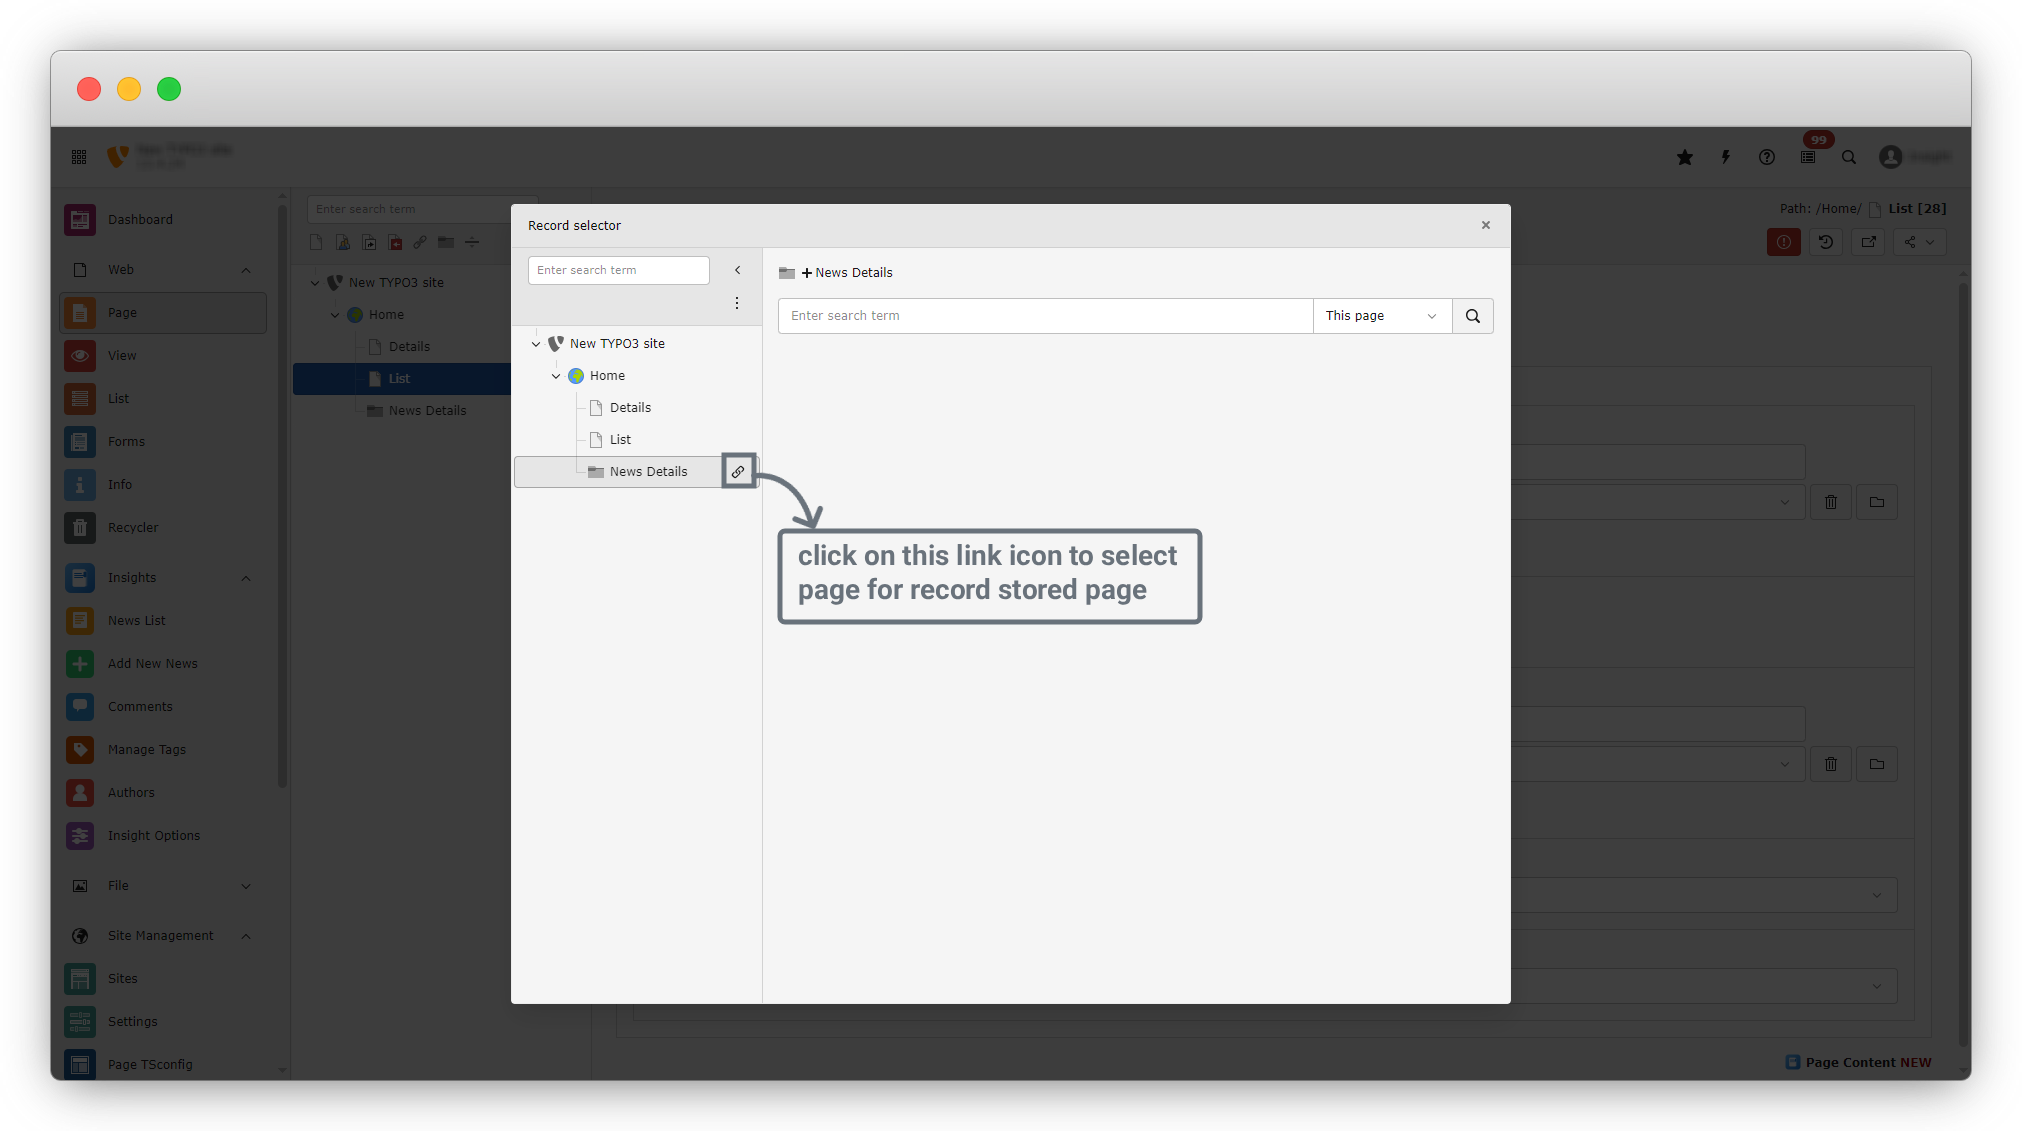
15. After clicking the Page button, a dialog will appear, as shown in the screenshot. Since our news records are stored in the “News Details” folder, hover over the News Details folder. You will see a link icon on the right side. Click on the link icon, and the folder will be selected. See the screenshot below.
16. Our News Details folder is now selected as the Record Stored Page. If you want to change the record, click the Delete button to remove the current selection, then click the Page button again to select a new record.
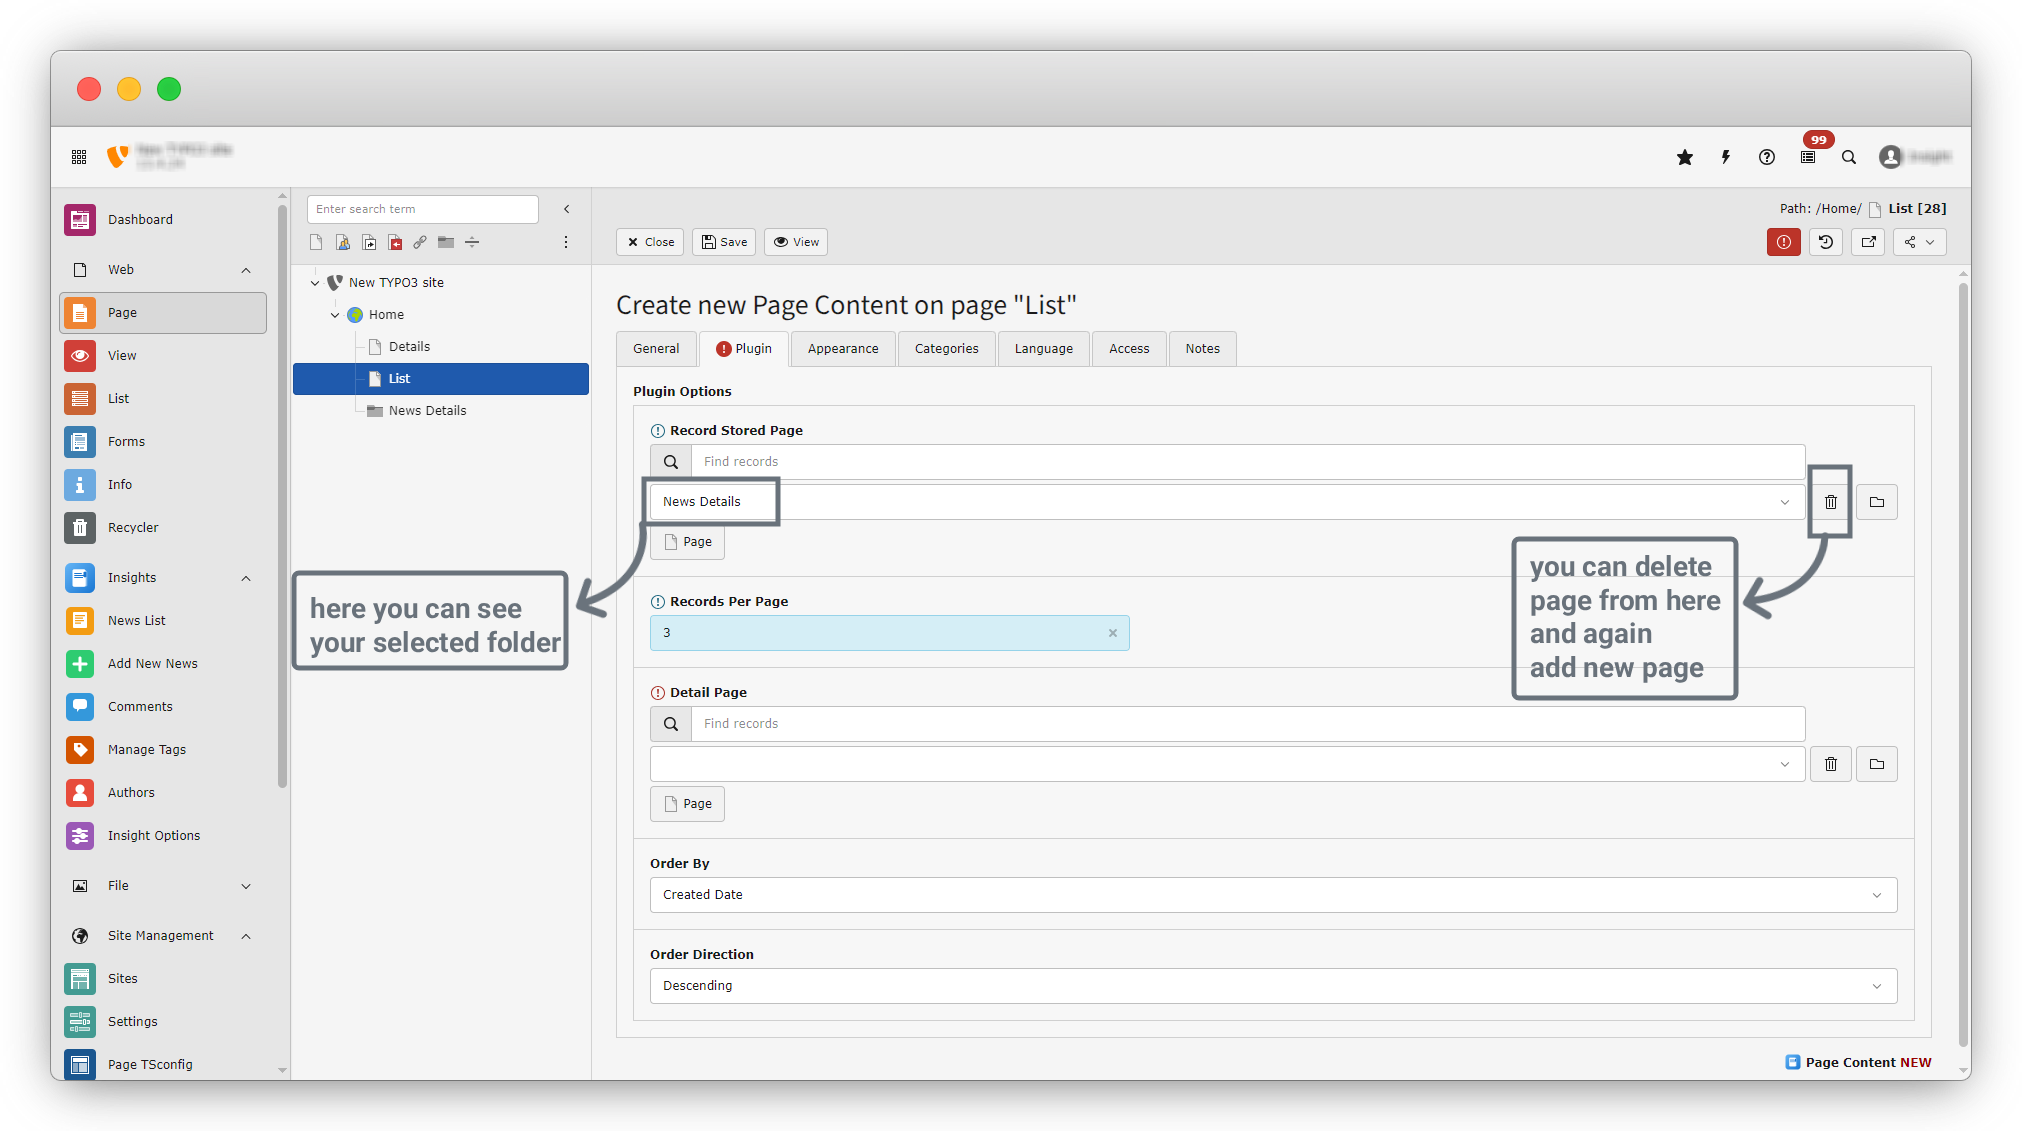
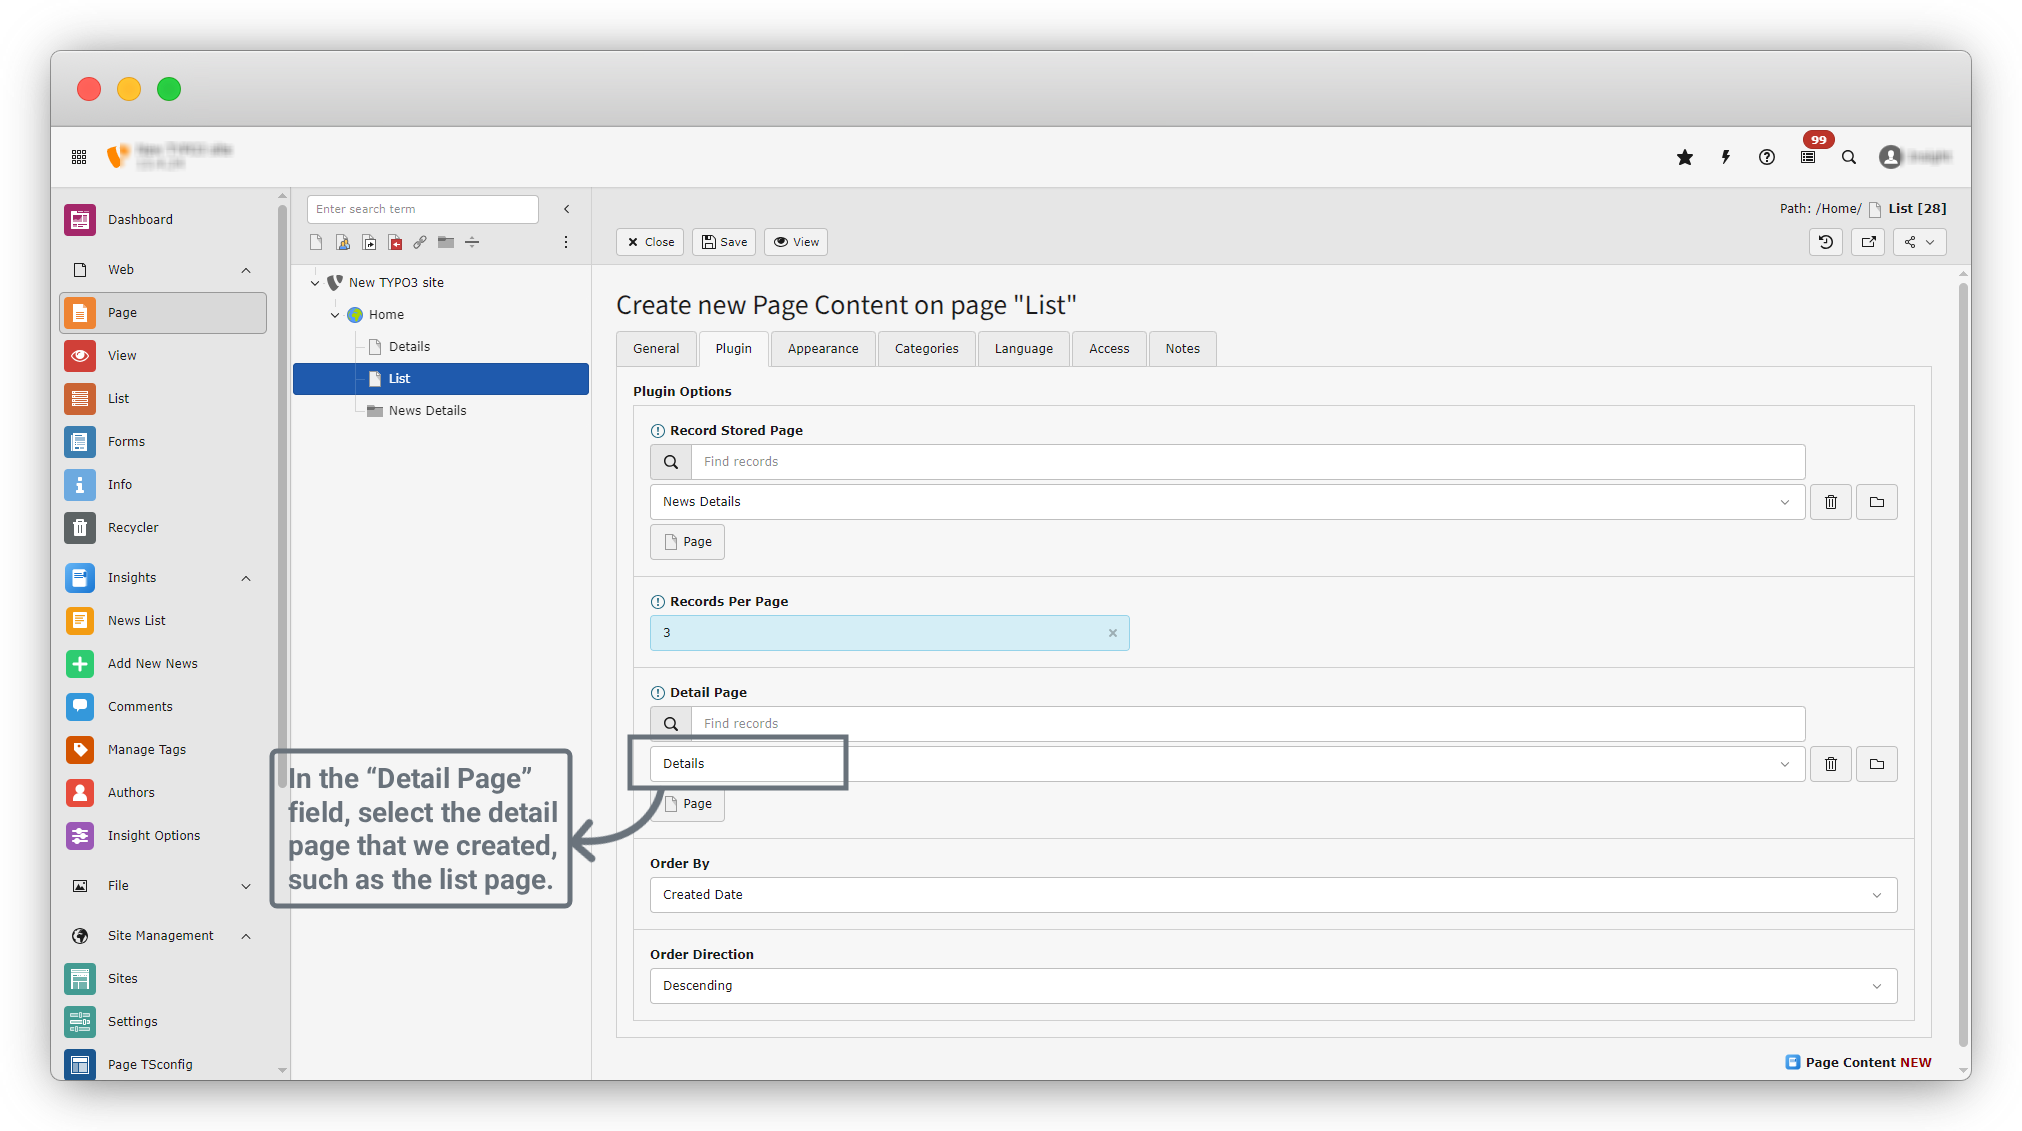
17. Just like we selected the News Details folder for the Record Stored Page, we now need to select the Detail Page. Click on the Page button in the Detail Page field and choose the Details page that we recently created.
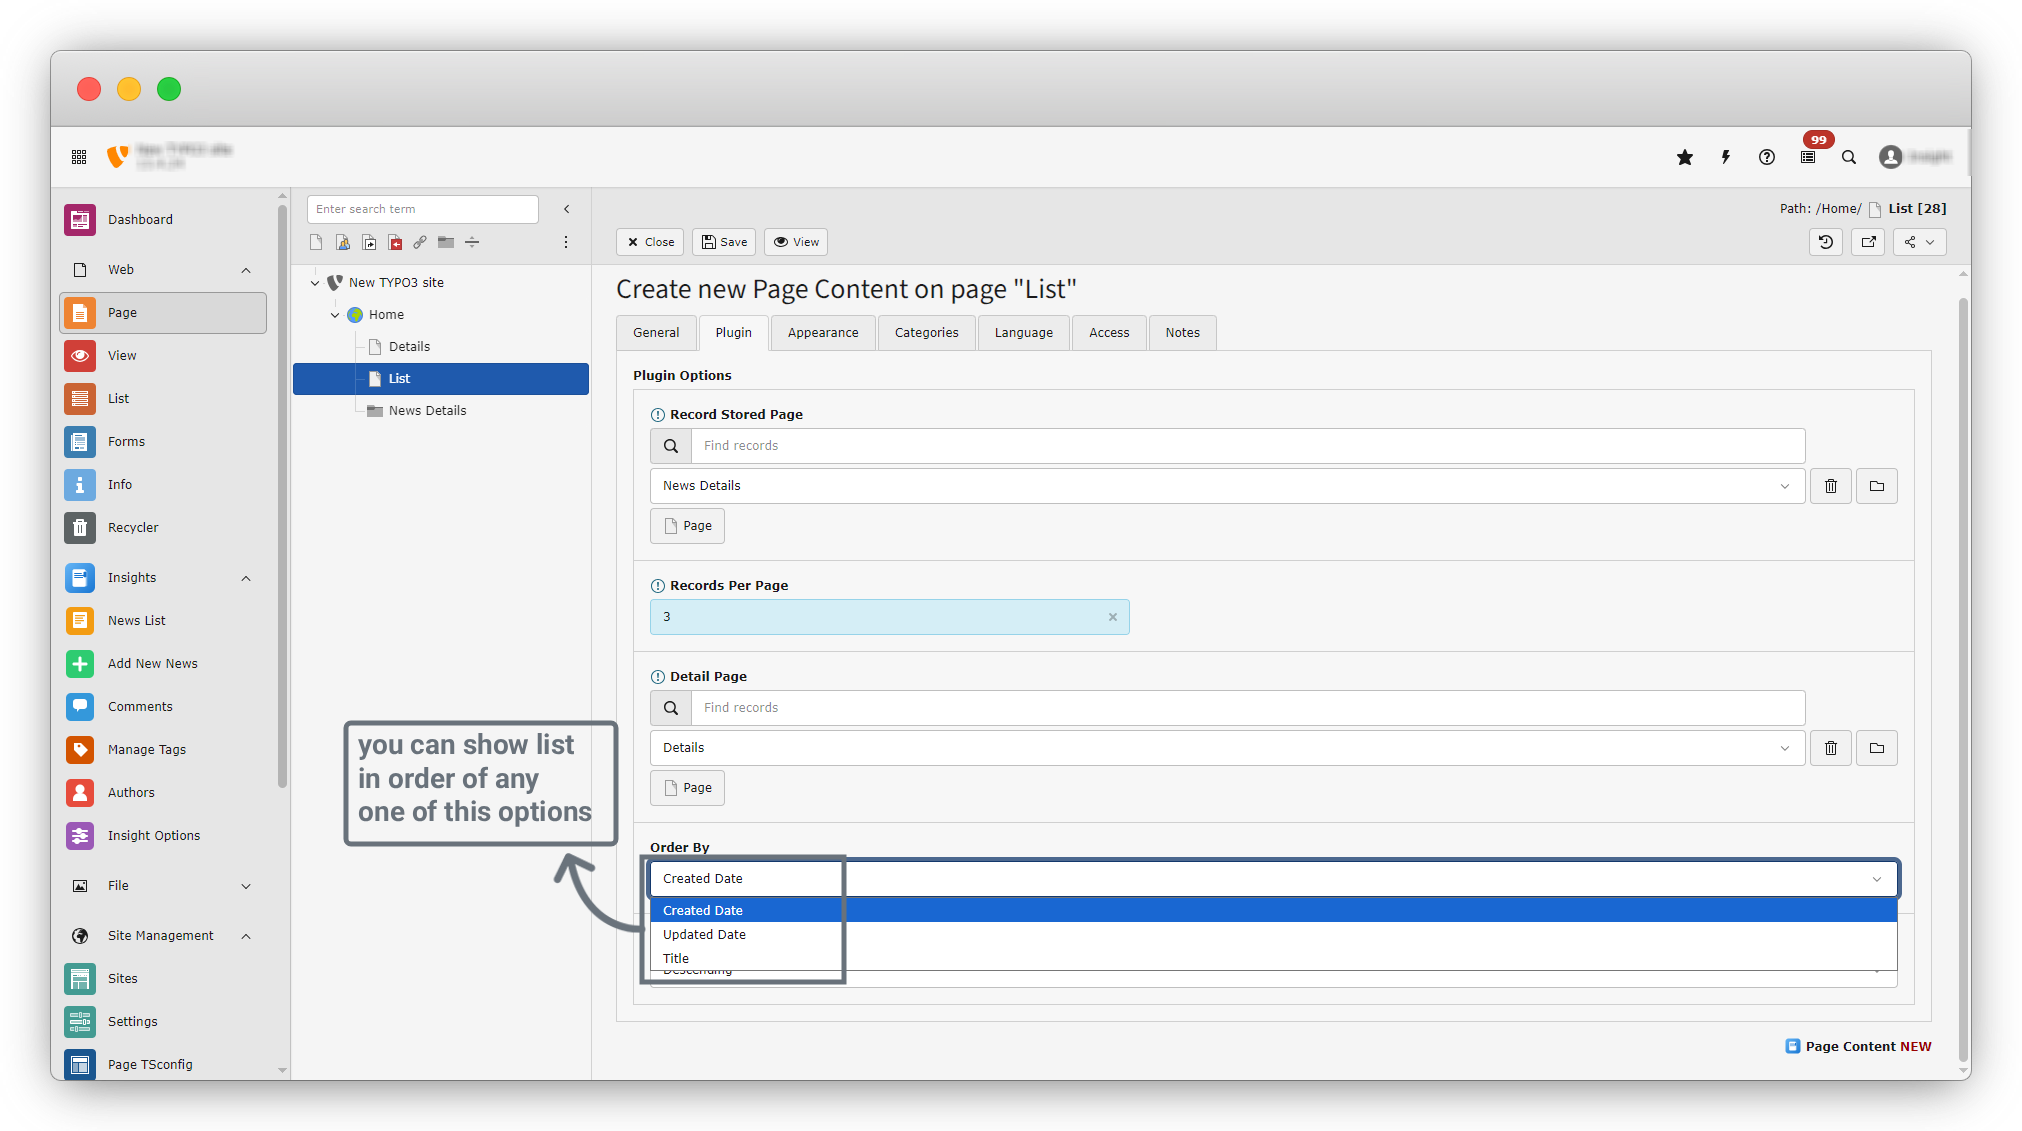
18. Order by : By default, Created Date is selected. However, you can choose from three options:
- Created Date
- Updated Date
- Title
Select any of these options to display your data in that order.
Example: If you select Created Date, your news items will be shown in the order of their creation date.
19. Similar to Order By, there is the Order Direction field. In this field, you have two options:
- Ascending
- Descending
You can choose either option to determine how your data is displayed.
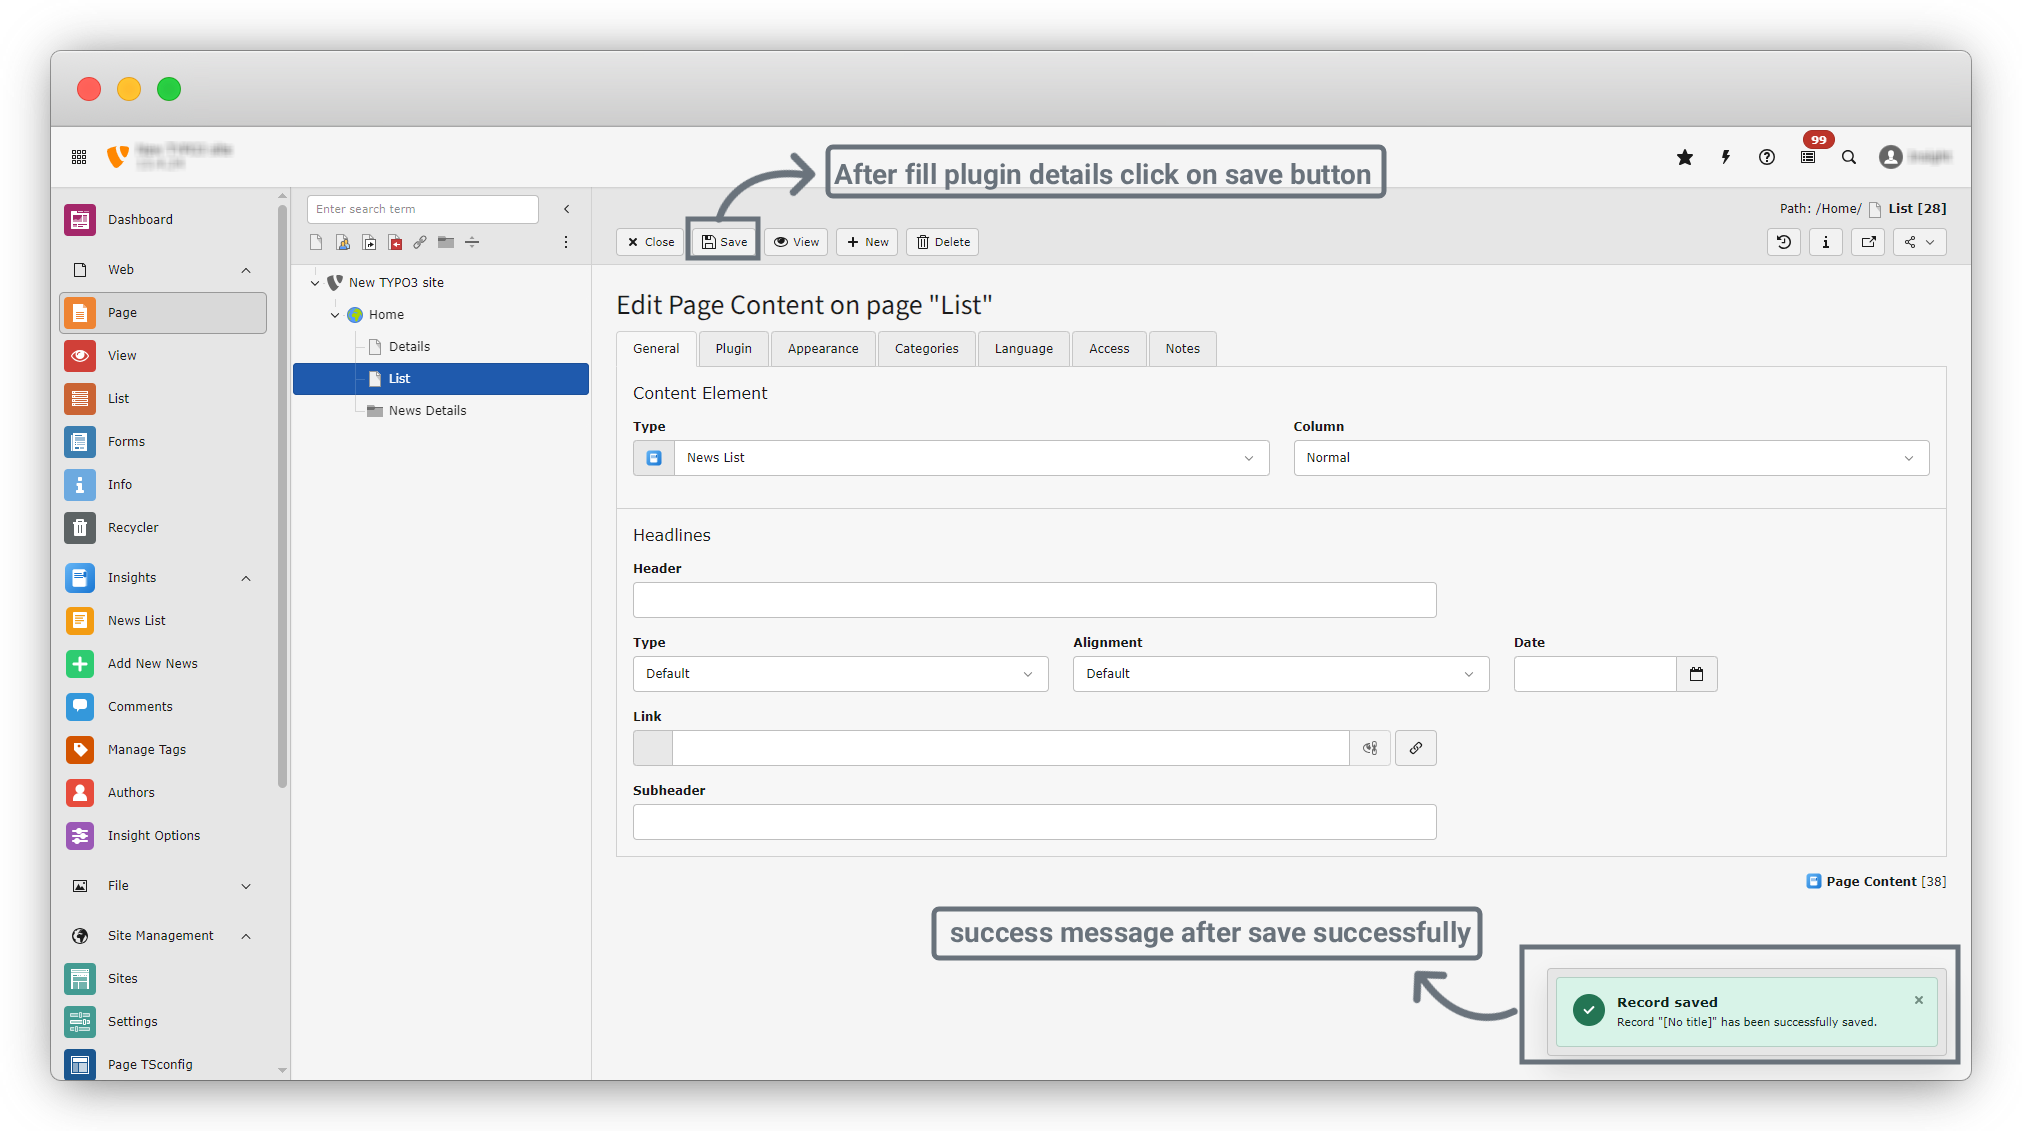
20. After filling in all the details, click the Save button to save your settings. Once saved, you will see a success message confirming that the data has been saved successfully.
21. Now, on the left sidebar under Pages, click on the List page. After clicking the List page, you will see the screen as shown in the screenshot below.
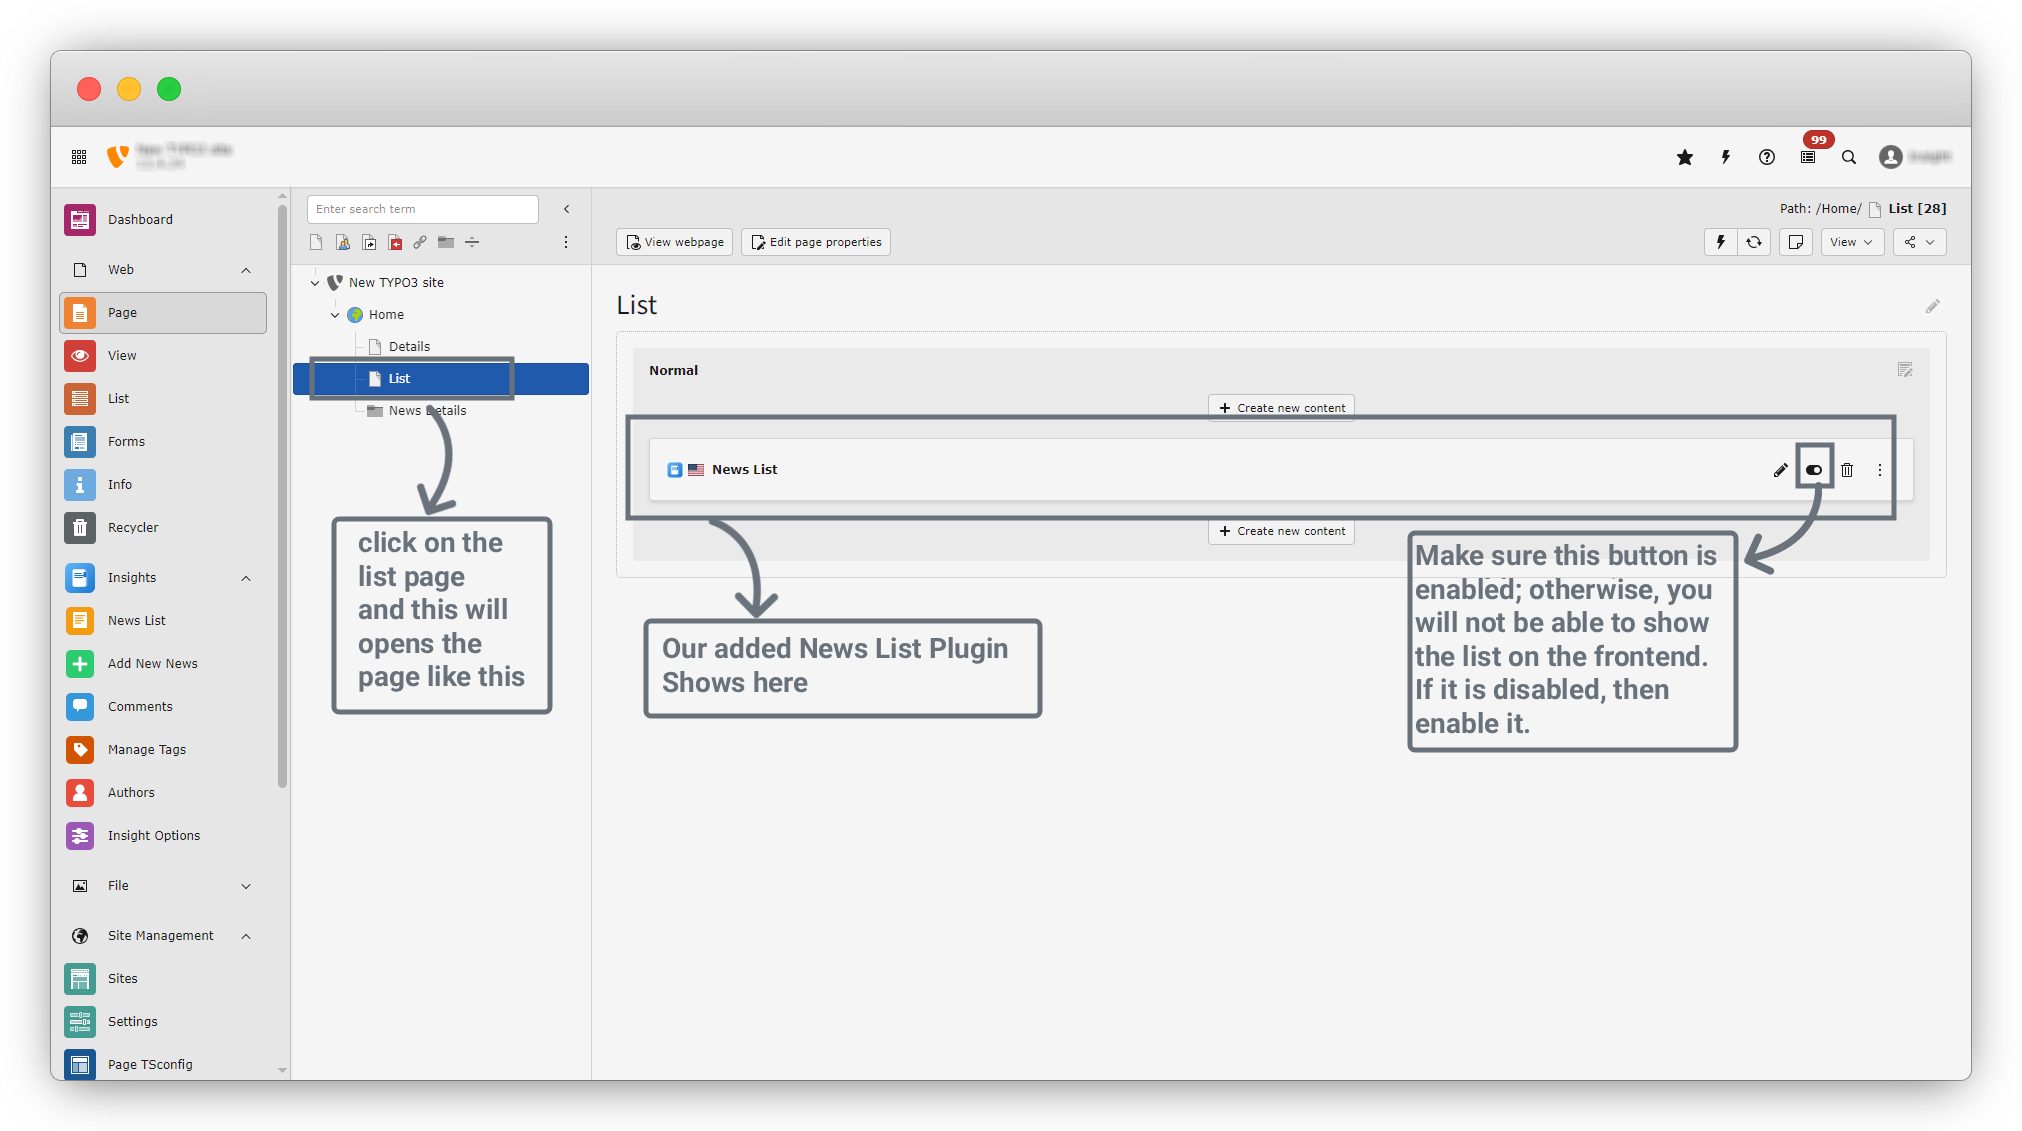
22. You can see our news list plugin there and it shows 4 buttons on the right side.
- Edit : Edit the plugin again
- Enable : to enable the plugin. If the plugin is disabled then this will not show in the frontend. So make sure your plugin is enabled.
- Delete : You can delete the plugin
- More : on 3 dots you will get many options related to plugins.
23. Click on the “View Webpage” button to see the front end view.

24. Currently the page is getting black because we have not added any news yet. In future we will add news and check it again.
Create Page for News Details
1. On the left sidebar you will get the Home > Details page. Click on the “Details” page. and you will see the screen like the screenshot below.
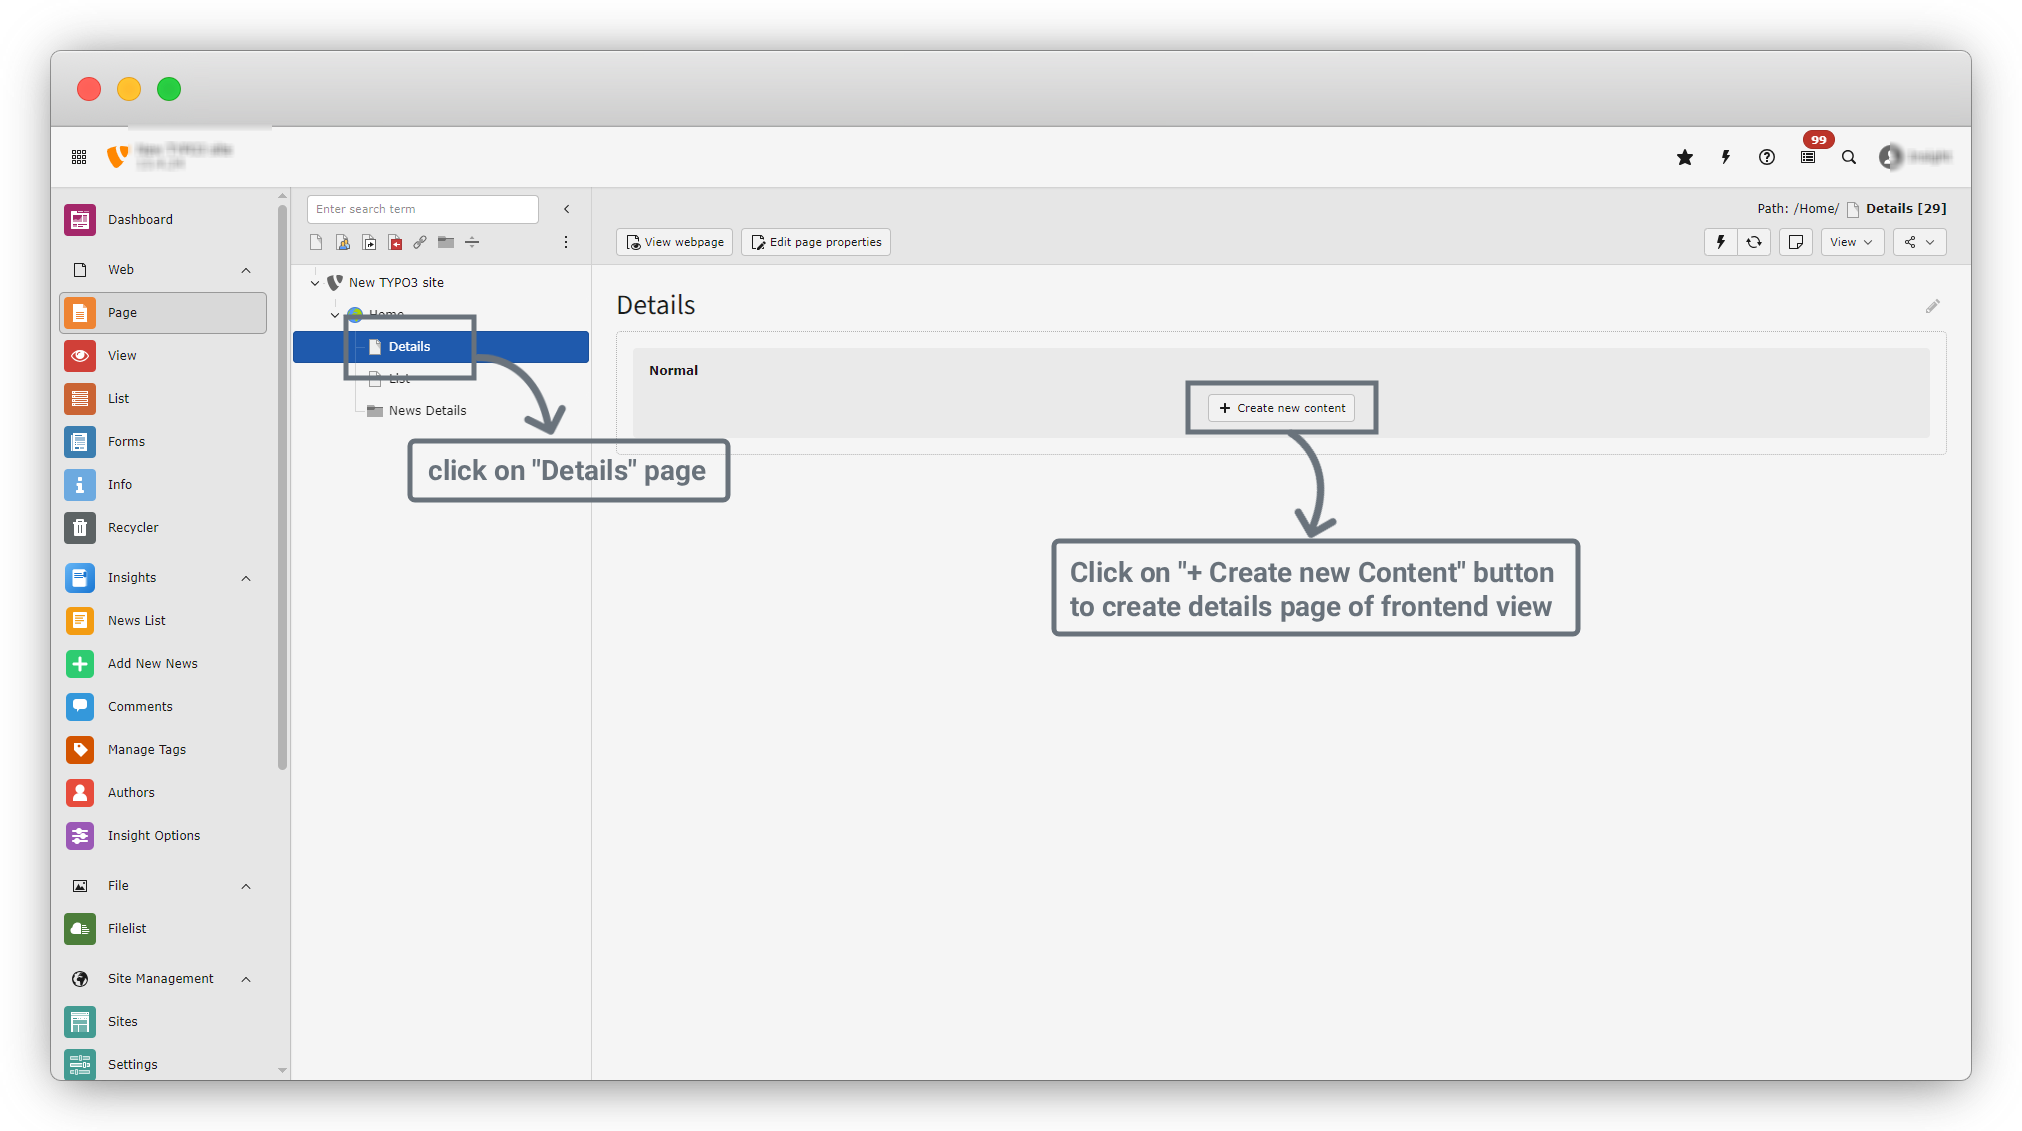
2. click on "+ Create new Content" to add news details.
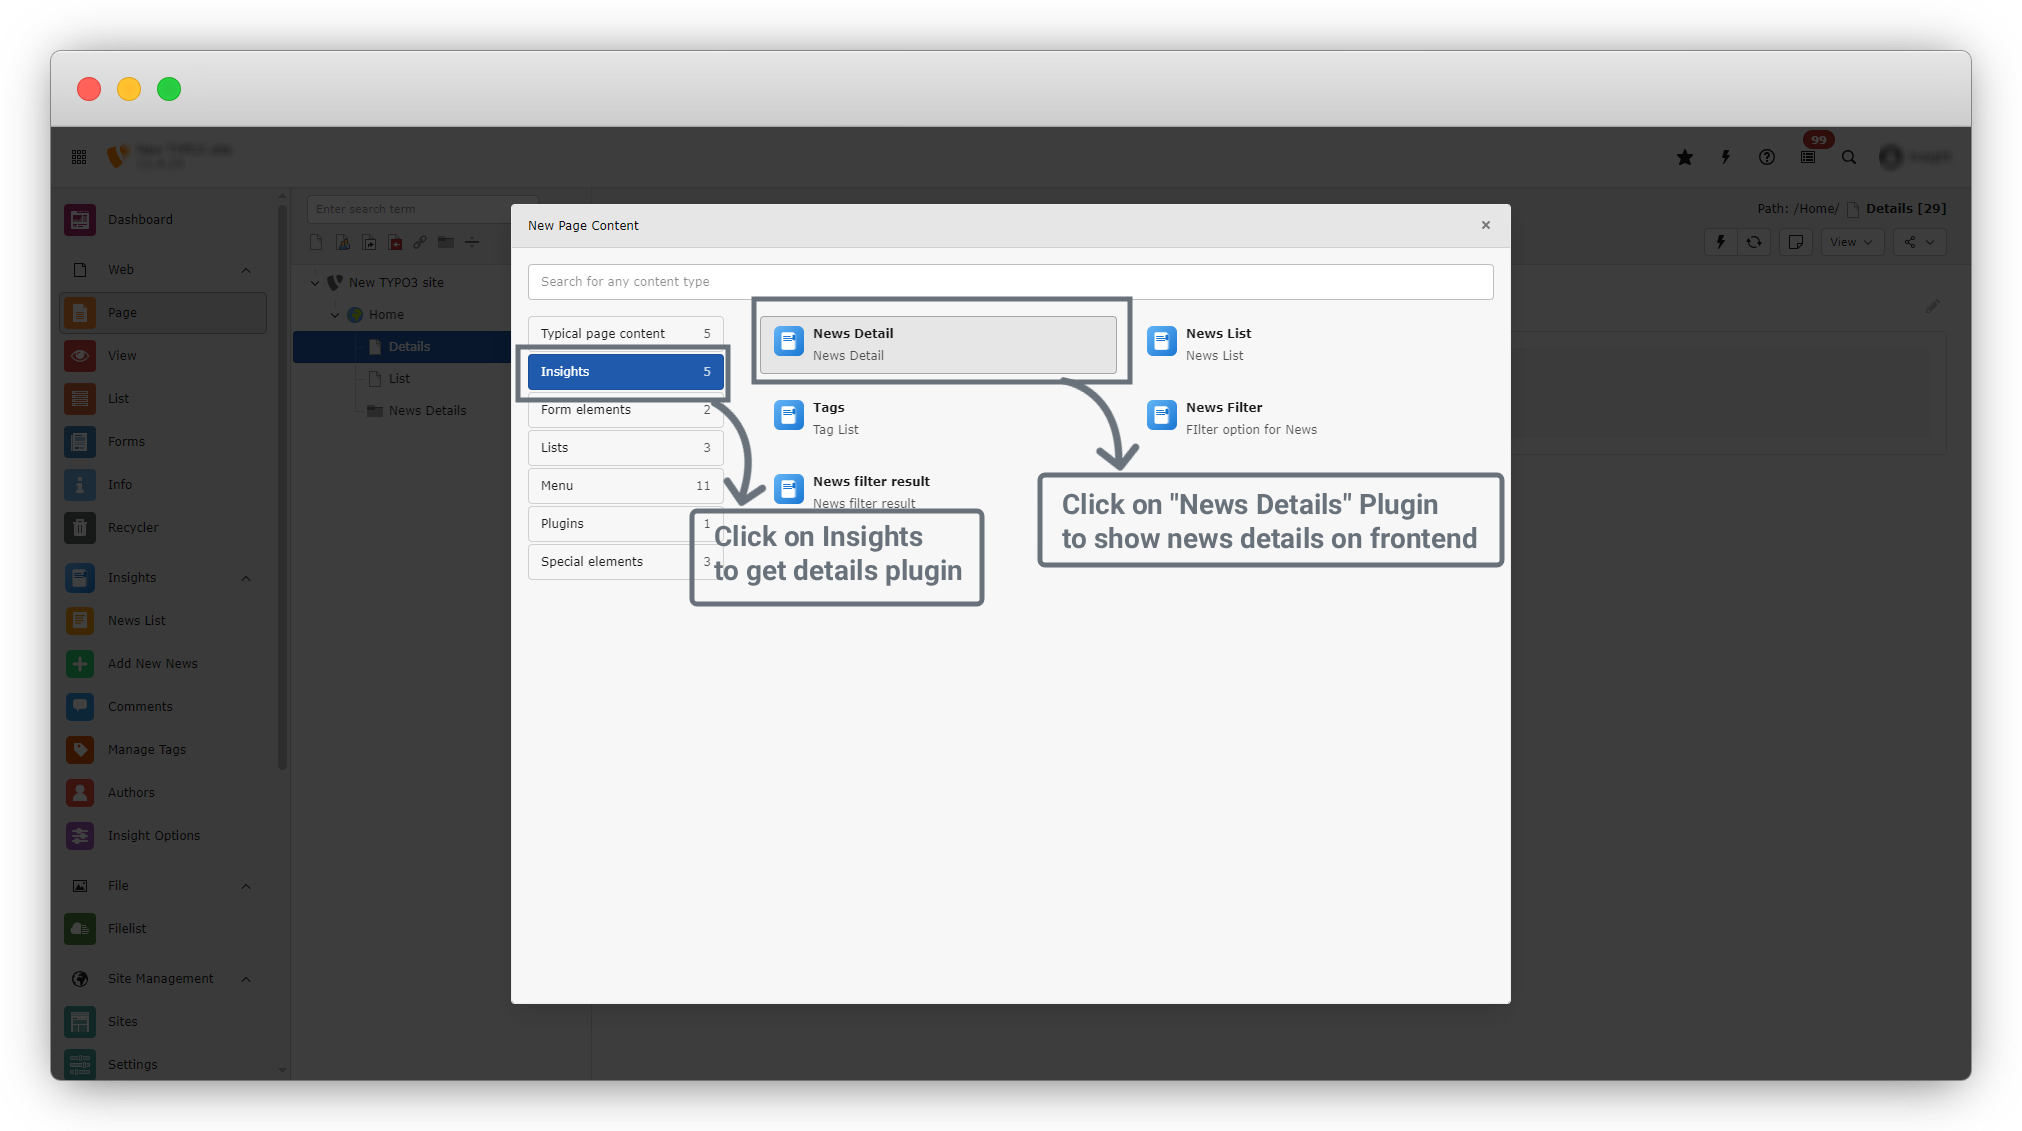
3. After clicking on "+ Create new content" you will see a dialog and click on the "Insights" menu that is located on the left sidebar of dialog.
4. By clicking on "Insights" menu you will see 5 options
- News Details
- News List
- Tags
- News Filter
- News Filter Result
5. As we need to show details so we have to click on "News Details" option in Insights menu
6. after clicking on news Details, you will see the screen of page content. There are many tabs in this page
- General – Basic content element settings (headline, layout, etc.)
- Plugin – Main configuration for the list output
- Appearance – Visual layout and styling options
- Categories – Category-based filtering
- Language – Language visibility and translation behavior
- Access – Access restrictions (user groups, time-based visibility)
- Notes – Internal editor notes (not shown on frontend)
7. Click on the "Plugin" Tab. and you will see a screen like the screenshot below.
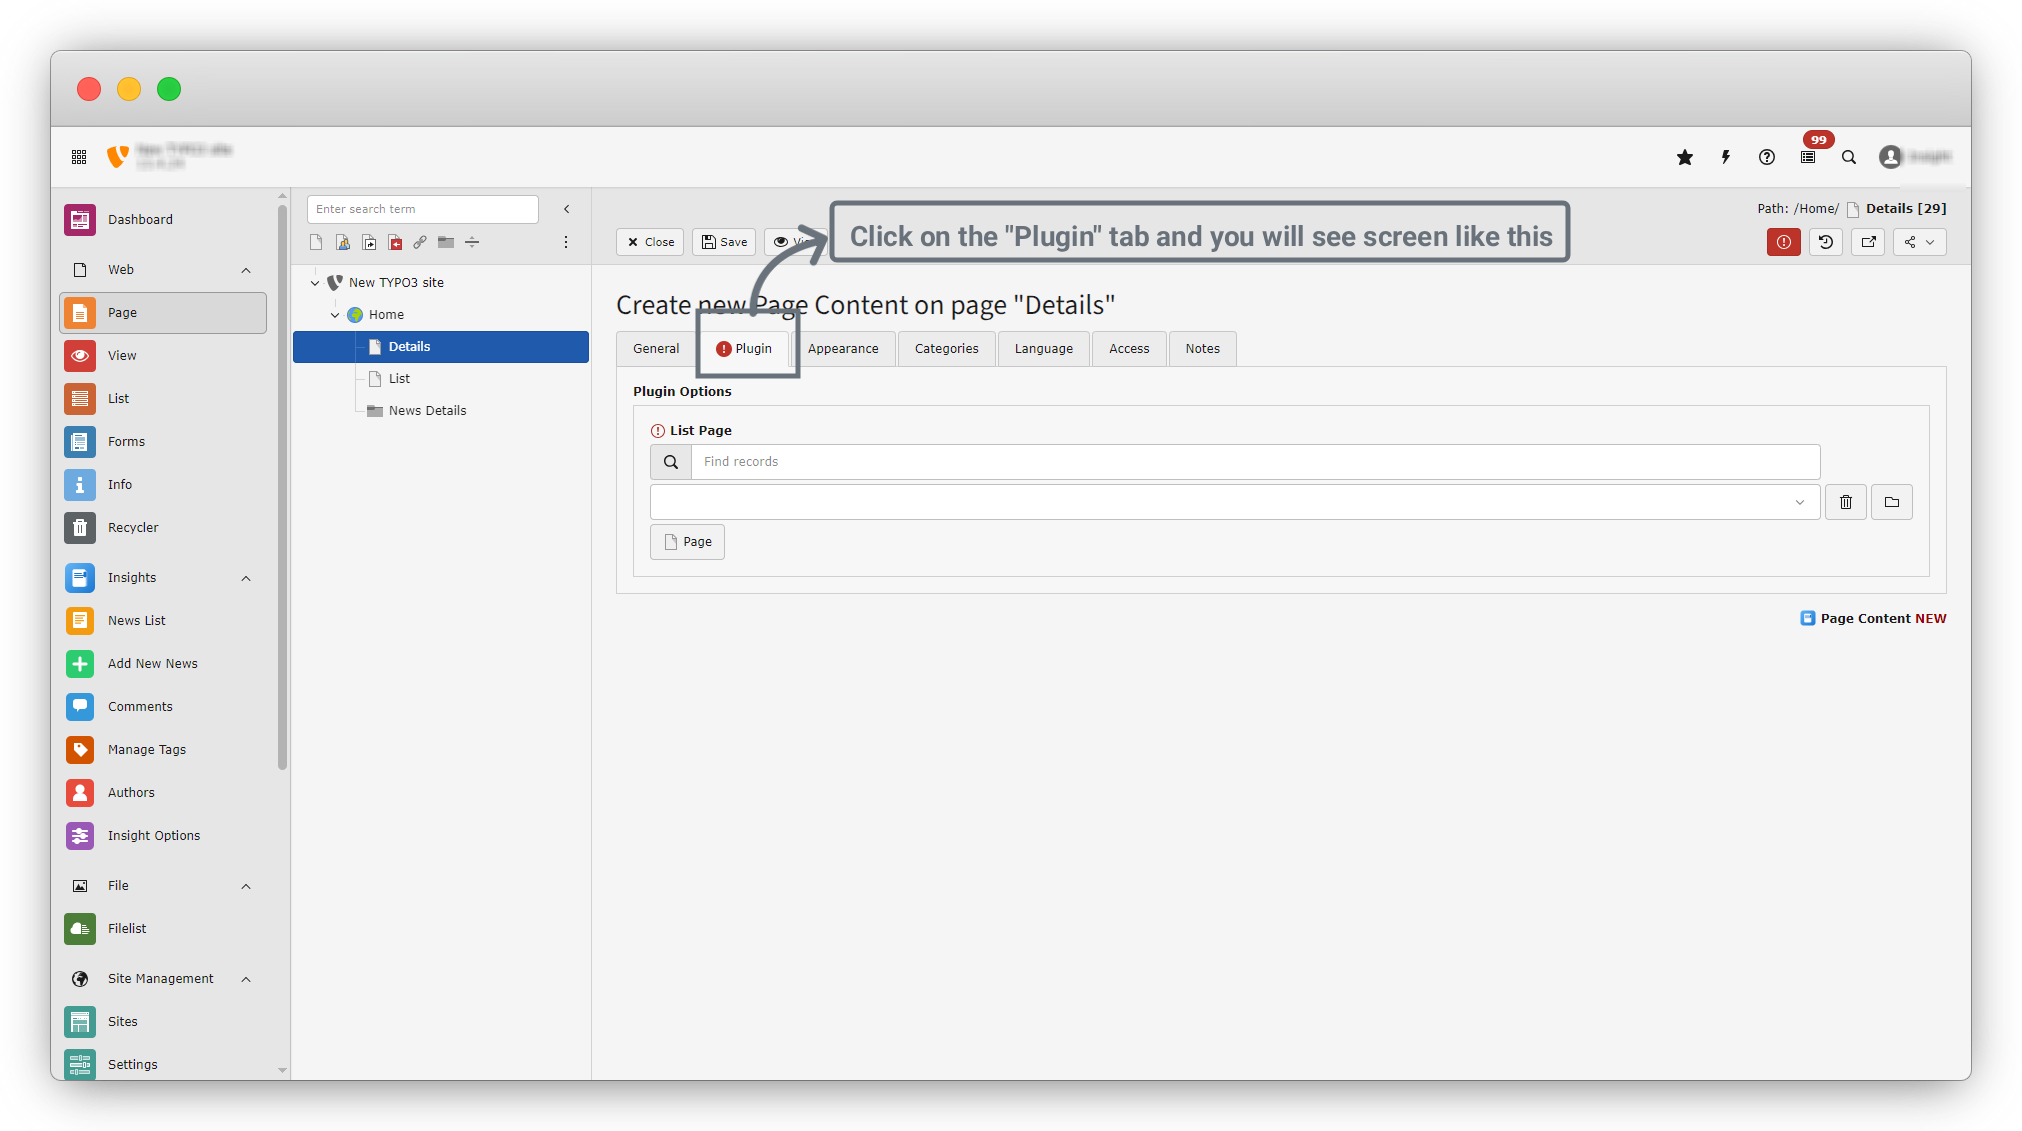
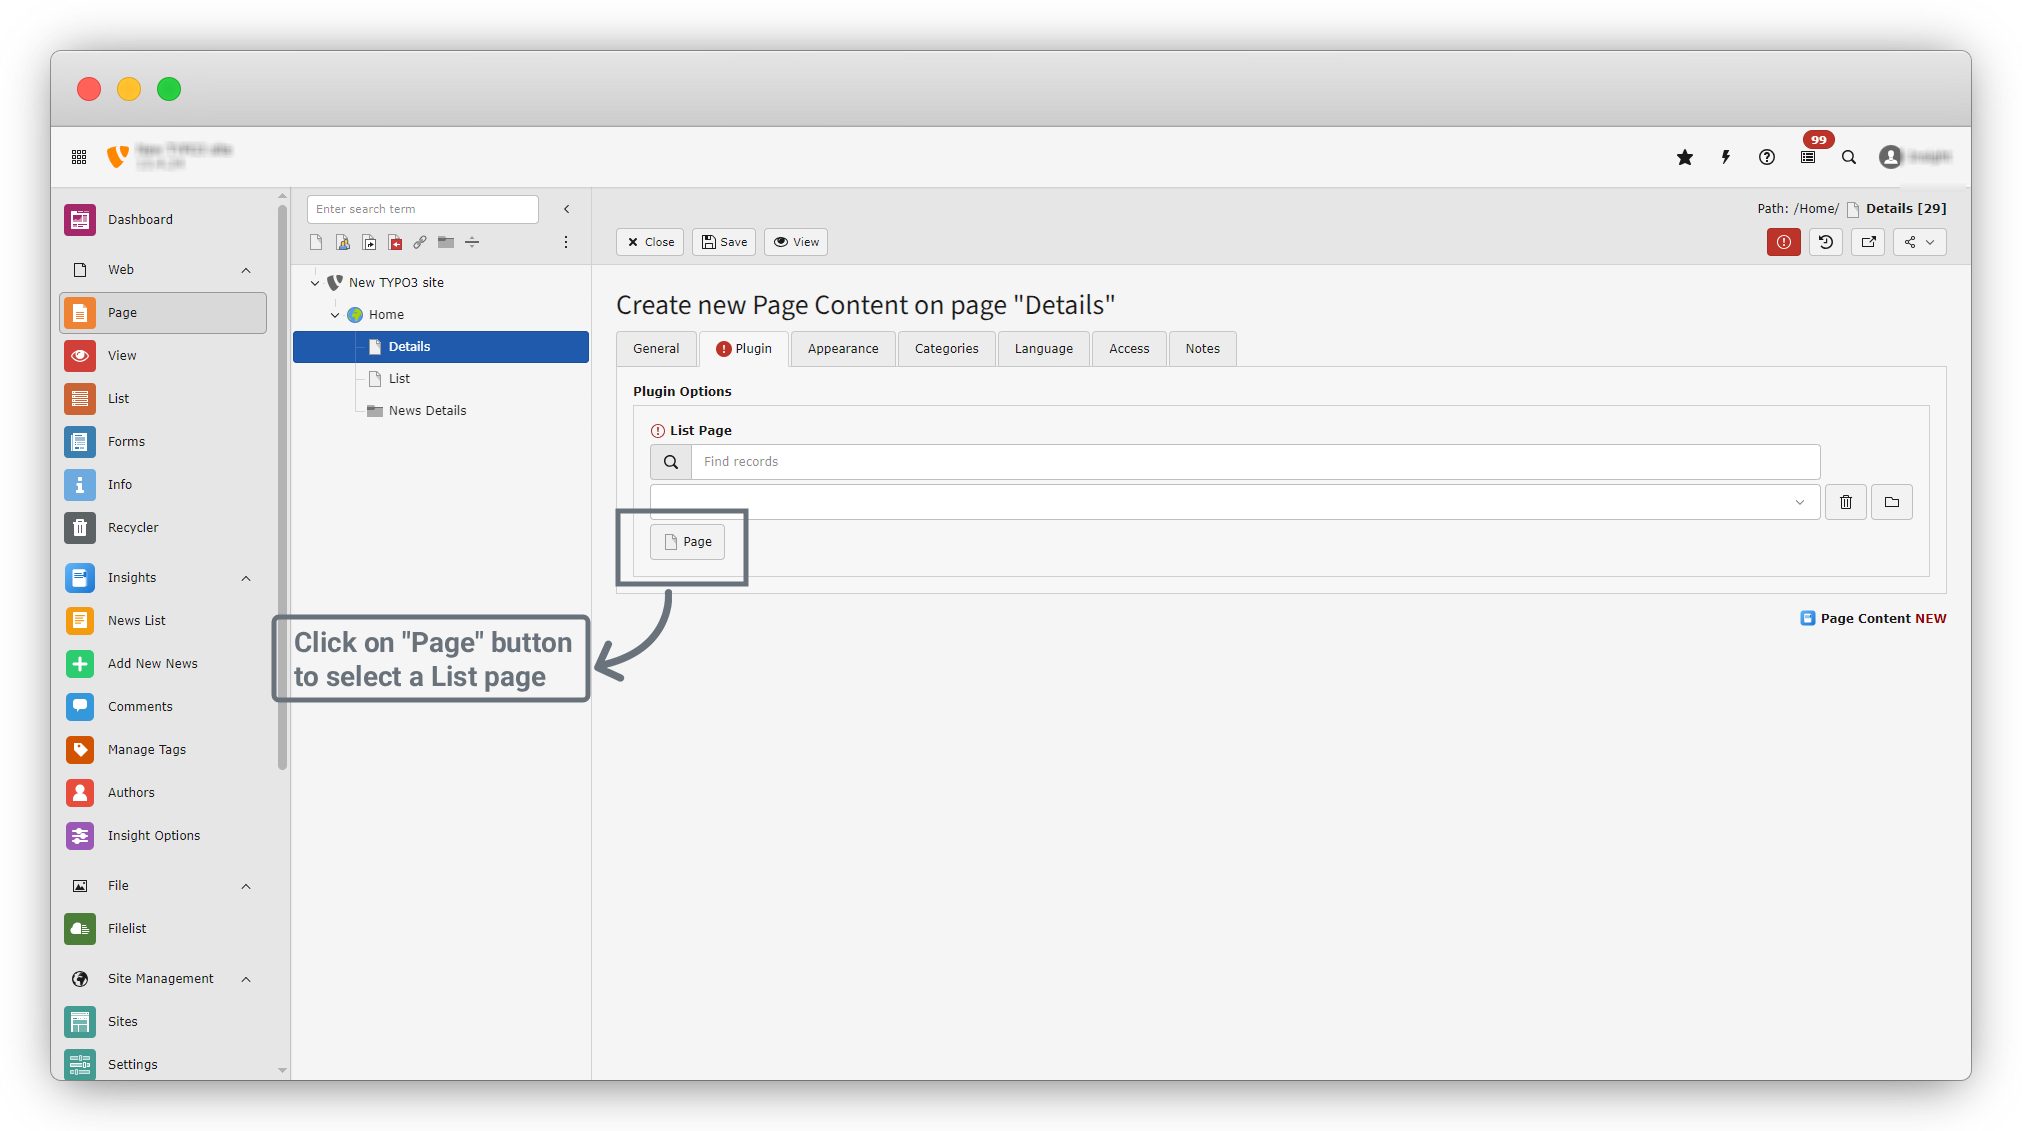
8. You can see one field there called "List page". Here we have to select our Listing page where our news will be listed and our listing page is "List" page. so click on the "Page" button to select a list page.
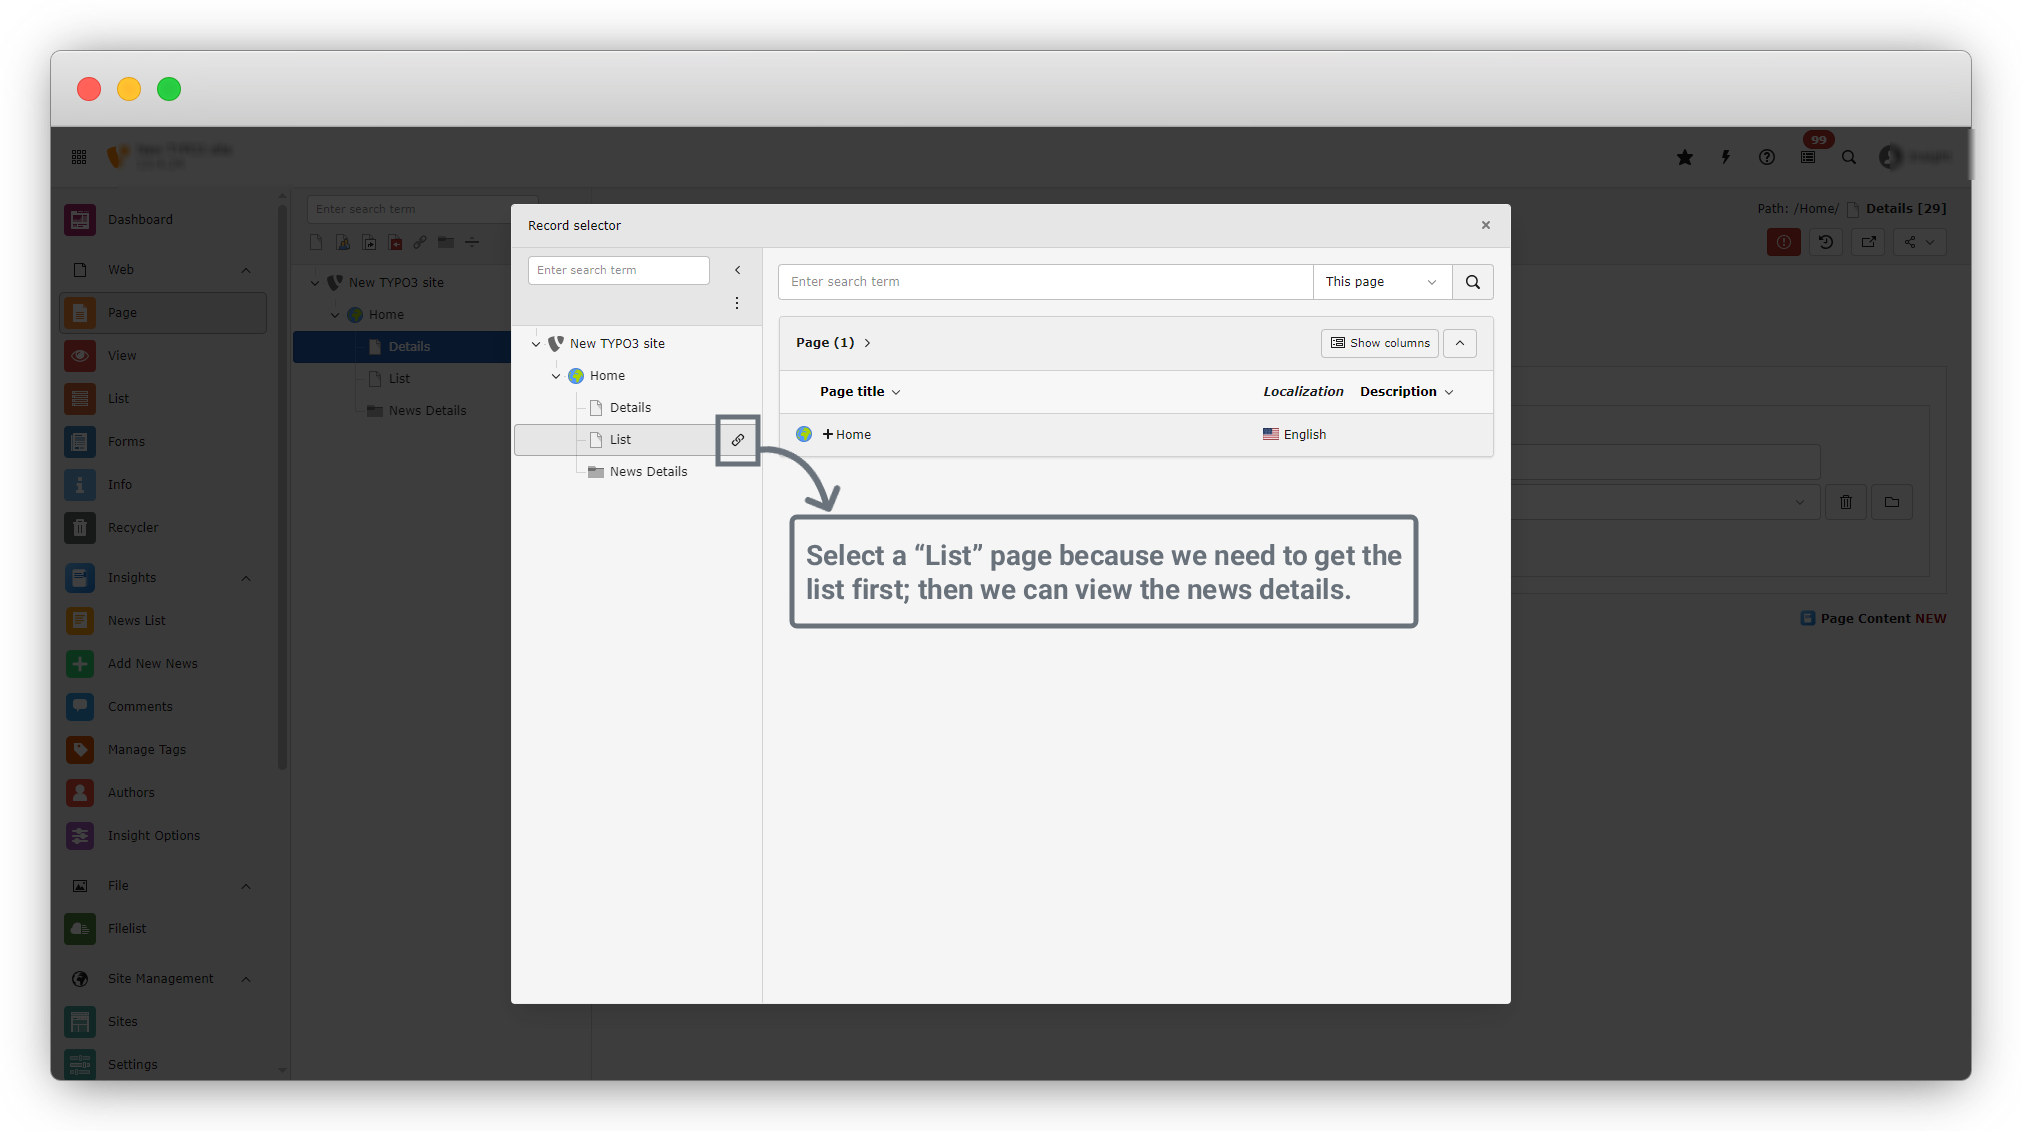
9. After clicking on the page button you will see a dialog like screenshot. As we know we need to add our List page so hover on the “List” page you will see the right side link icon. Click on the link icon and your page will be selected. See the screenshot below.
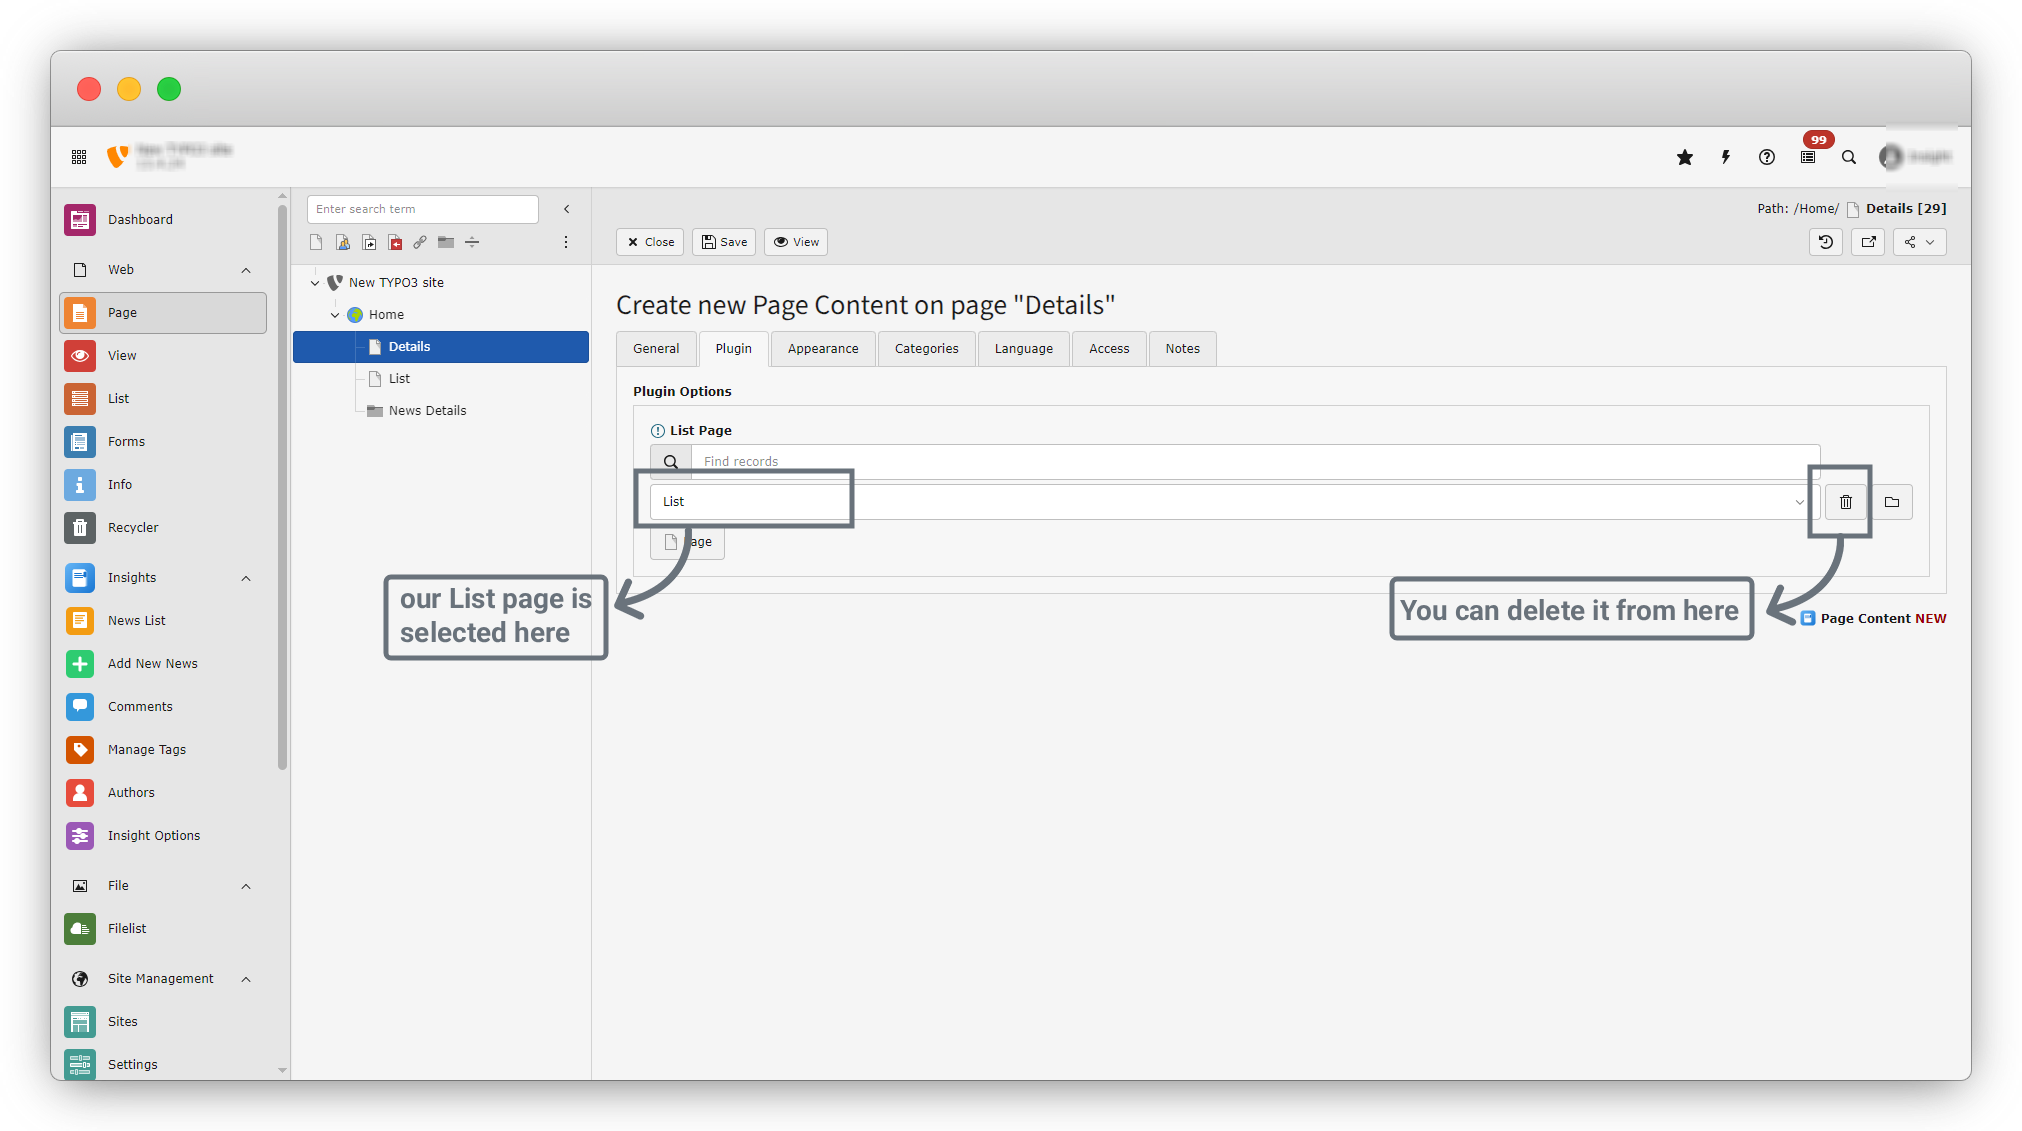
10. Our List page is selected as a “List page”. You can change the record by clicking on delete button to delete record and again click on page button to select a new record.
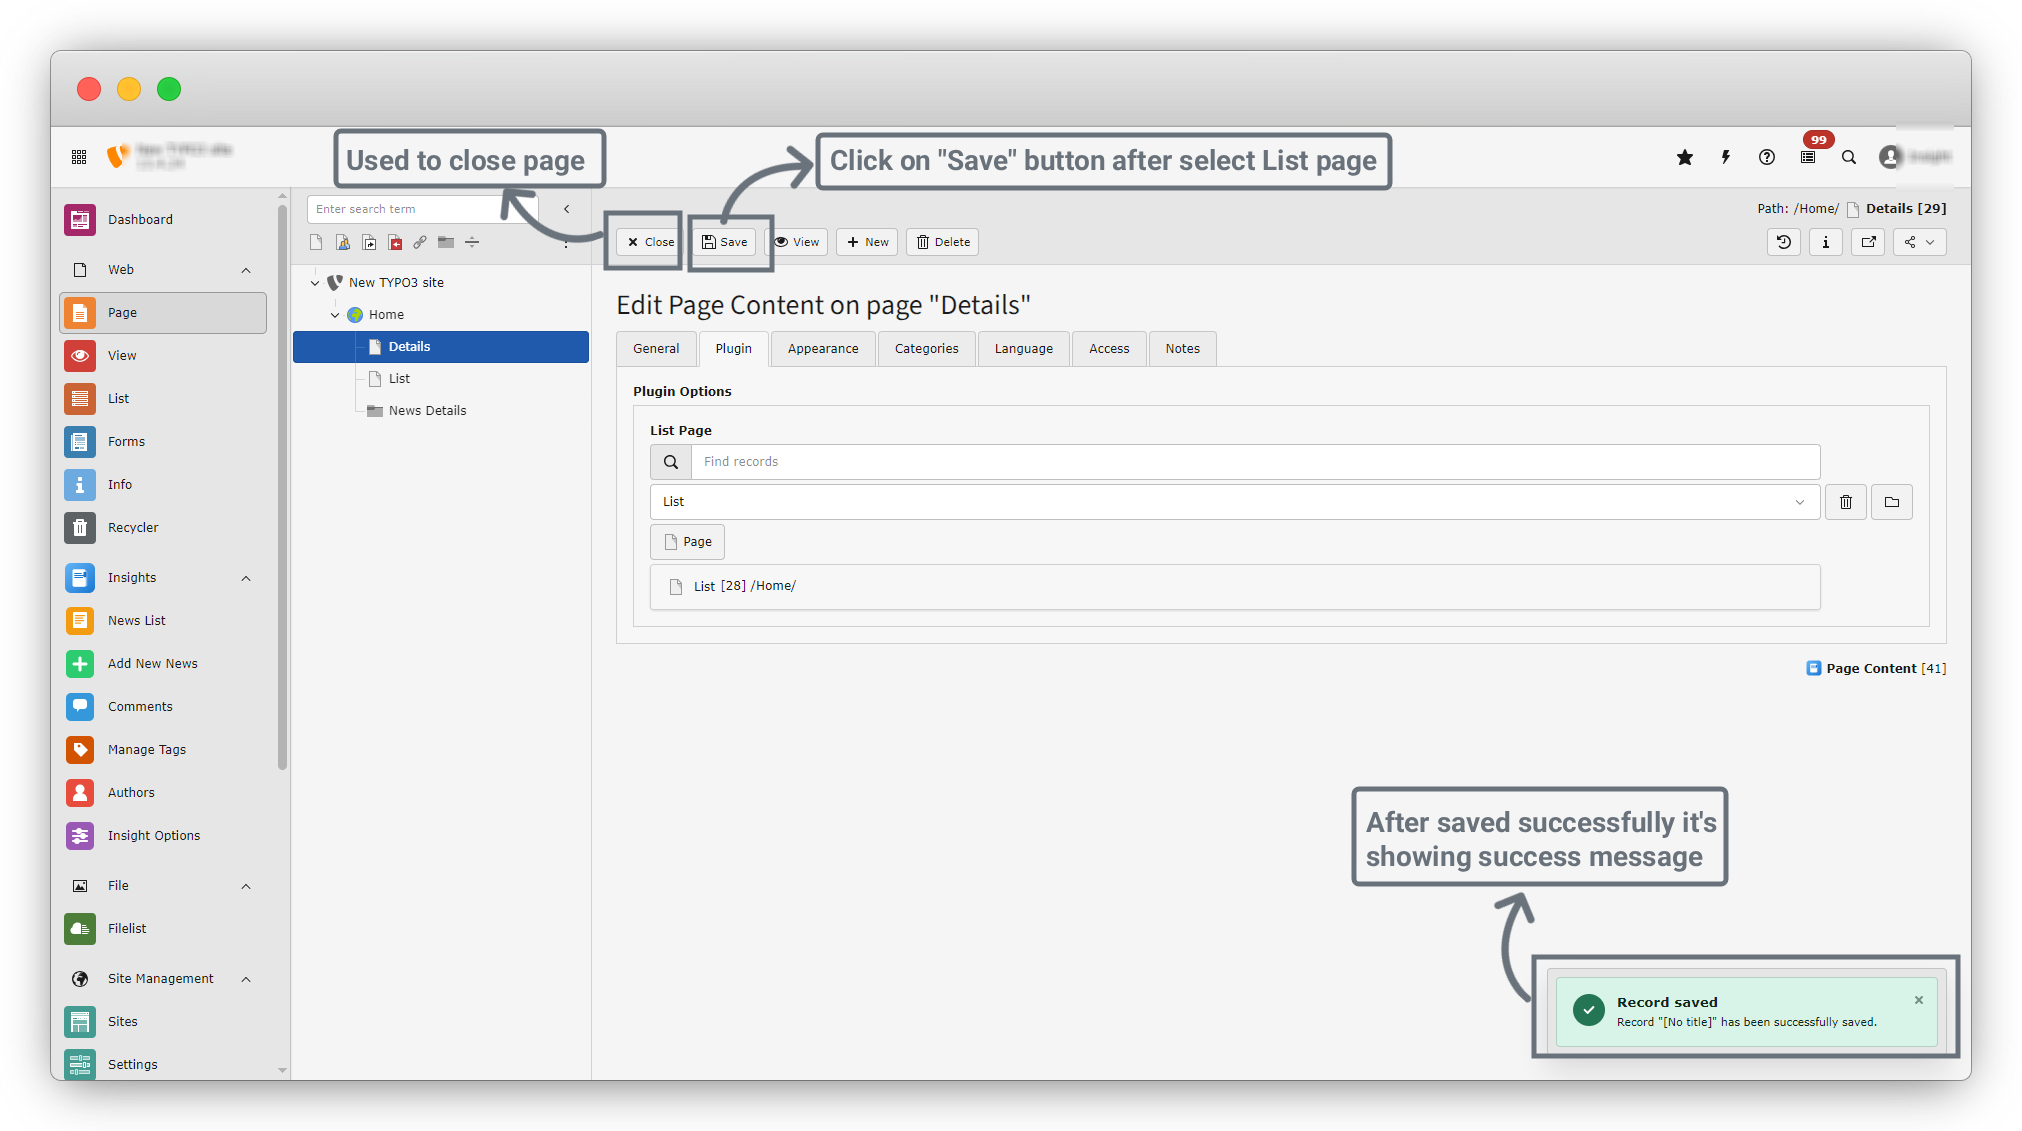
11. After filling the List page you have to click on the “save” button to save data. Click on save button and you get a success message of save data successfully.
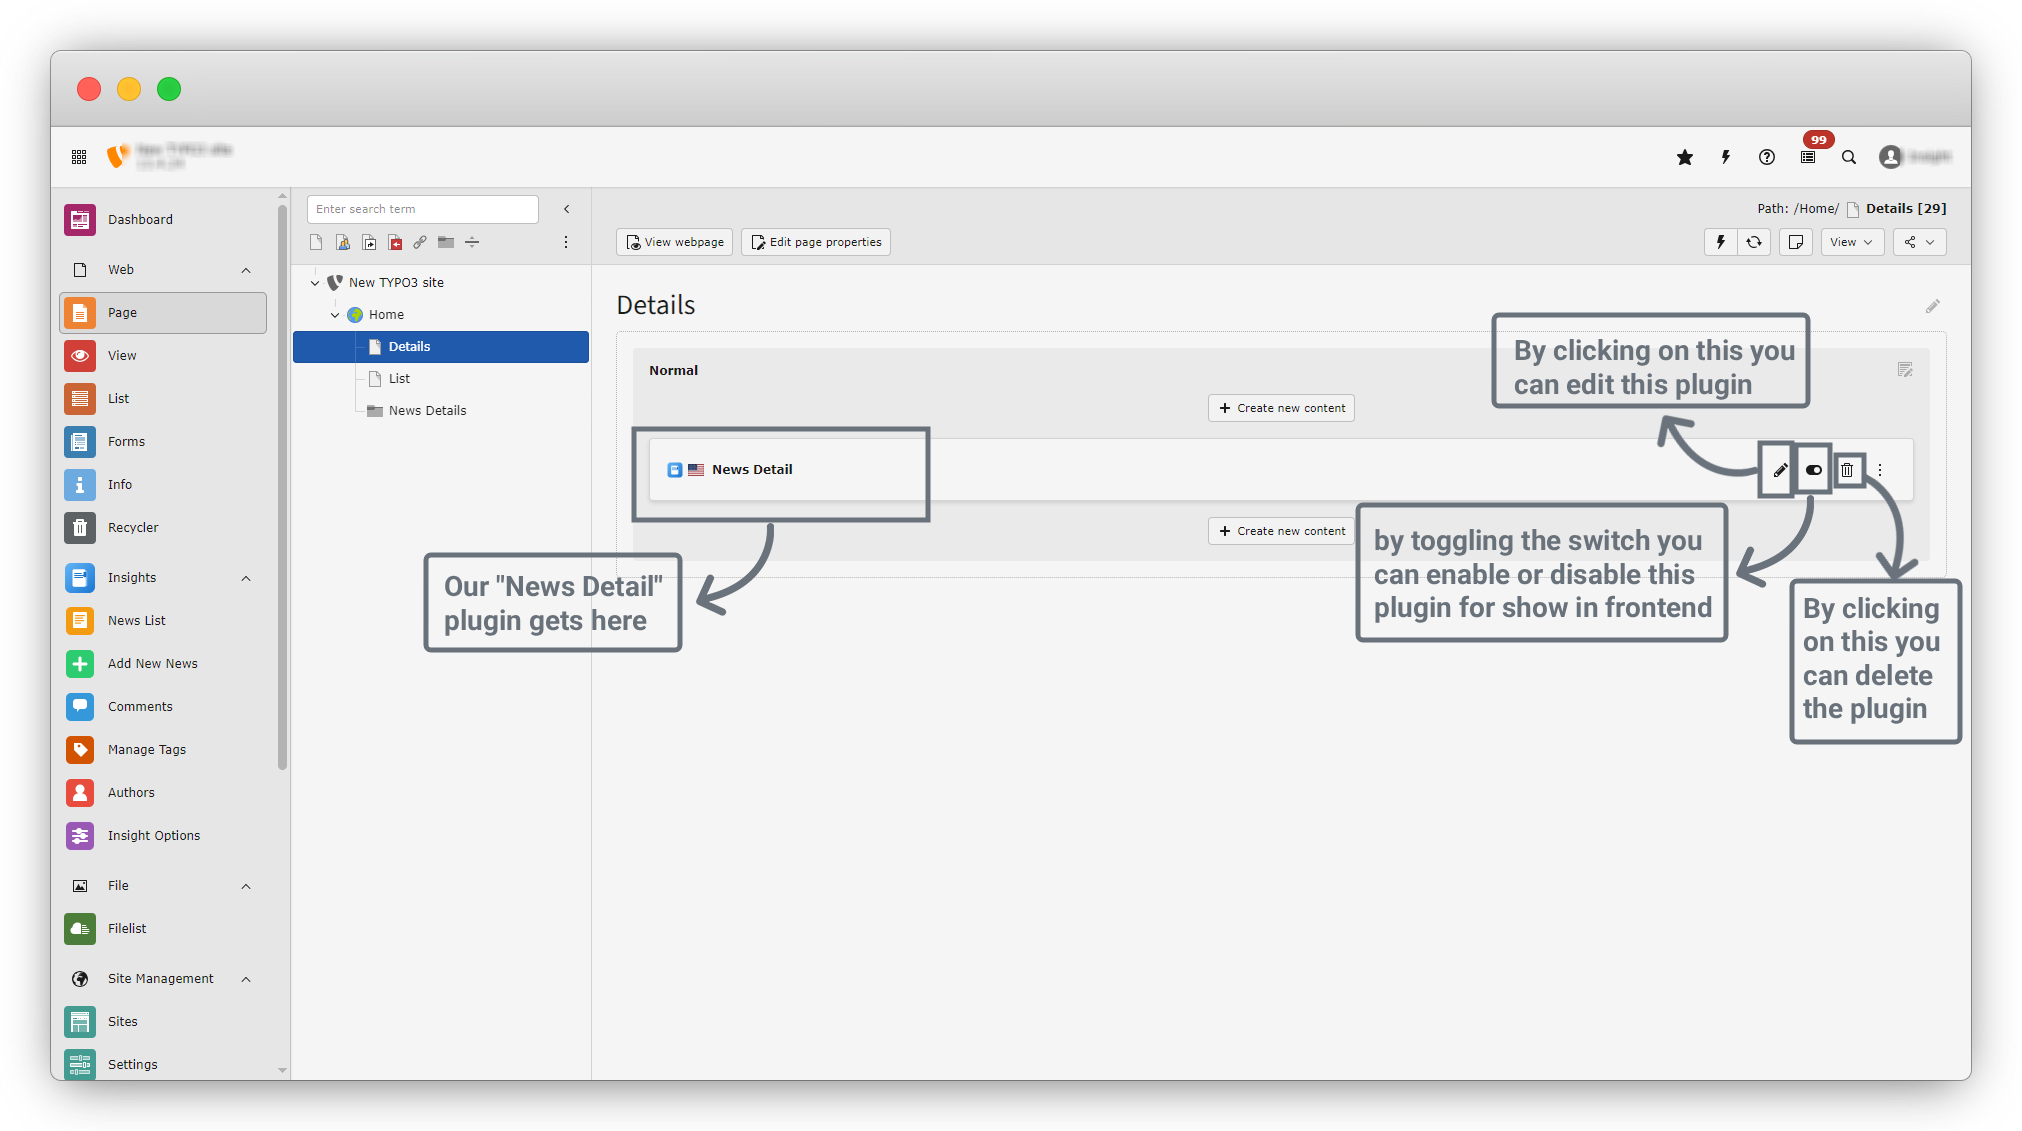
12. Now Click on the “close” button to close the page and you will see the screen that looks like the screenshot below. Our news details plugin shows there. Also you can edit, delete or enable disable the plugin.
13. All set now we can create news and we can check news also. Let's create some new news.
Share


