
URL copied to clipboard

Slider Element
6 views
__readtime__ Min
read
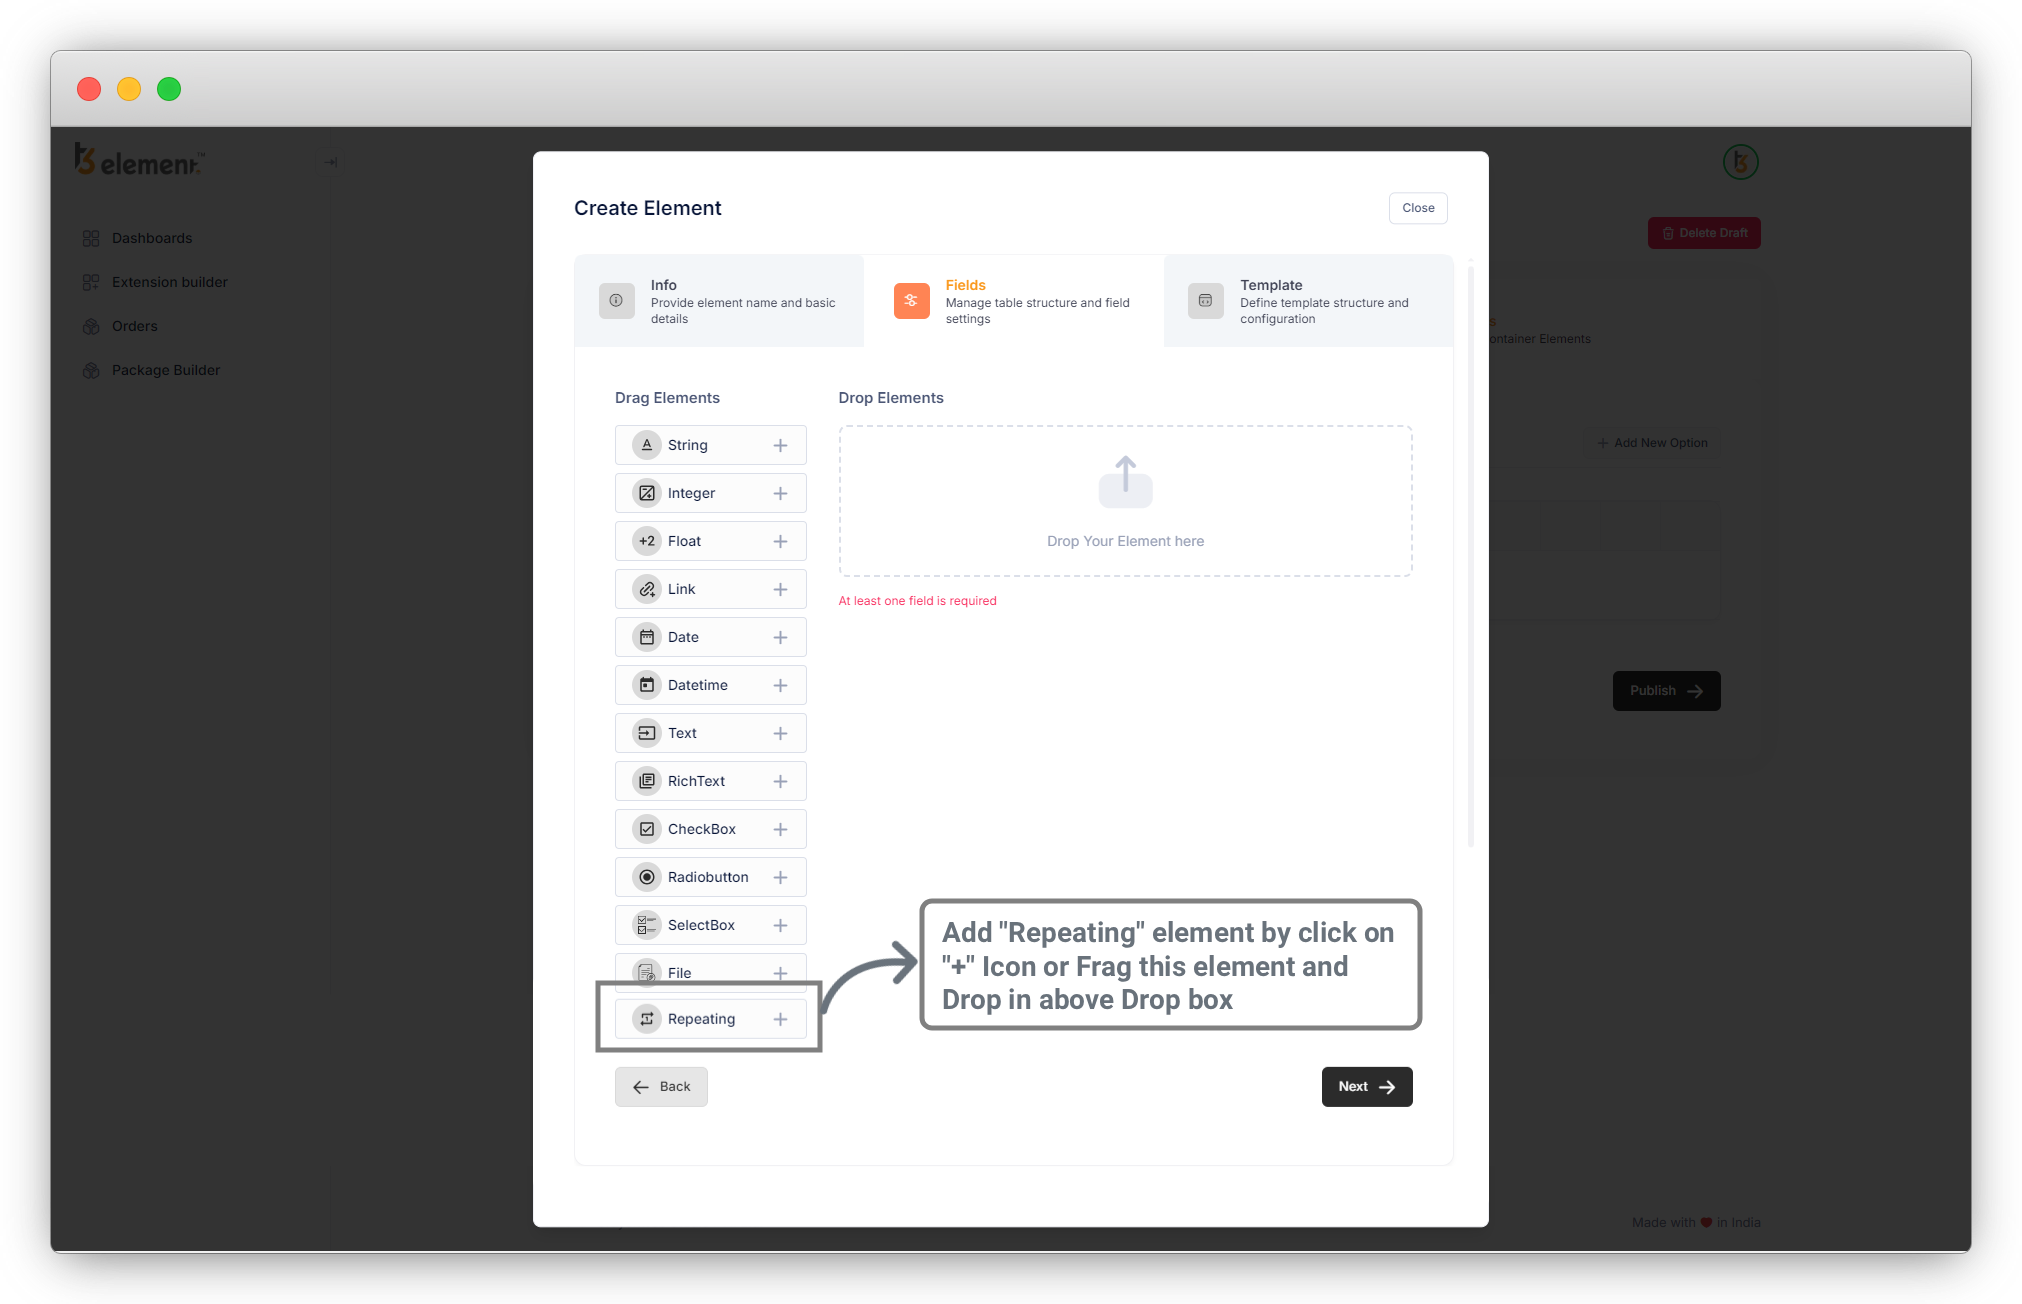
To Create a Slider Element, we have to use the “Repeating” element.
1. This “Repeating” element is specially built for elements like sliders that have the same field or group of fields in a loop, like an image slider; which has an image in a loop or a slider with a group of fields that have a Title, Image and Button.
2. Let’s go with an example of a group of fields to create a Slider.
Each slide will contain a Title, an Image, and a Button.
3. Add repeating element.
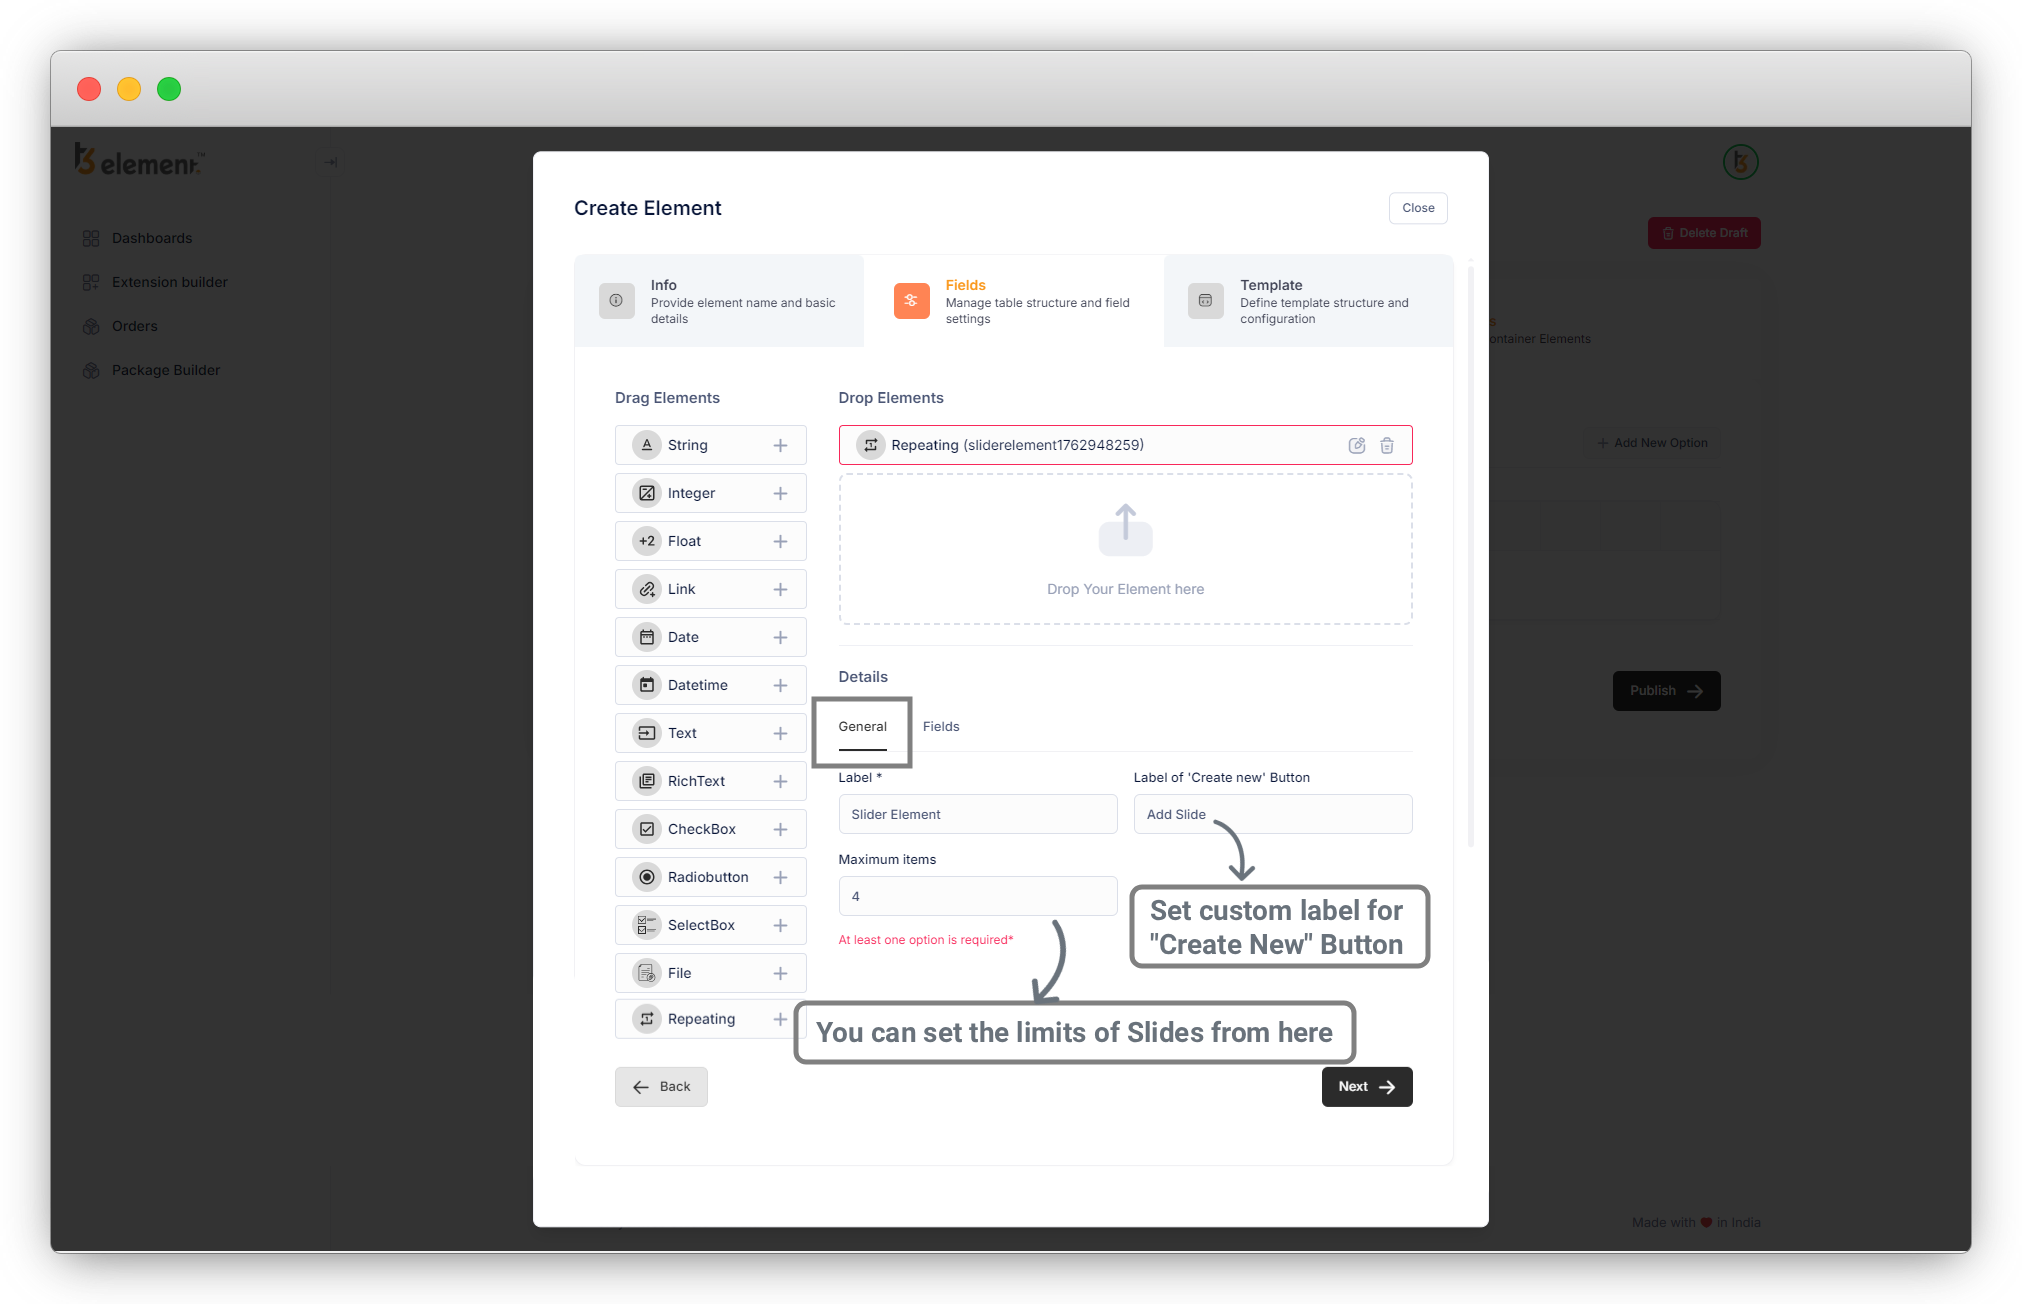
4. Now you will see 2 tabs “General” and “Fields”.
5. In the General Tab, you can fill up details of the “Repeating” field as you can see in below screenshot.
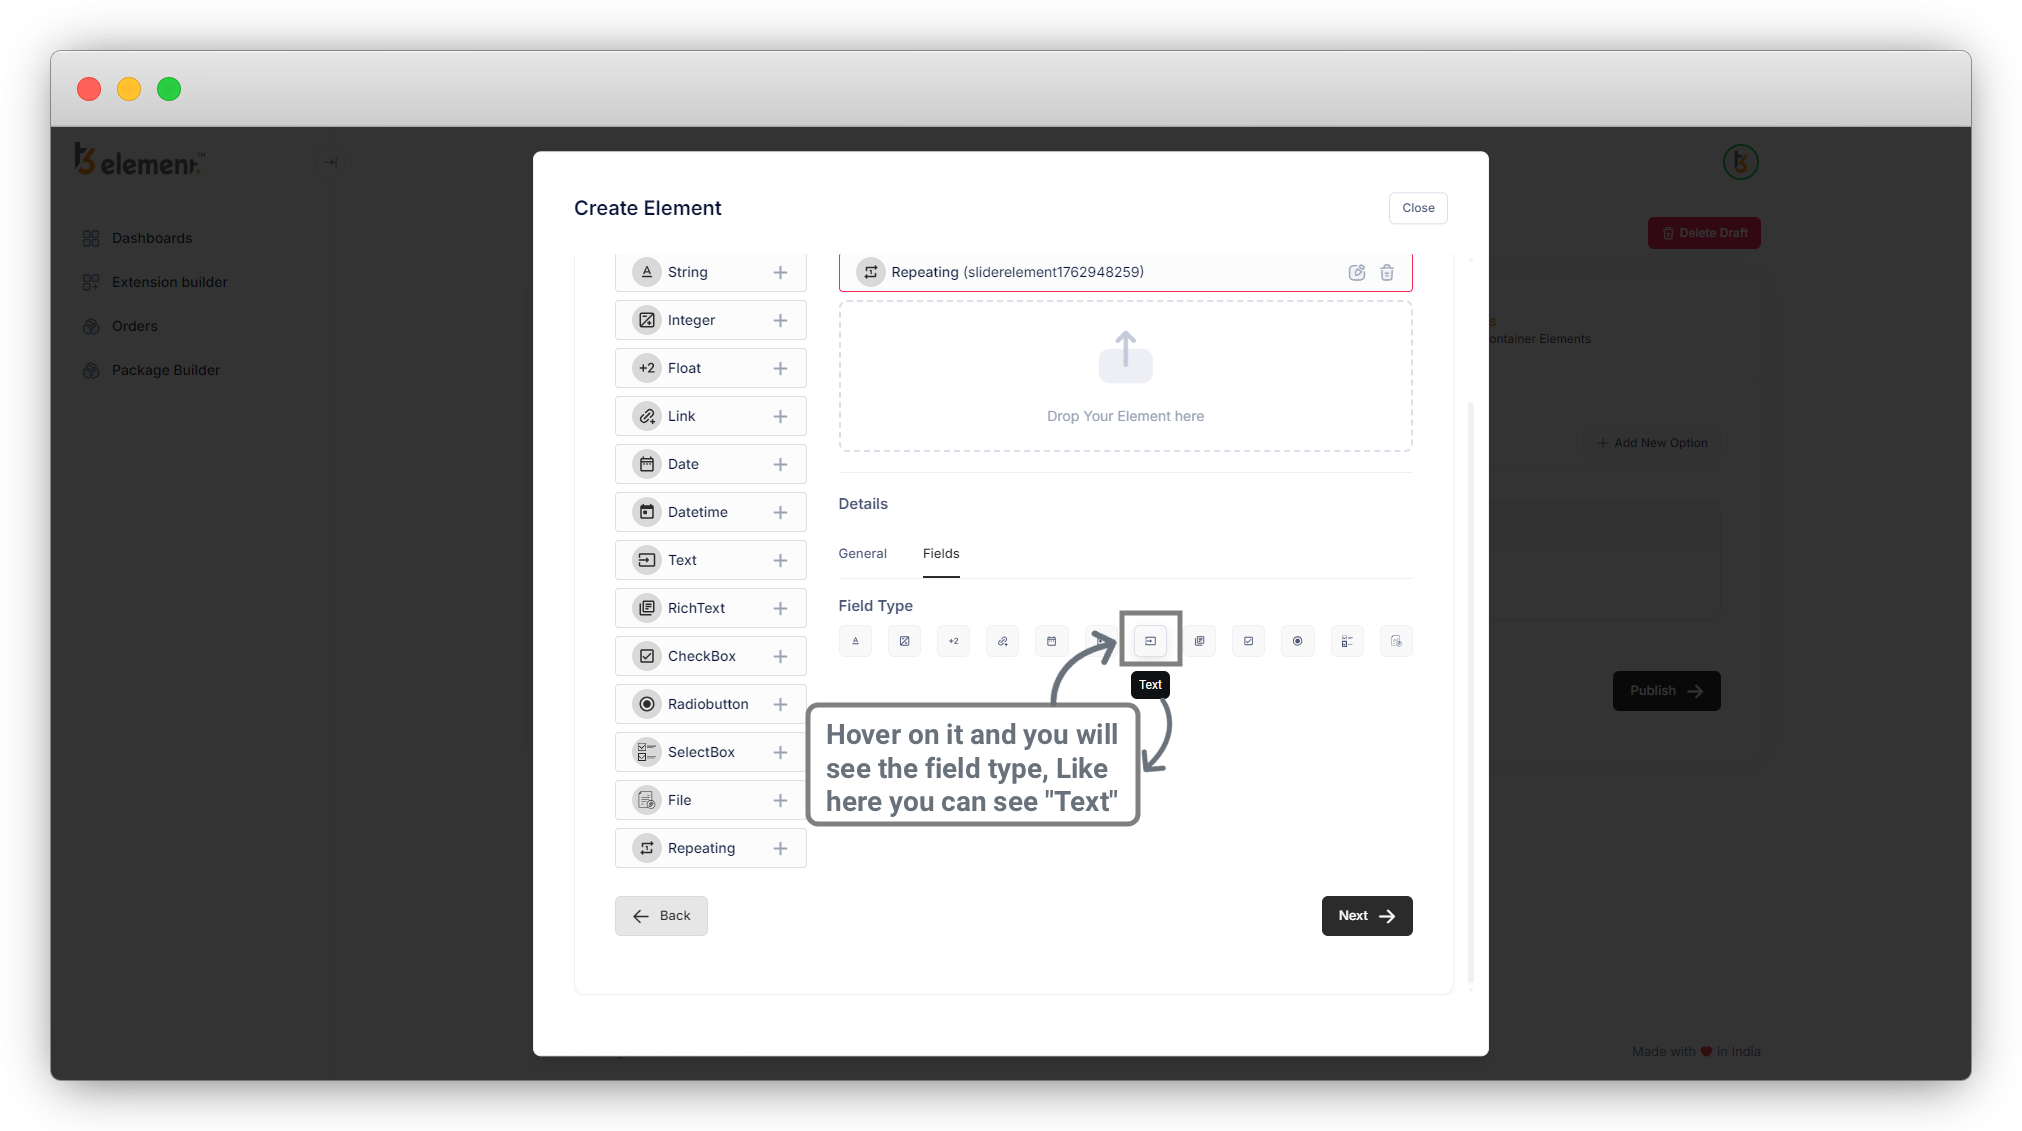
6. In the Fields Tab, you can add fields for the slider like Title, Image, and Button. Hover over the icons and you will see the type of field.
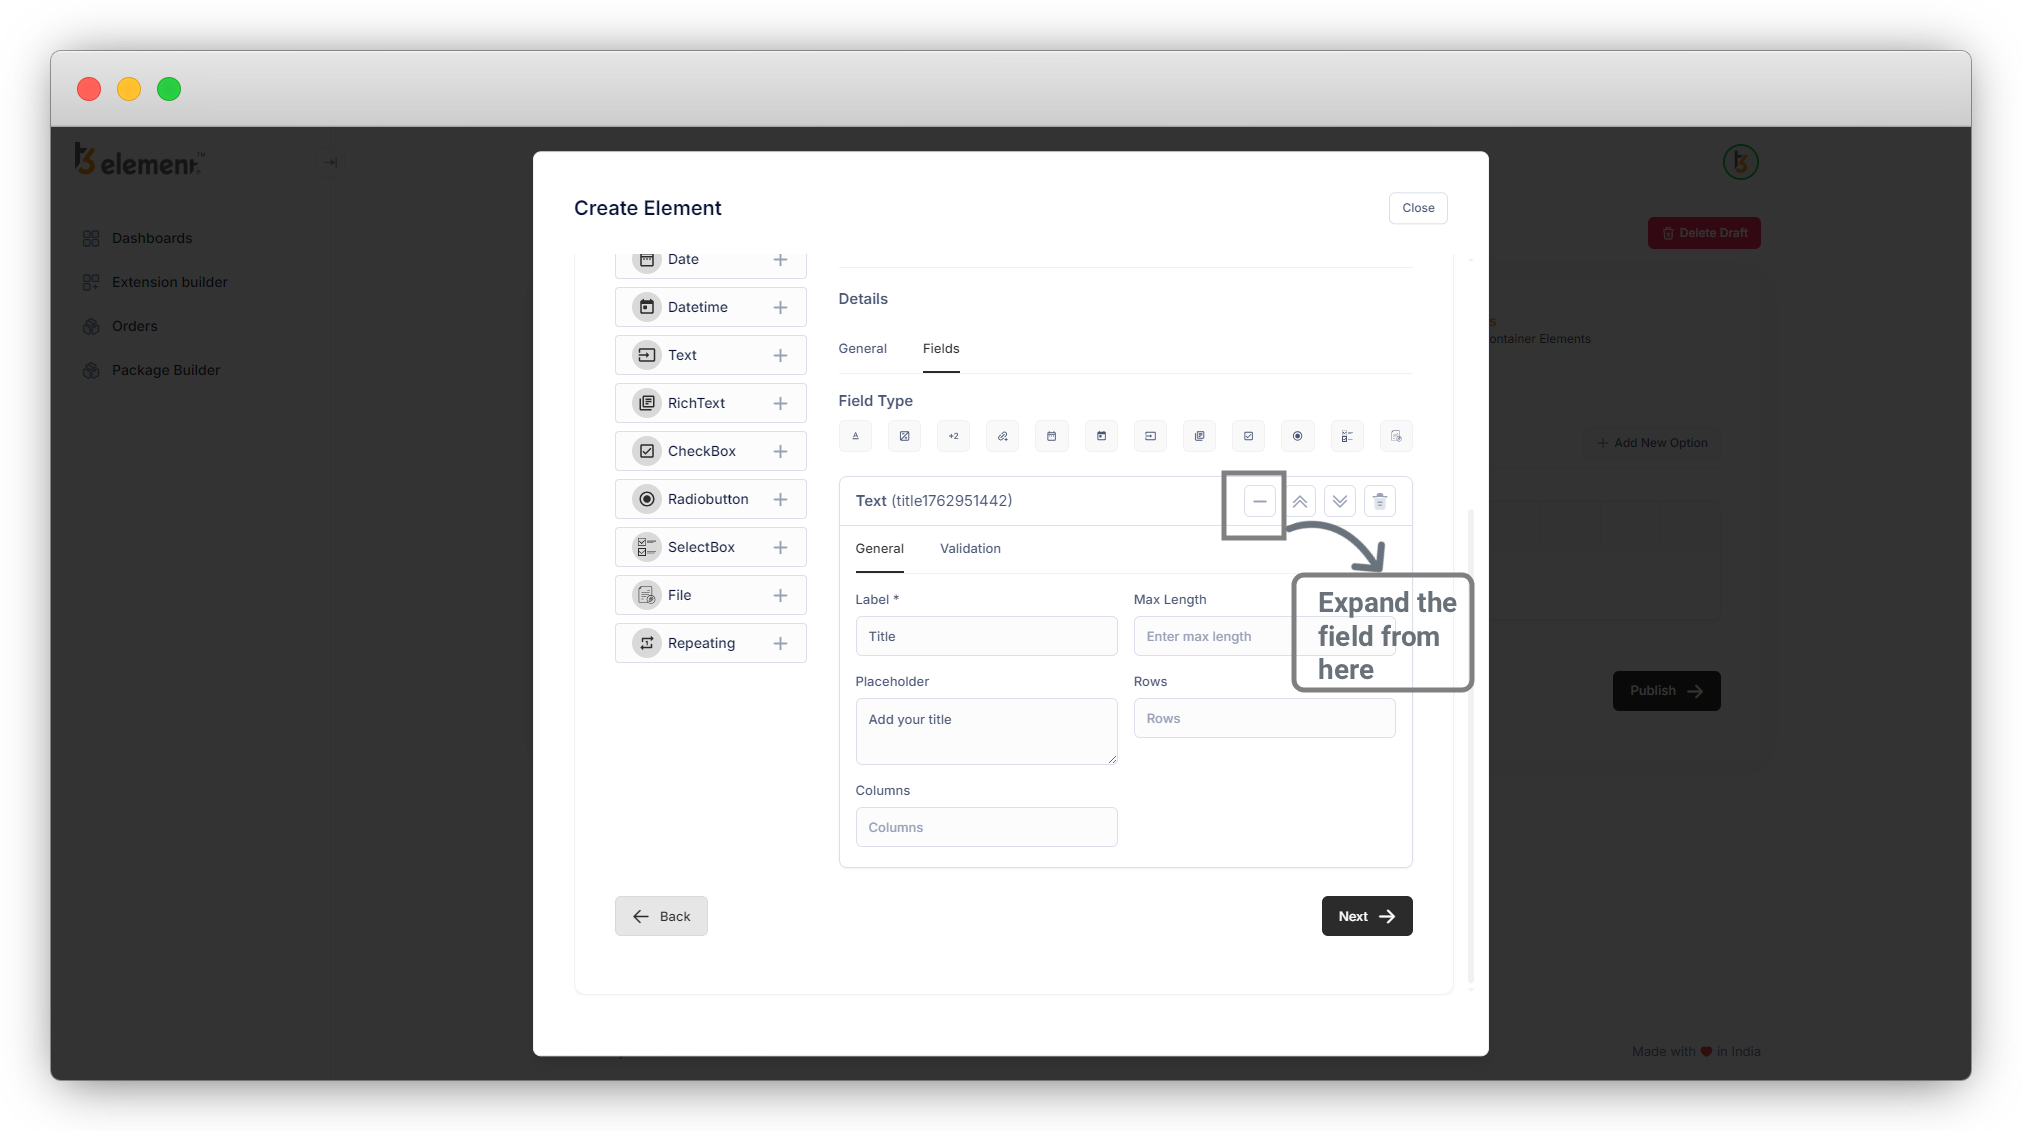
1. Title
Add “String” or “Text” type for the Title, expand the field by clicking on the arrow on the far right side, and fill up the details of fields.
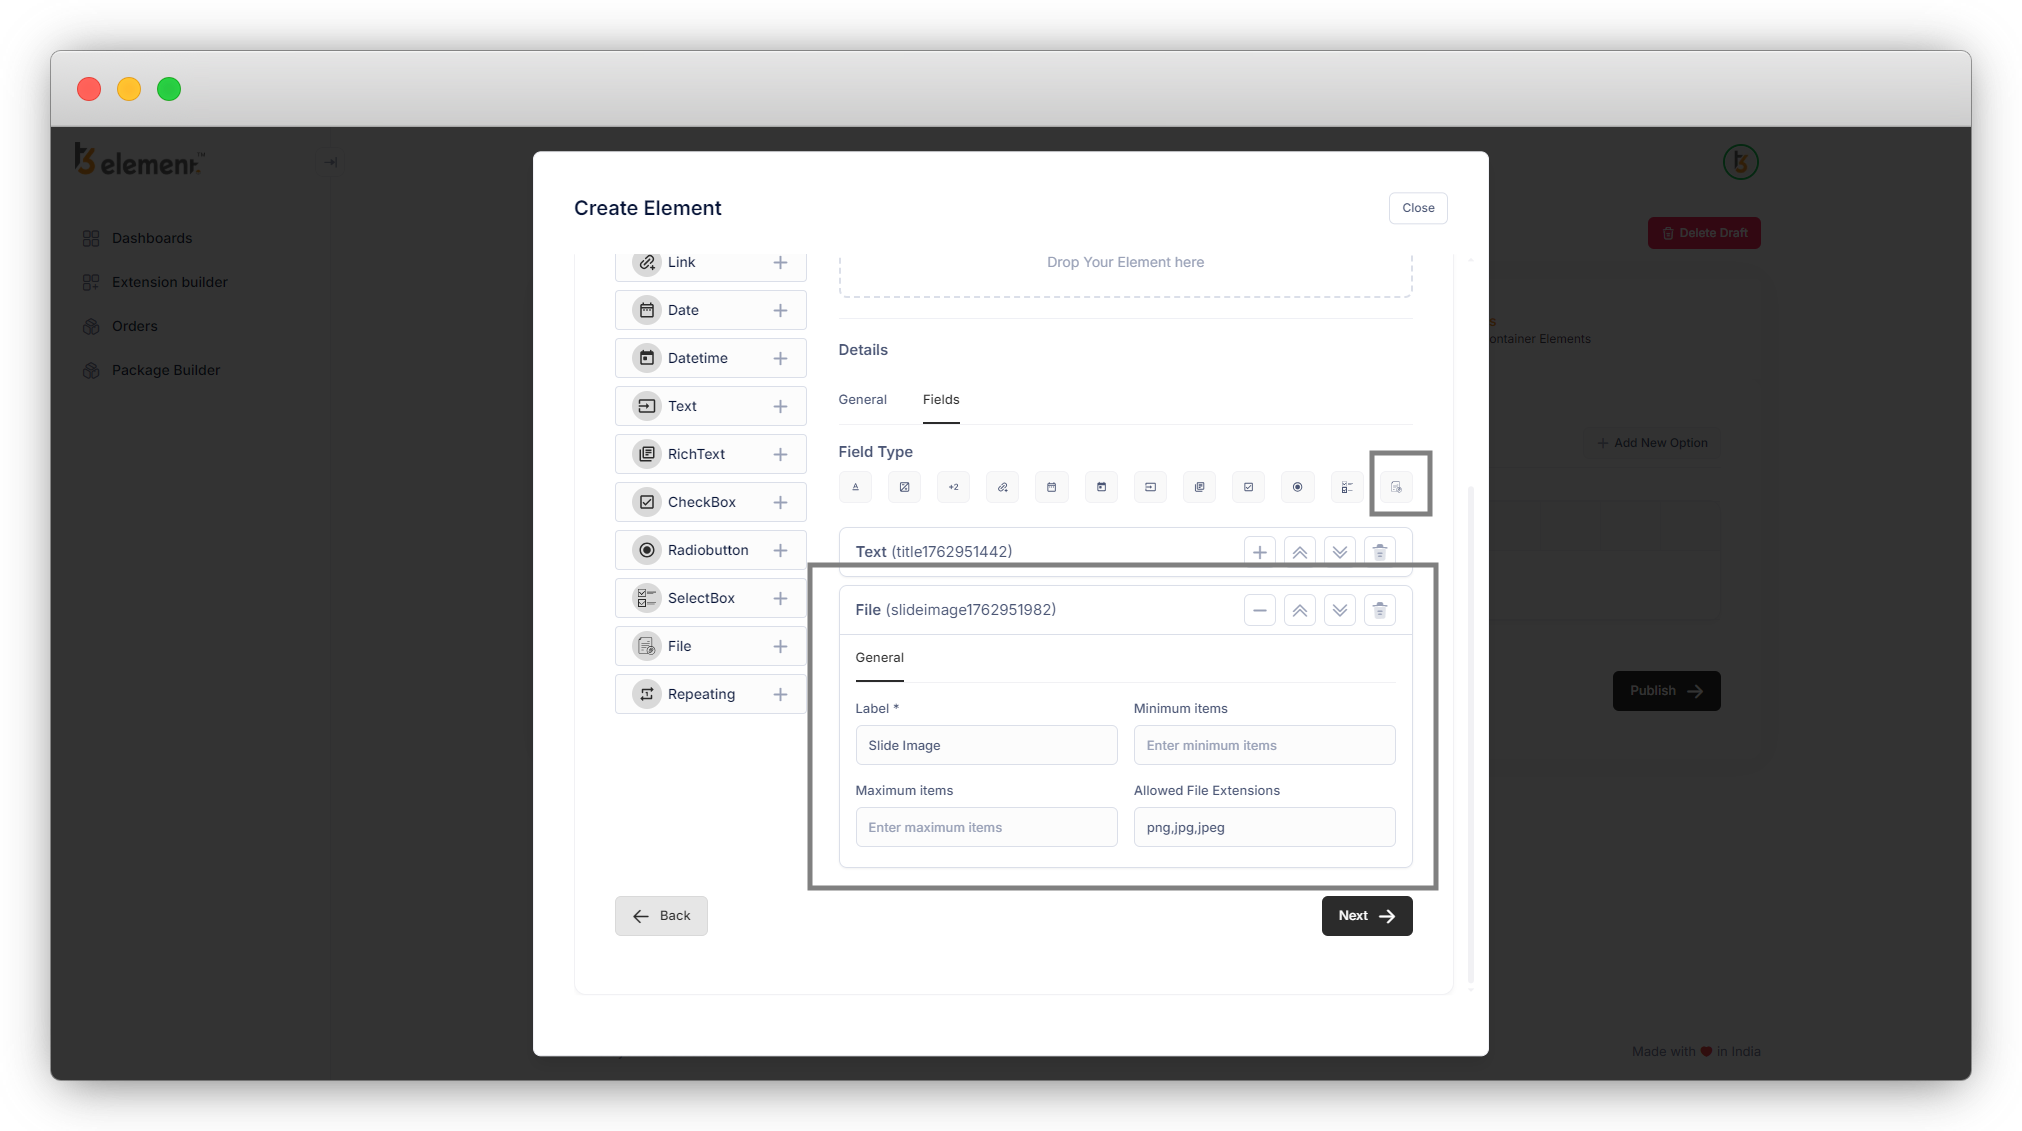
2. Image
Add “File”, expand the field, and fill up the details.
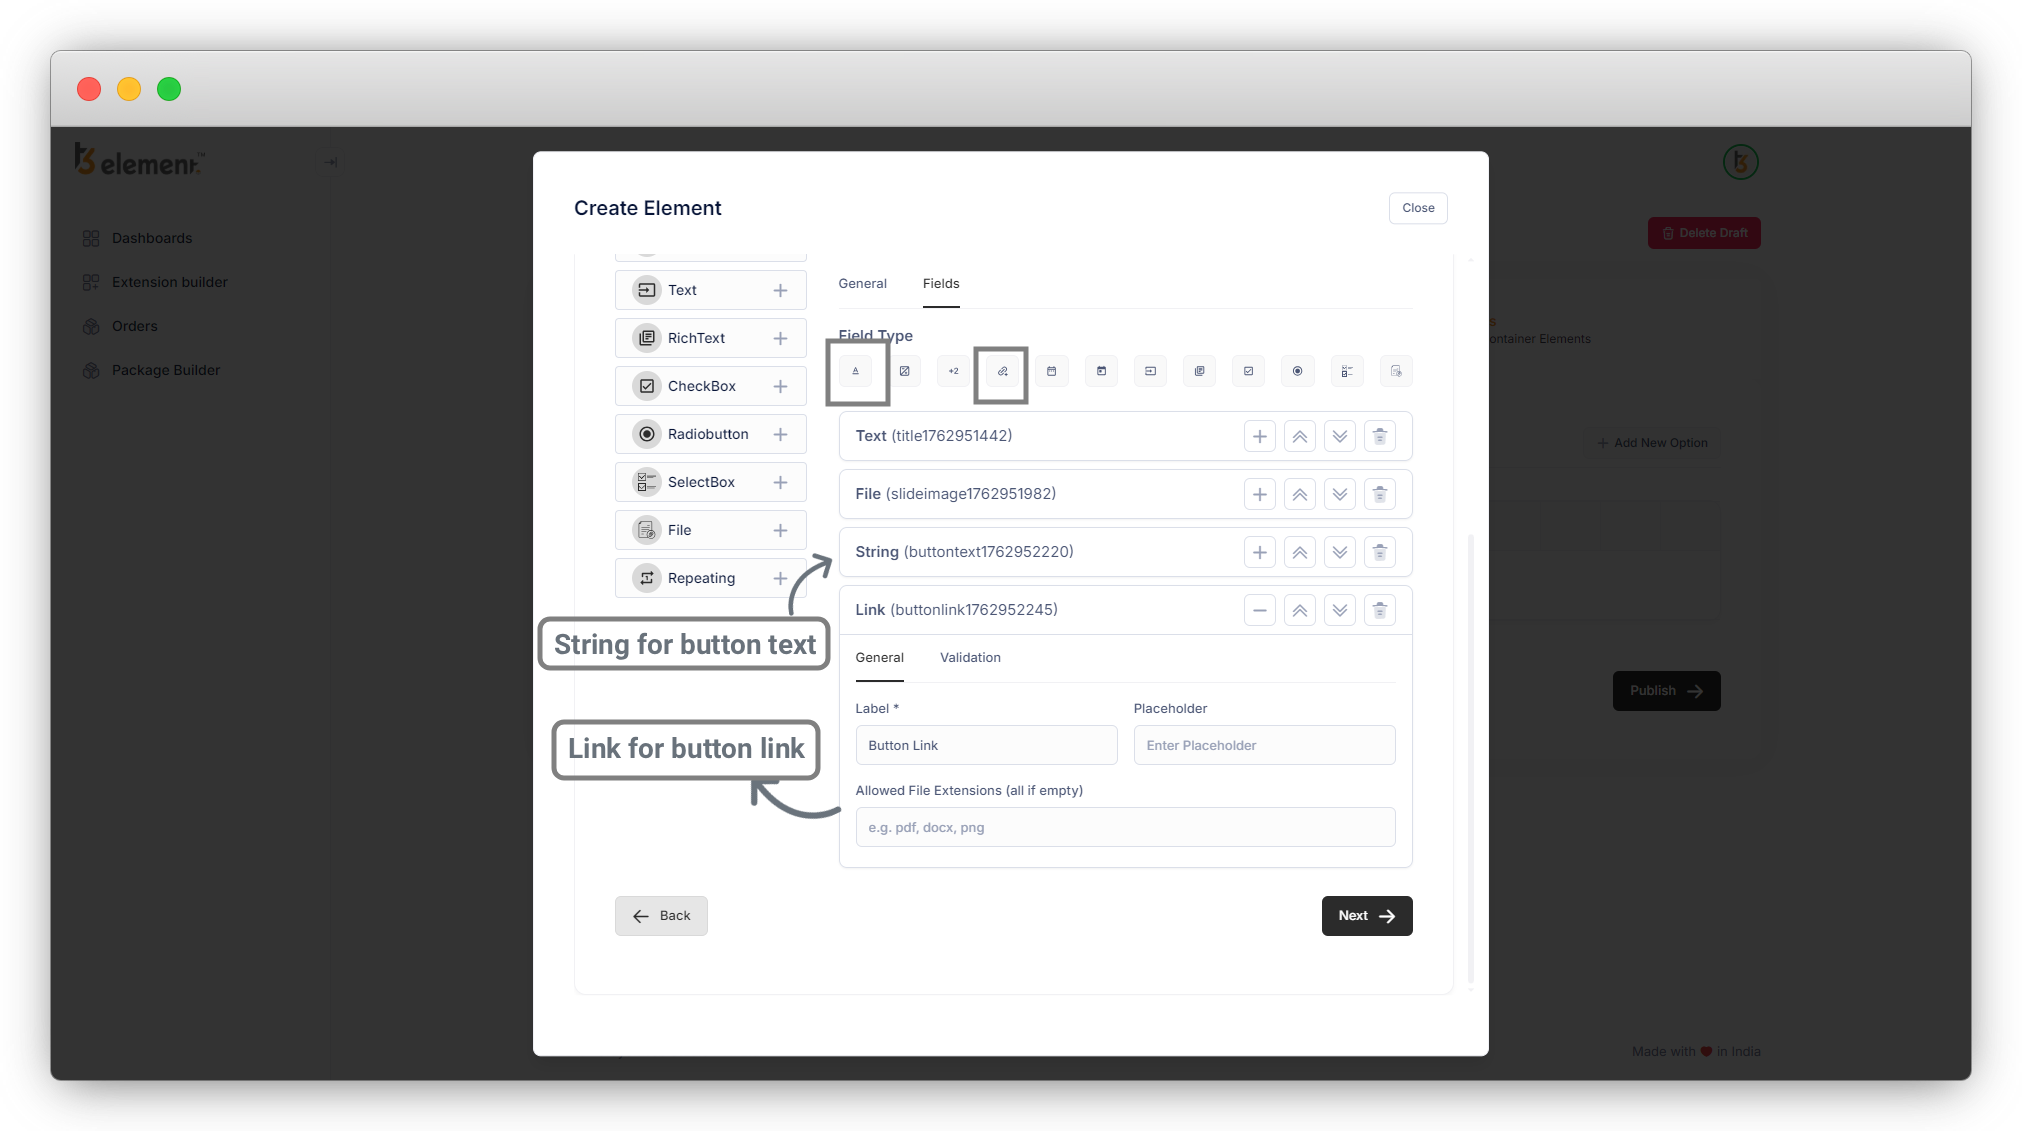
3. Button
To add the button, you will need to add a String for the button text and a Link to link the button as you can see in the below screenshot.
7. Now all the required fields are added, press on the “Next” button and you will see the template which has been generated according to the fields you chose to create the Slider element.
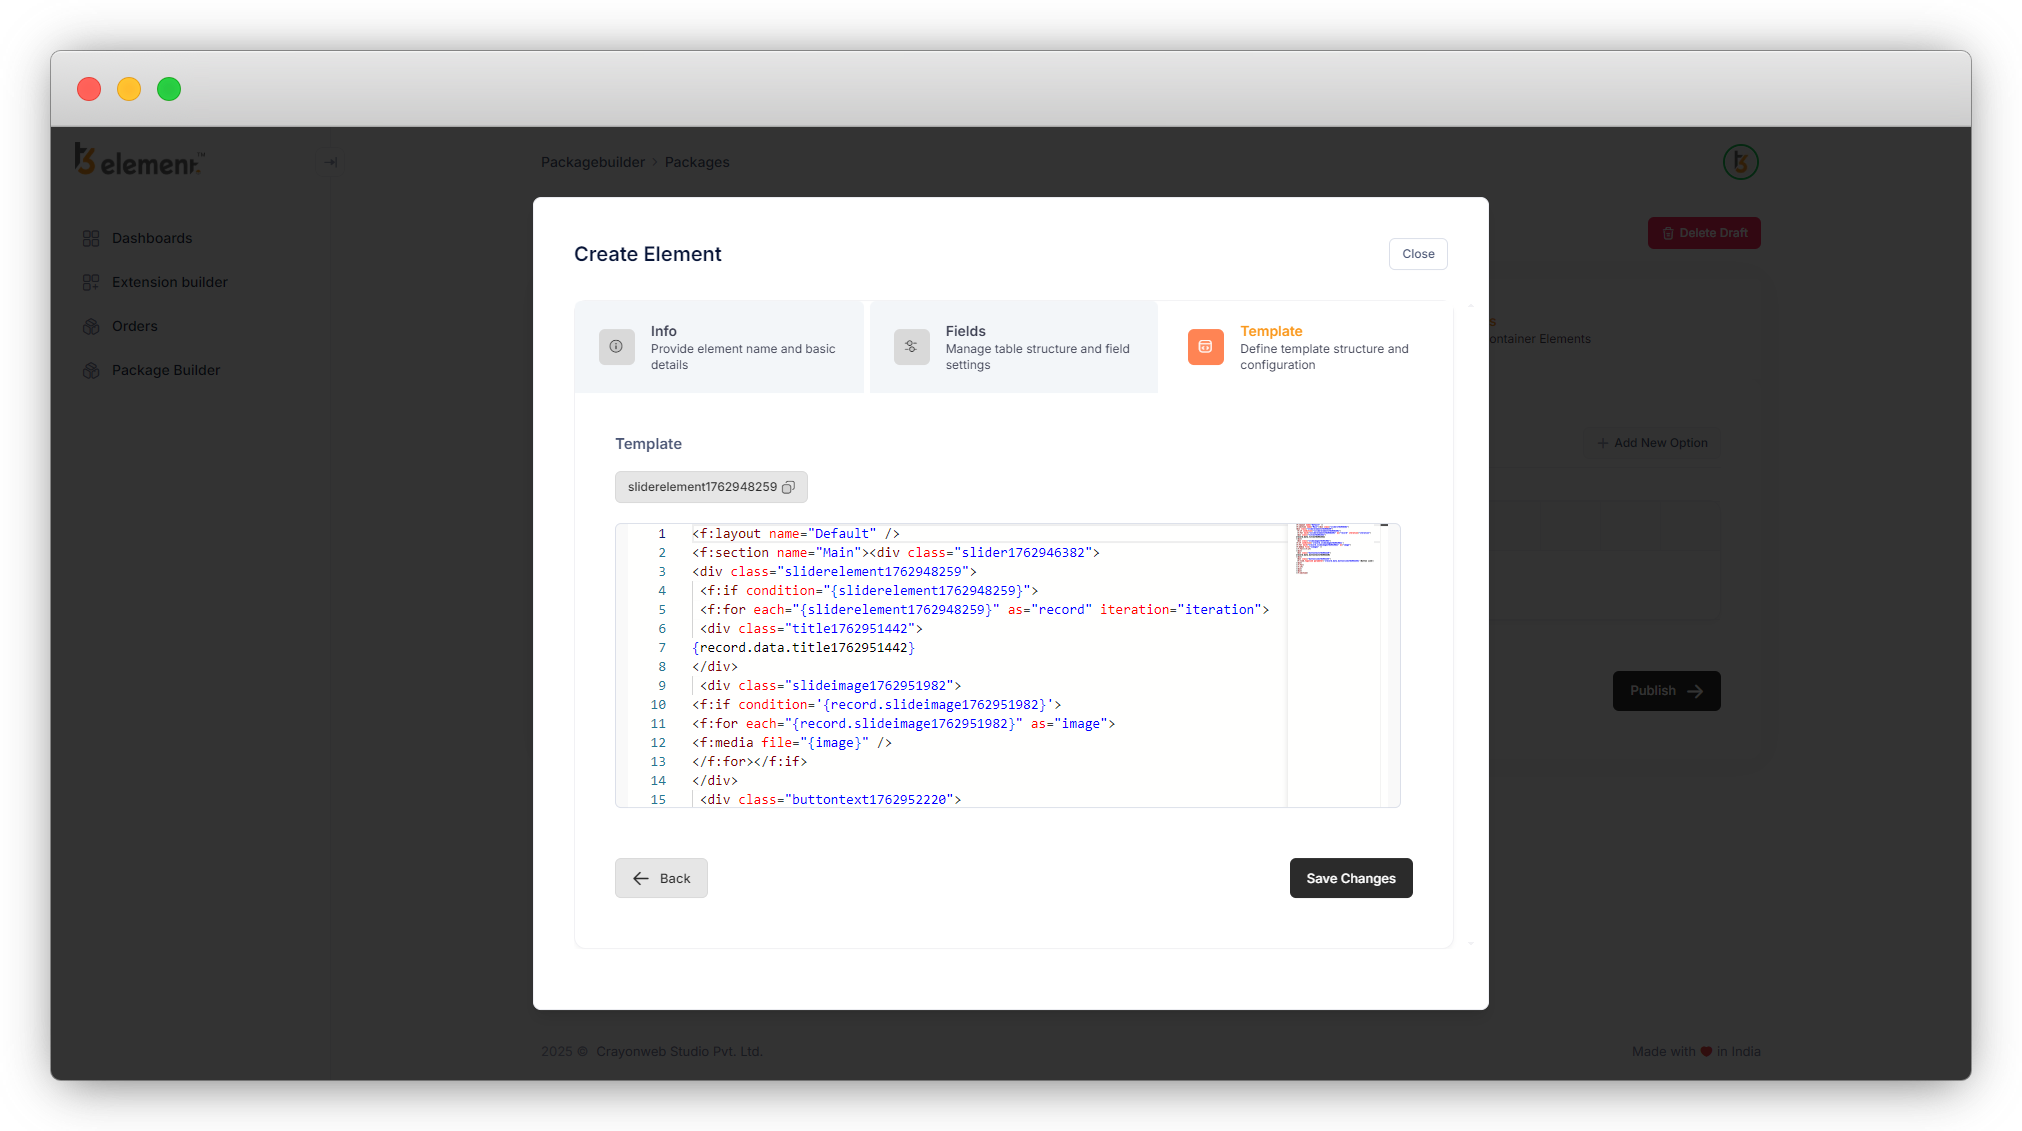
Use the template to structure your element as you can see in the below screenshot. Save the template.
The template code is:
<div>
    <div>
        <div>
            <div>
                <div>
                    <f:if condition="{sliderelement1716975317175}">
                        <f:for each="{sliderelement1716975317175}" as="record" iteration="iteration">
                                <div>
                                    <h2>{record.data.title1718631893965}</h2>
                                    <div>
                                        <f:if condition='{record.slideimage1718632444436}'>
                                            <f:for each="{record.slideimage1718632444436}" as="image">
                                                <div>
                                                    <f:media file="{image}" width="400" height="375" />
                                                </div>
                                            </f:for>
                                        </f:if>
                                    </div>
                                    <div>
                                        <f:link.typolink parameter='{record.data.buttonlink1718632898015}'>
                                            {record.data.buttontext1718632882162}</f:link.typolink>
                                    </div>
                                </div>
                        </f:for>
                    </f:if>
                </div>
            </div>
        </div>
    </div>
</div>
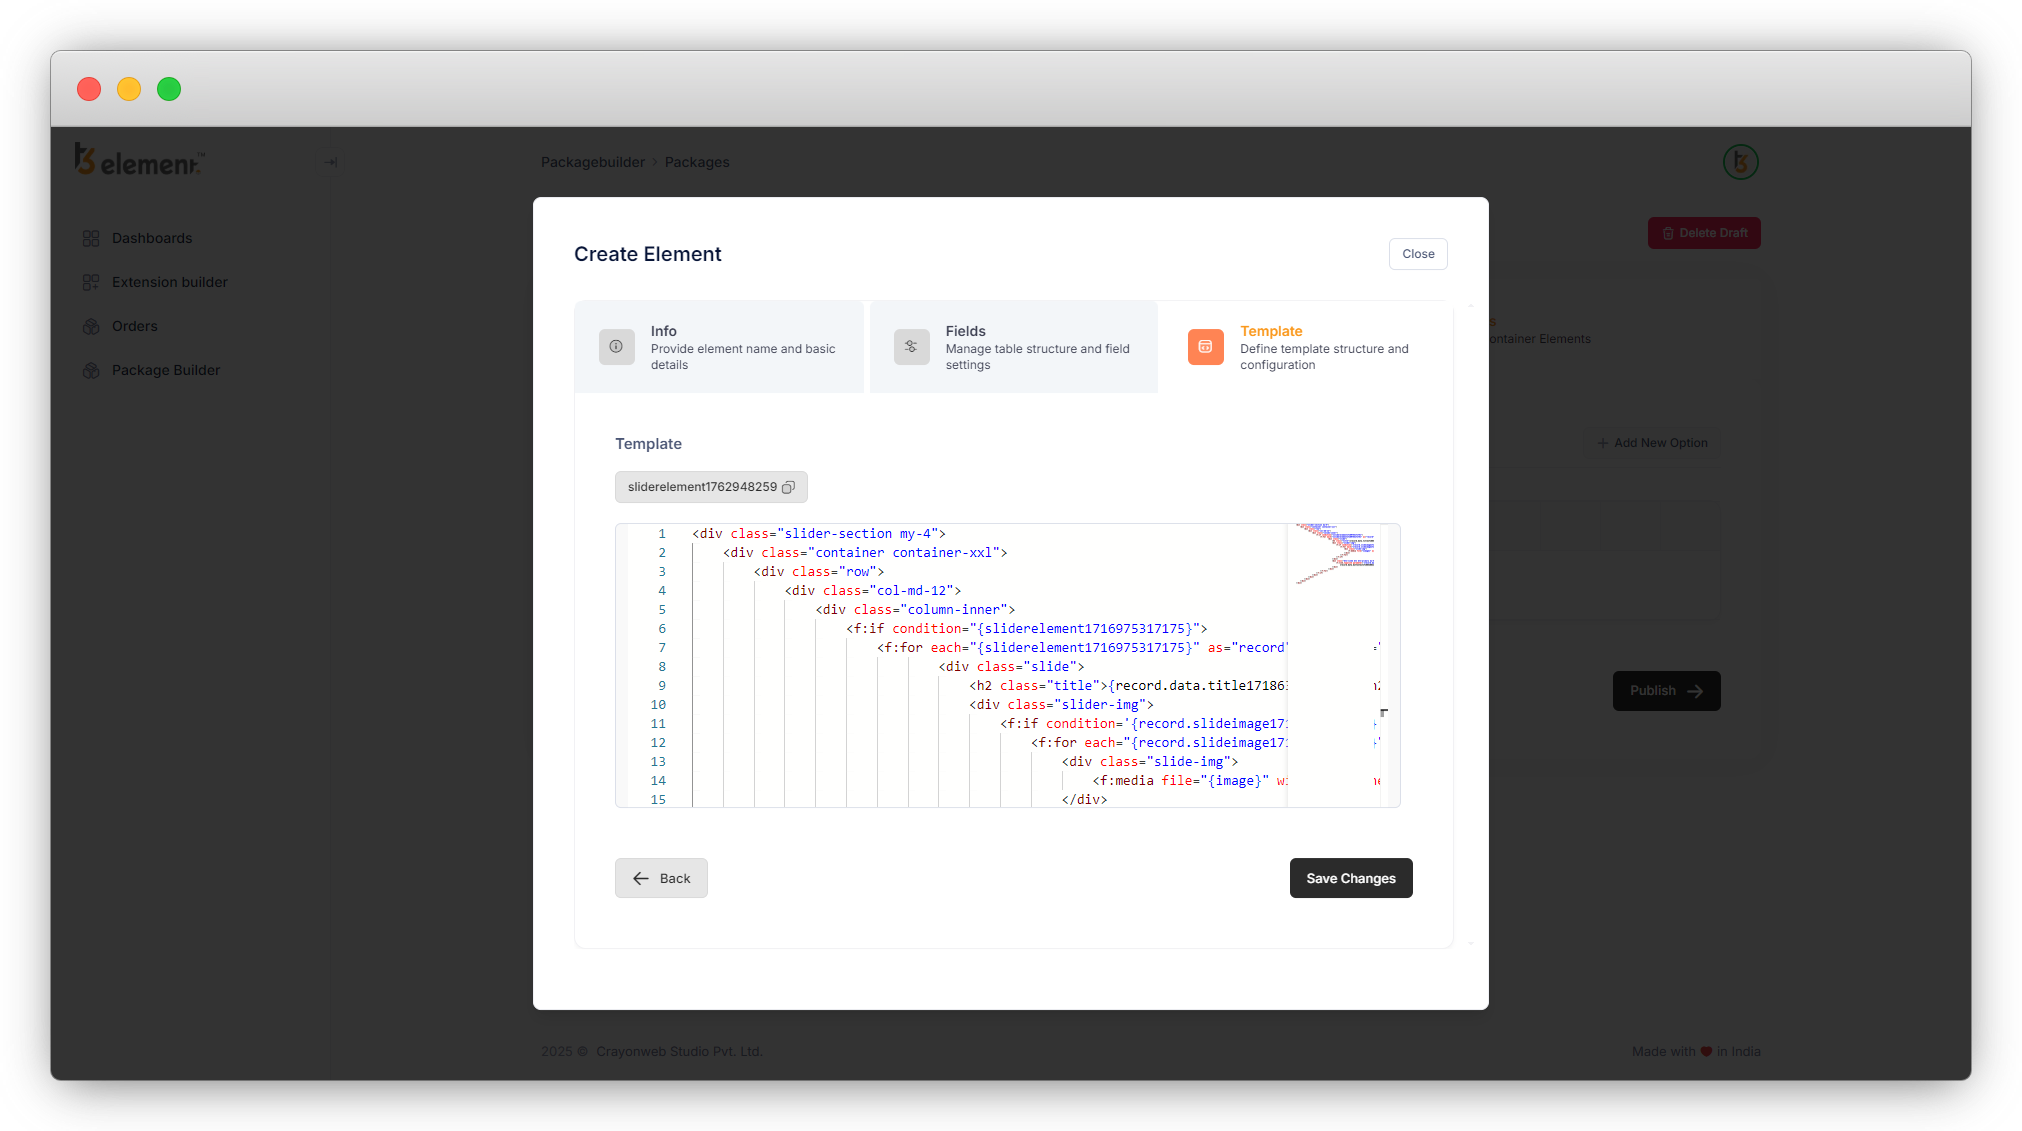
You can use the above template if you want the same structure, but make sure that you are using your markers, instead of in above template code.
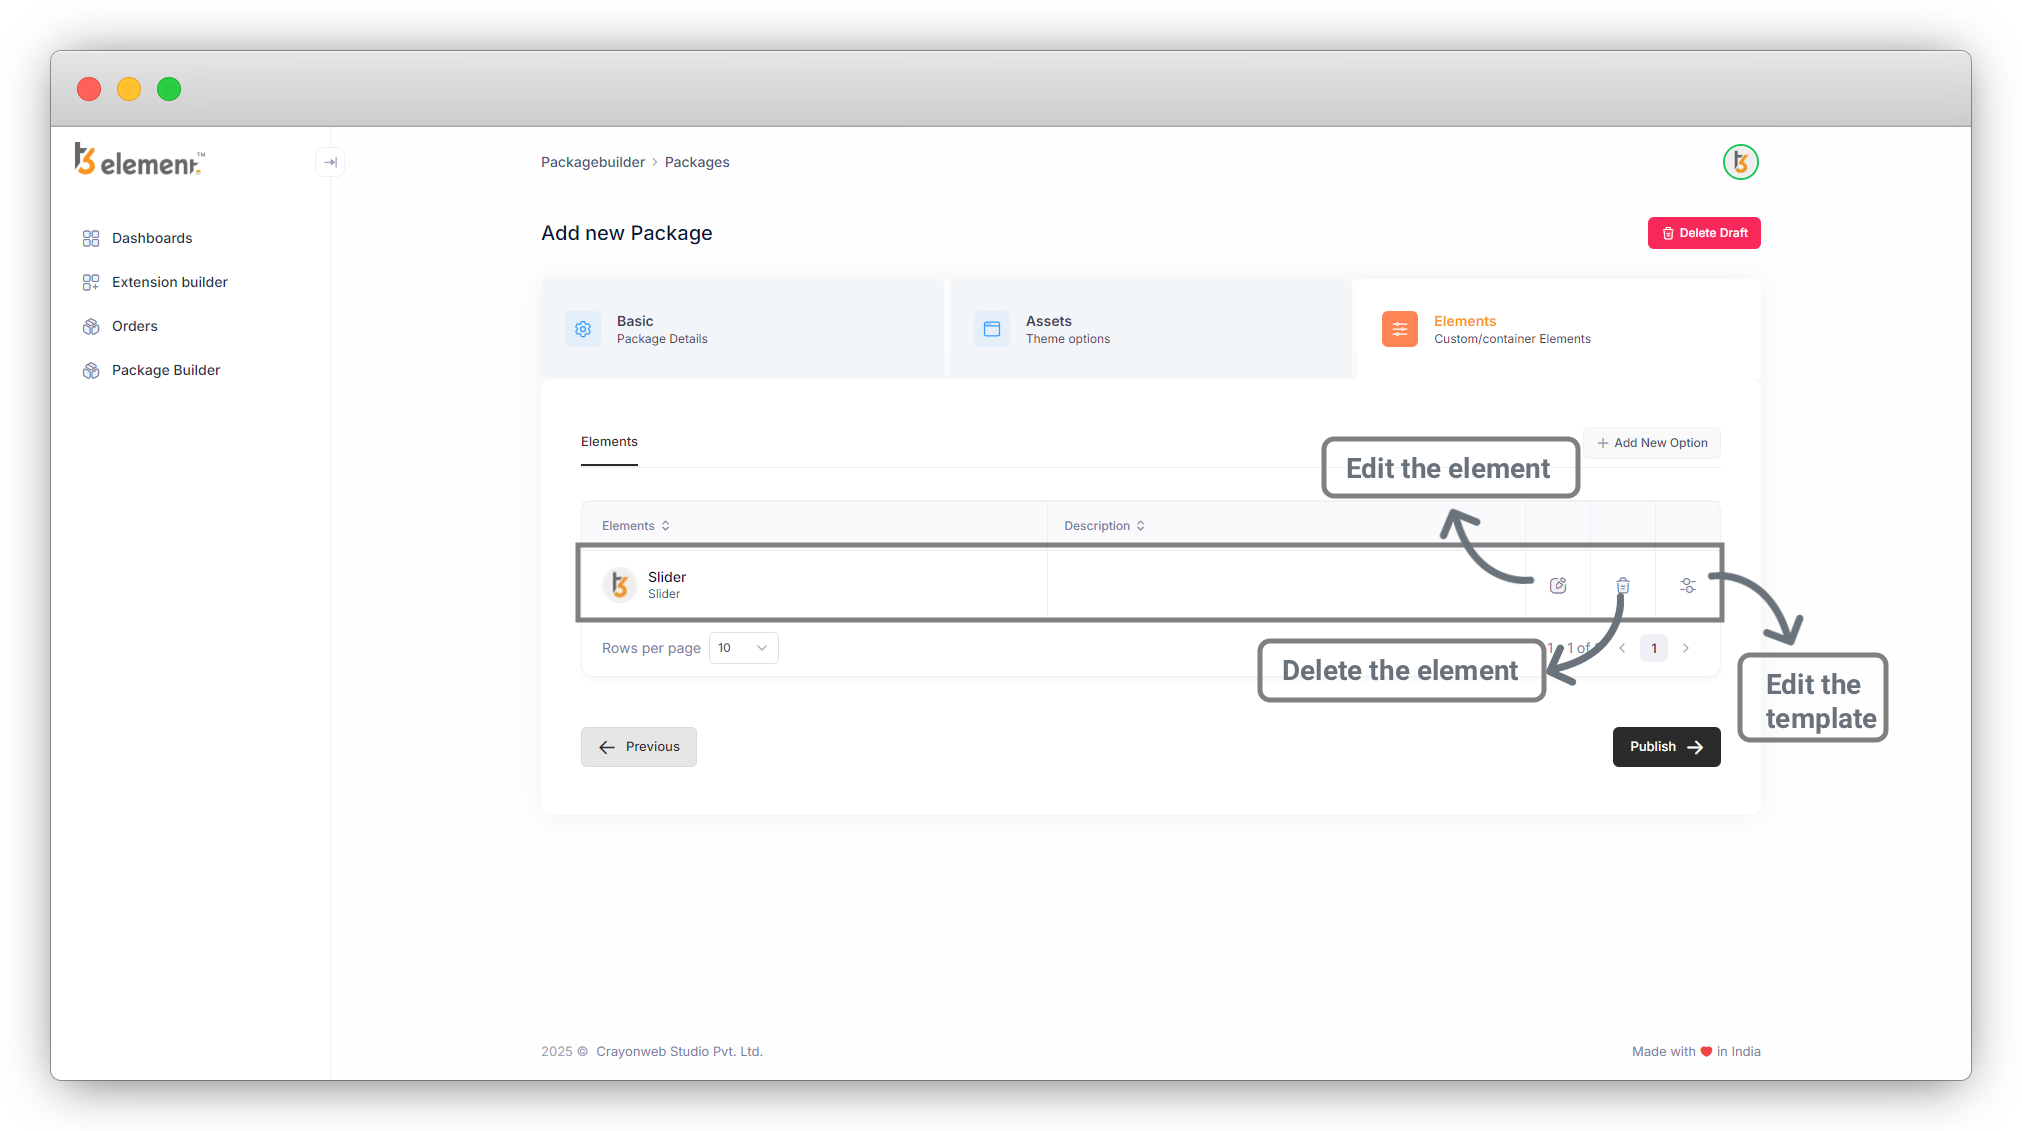
7.1. When you click on the “Save Template” button, you will find the element you just created in the element list as you can see in the below screenshot and you can edit or delete the element and you can edit the template file also.
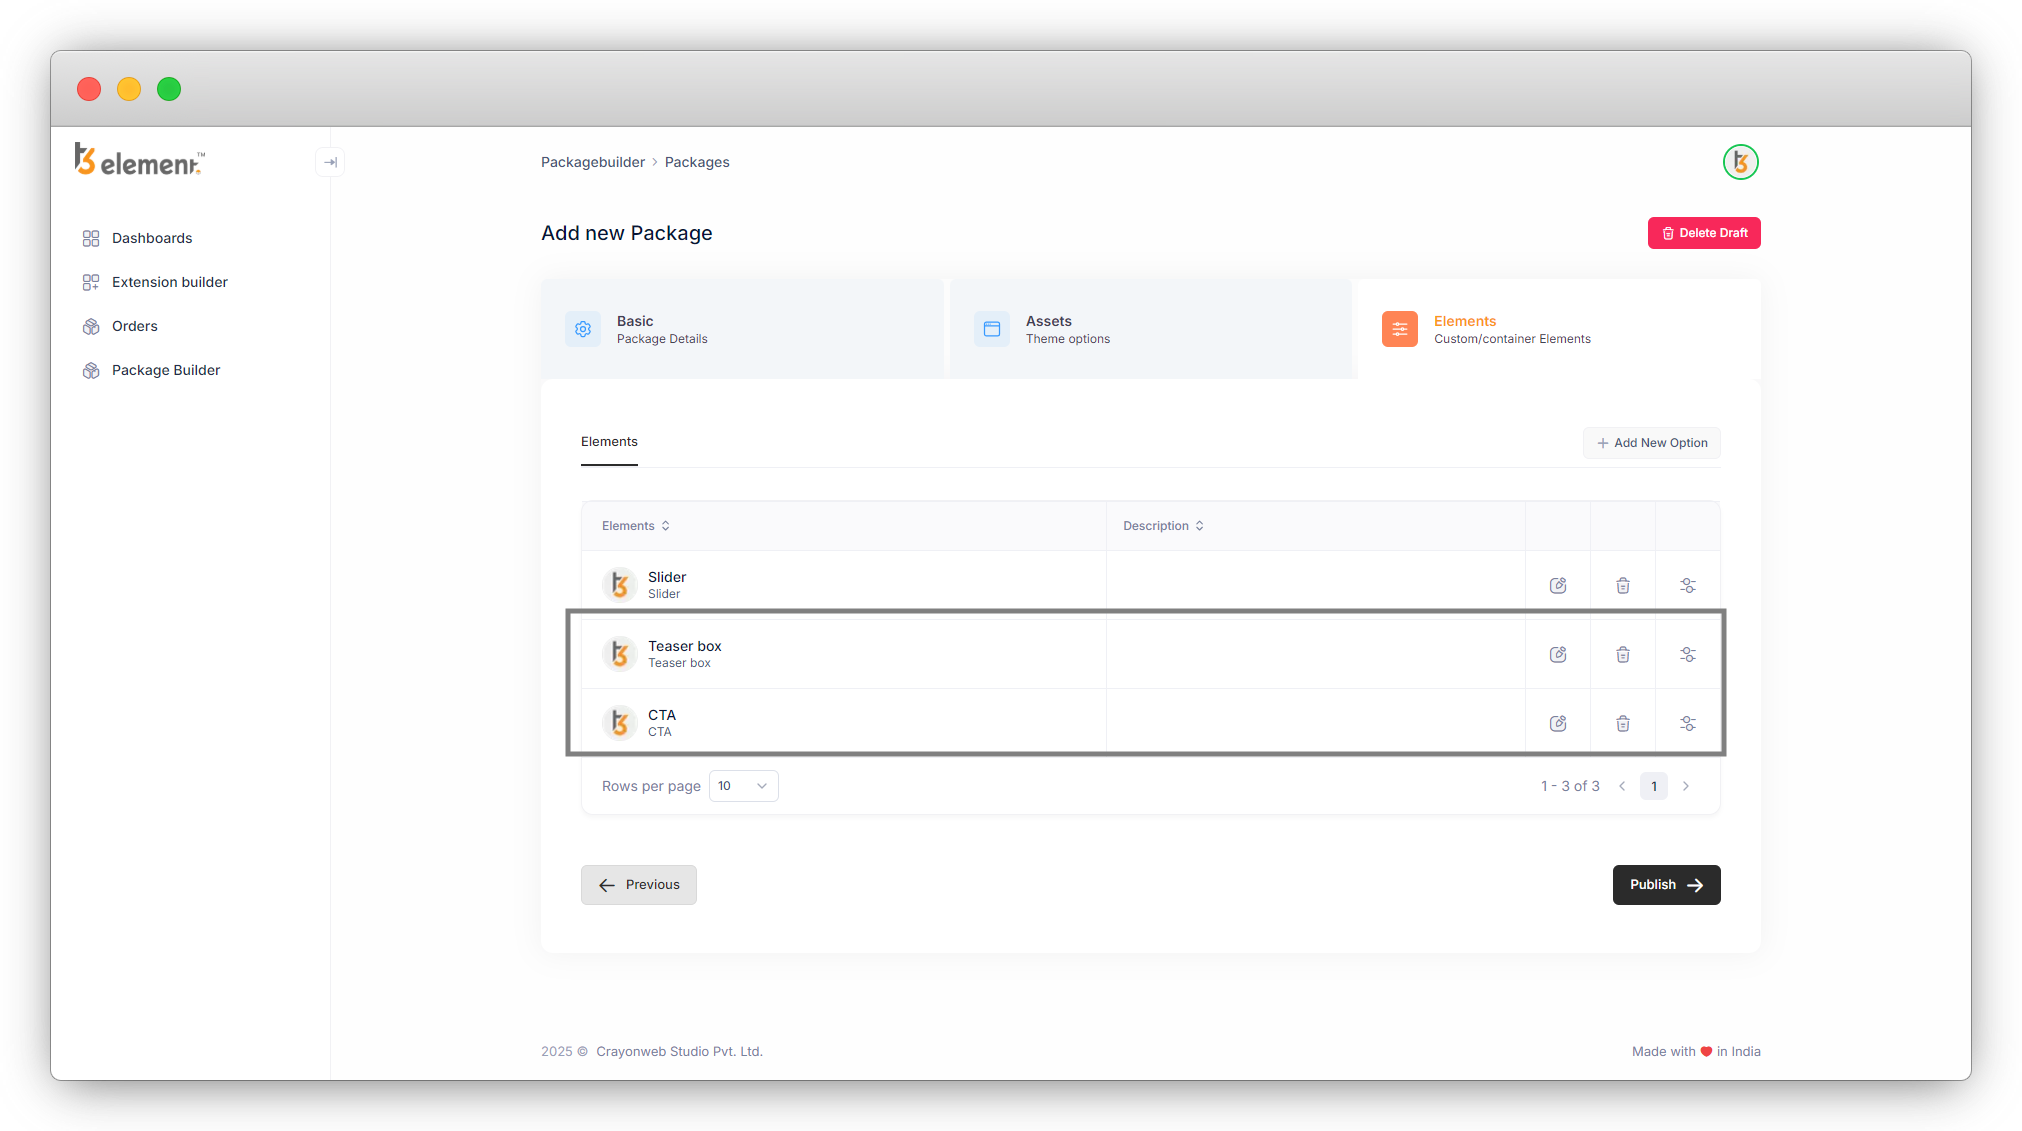
As mentioned before, you can add multiple Elements in one package. Here 2 more elements are added for “Teaser box” and “CTA (call to action)” as you can see in the below screenshot of the custom element’s list.
Share


