
URL copied to clipboard

How to create the product detail page with the plugin type “Detail”?
4 views
__readtime__ Min
read
Plugin – Product detail plugin (without “Only Show Selected Item” option)
1. When you click on the “Learn More” button from the list without adding the detail plugin, the blank detail page will appear. Let’s add the detail plugin for products so the corresponding detail page will open with the click of the “Learn More” button.
2. We already created the page “Product Details” so we will use that page to add the “Product detail plugin”.
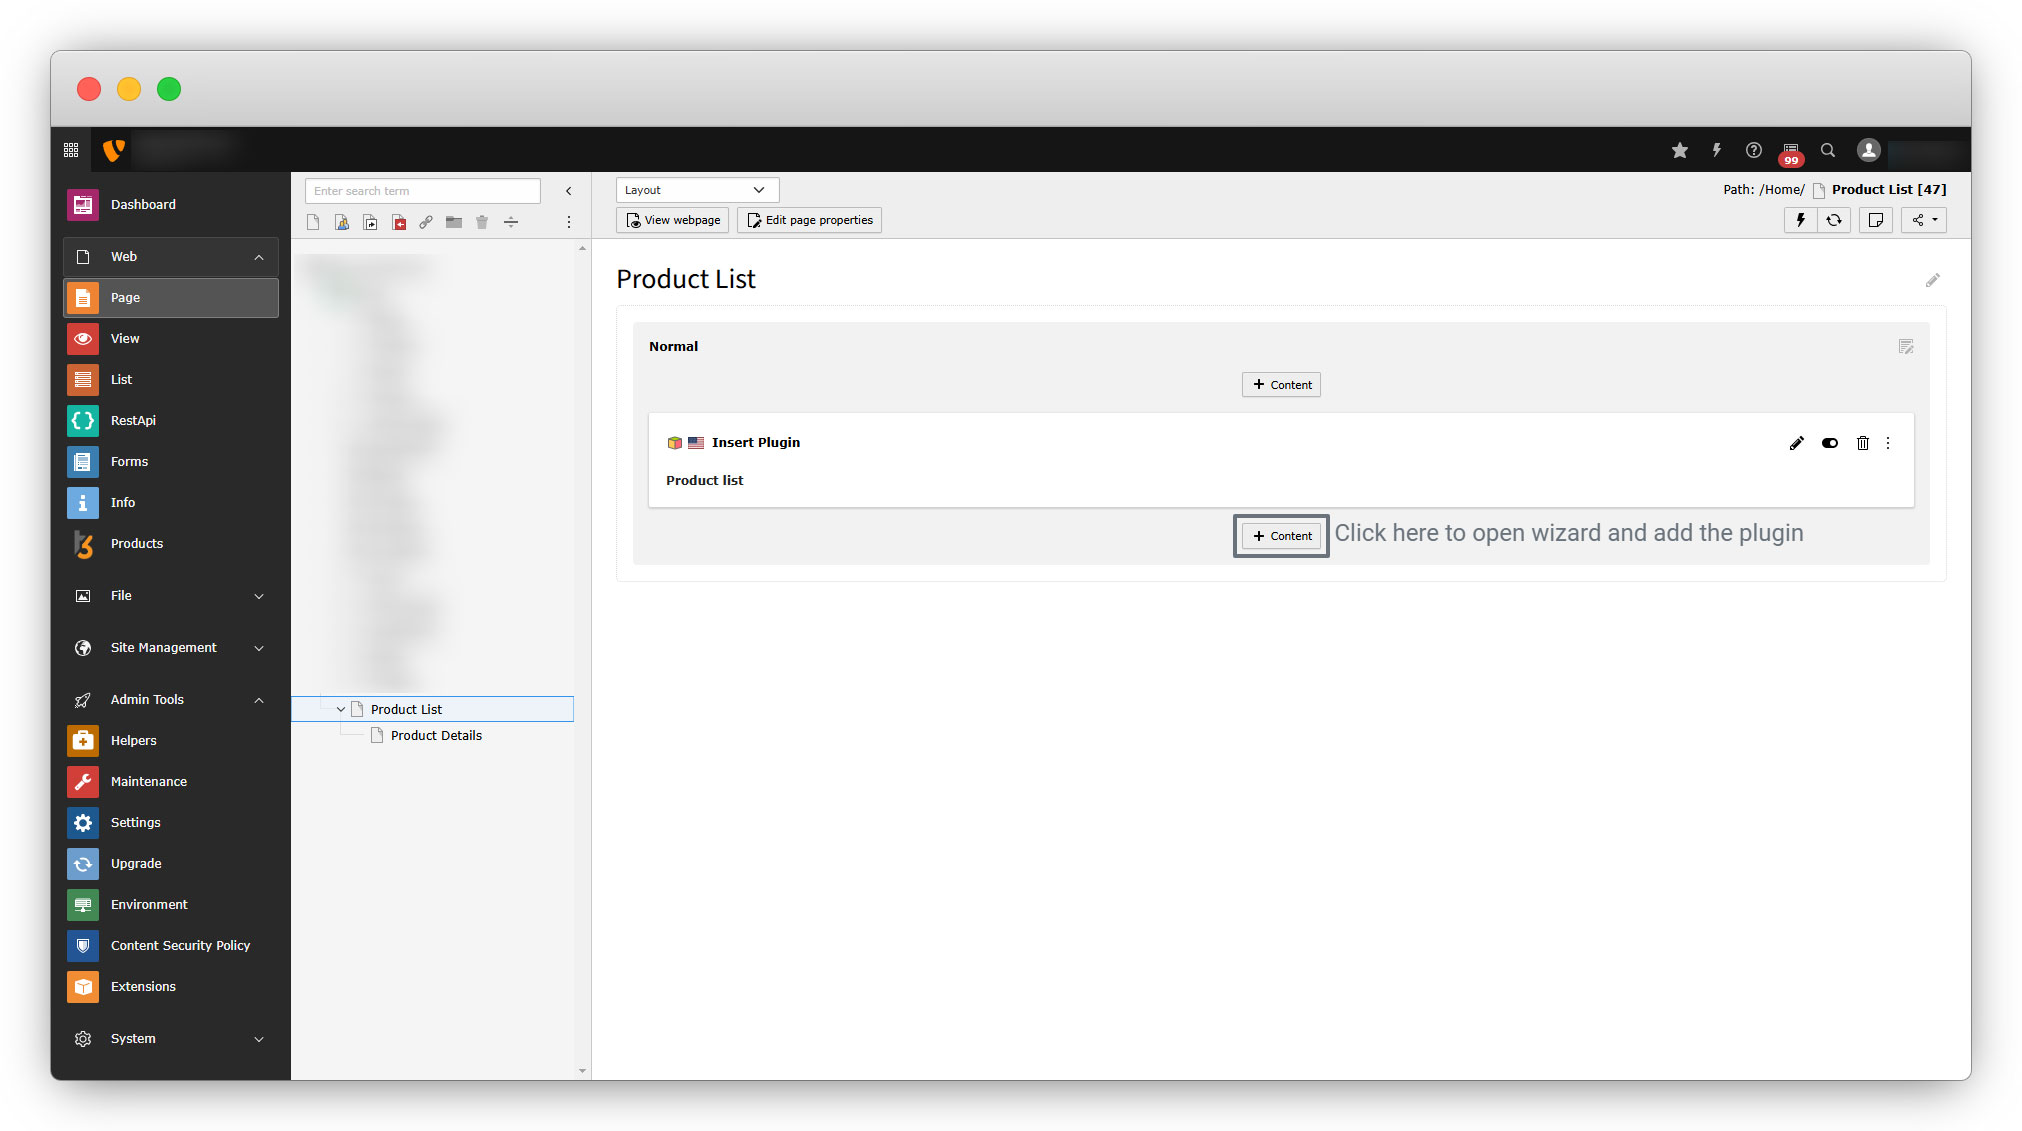
3. Open the page “Product Details”, click on the “+ Content” button, and select the plugin “Product detail plugin” from the wizard.
4. Go to the tab “Plugin” and fill up the details.
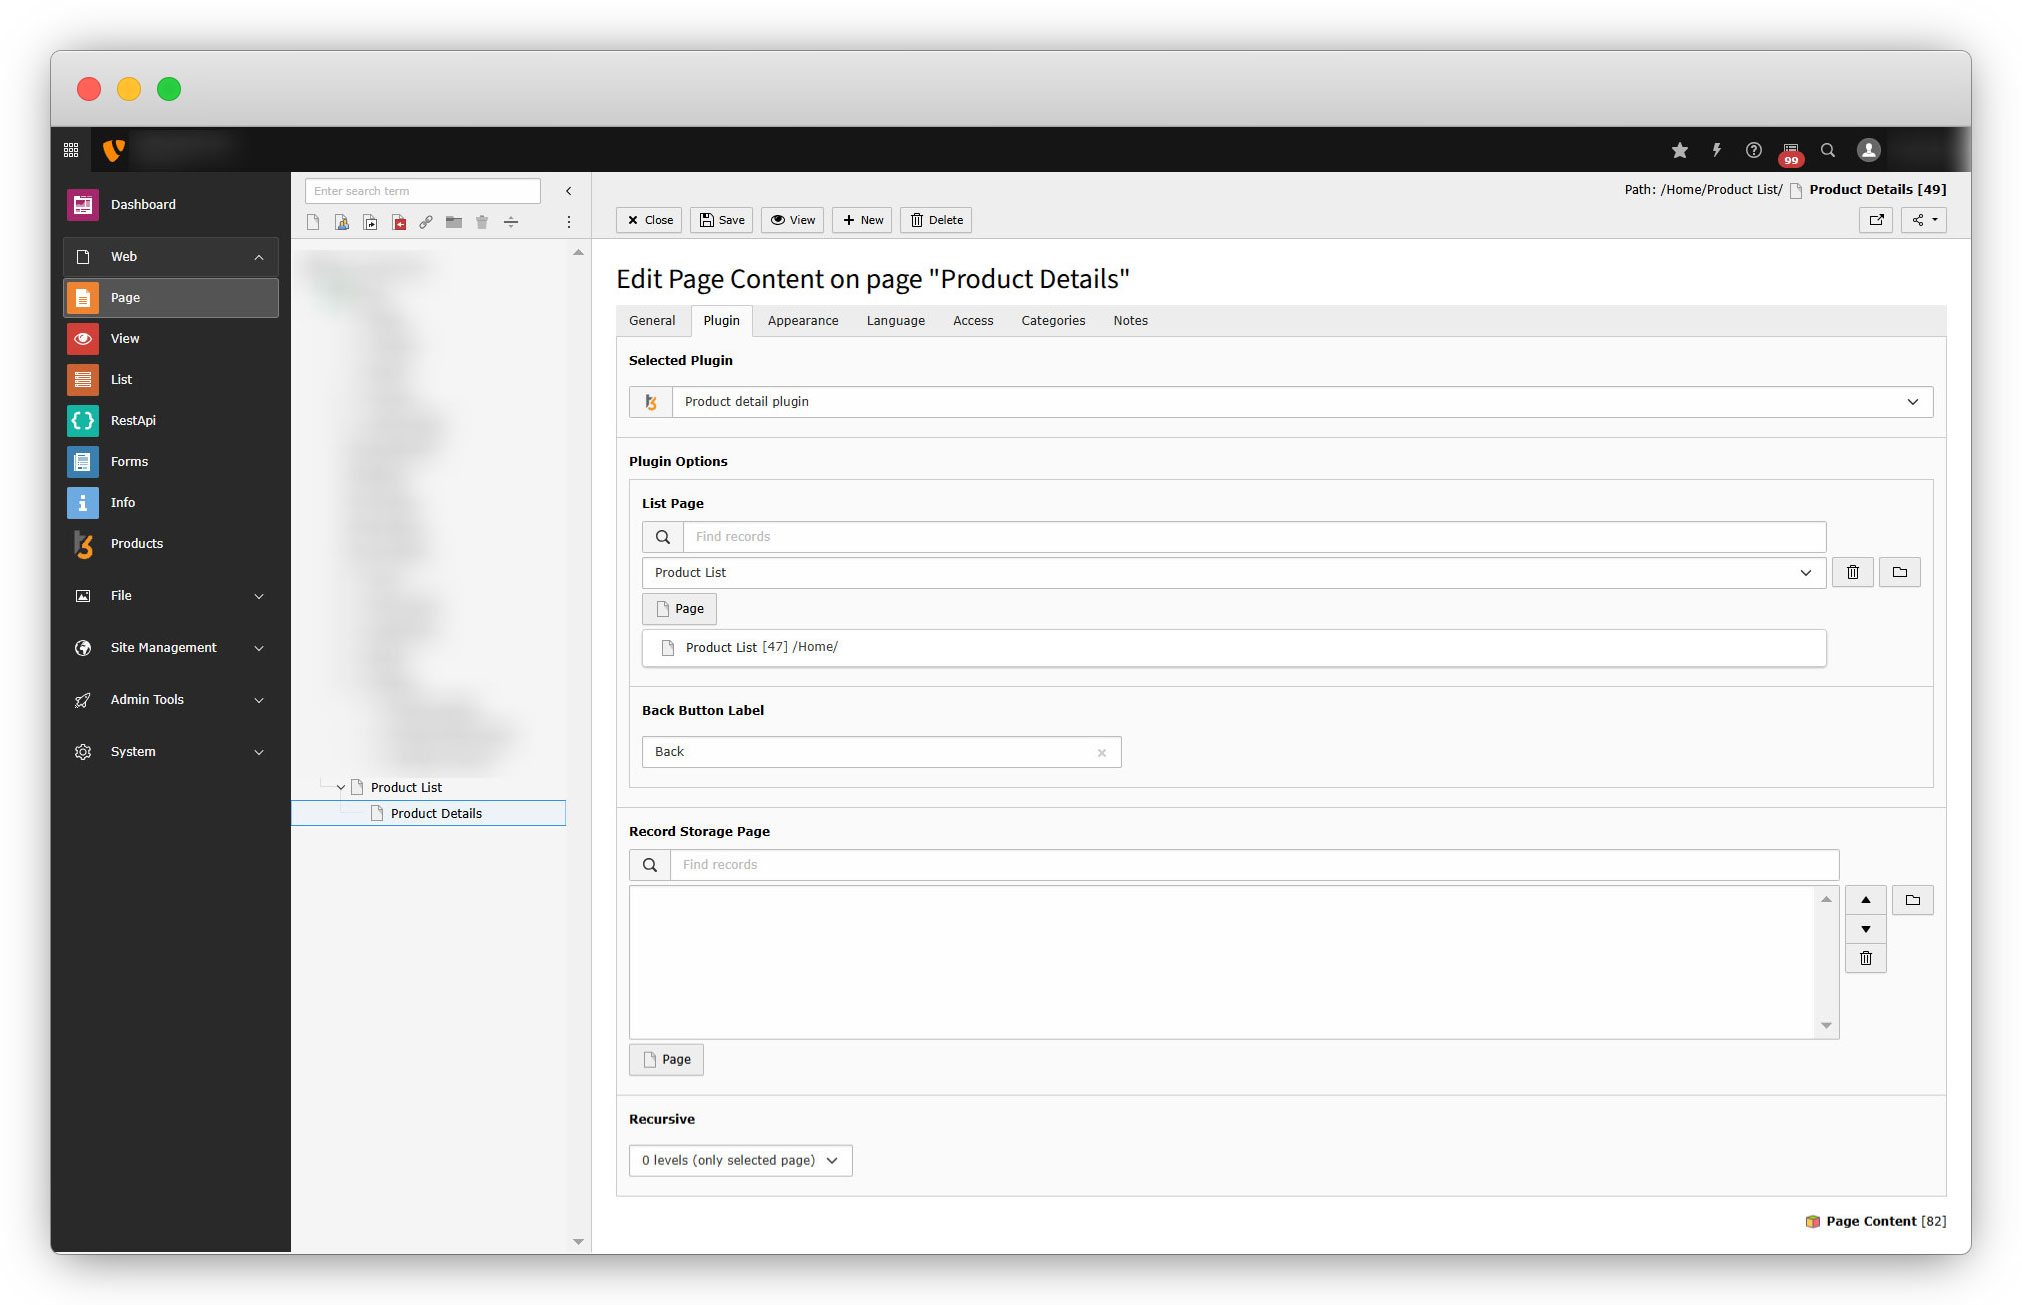
- List Page: Select the product list page. Here we have selected the “Product List” page as that is our product list page.
- Back Button Label: This option appears because we selected the option “Display Back Button?” at the time of creating the plugin. This button will be redirected to the list page again. You can change the label as you wish.
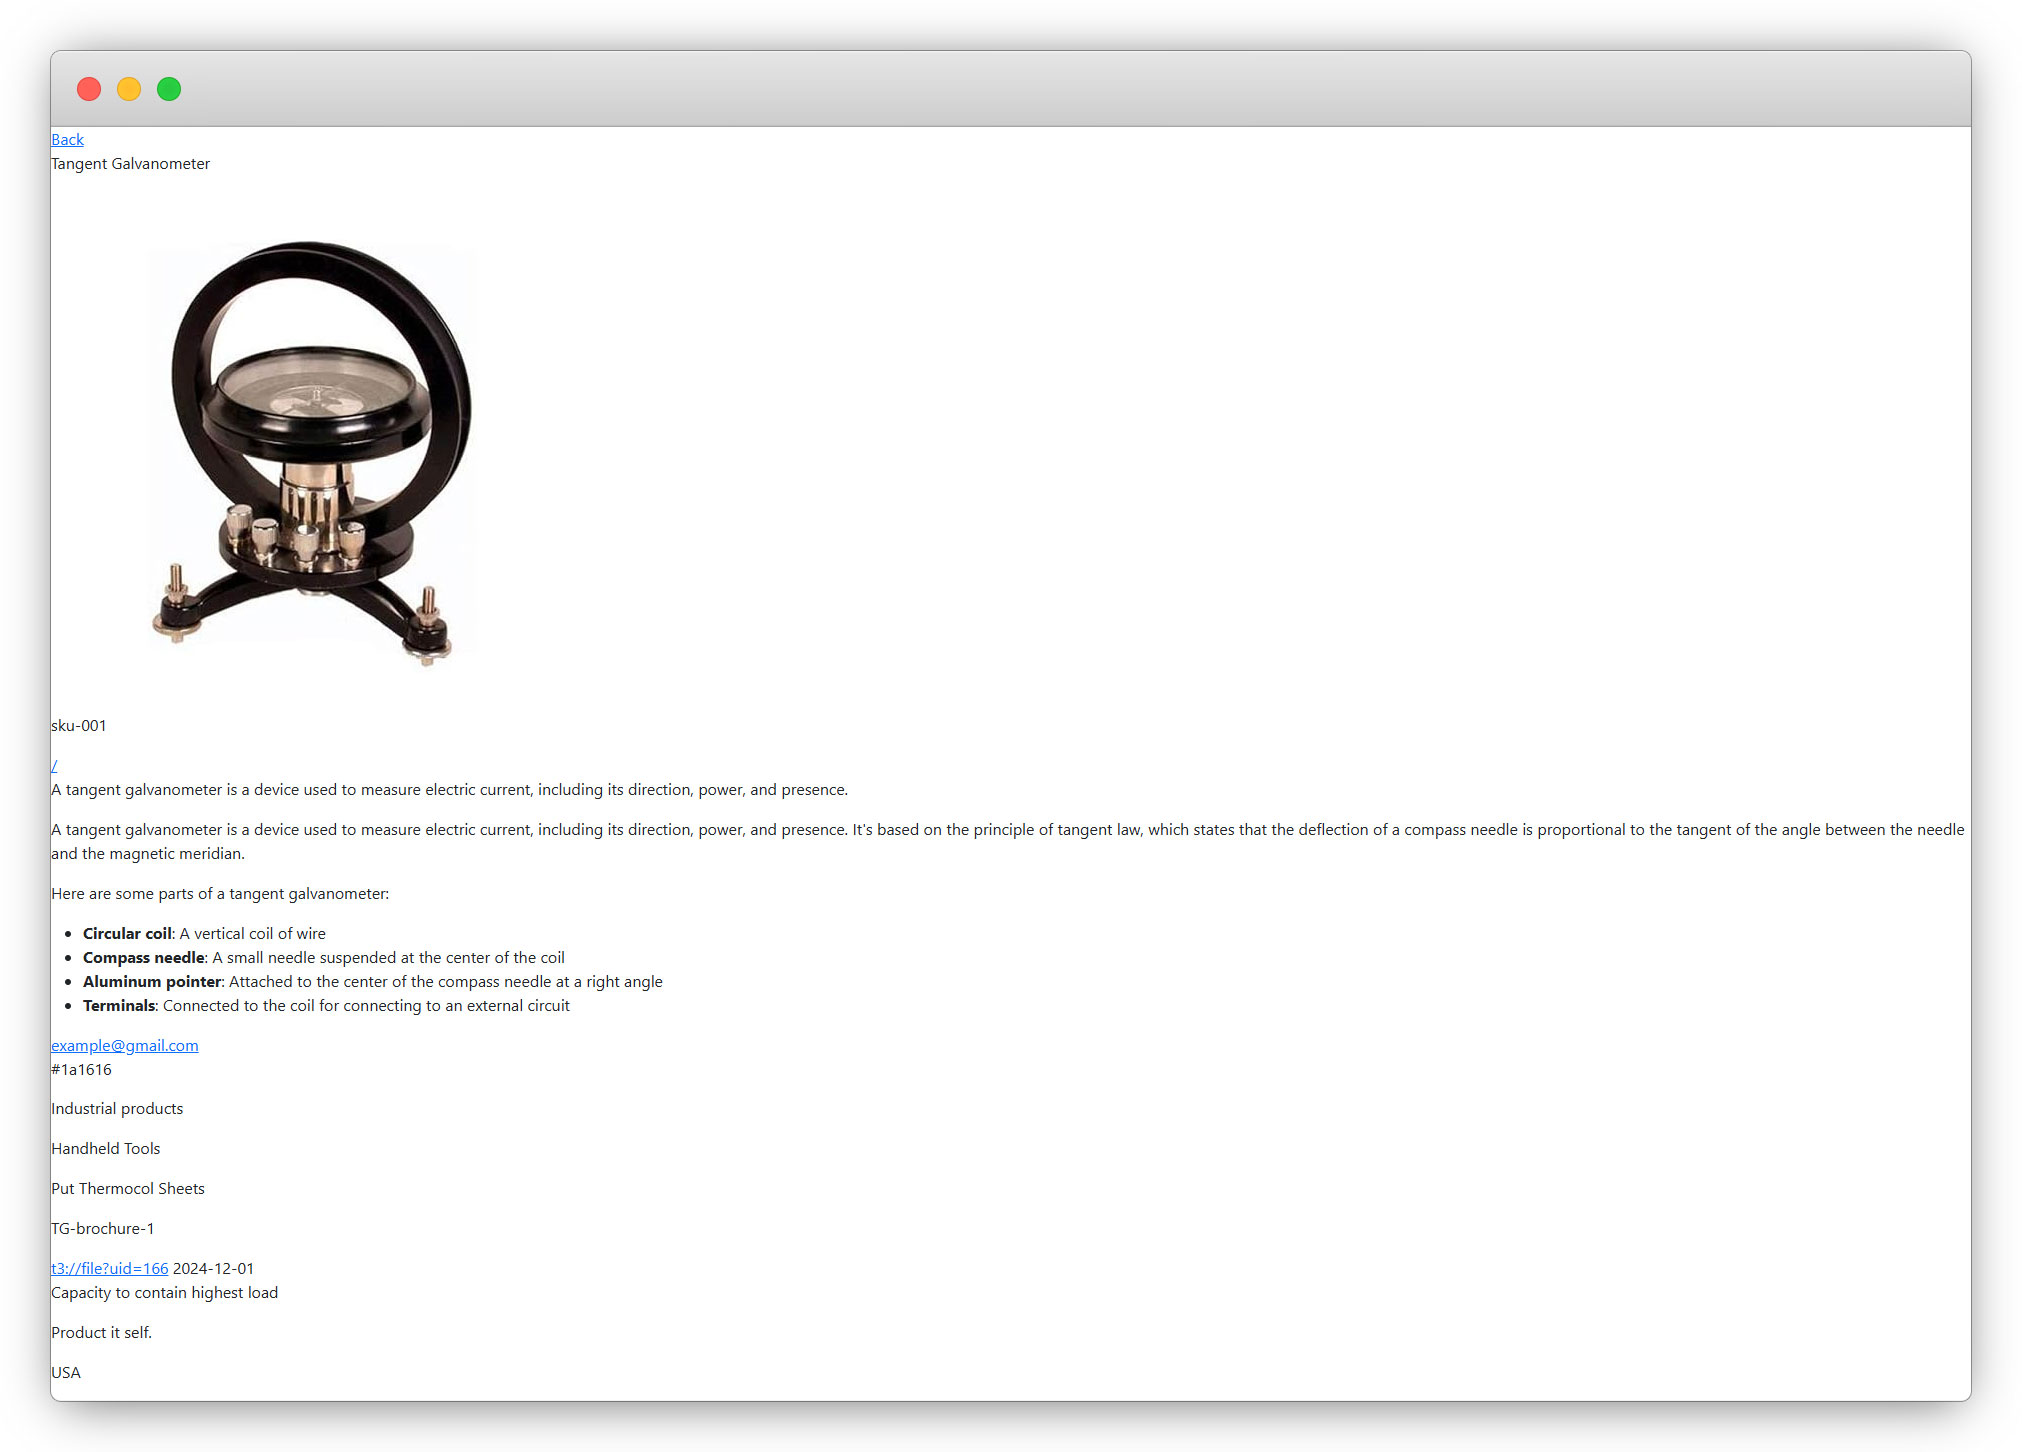
5. After saving the page “Product Details”, click on the “Learn More” button of any product from the product list, and the corresponding detail page will open. Let’s click on the “Tangent Galvanometer” and the detail page will open
6. The detail page appears with all the details in it’s original form. We should edit the template of the plugin “Product detail plugin”, before editing the template let’s add similar products for the “Tangent Galvanometer”.
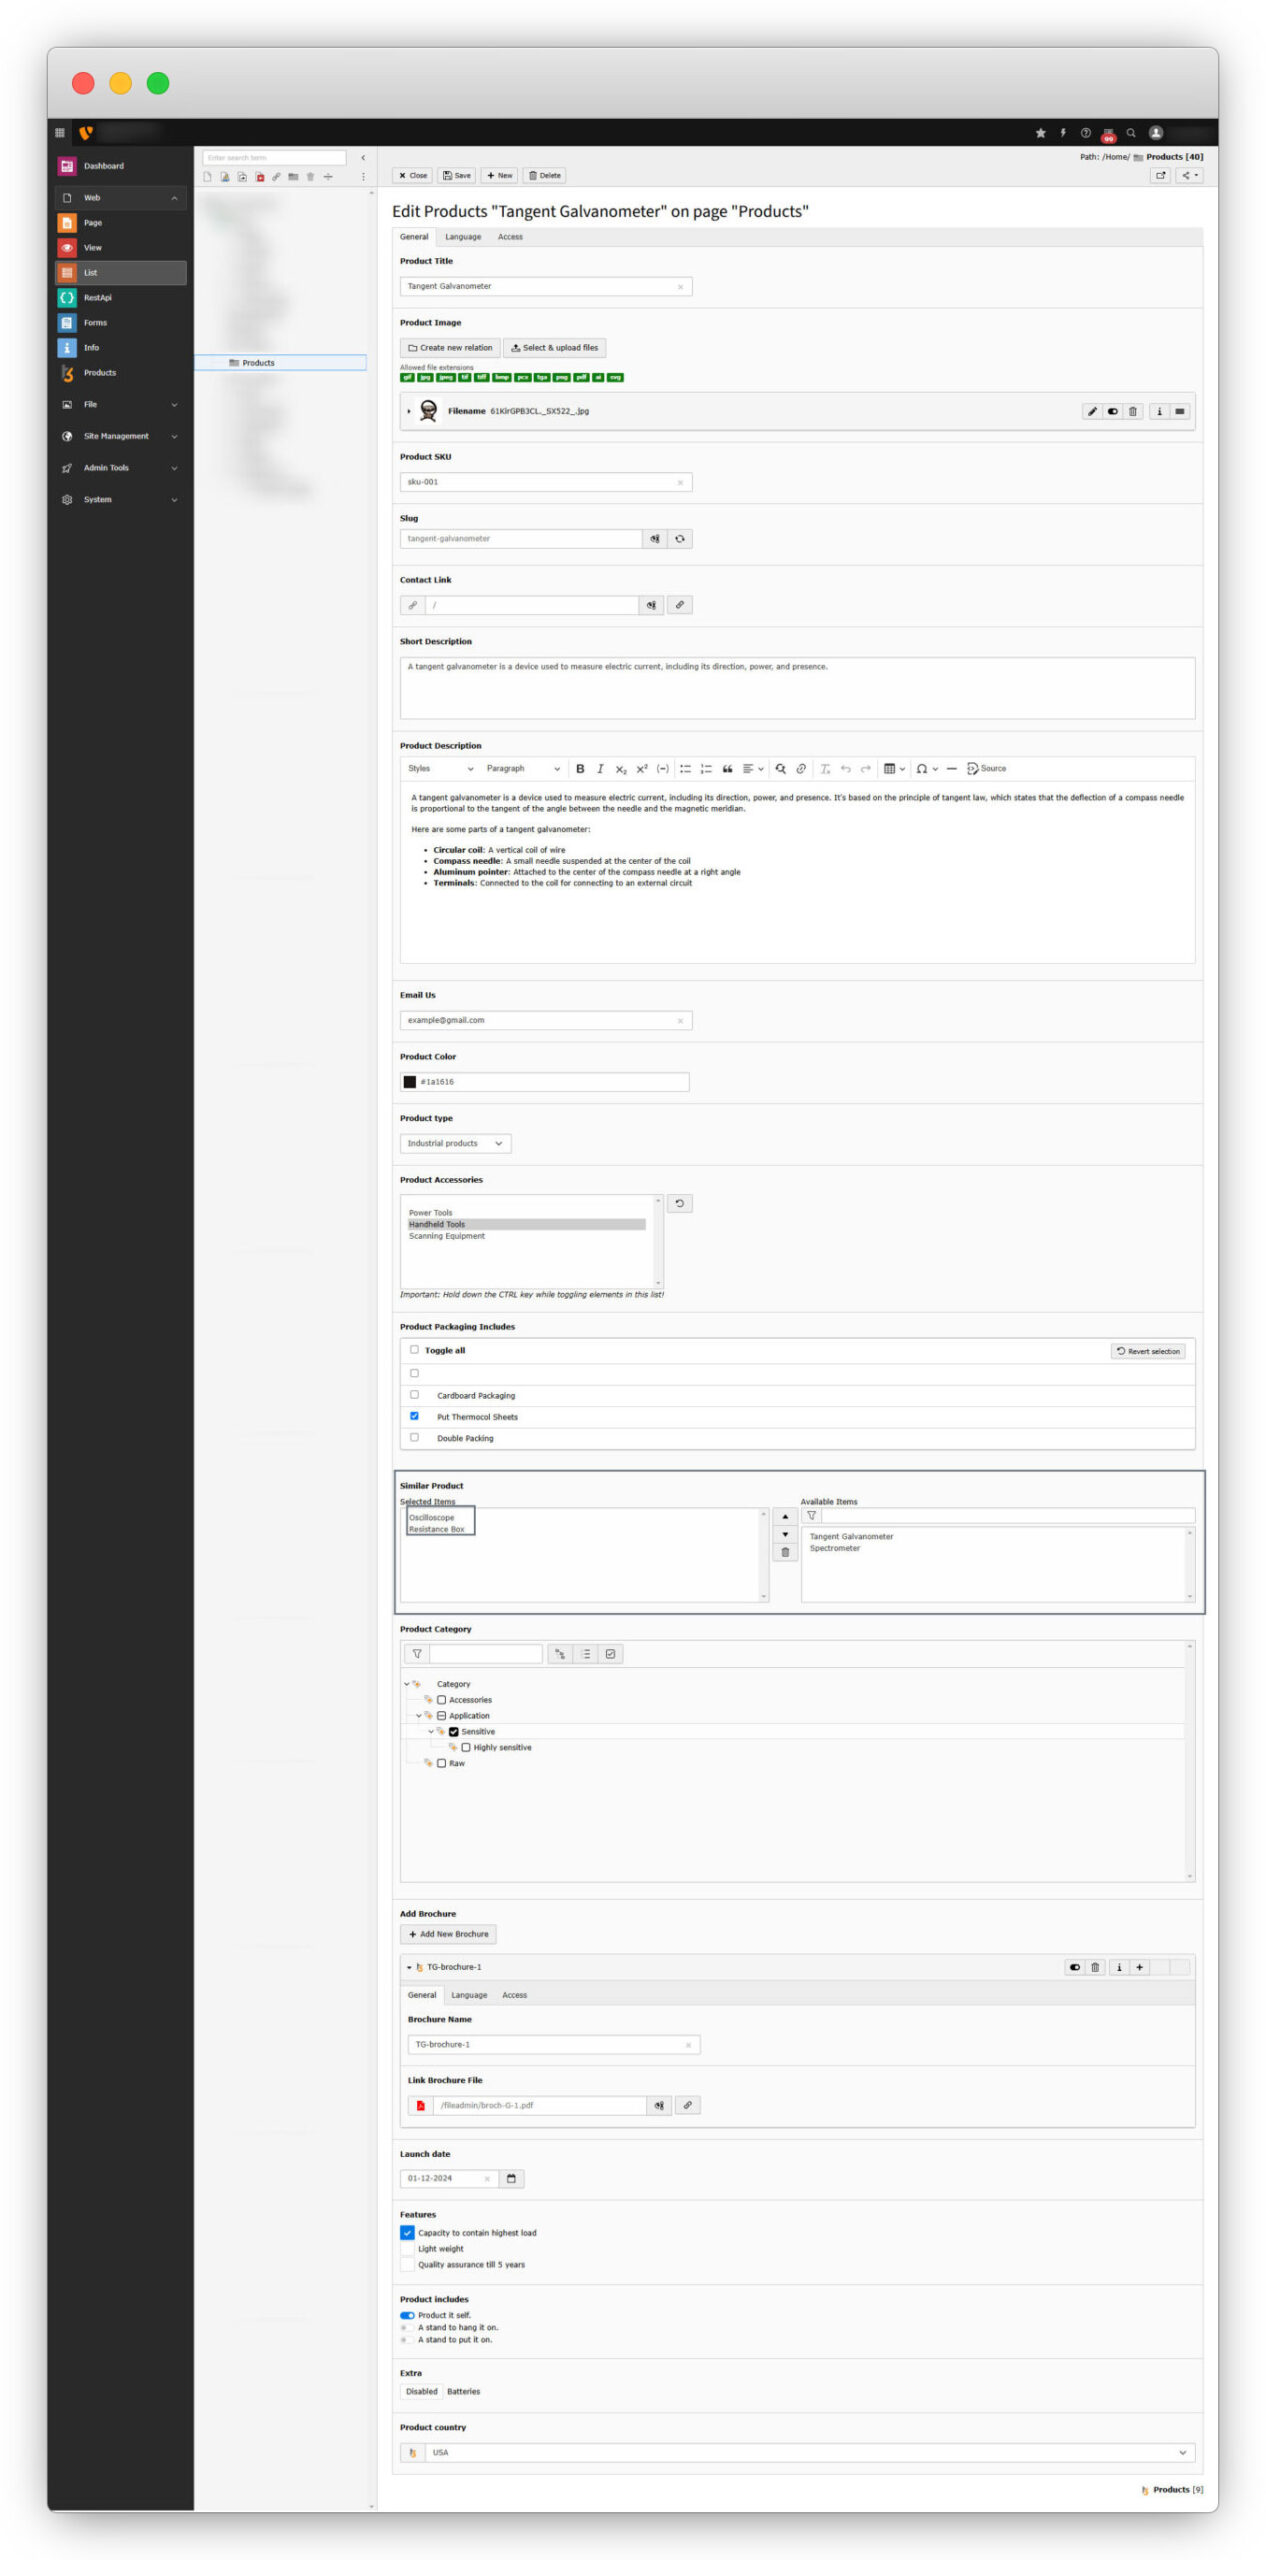
7. Go to “List” module and open the “Products” folder, select the product “Tangent Galvanometer” and add a similar product to its field as seen and highlighted in the below screenshot.
8. After selecting similar products, if you open the detail page for this product “Tangent Galvanometer”, you will see the selected similar products are displayed below the product.
9. Now let’s update the template of the detail plugin. Go to the extension builder, log in to your account, go to the Plugins tab, click on the template icon of the plugin “Product detail plugin”, copy the existing code (to use IDs/markers from it), and paste it anywhere in your system editor, clear that existing code, and add the below code which is specific for this plugin only. But before saving the template, replace the field IDs with your own field IDs. E.g. in the below code, the ID for the brochure’s link is “f17314105191” but it can be different for your code, so find out the correct IDs from your default code and then replace the appropriate IDs in the given code below
<div>
    <div>
        <f:if condition="{item}">
            <f:if condition="{item.producttitle}">
                <h1>{item.producttitle}</h1>
            </f:if>
            <div>
                <f:for each="{item.productimage}" as="img">
                    <f:image image="{img}" alt="image" />
                </f:for>
            </div>
            <div>
                <f:if condition="{item.productsku}">
                    <h3><strong>Product SKU:</strong> {item.productsku}</h3>
                </f:if>
                <f:if condition="{item.shortdescription}">
                    <f:format.html>{item.shortdescription}</f:format.html>
                </f:if>
                <f:if condition="{item.productcolor}">
                    <p><strong>Product Color: </strong> {item.productcolor}</p>
                </f:if>
                <f:if condition="{item.producttype}">
                    <p><strong>Product Type: </strong> {producttype}</p>
                </f:if>
                <f:if condition="{item.productaccessories}">
                    <p><strong>Product Accessories: </strong> {productaccessories}</p>
                </f:if>
                <f:if condition="{item.productpackagingincludes}">
                    <p><strong>Product Packaging Includes:</strong> {productpackagingincludes}</p>
                </f:if>
                <f:if condition="{item.launchdate}">
                    <p><strong>Product Launch Date: </strong>
                        <f:format.date>{item.launchdate}</f:format.date>
                    </p>
                </f:if>
                <f:if condition="{features}">
                    <p><strong>Product Features: </strong>{features}</p>
                </f:if>
                <f:if condition="{productincludes}">
                    <p><strong>What Product Includes: </strong>{productincludes}</p>
                </f:if>
                <f:if condition="{extra}">
                    <p><strong>What you will get with the product?: </strong>{extra}</p>
                </f:if>
                <f:if condition="{productcountry}">
                    <p><strong>Country of Origin: </strong>{productcountry}</p>
                </f:if>
                <div>
                    <f:if condition="{item.contactlink}">
                        <f:link.typolink parameter="{item.contactlink}">Contact Us
                        </f:link.typolink>
                    </f:if>
                    <f:if condition="{item.emailus}">
                        <f:link.email email="{item.emailus}">Email Us</f:link.email>
                    </f:if>
                </div>
                <f:link.page pageUid="{settings.listPid}">{settings.backTitle}</f:link.page>
            </div>
    </div>

    <f:if condition="{item.productdescription}">
        <div>
            <h2>Product Description</h2>
            <f:format.html>{item.productdescription}</f:format.html>
        </div>
    </f:if>

    <f:if condition="{item.addbrochure}">
        <div>
            <h2>Brochures</h2>
            <f:for each="{item.addbrochure}" as="itm" iteration="inline">
                <f:link.typolink
                    parameter="{itm.f17314105191}">{itm.f17314104270}</f:link.typolink>
            </f:for>
        </div>
    </f:if>
    </f:if>
    <f:if condition="{similarproduct}">
        <h2>Similar Products</h2>
        <div>
            <f:for each="{similarproduct}" as="_similarproduct" iteration="i">
                <div>
                    <div
                        style="min-height: 354px;">
                        <h4>{_similarproduct.producttitle}</h4>
                        <f:for each="{_similarproduct.productimage}" as="img">
                            <f:image image="{img}" alt="image" width="400" height="auto" />
                        </f:for>
                    </div>
                </div>
            </f:for>
        </div>
    </f:if>
</div>
</div>
Save the template, and then save the extension by clicking the “Save & Next” button for all the further steps. (This template contains a few bootstrap classes for the design of the detail page. You can use bootstrap class here or can add your custom style in your CSS file.)
10. Download the extension “Products” again, upload, and override the extension.
11. Open the detail page in the front end, you will see the below view with the above template code.
Now let’s check how the detail plugin with “Only Show Selected Item?” works
Plugin – Single Product Detail (with “Only Show Selected Item” option)
Let’s add the plugin “Single Product Detail” on the home page. We are adding it to the home page. You can add this on any page where you want the details for any particular product.
1. Open the home page and add the plugin “Selected Product Deail” the same as we did for the “Product detail plugin”.
2. Then go to the tab “Plugin” and fill up the details.
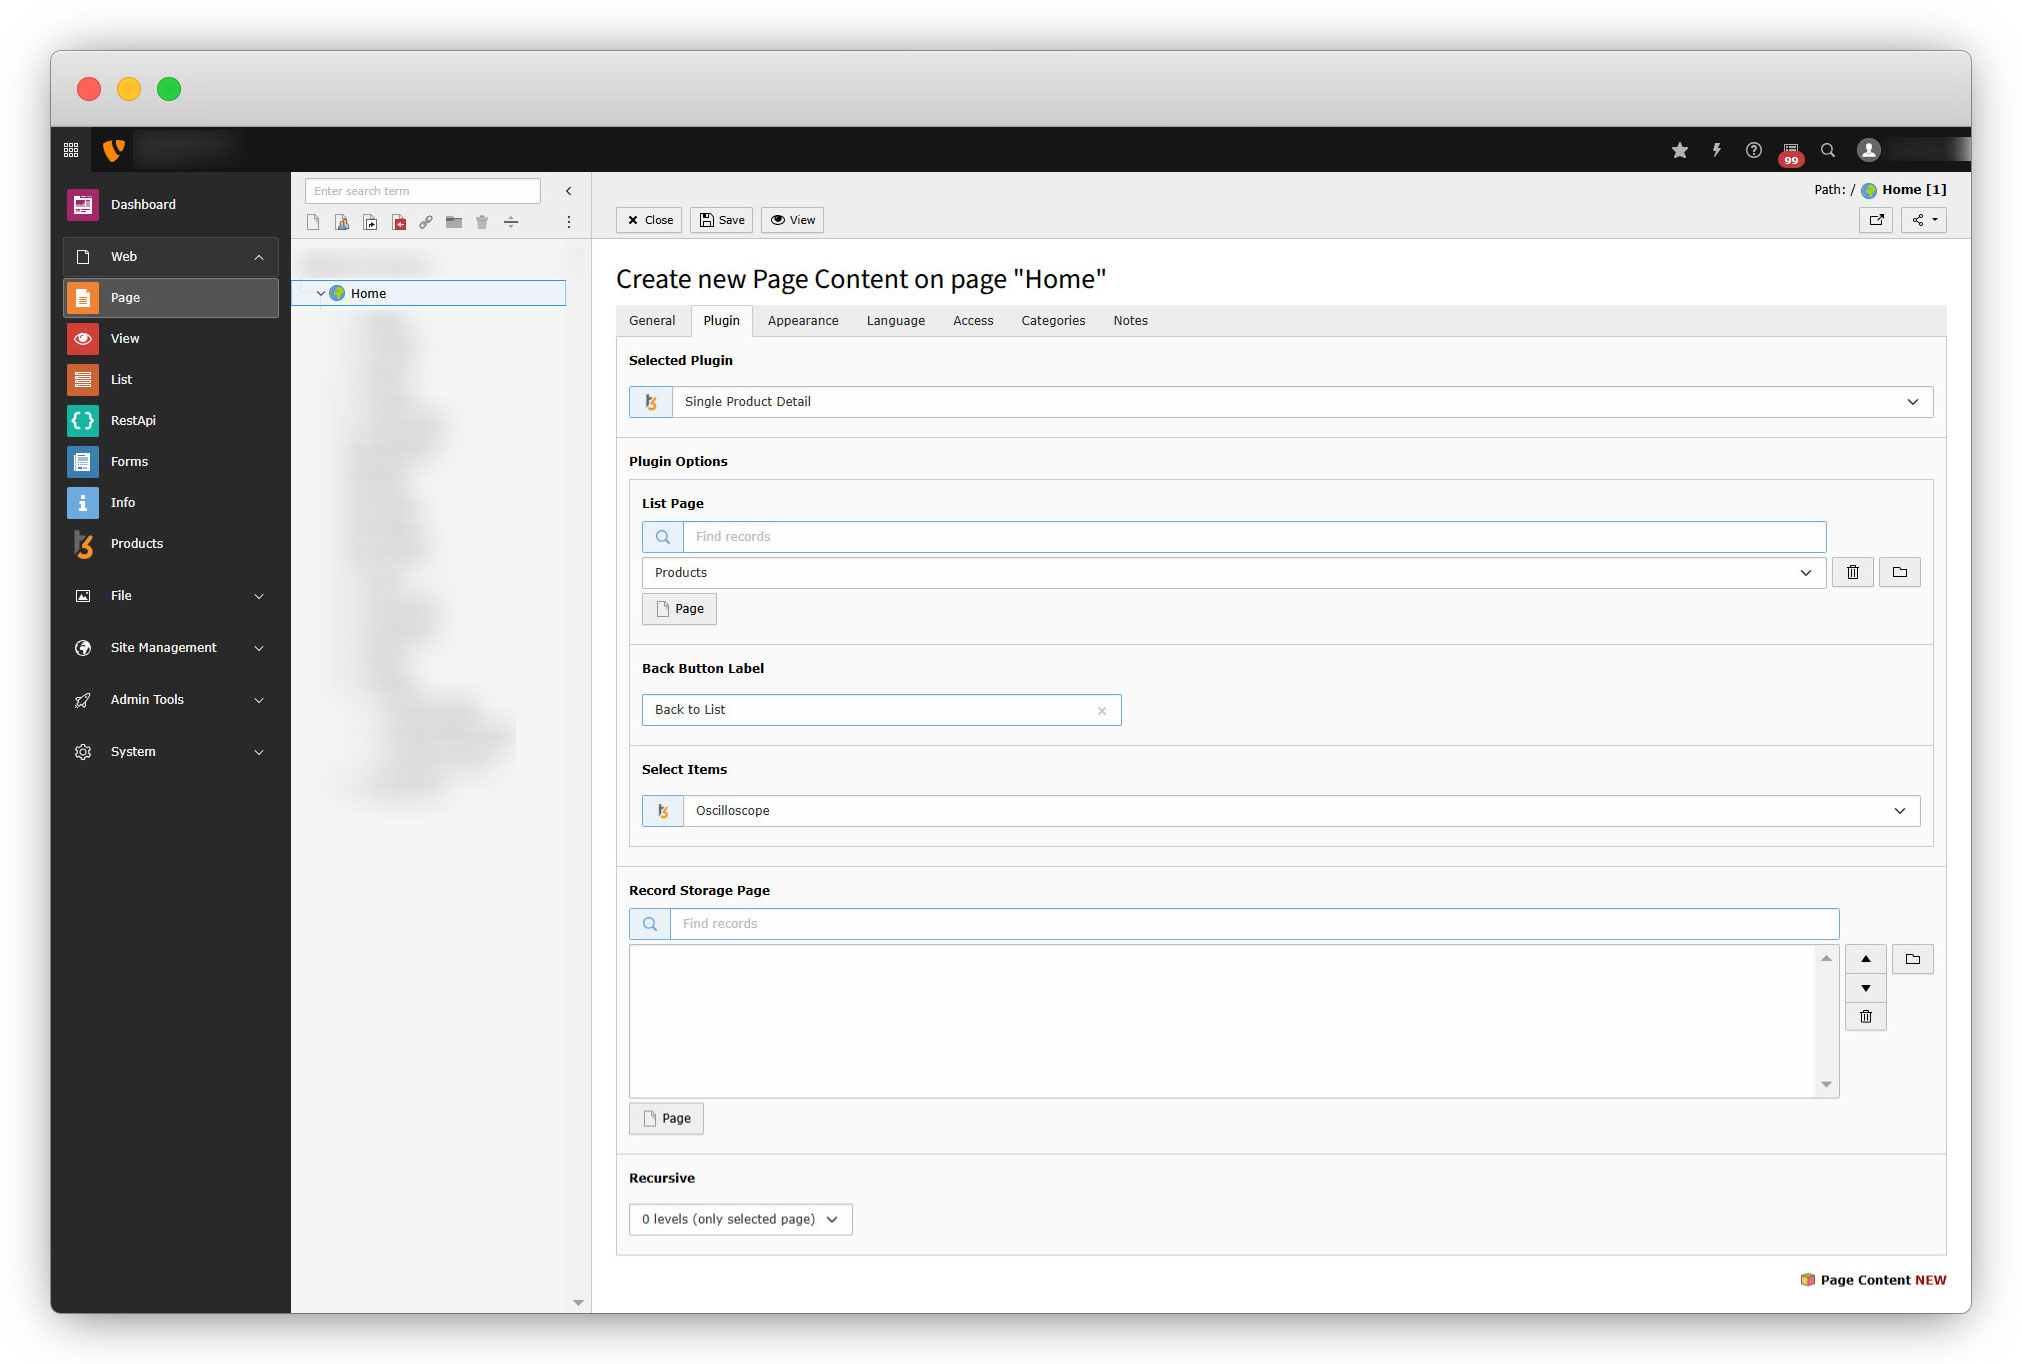
Select Items: This option appears because we selected the option “Only Show Selected Item?” at the time of creating the plugin. When you select the product here, you will be able to use that product’s detail page as a normal page. E.g. in this illustration we want to show the detail page of the “Oscilloscope” when viewing the Home page, then this option is useful here.
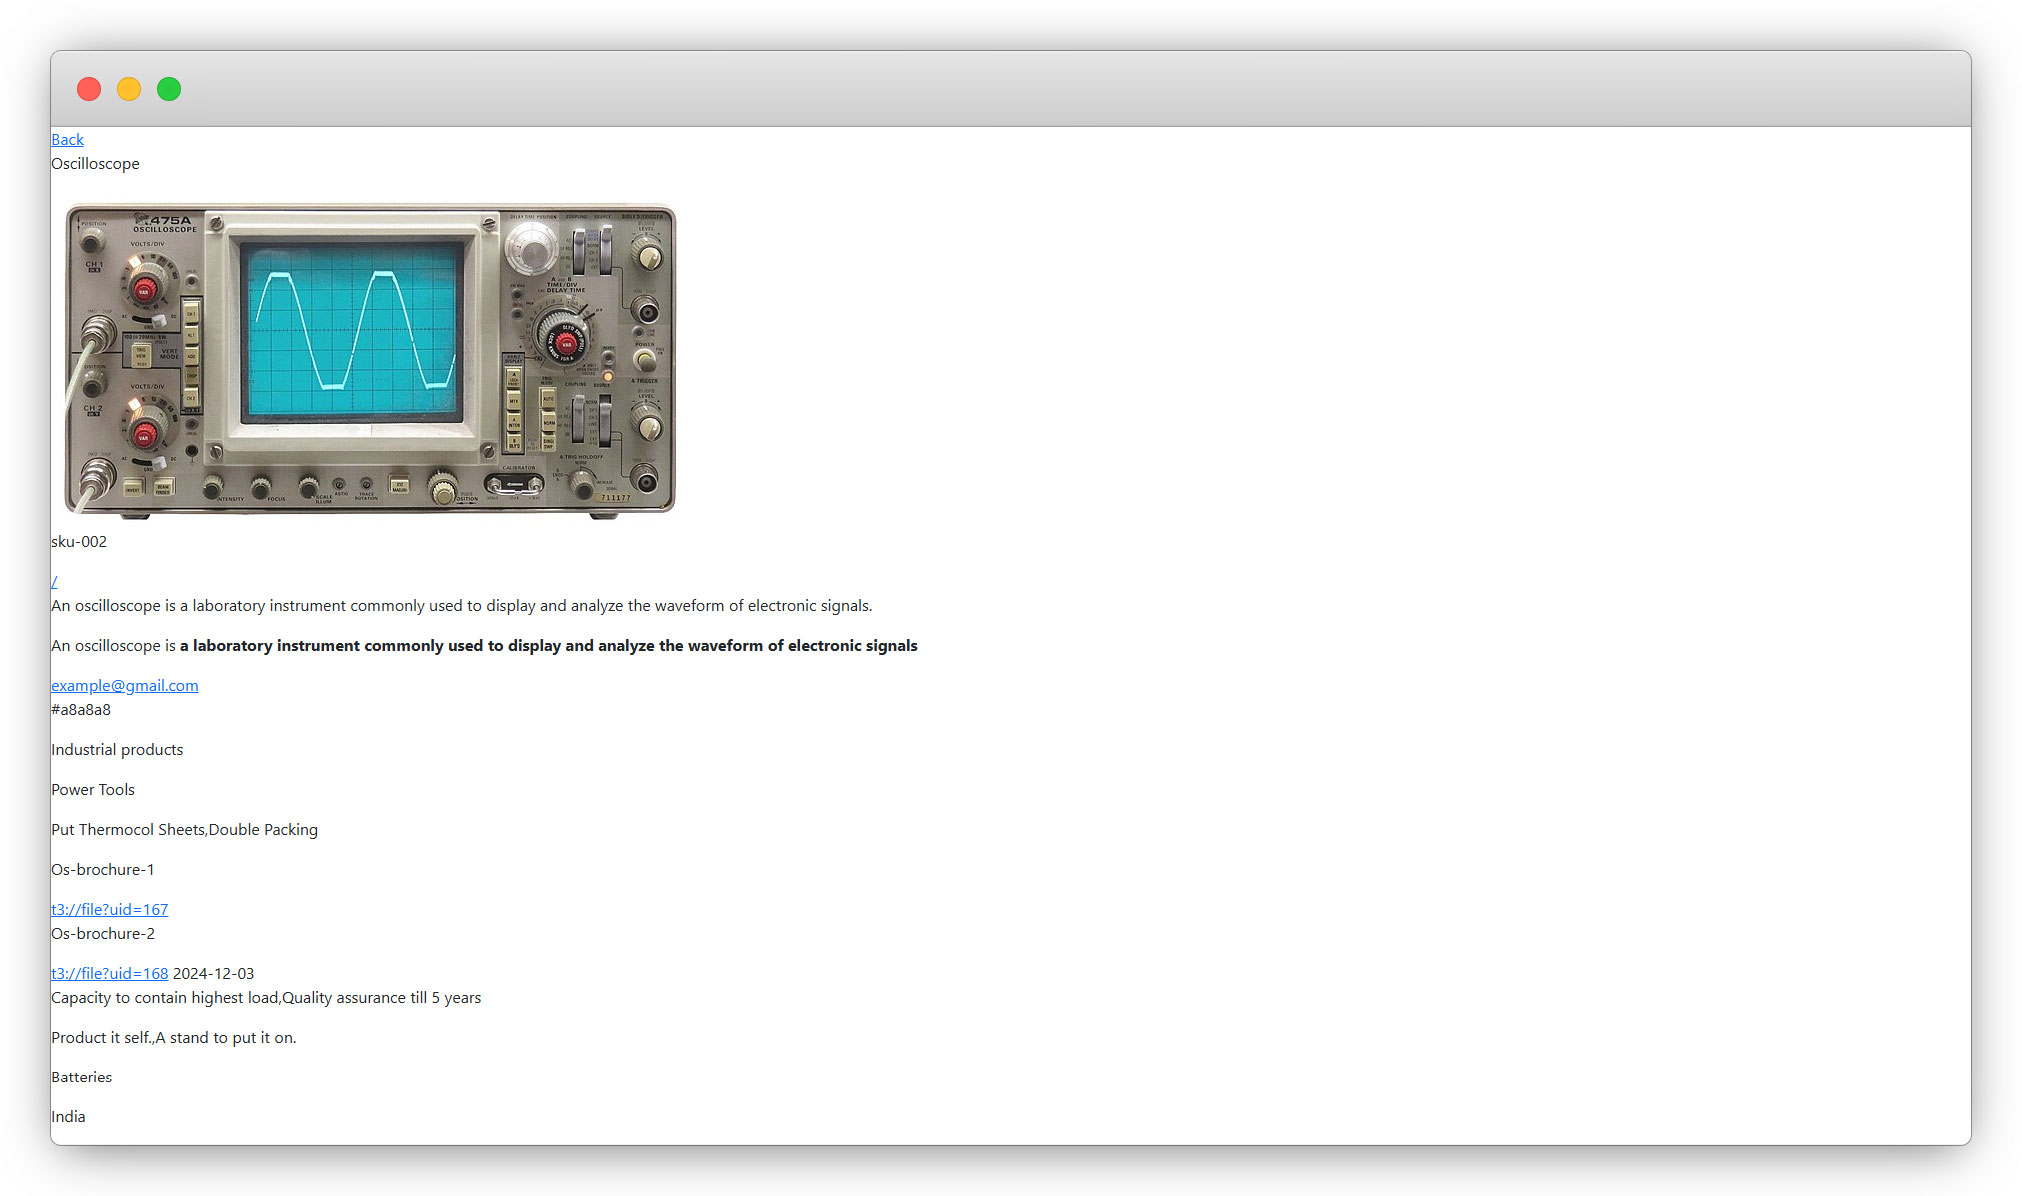
3. Save the page and click on the view button at the top left and the detail page of the product “Oscilloscope” will open because in “Select Items” we selected the product “Oscilloscope”:
4. You can manipulate the template of this plugin the same as we did for the plugin “Product detail plugin”.
5. After the detail plugin, let’s check how to use the plugin “Filter.”
Share


