
URL copied to clipboard

How to create the product list with the plugin type “List”?
4 views
__readtime__ Min
read
1. Go to “Page”. Create a page you want to render the product list in.
2. Here we have created a page named “Product List”. Enable the page.
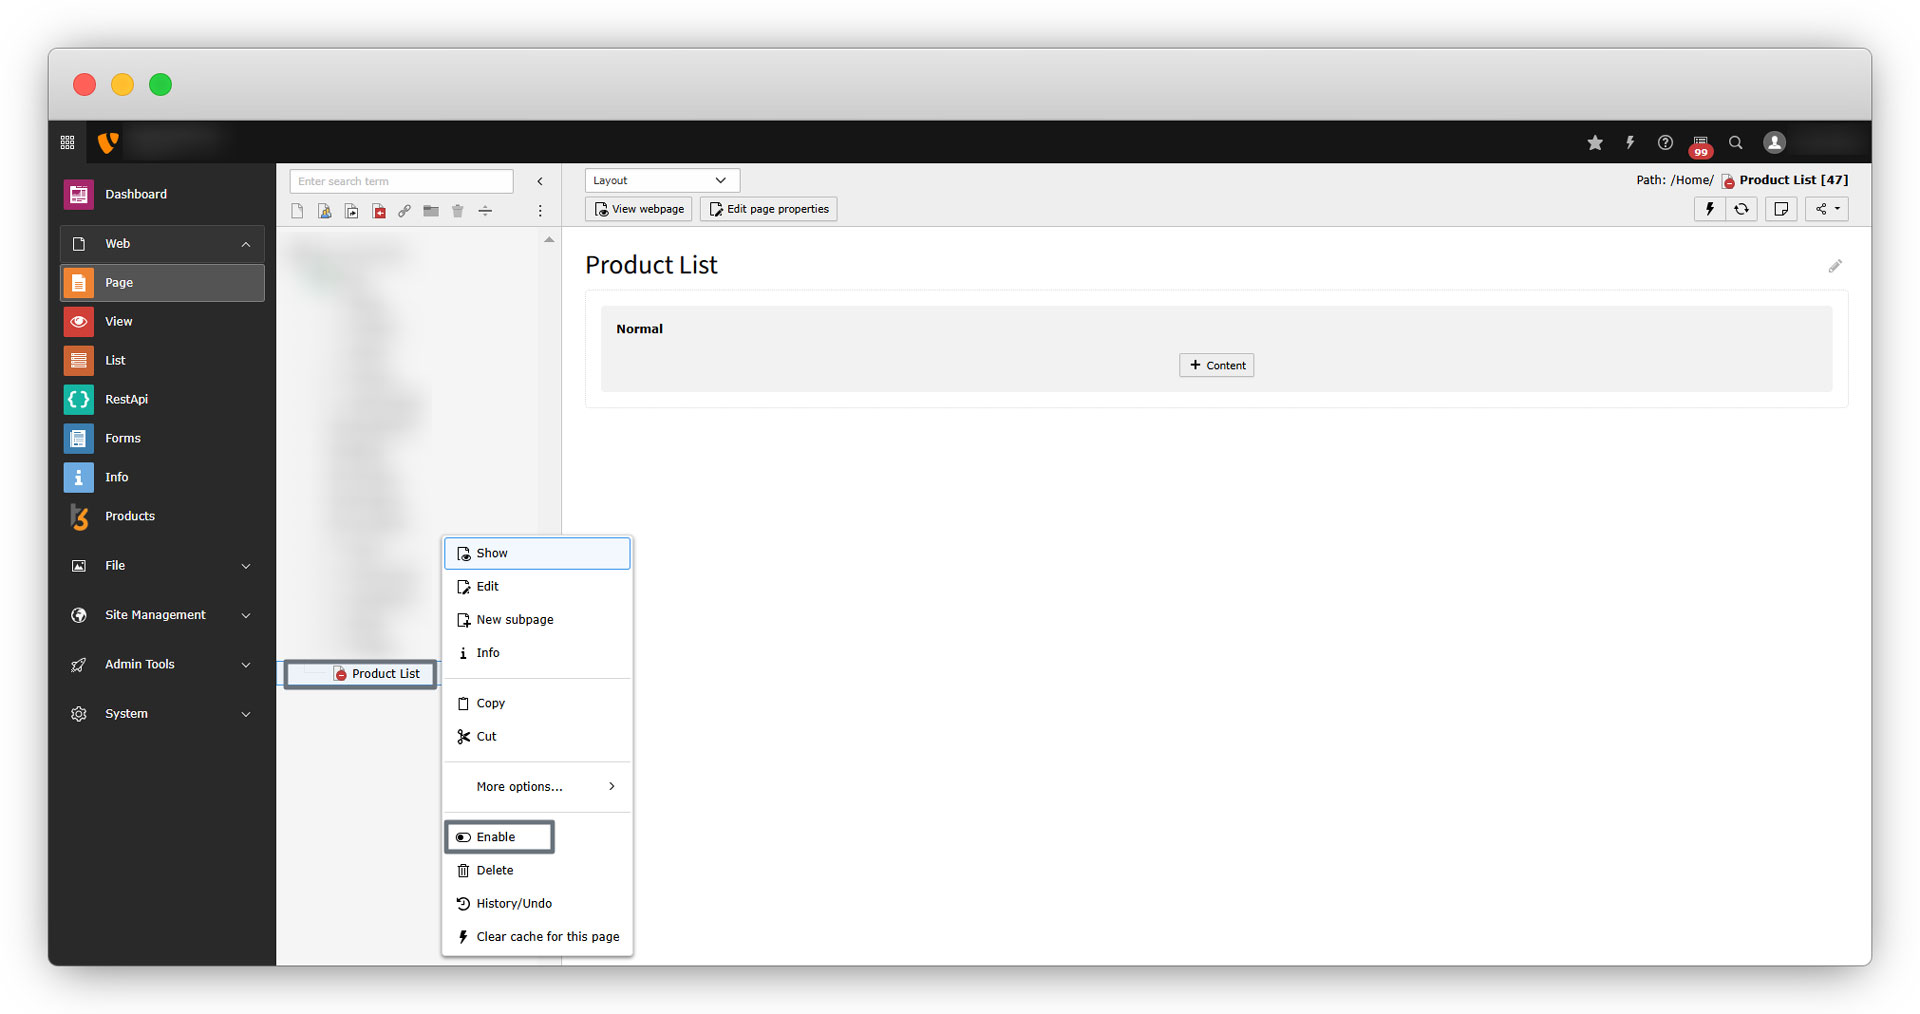
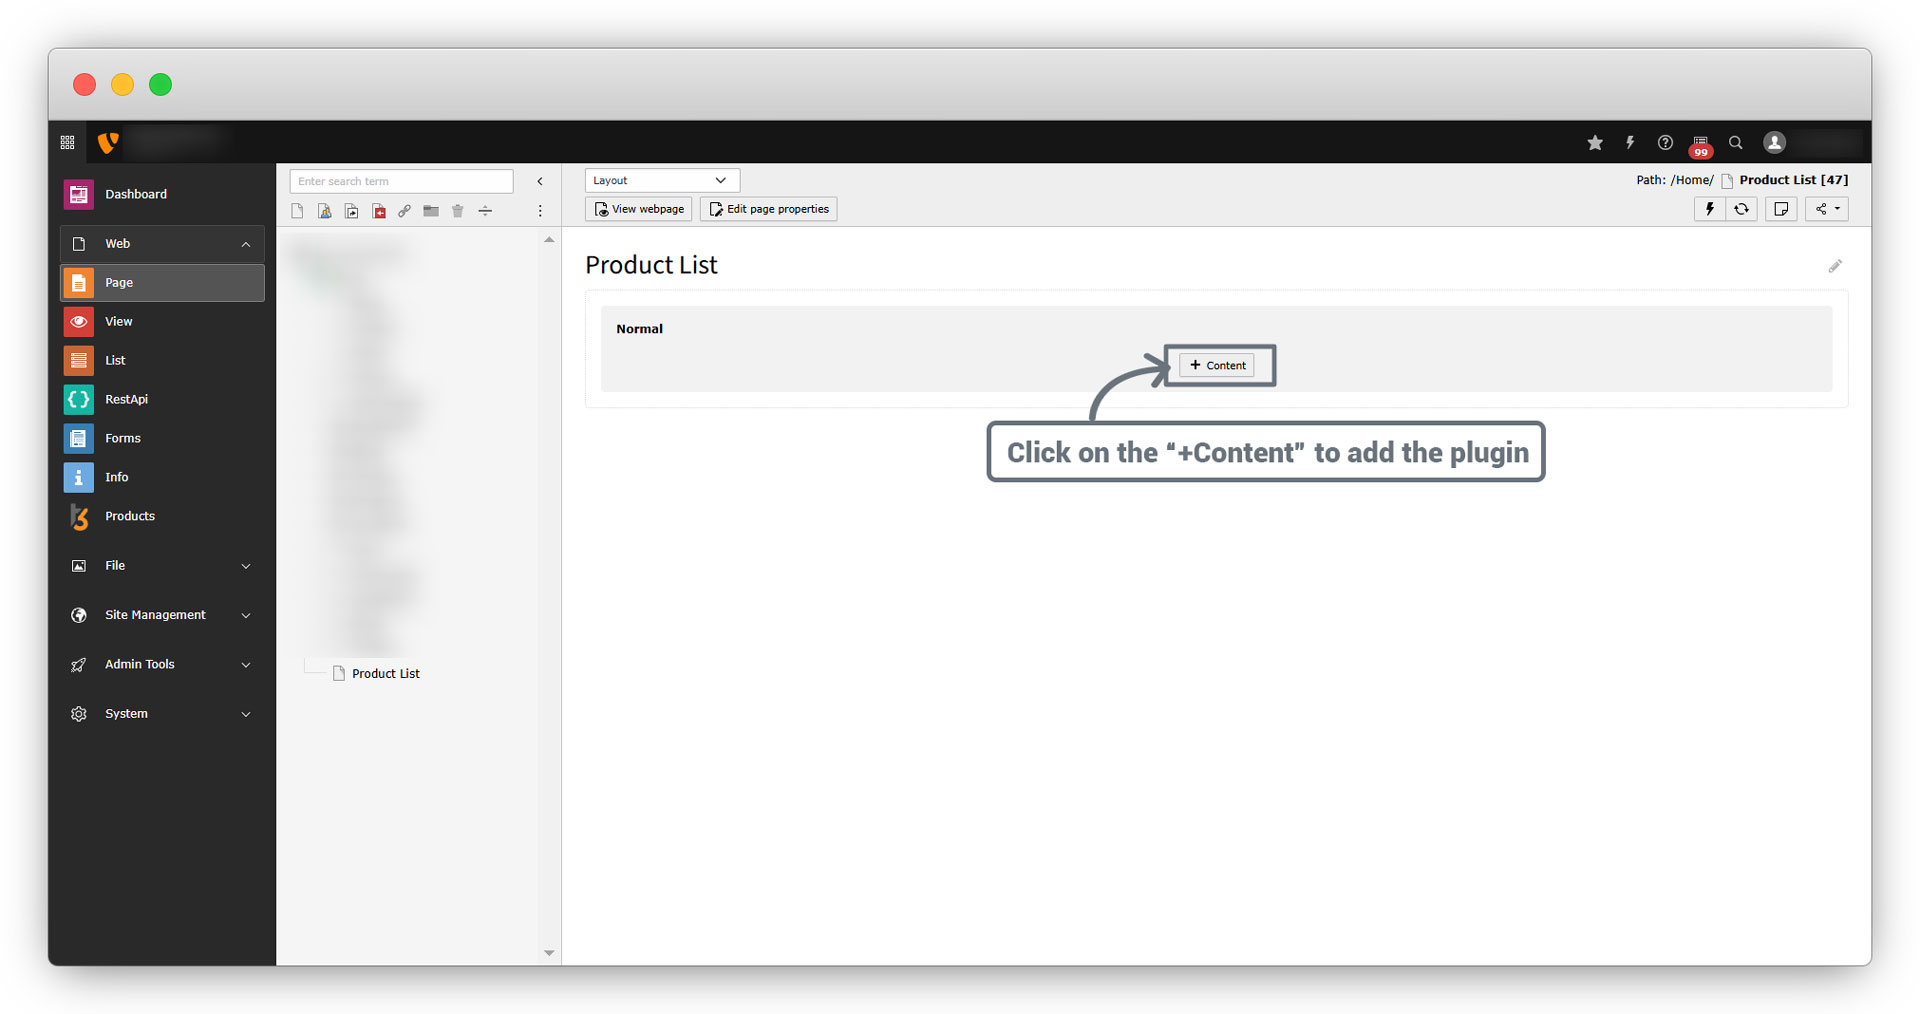
3. To create the product list, let’s add the plugin “Product list”.
4. Click on the “+ Content” button and the widget will open as seen in the screenshots:
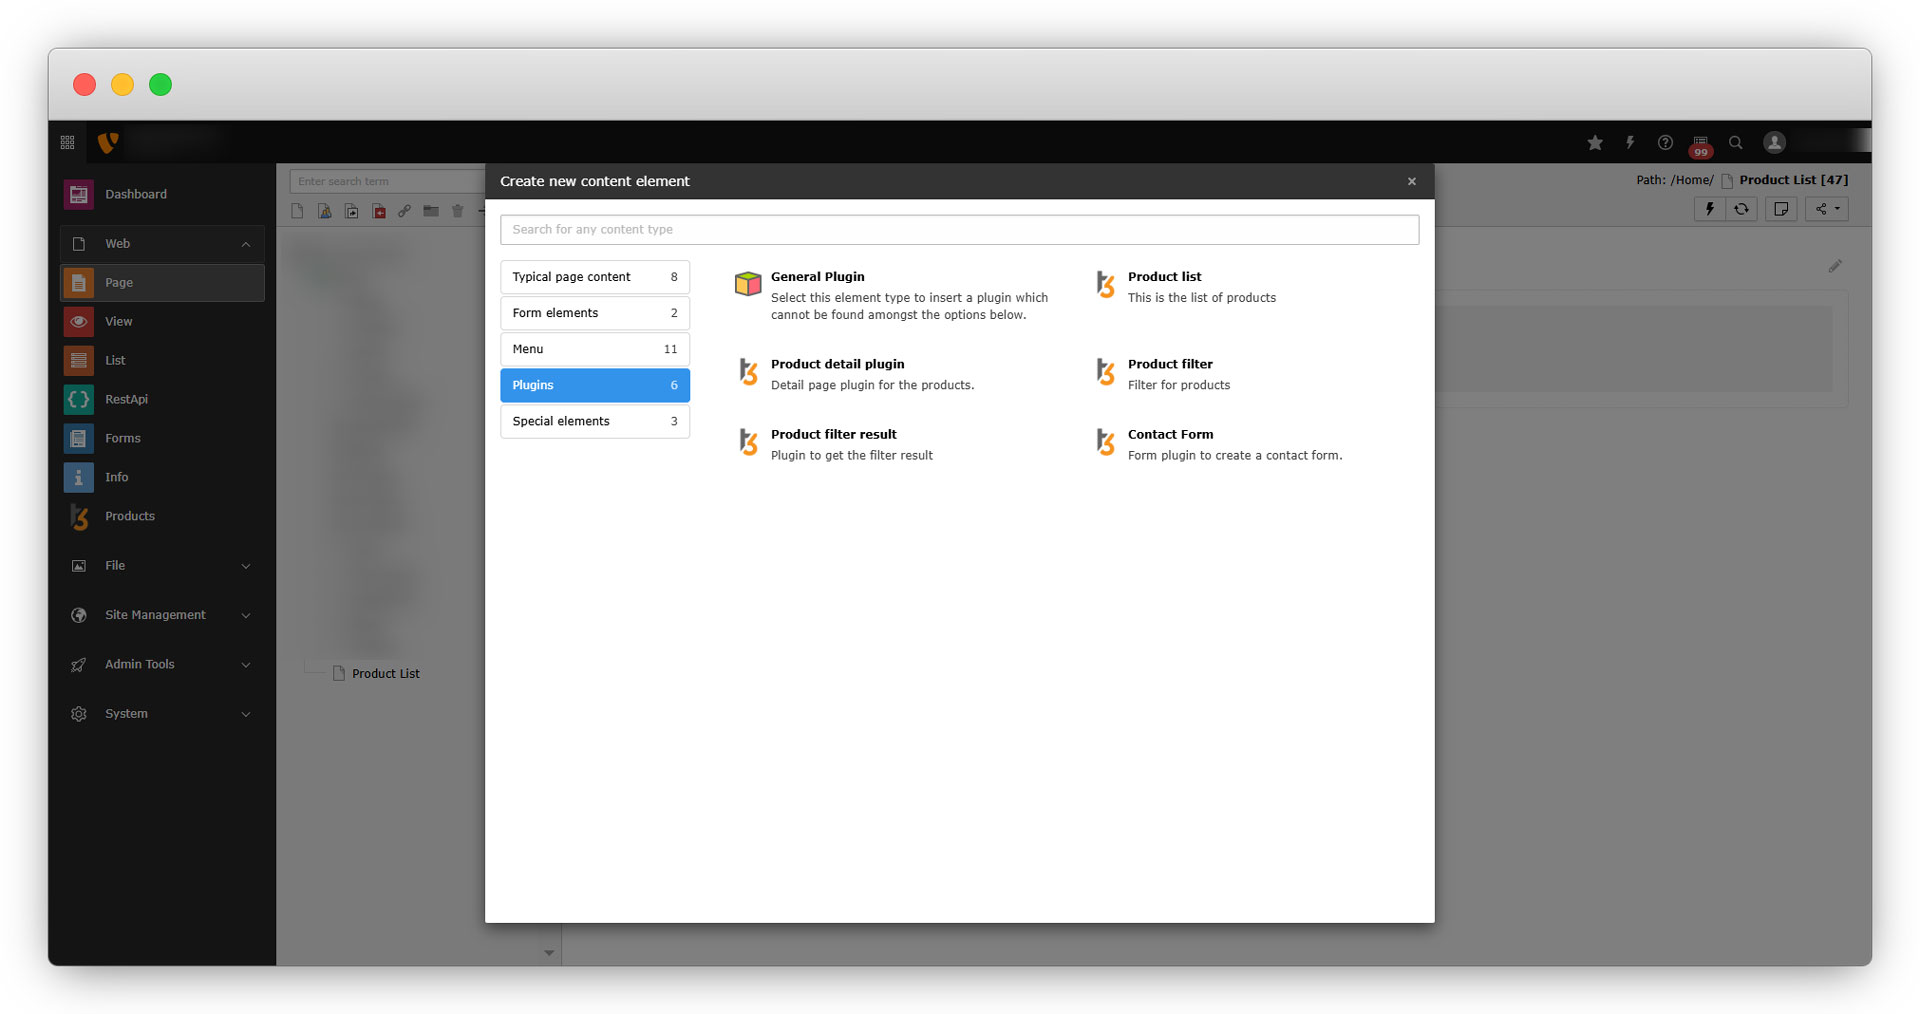
5. Go to “Plugins” in the widget and select the plugin “Product list”, and you will see the below screen.
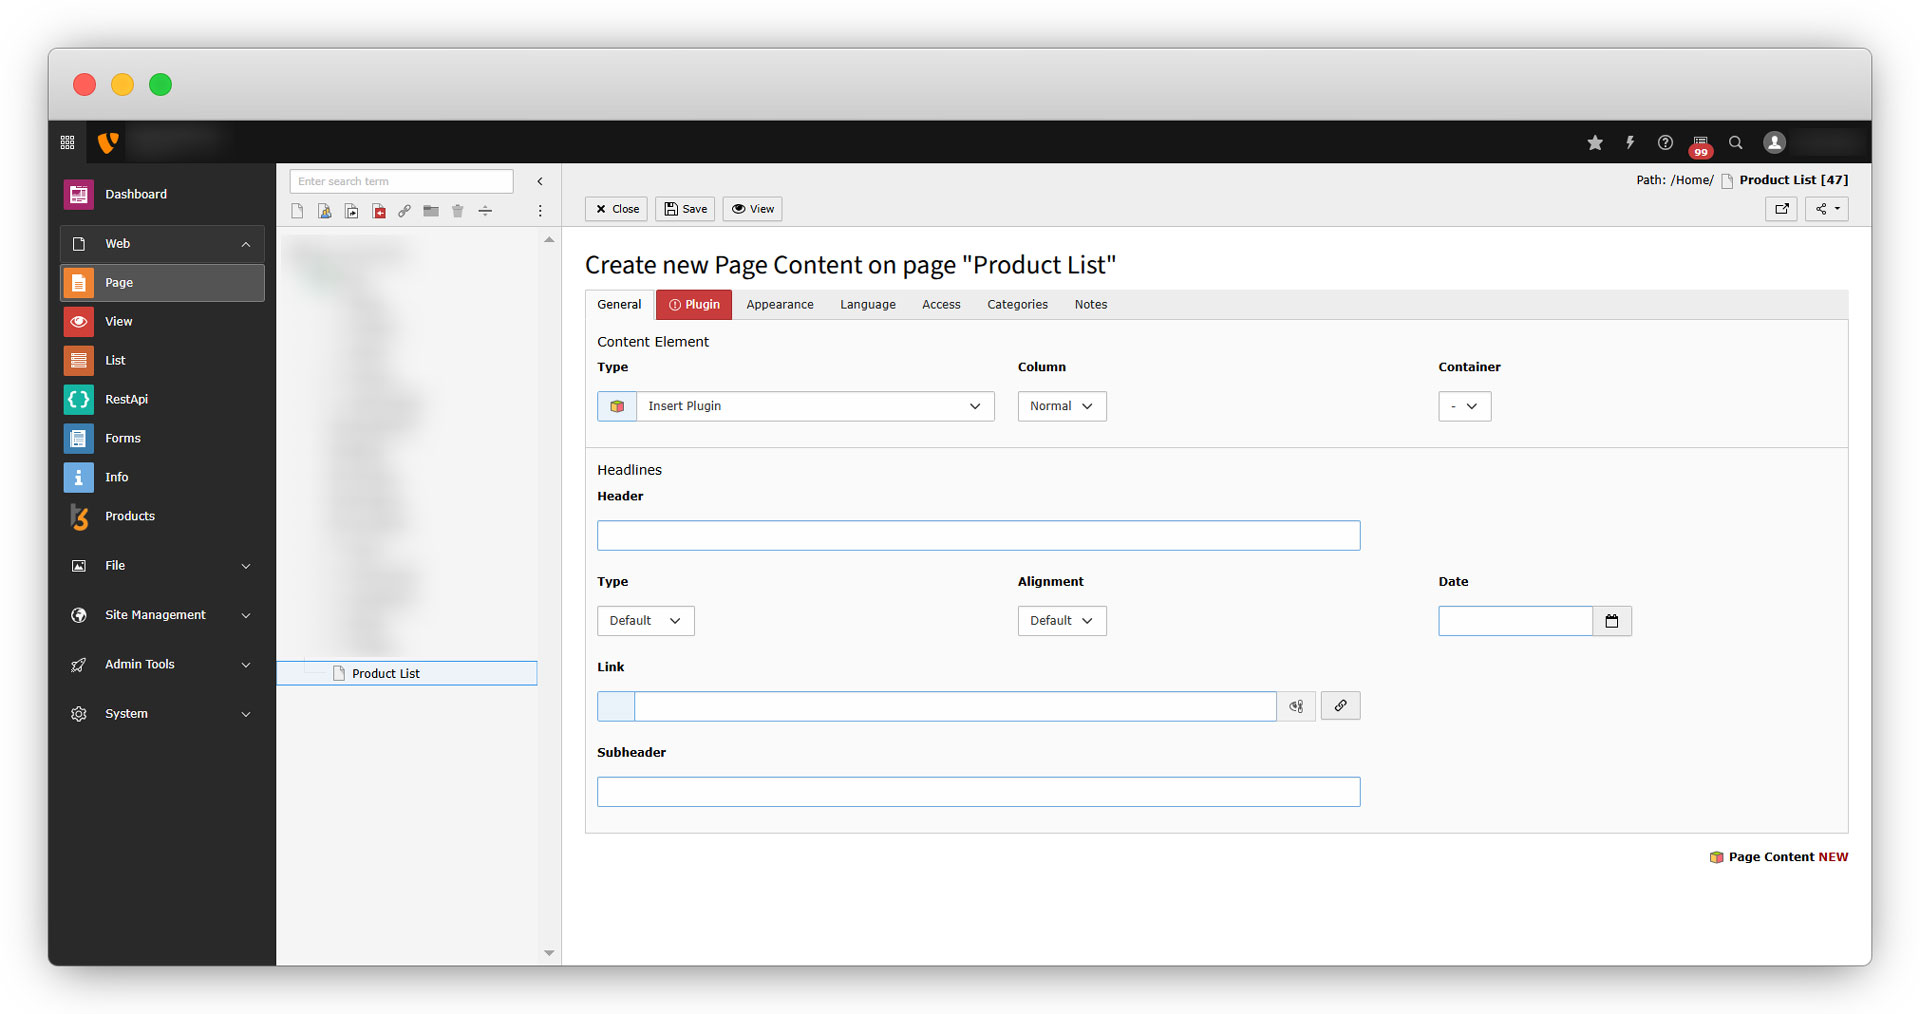
6. Go to the “Plugin” tab and you will see the below screen:

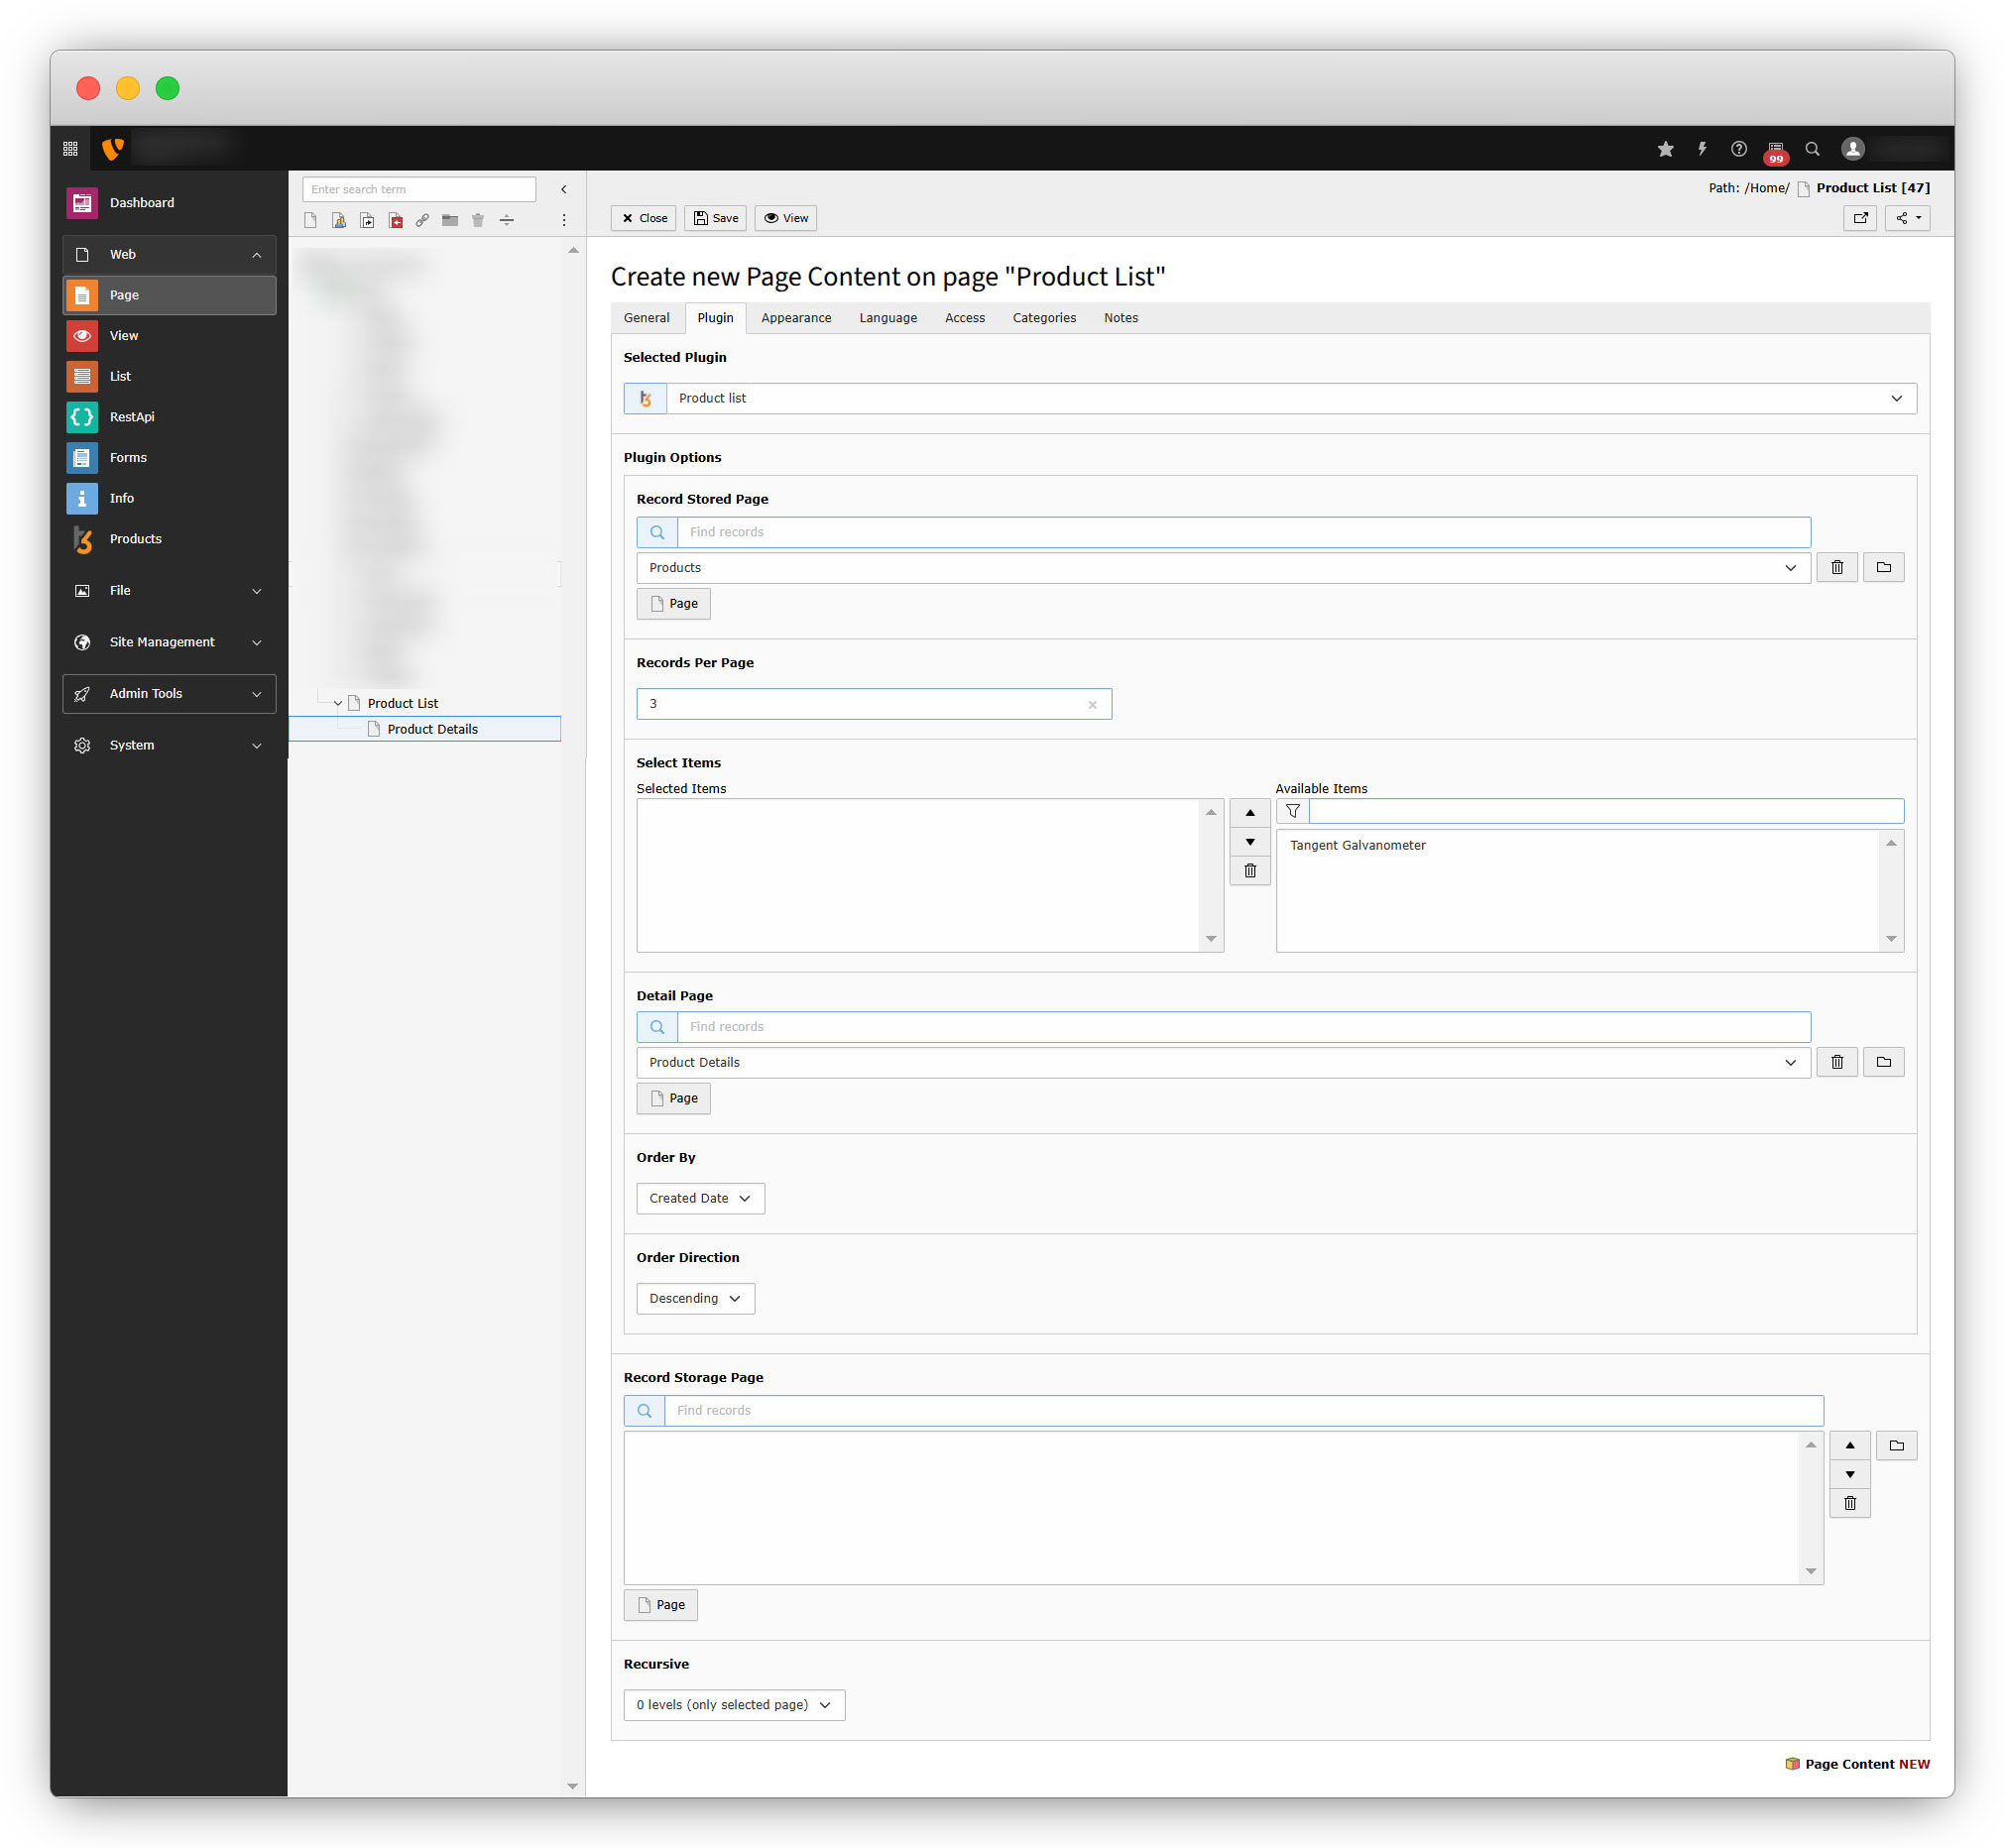
7. As you can see in the above screenshot, in “Plugin Options” it is required to add the “Record Stored Page”. Click on the “Page” button and select the folder you have stored your records in. Here the folder is “Products”.
8. Add the number of records you want per page in “Records Per Page”.
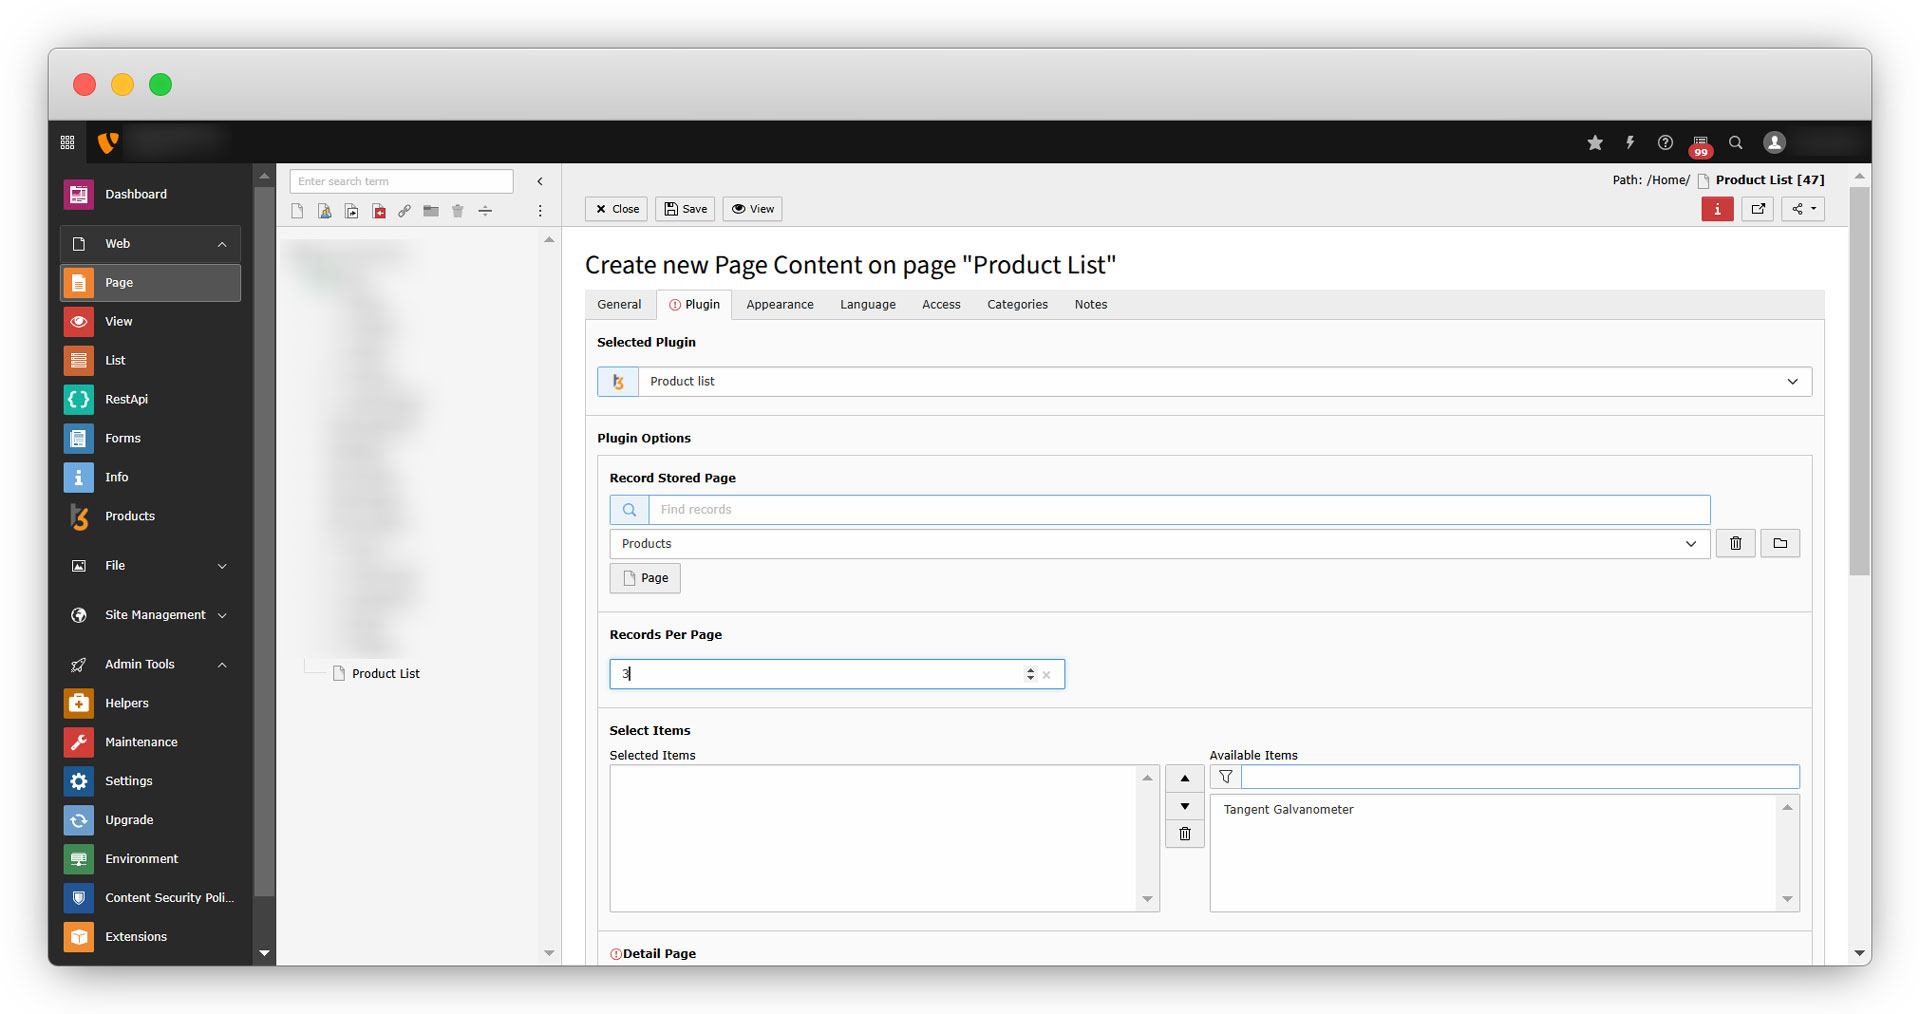
9. Add the “Detail page”. At the time of creating the list plugin, we checked the checkbox of “Detail Page?”, so that we can have a detail page for products. Here we have to choose the detail page for products. For that, we need to create a detail page and select that detail page by clicking on the “Page” button.
10. See the screenshots below.
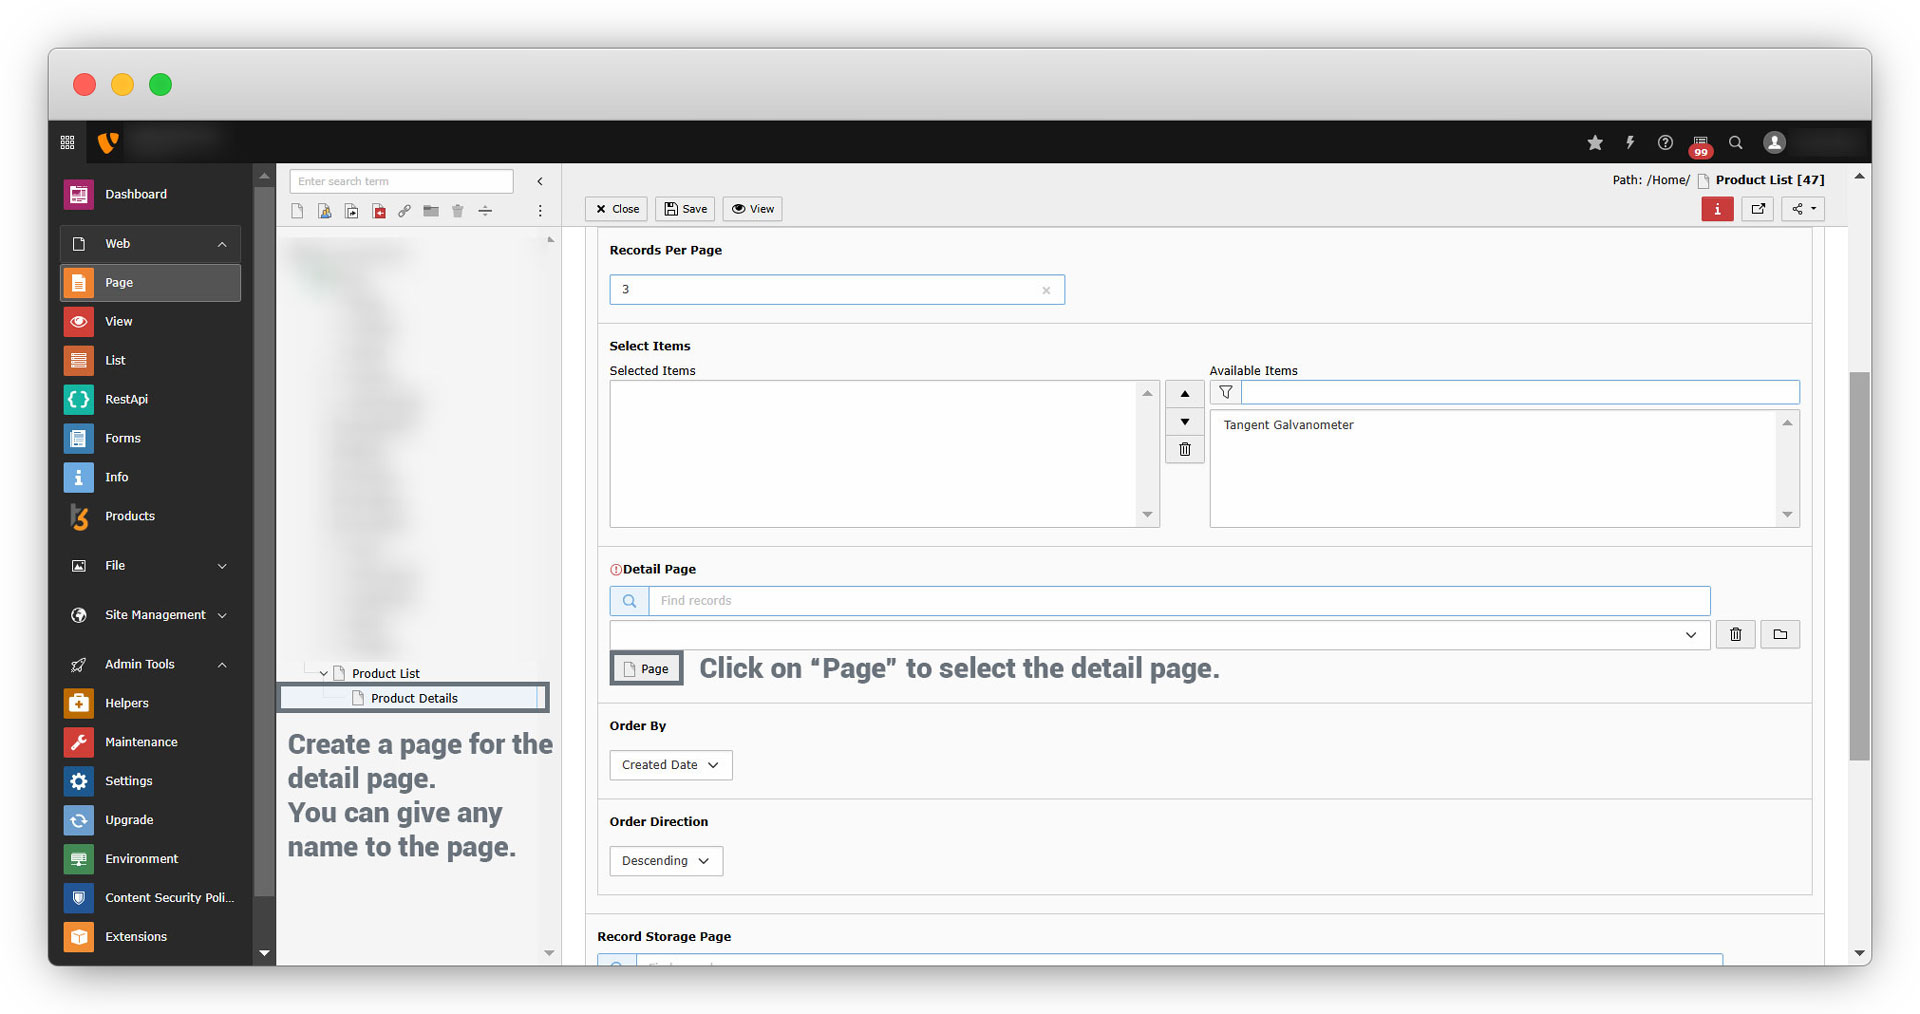
11. Order By and Order Direction options have selected value, you can change their values according to your requirements. Below is the final screenshot:
12. Save the plugin and click on the “View” button to view the webpage.
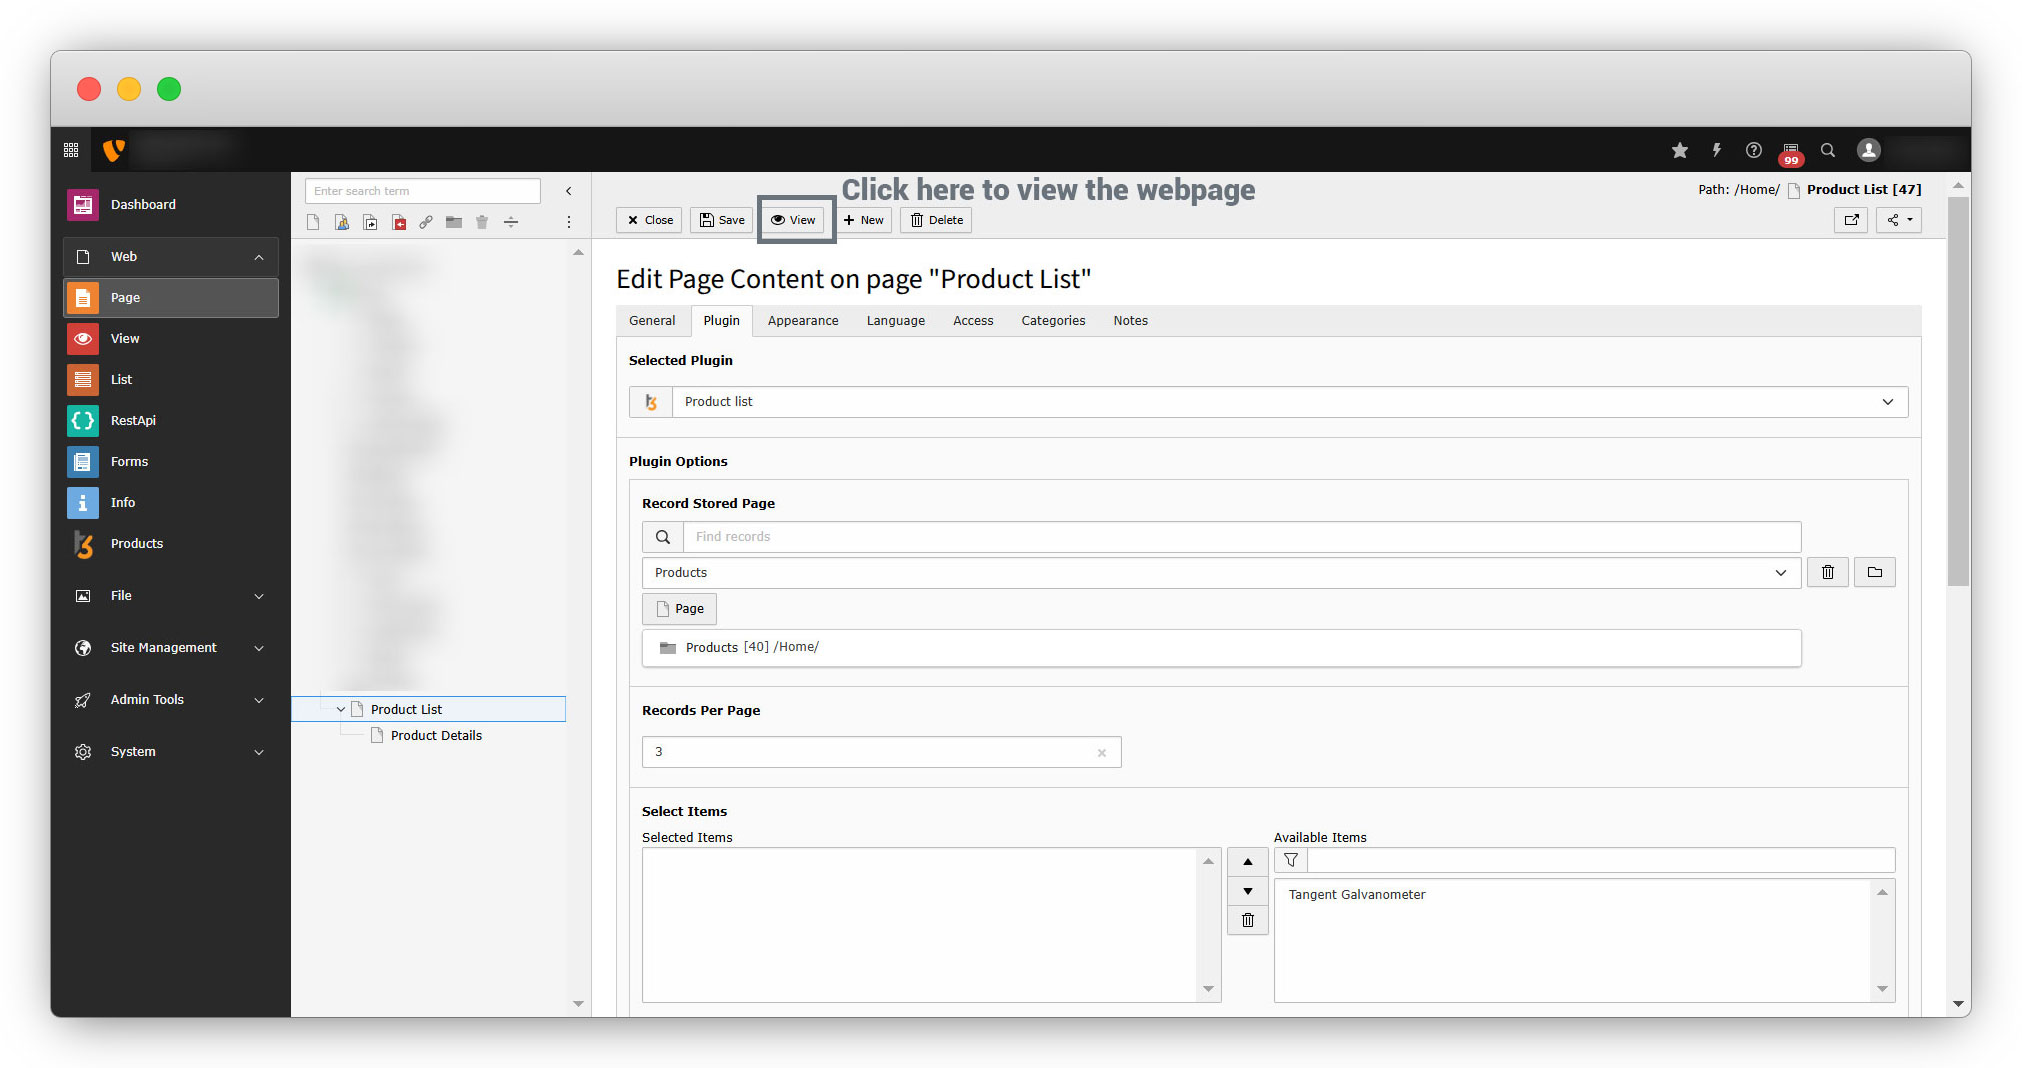
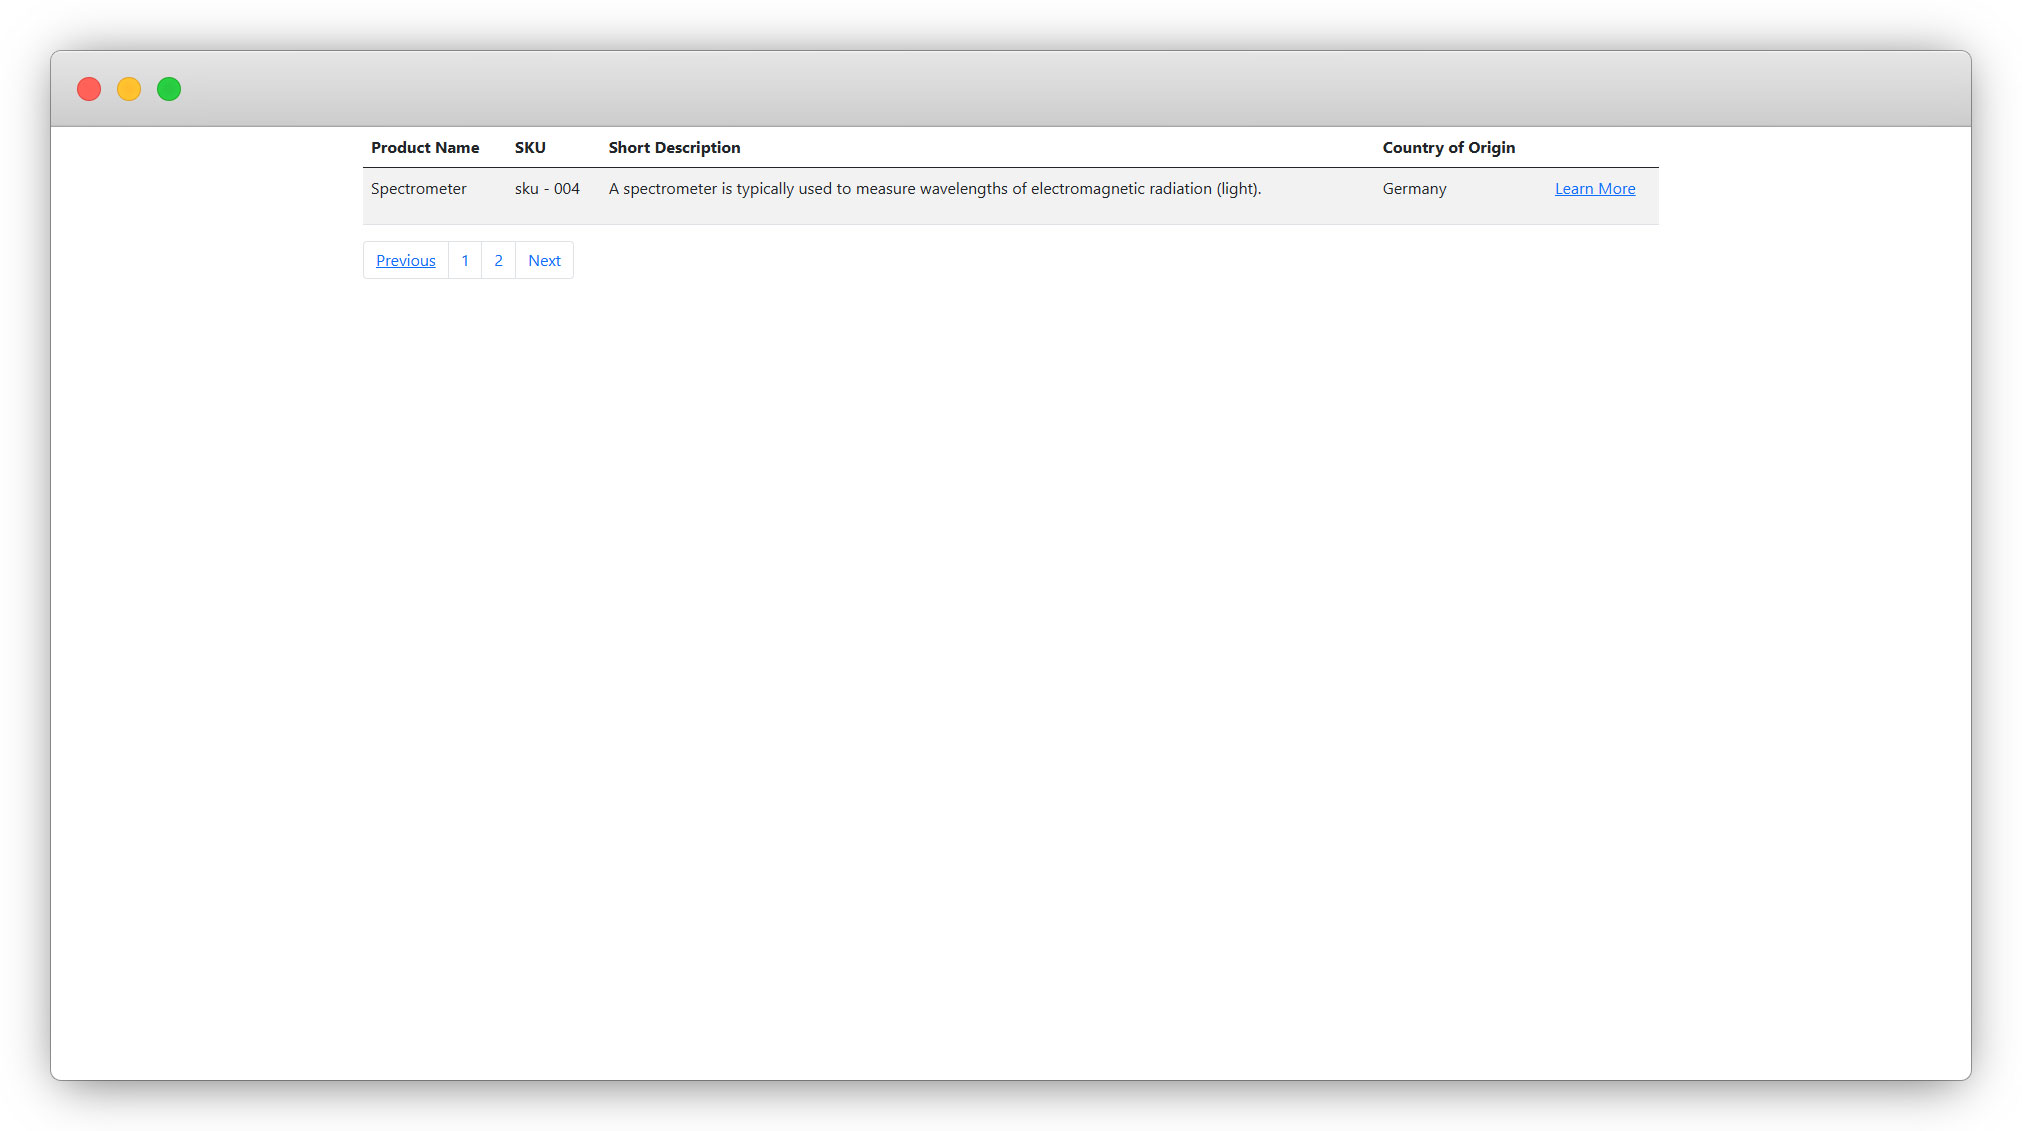
13. When you click on the “View” button, you will see the list of products. As we have only one product, the list will show only one product as seen in the screenshot below:

14. To implement the design for the list, let’s manipulate the template of the list plugin.
Template manipulation in extension builder
1. Go to the extension builder, log in to your account.
2. Edit the extension and go to the “Plugins” tab.
3. Click on the template icon of the “Product list” plugin to open the template, and paste the below code.
<div>
  <table>
    <f:if condition="{items}">
      <f:then>
        <thead>
          <tr>
            <th scope="col">Product Name</th>
            <th scope="col">SKU</th>
            <th scope="col">Short Description</th>
            <th scope="col">Country of Origin</th>
            <th></th>
          </tr>
        </thead>
        <f:for each="{items}" as="item" iteration="i">
          <tbody>
            <tr>
              <td>
                <p>{item.producttitle}</p>
              </td>
              <td>
                <p>{item.productsku}</p>
              </td>
              <td>
                <f:format.html>{item.shortdescription}</f:format.html>
              </td>
              <td>
                <p>{productcountry_{i.index}}</p>
              </td>
              <td>
                <f:link.page pageUid="{settings.detailPid}" additionalParams="{uid: item.uid}">Learn More</f:link.page>
              </td>
            </tr>
          </tbody>
        </f:for>
      </f:then>
      <f:else>
        <p>NO Items Found !! </p>
      </f:else>
    </f:if>
  </table>
  <f:if condition="{items}">
        <nav aria-label="pagination">
            <ul>
                <li>
                    <f:if condition="{previousPage}">
                        <f:then>
                            <f:link.action arguments="{page:previousPage,pagesize:pagesize}">
                                <span>Previous</span>
                            </f:link.action>
                        </f:then>
                        <f:else>
                        <span>Previous</span>
                        </f:else>
                    </f:if>
                </li>
                <f:for each="{pagination.allPageNumbers}" as="page">
                    <li>
                        <f:link.action arguments="{page:page,pagesize:pagesize}">
                            {page}
                        </f:link.action>
                    </li>
                </f:for>
                <li>
                    <f:if condition="{nextPage}">
                        <f:then>
                            <f:link.action arguments="{page:nextPage,pagesize:pagesize}">
                                <span>Next</span>
                            </f:link.action>
                        </f:then>
                        <f:else>
                        <span>Next</span>
                        </f:else>
                    </f:if>
                </li>
            </ul>
        </nav>
    </f:if>
</div>
Save the template, and then save the extension by clicking the “Save & Next” button for all the further steps.
4. Download the extension “Products” again, upload, and override the extension.
5. Open the list page in the front end, you will see the below view for the list with the above template code.
6. In our “Extension Builder”, the bootstrap CSS and JS files are already added, so we can implement the basic style just by using the bootstrap class.
7. Let’s add more products to get a list view for multiple products.
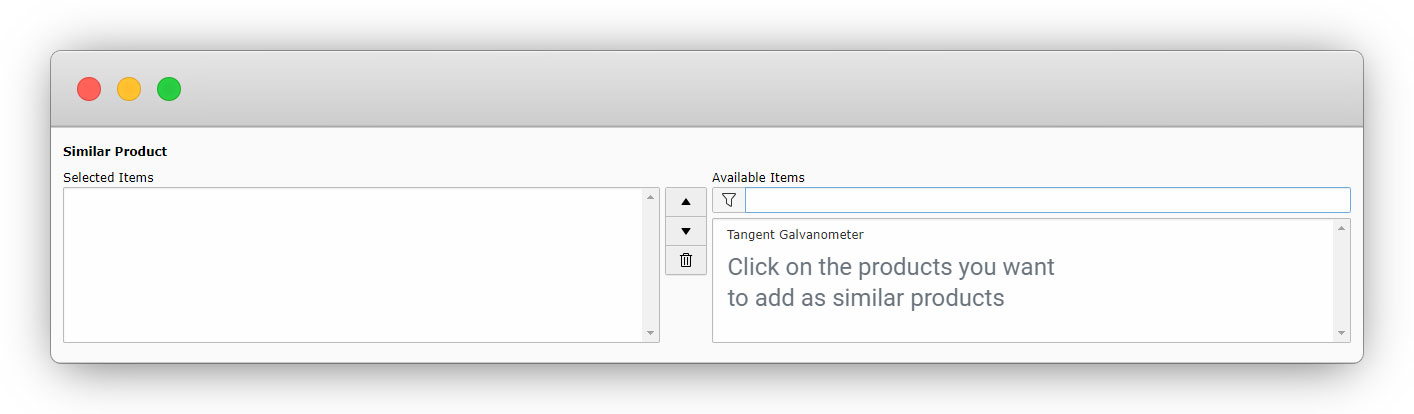
- When we add a new product as a second or third or any number product after creating the very first one, we will have an option in “Similar Products”. If you select the products from there, those products will be considered as “similar products” to that product.
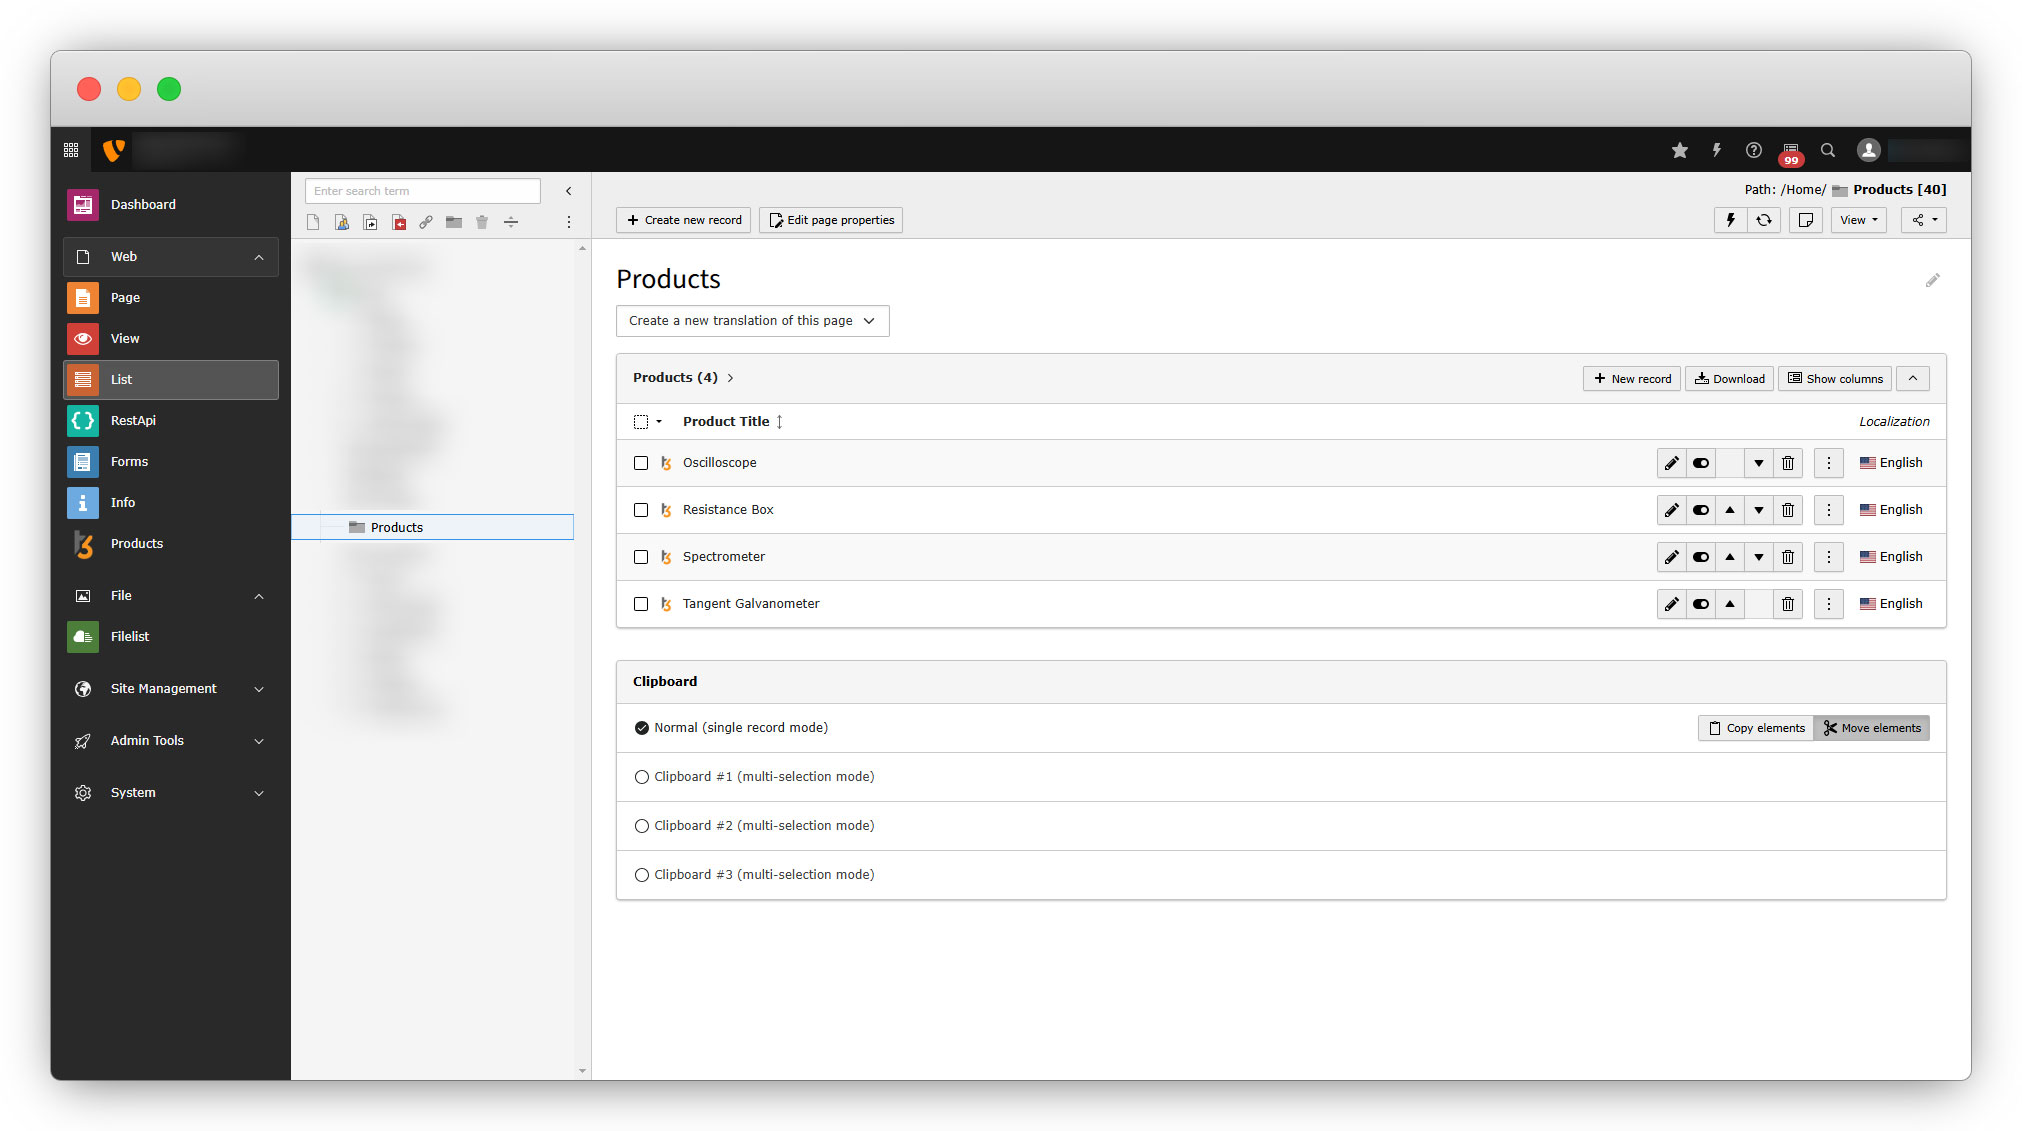
8. After adding more products, they can be seen in the TYPO3 backend “List” module by selecting the folder “Products”.
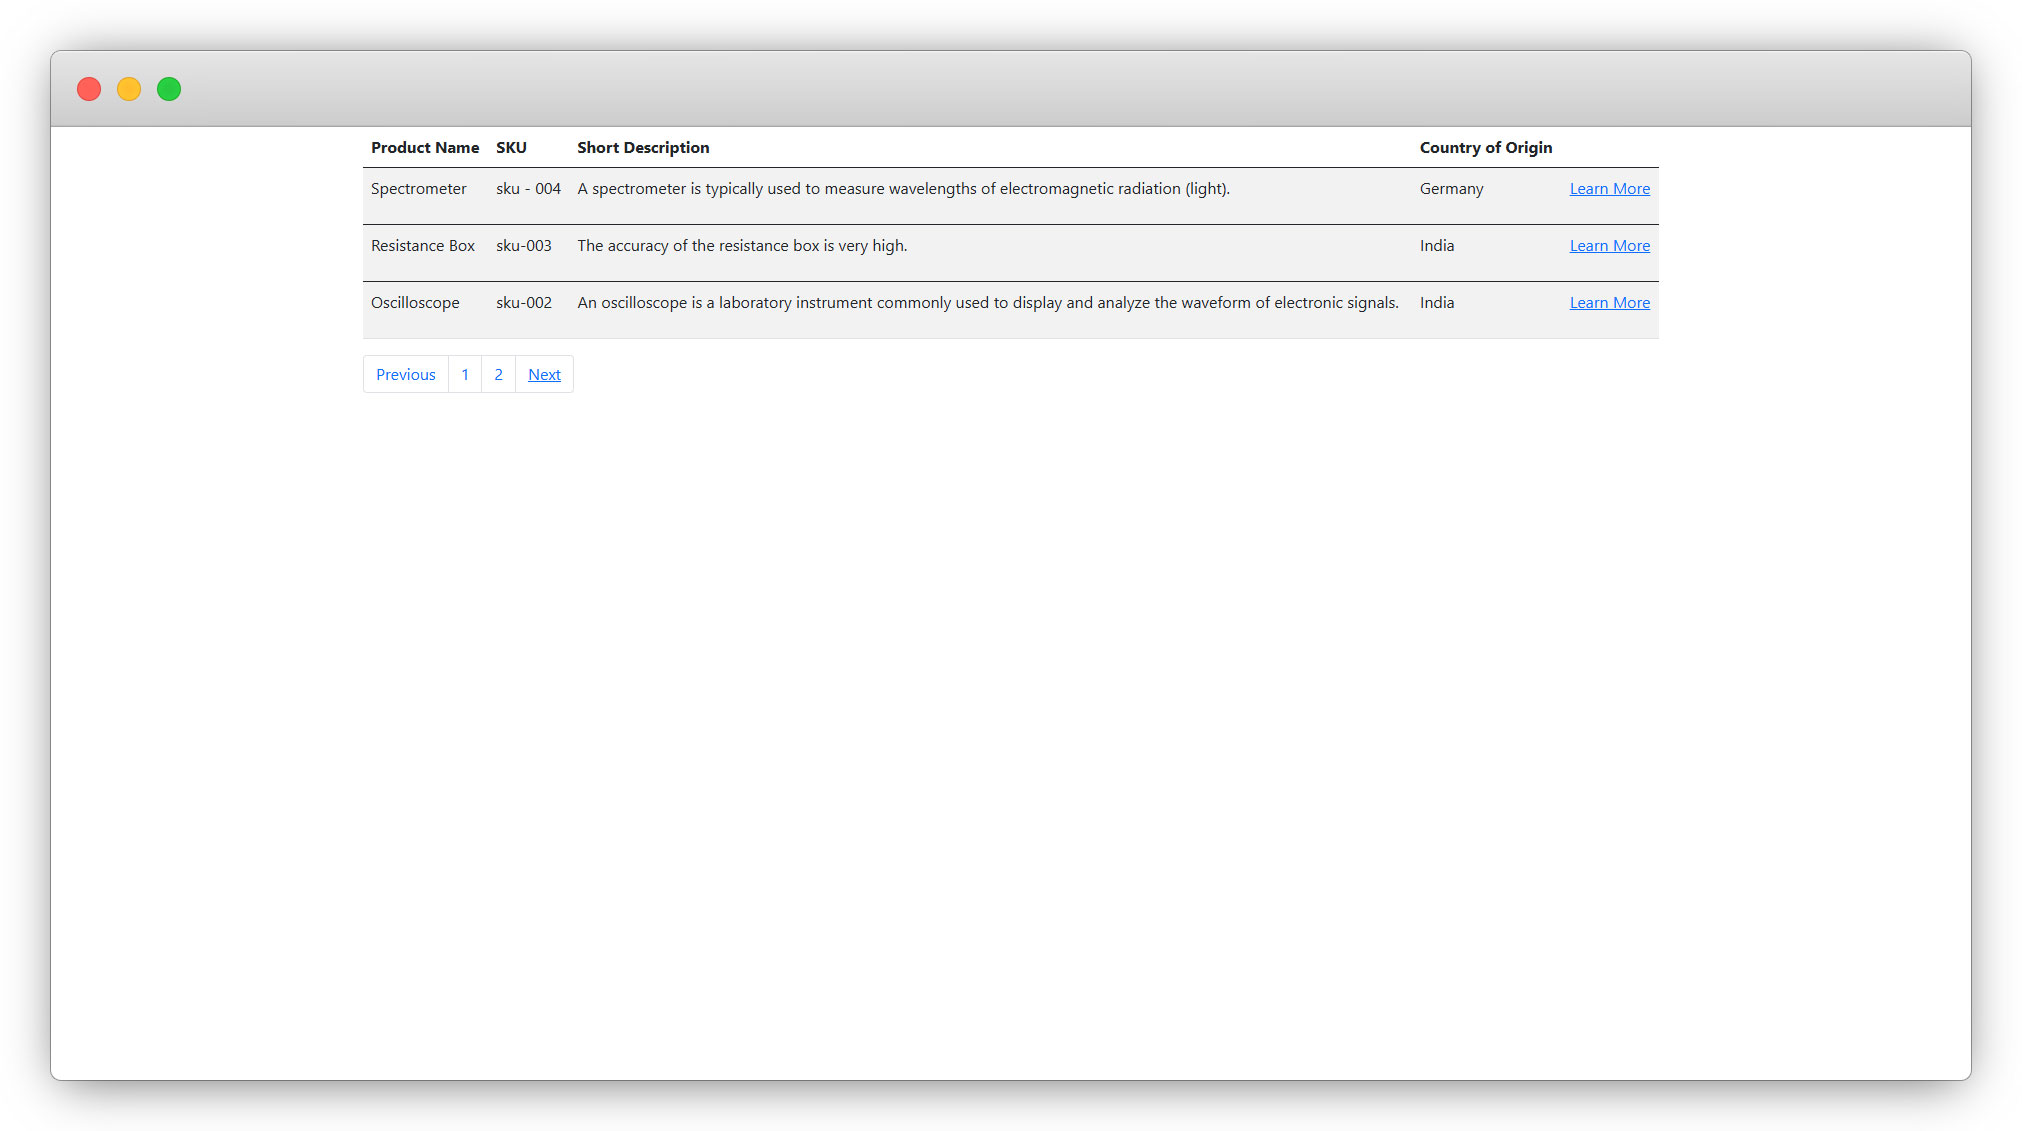
9. You can see the new products in the front-end product list as well. We have total 4 products and at the time of creating the page “Product List” we defined the “Records Per Page” field’s value as 3 so we will get 3 records on the first page and the 4th record will be seen on the second page, and the value of the “Order Direction” is “Descending ” so the records will be arranged in the descending order.
10. After “List” plugin, let’s check how to use the “Detail” plugin.
Share


