
URL copied to clipboard

How to use the custom element
13 views
__readtime__ Min
read
After creating the element, now it’s the time to use the element. We can place the custom element on any page like other elements.
1. Go to Web > Page from the left sidebar, open any existing page, or create a new page where you want to place the custom element and enable the page.
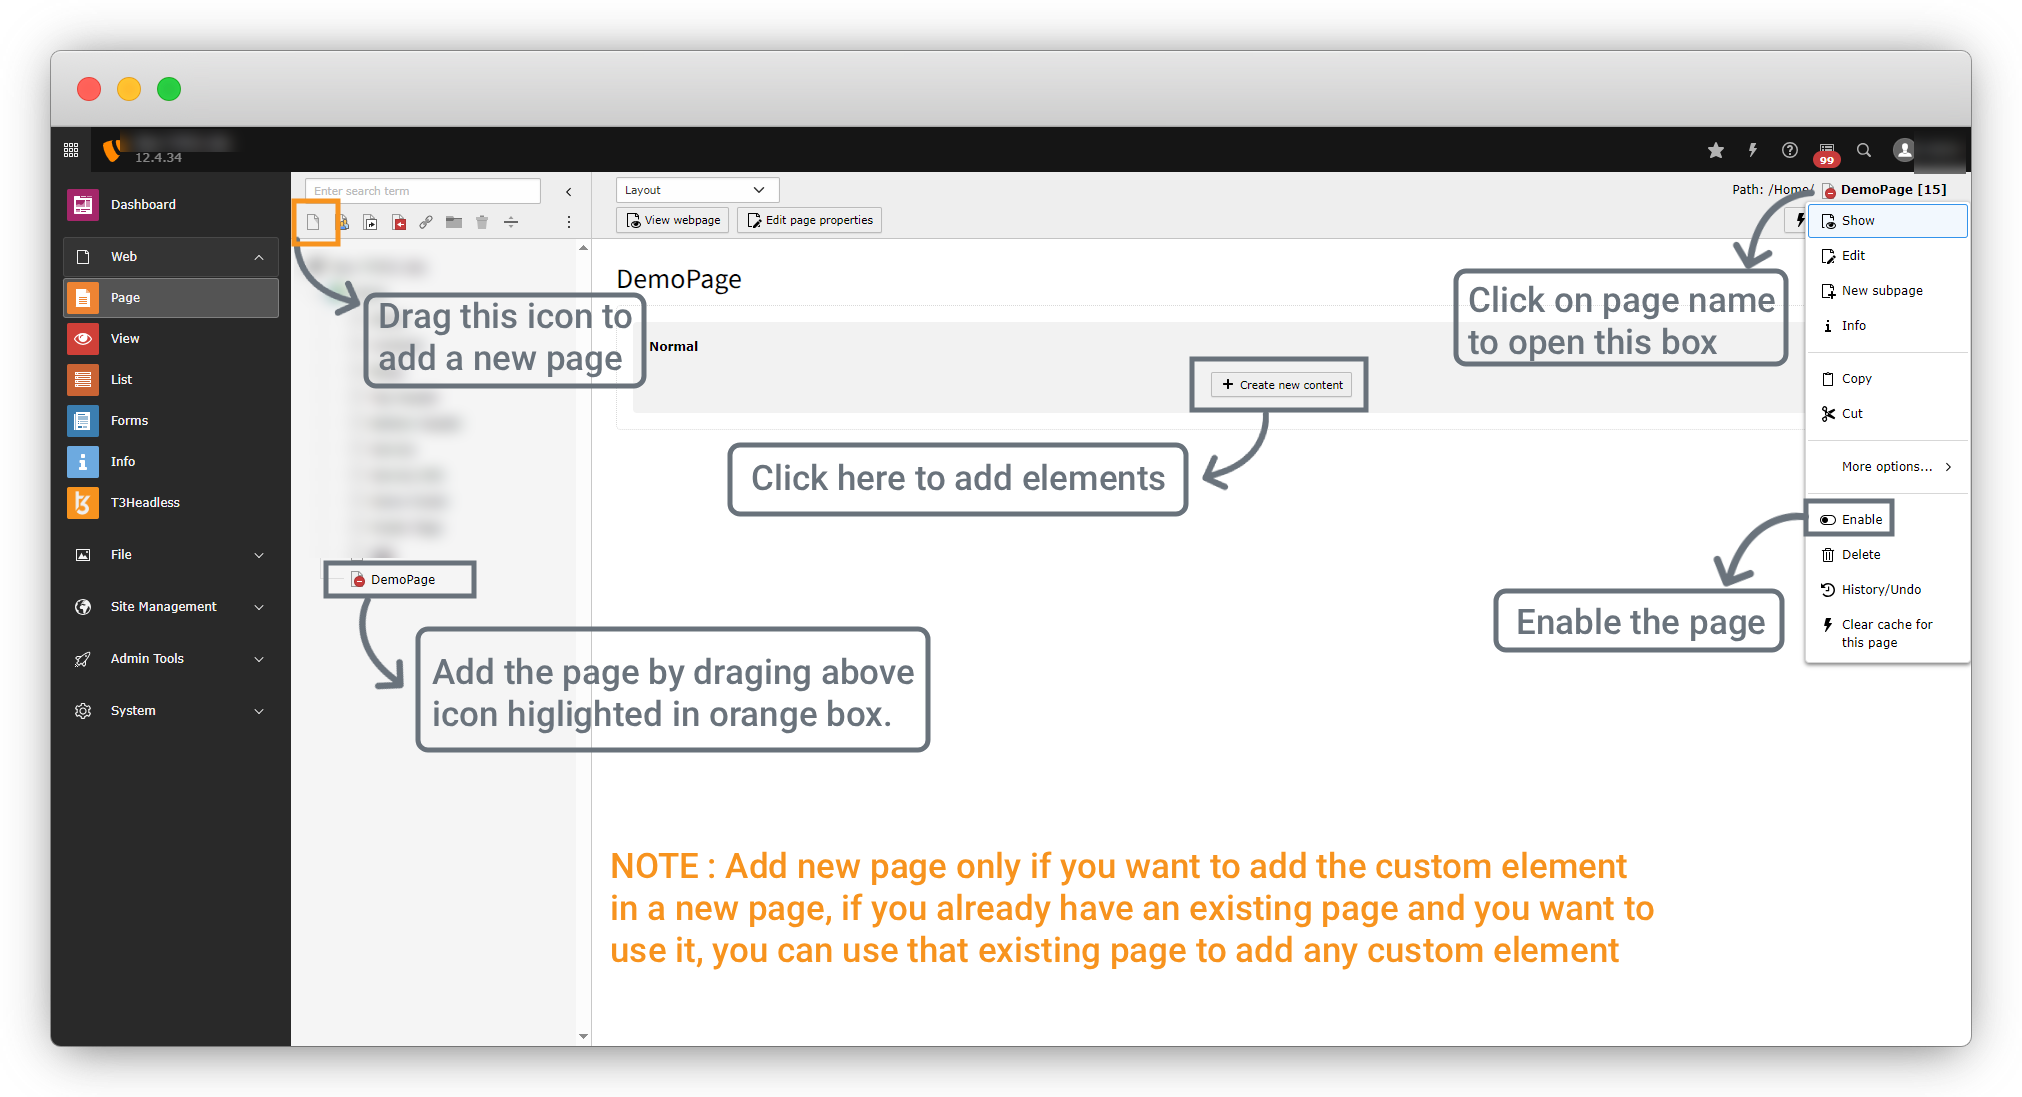
2. Go to Web > Page from the left sidebar, open any existing page, or create a new page where you want to place the custom element and enable the page.
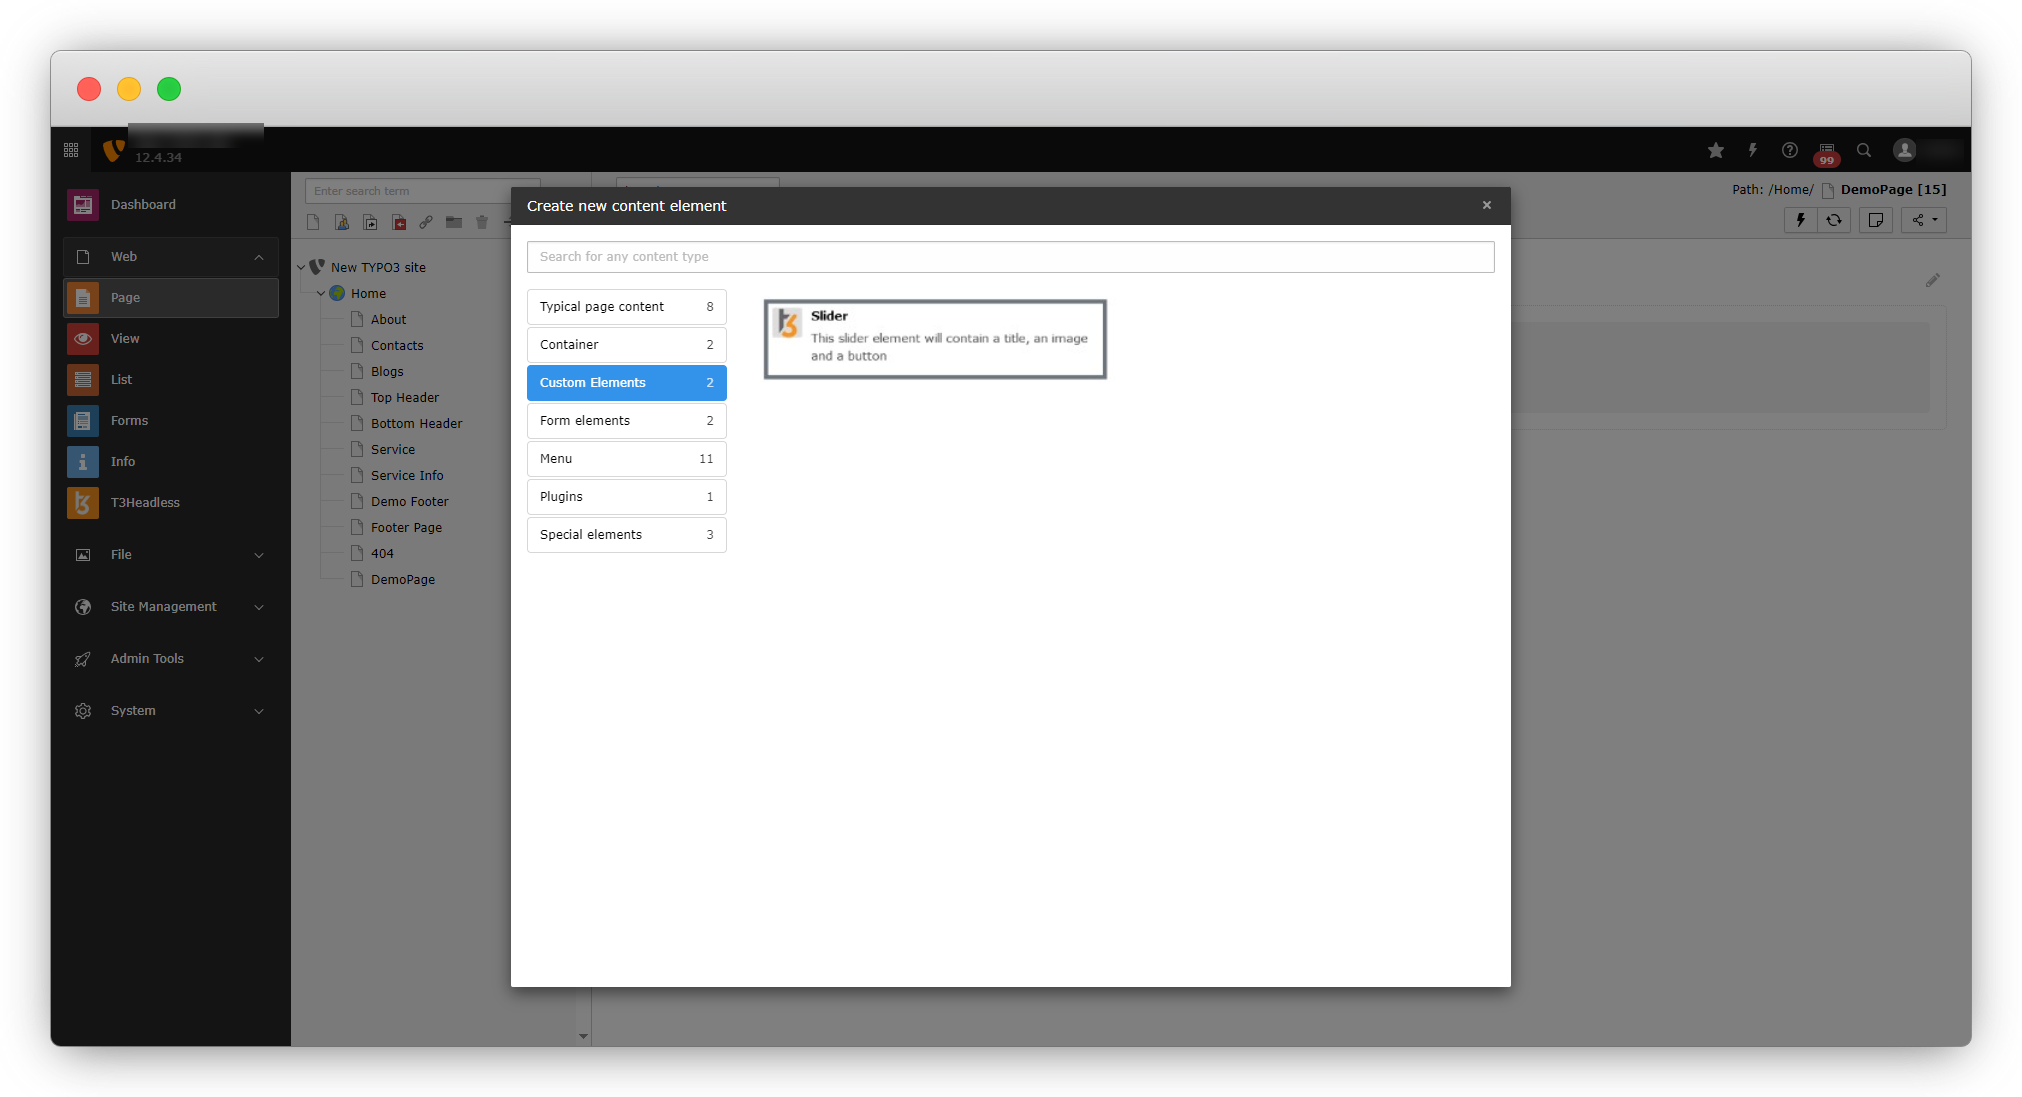
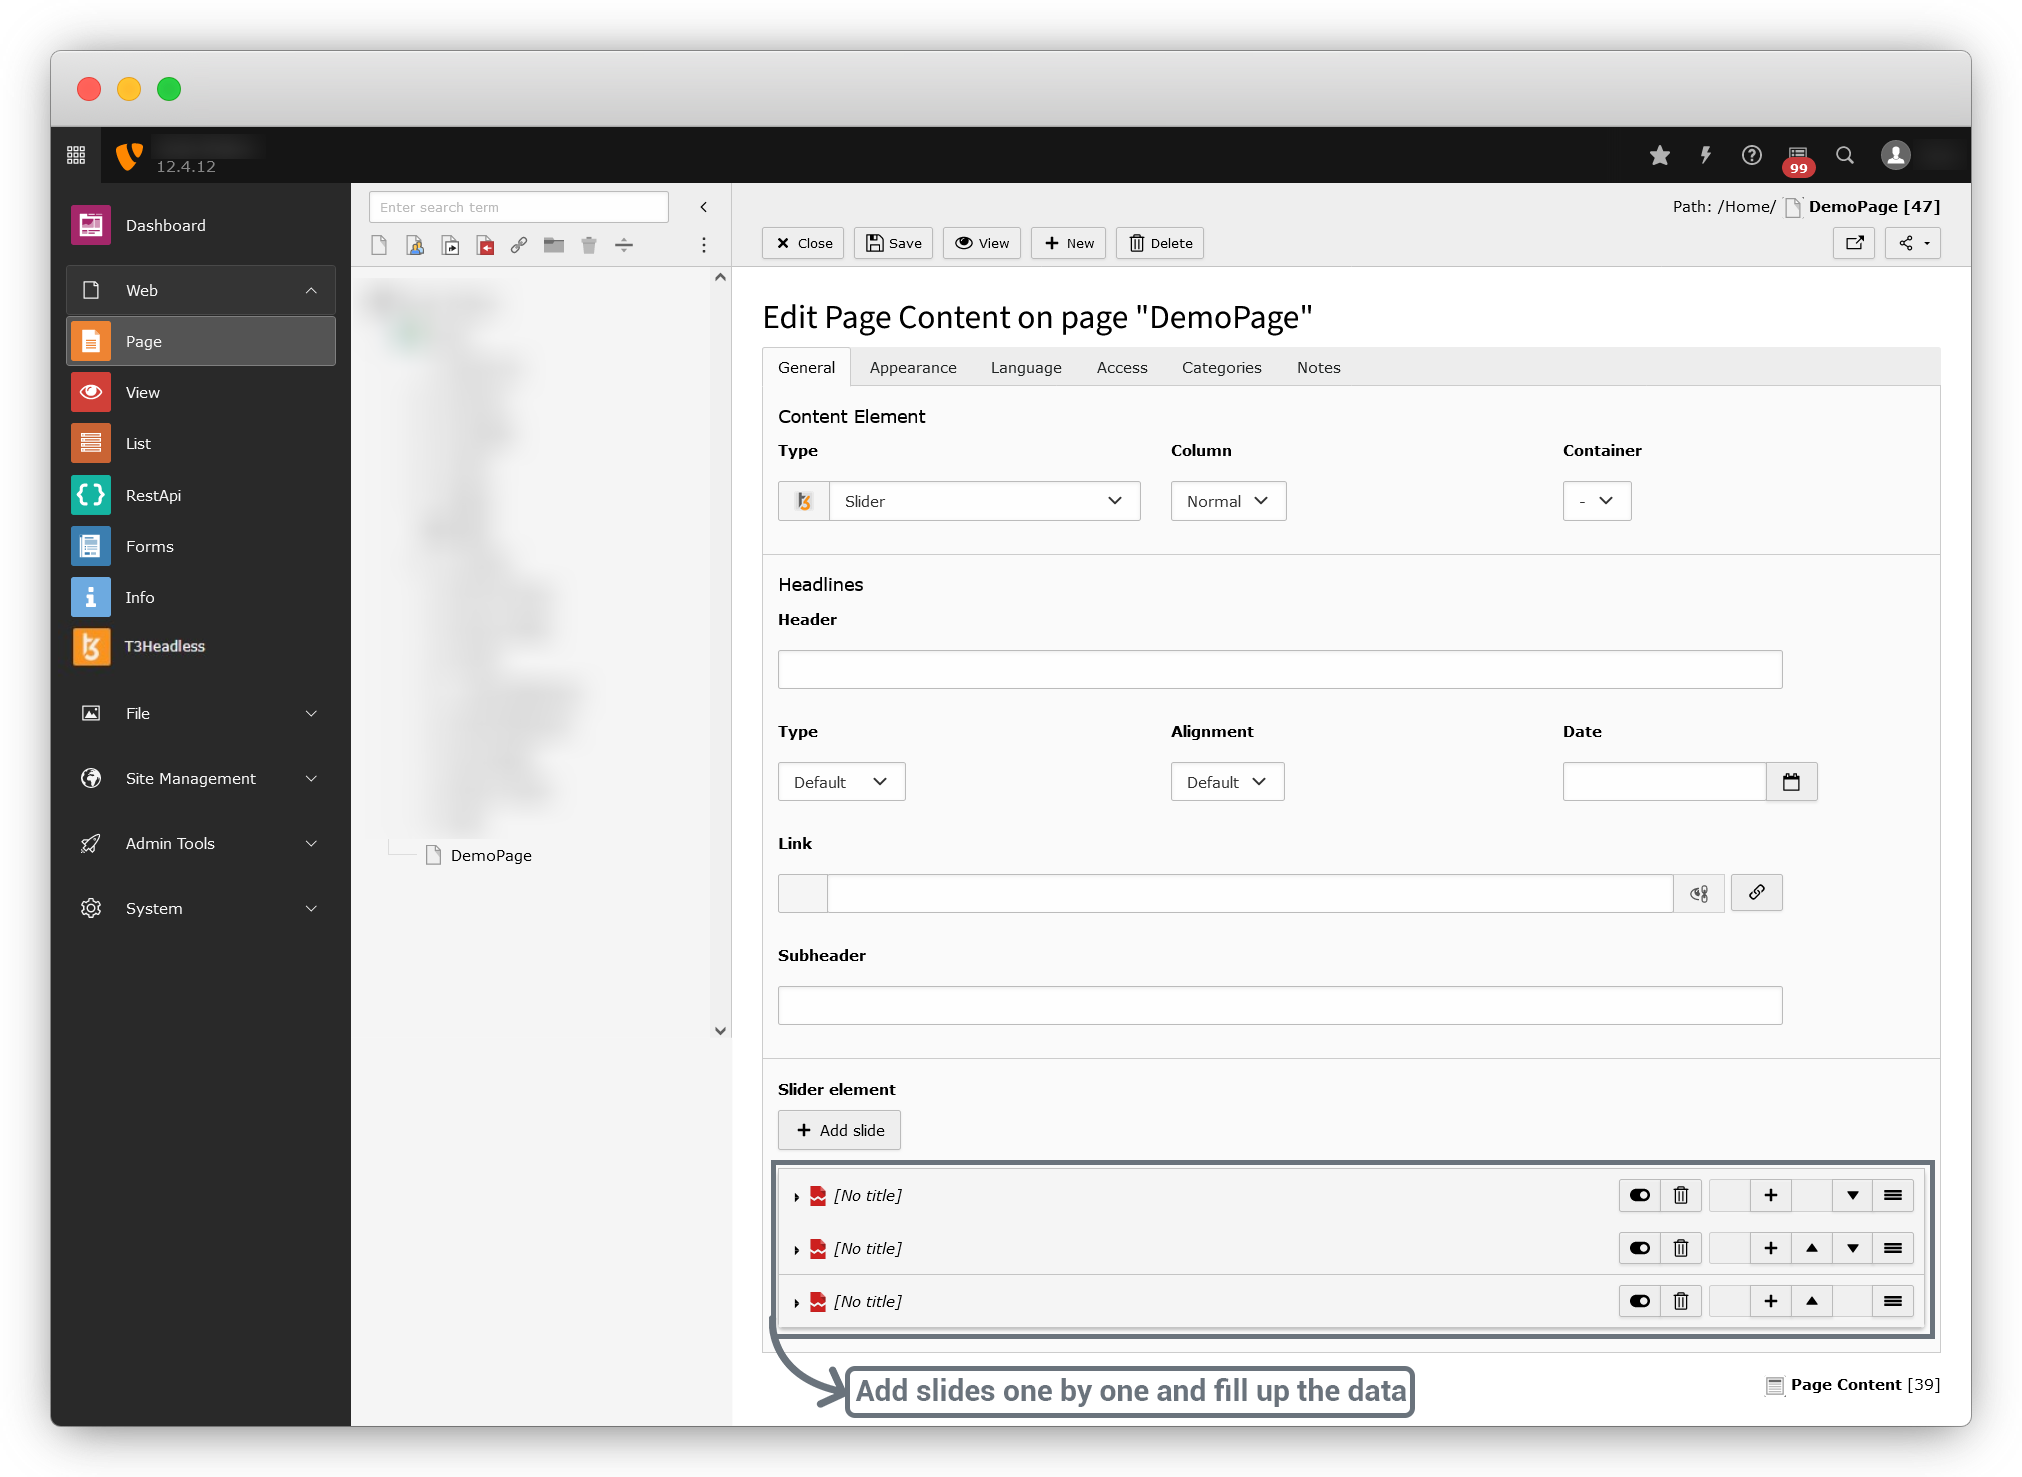
3. After clicking on the “Slider” element from the popup, the element will be open to let you add the data.
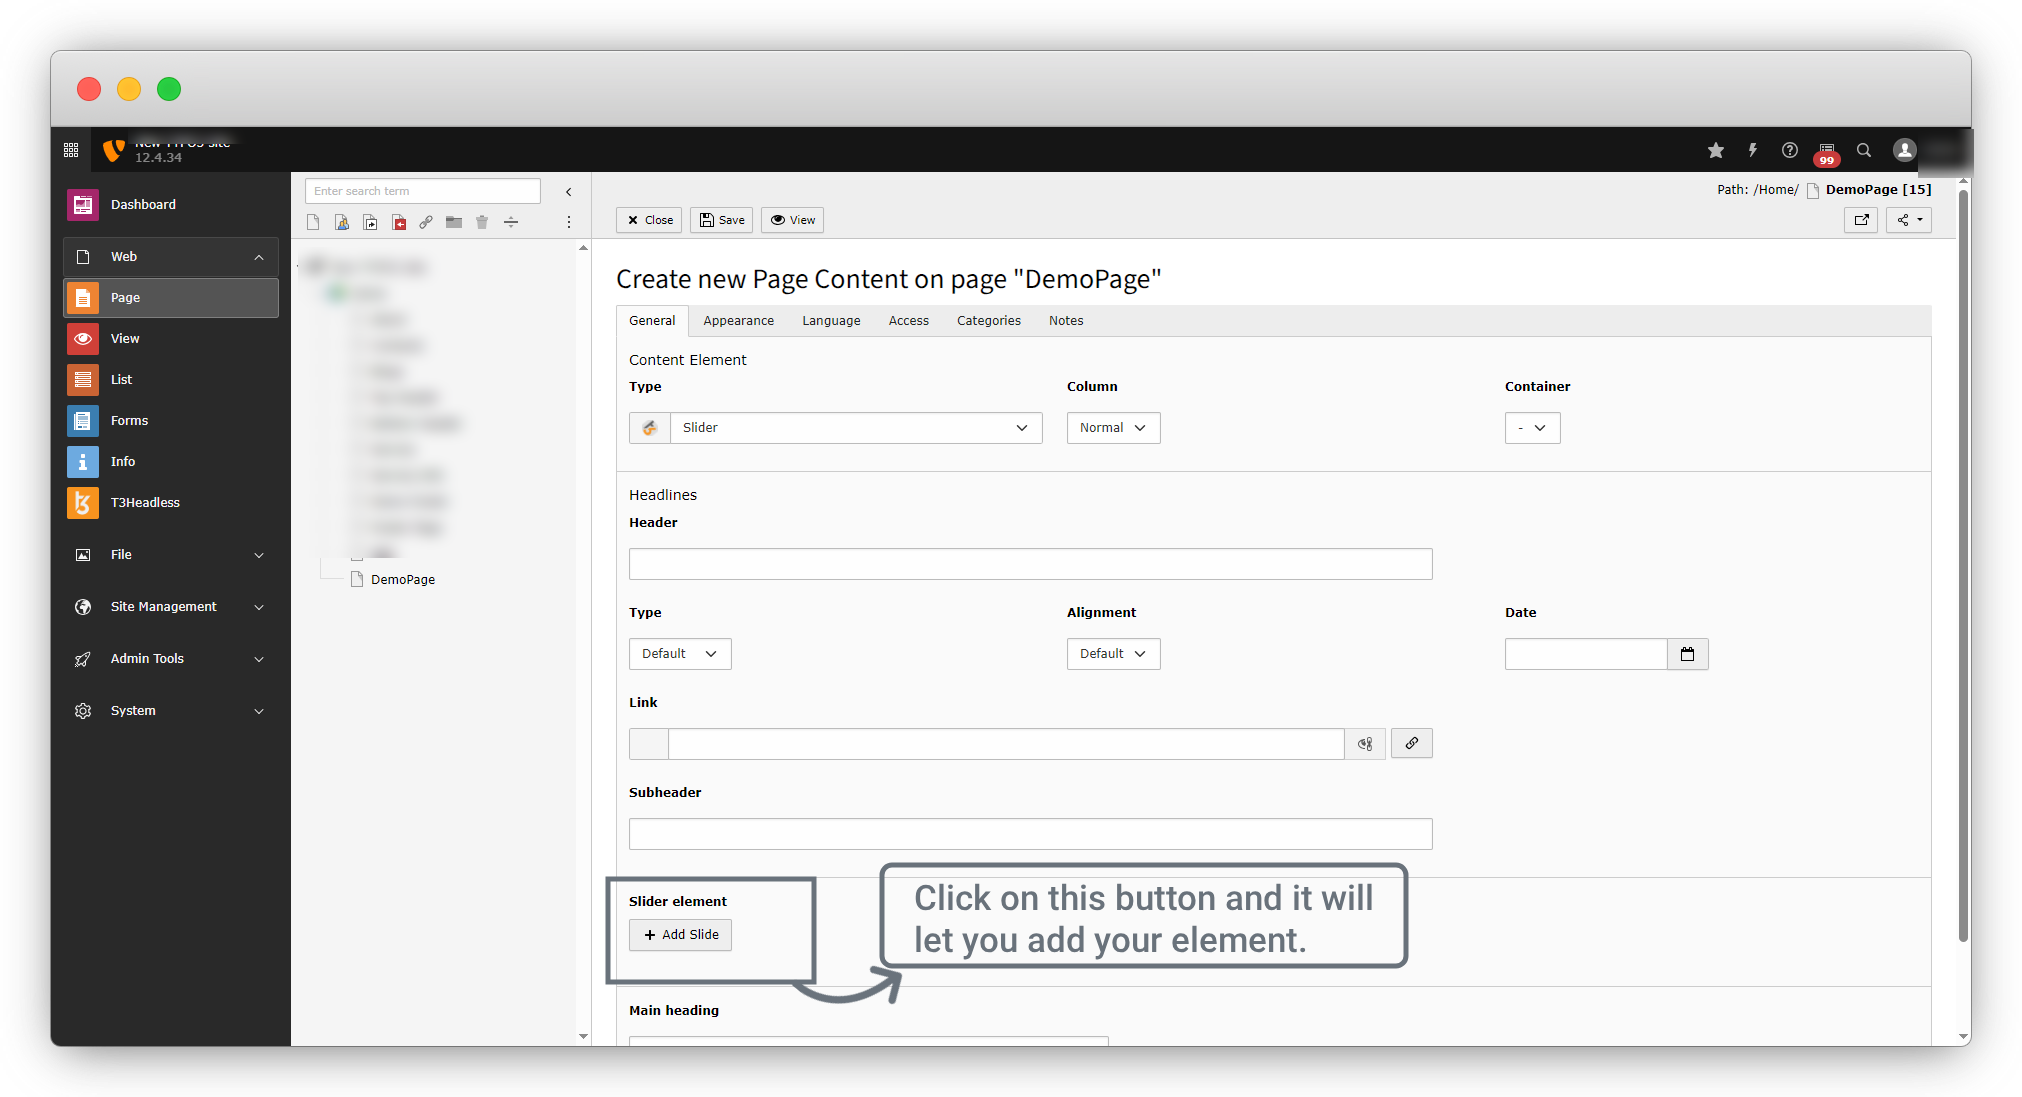
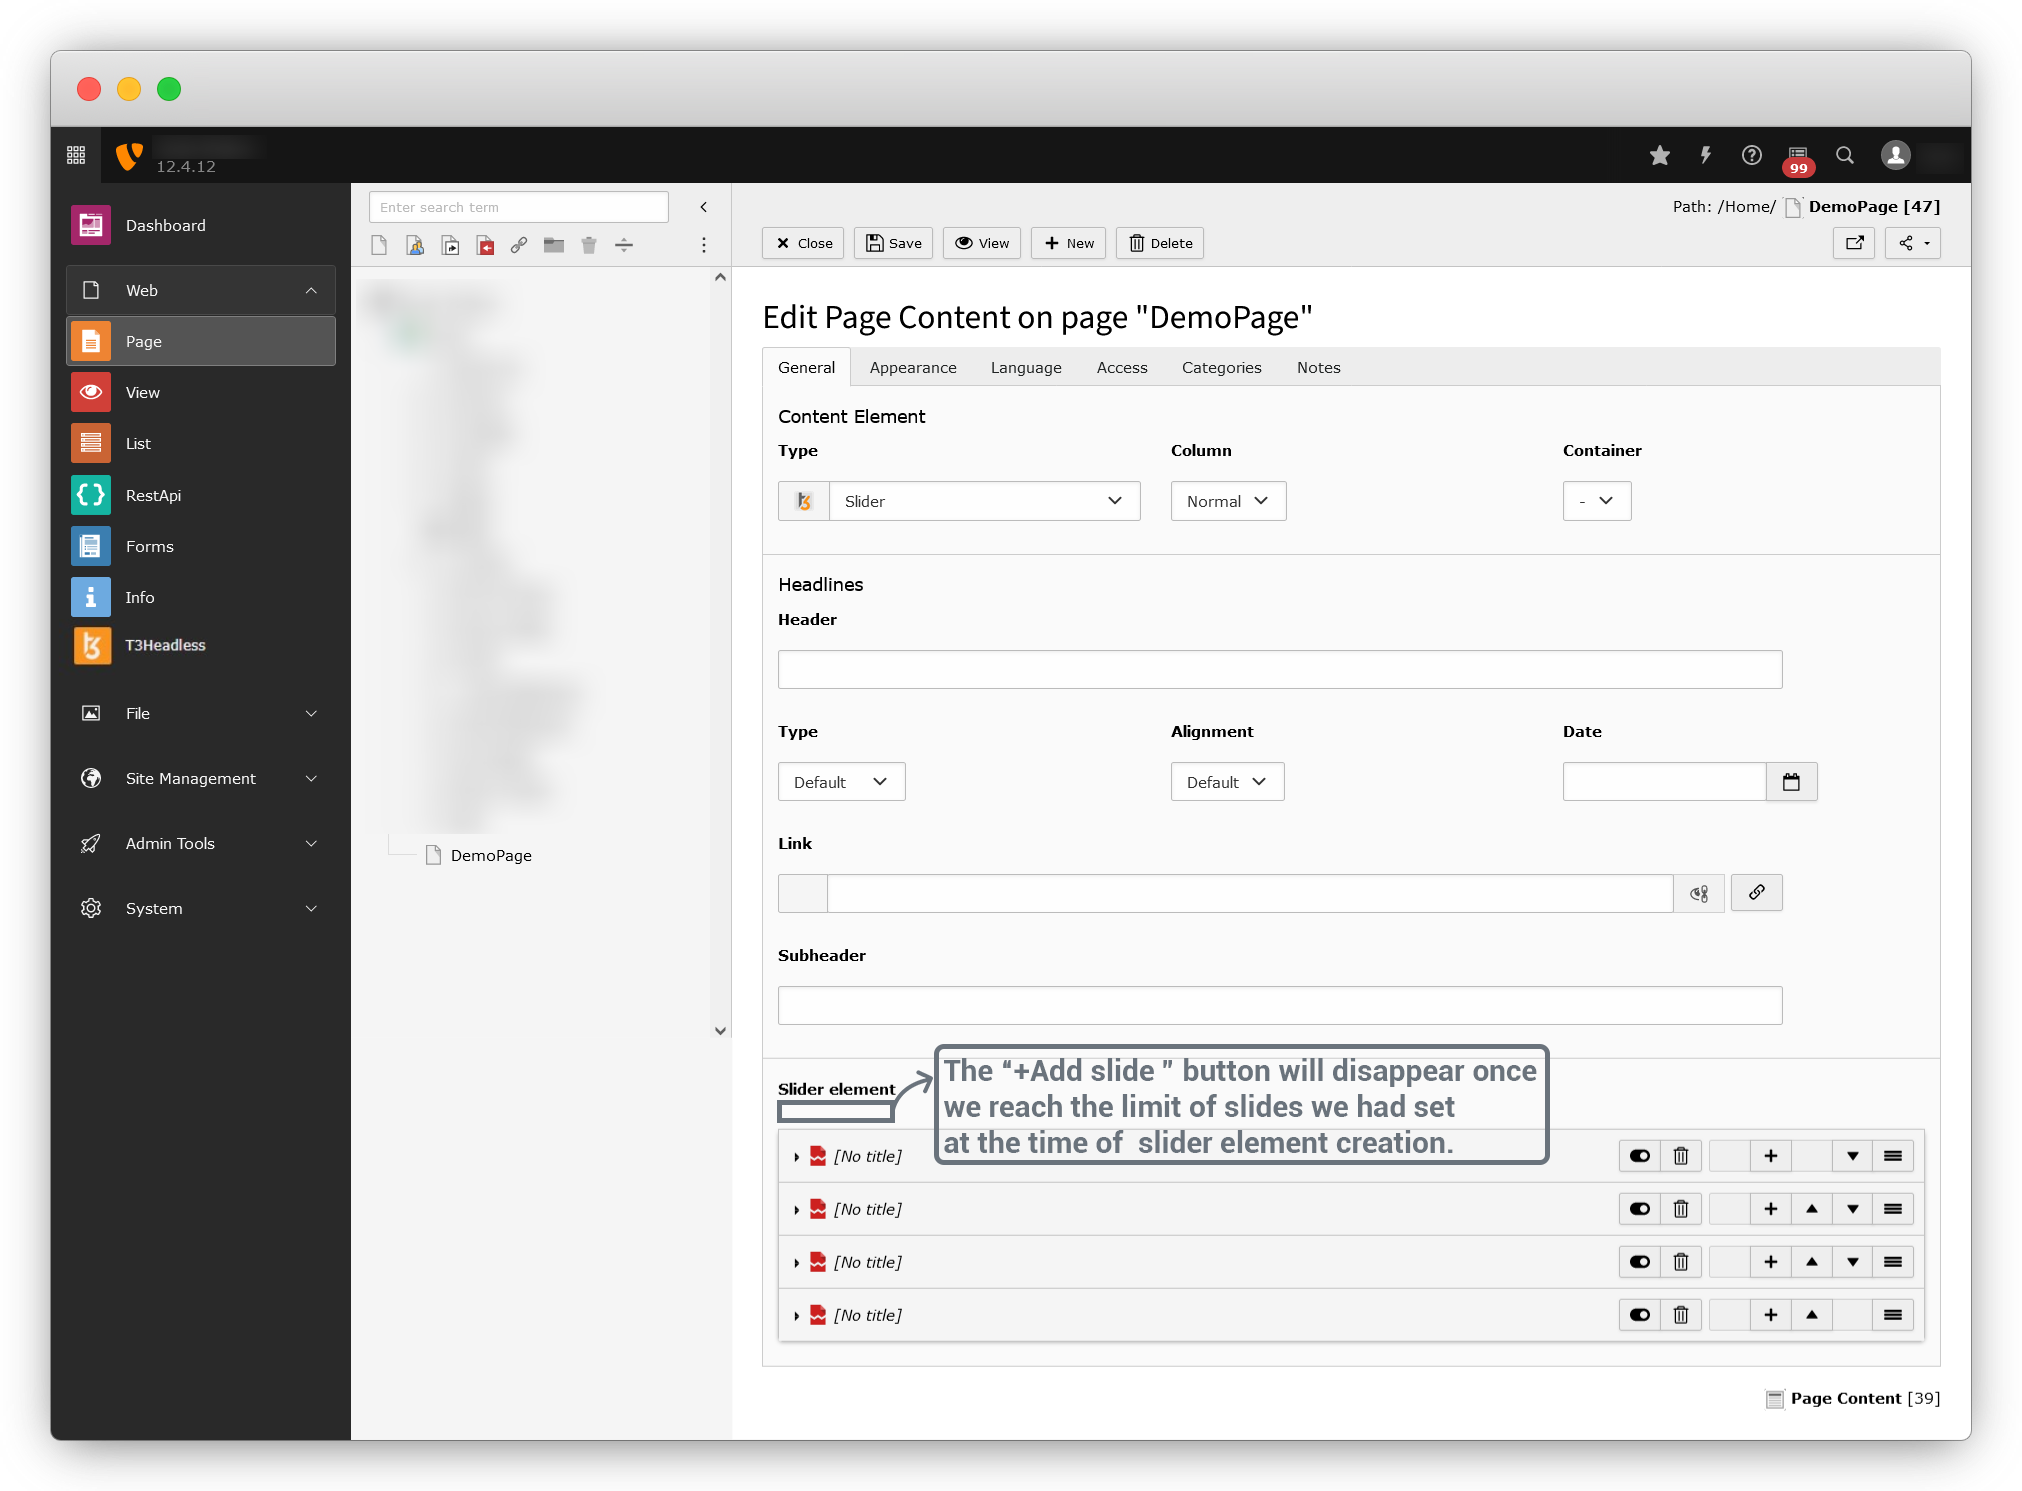
4. As it is seen in the above screenshot, the option is showing “Slider Element”, and it will allow you to add slides by clicking on the button “+Add Slide” (as we named the “Create New” button to “Add Slide” at the time of custom element creation.)
5. After the slide is added, you will be able to add the data into the fields.
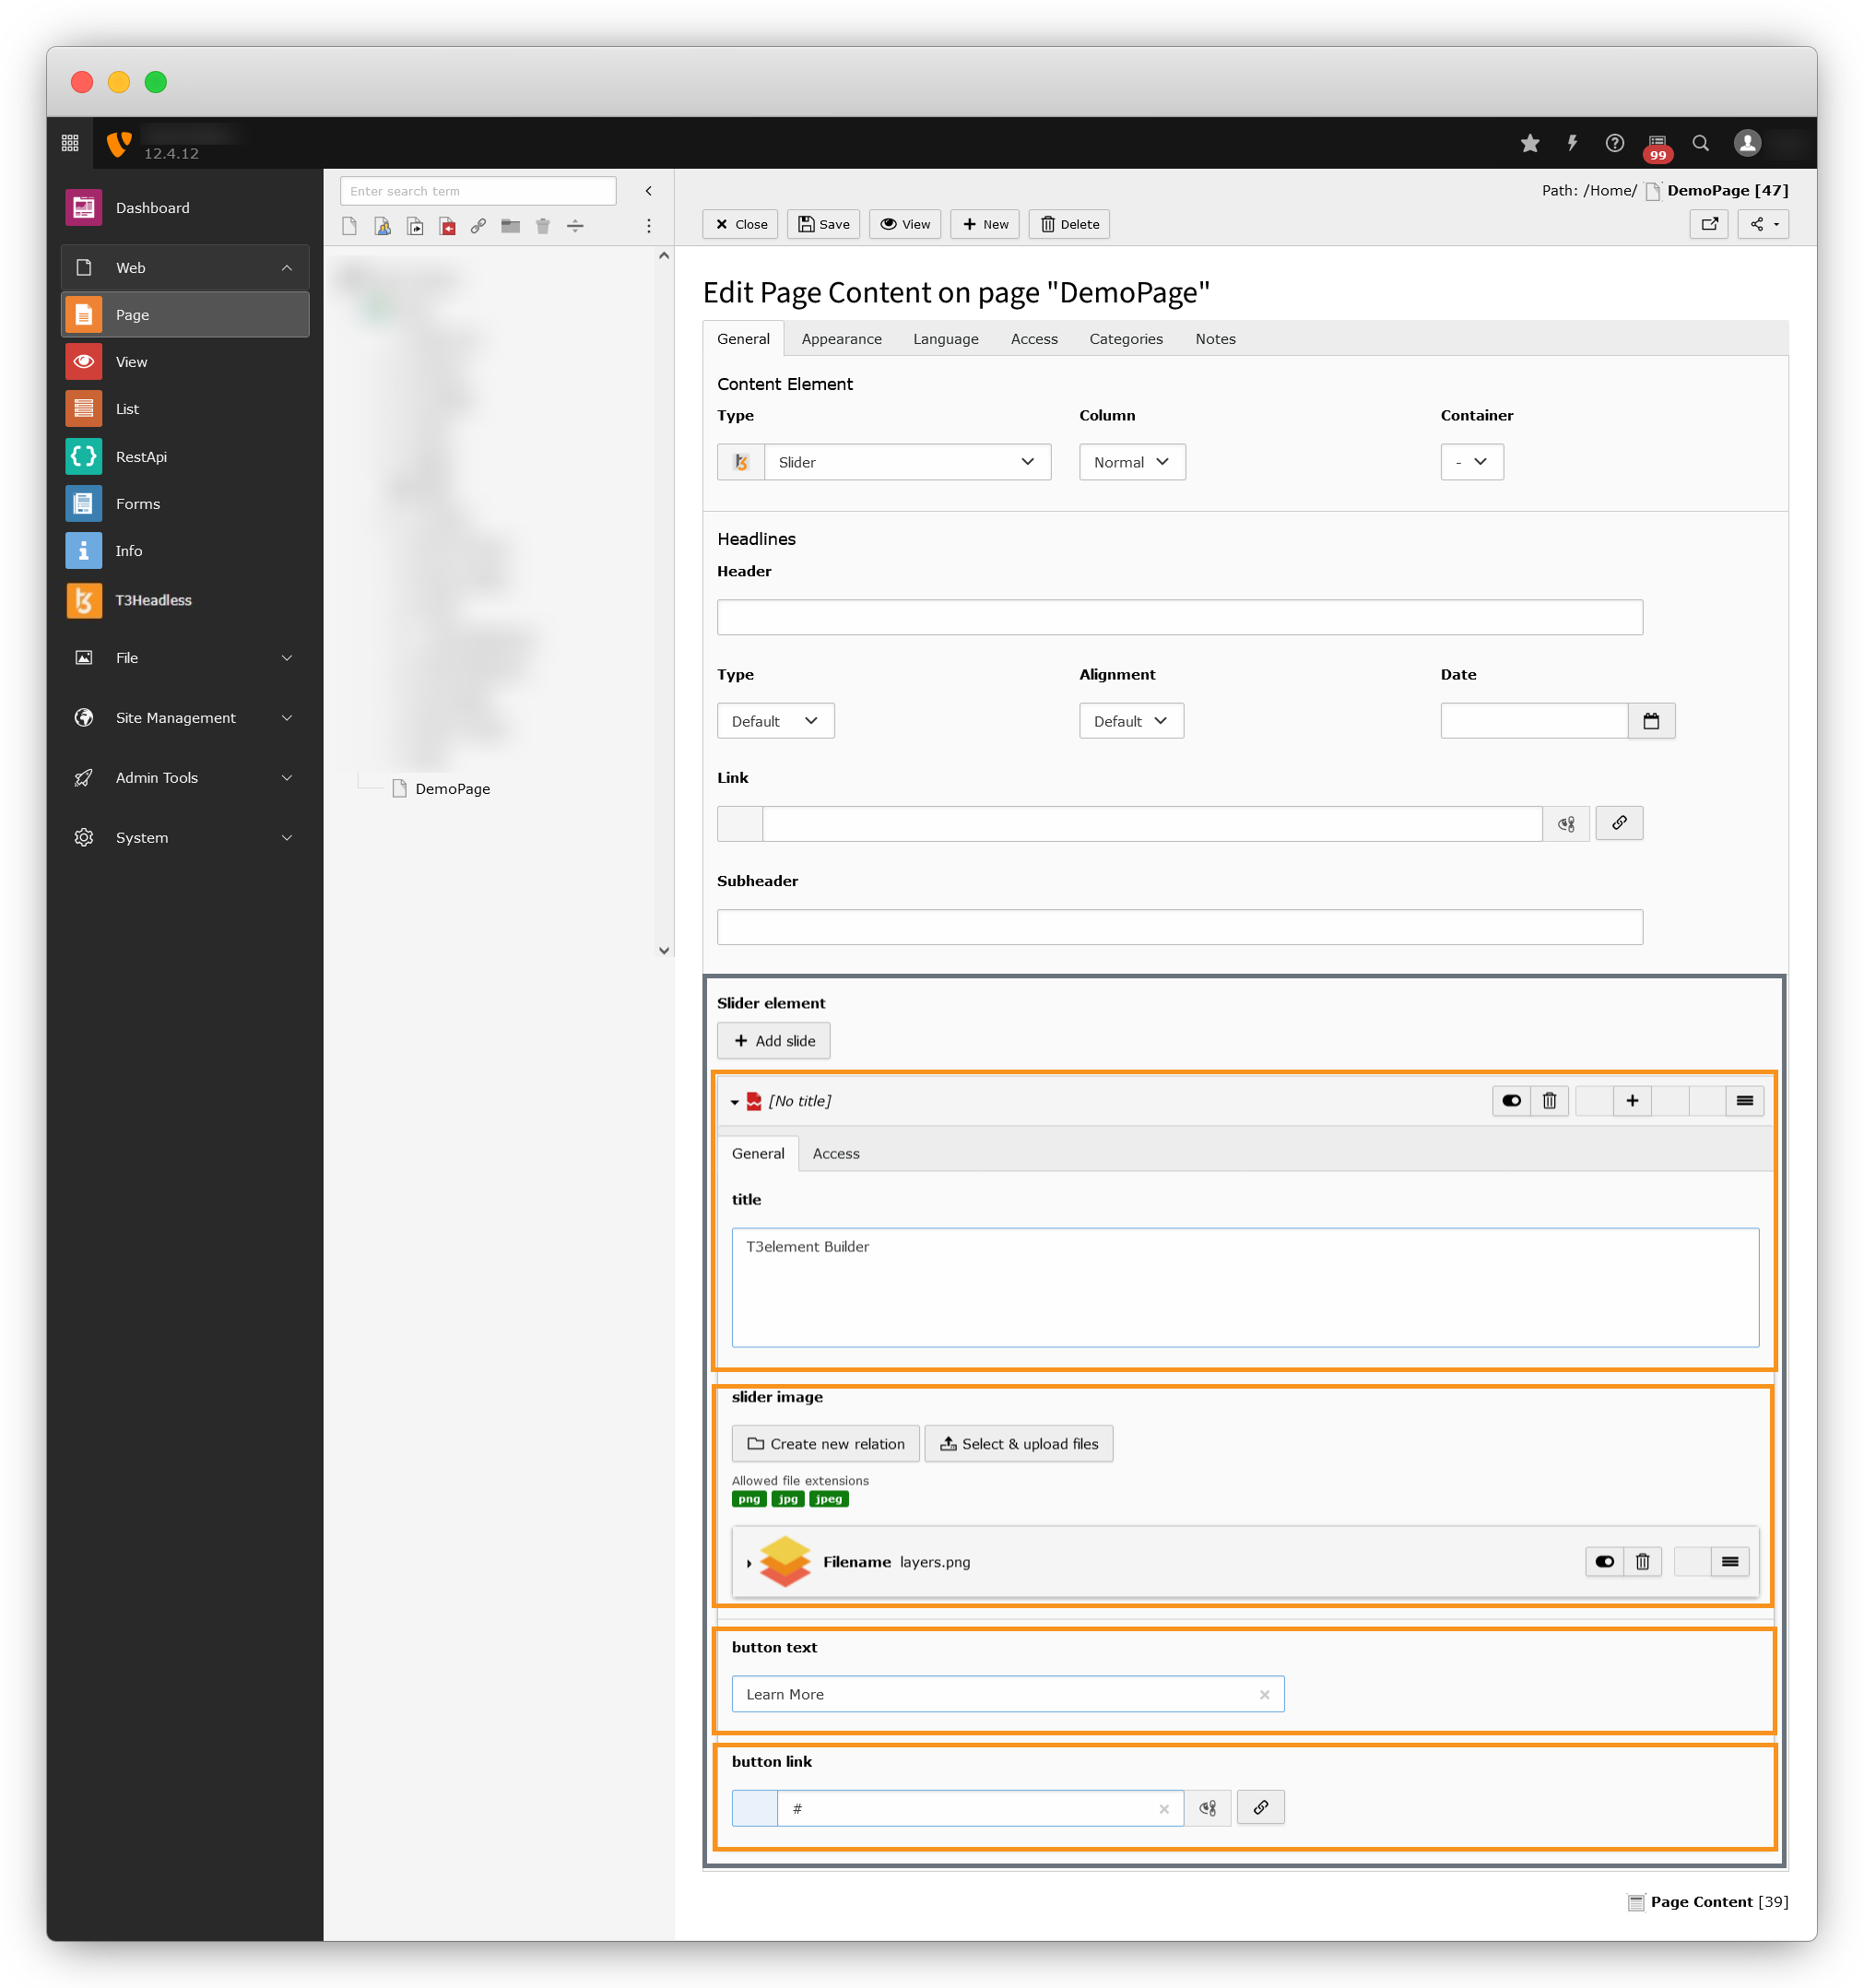
6. Fill up the data and then add more slides as per your requirement.
7. Then save the page and check in the front end, and you will see the element is rendering with the design according to the CSS file and template you have added.
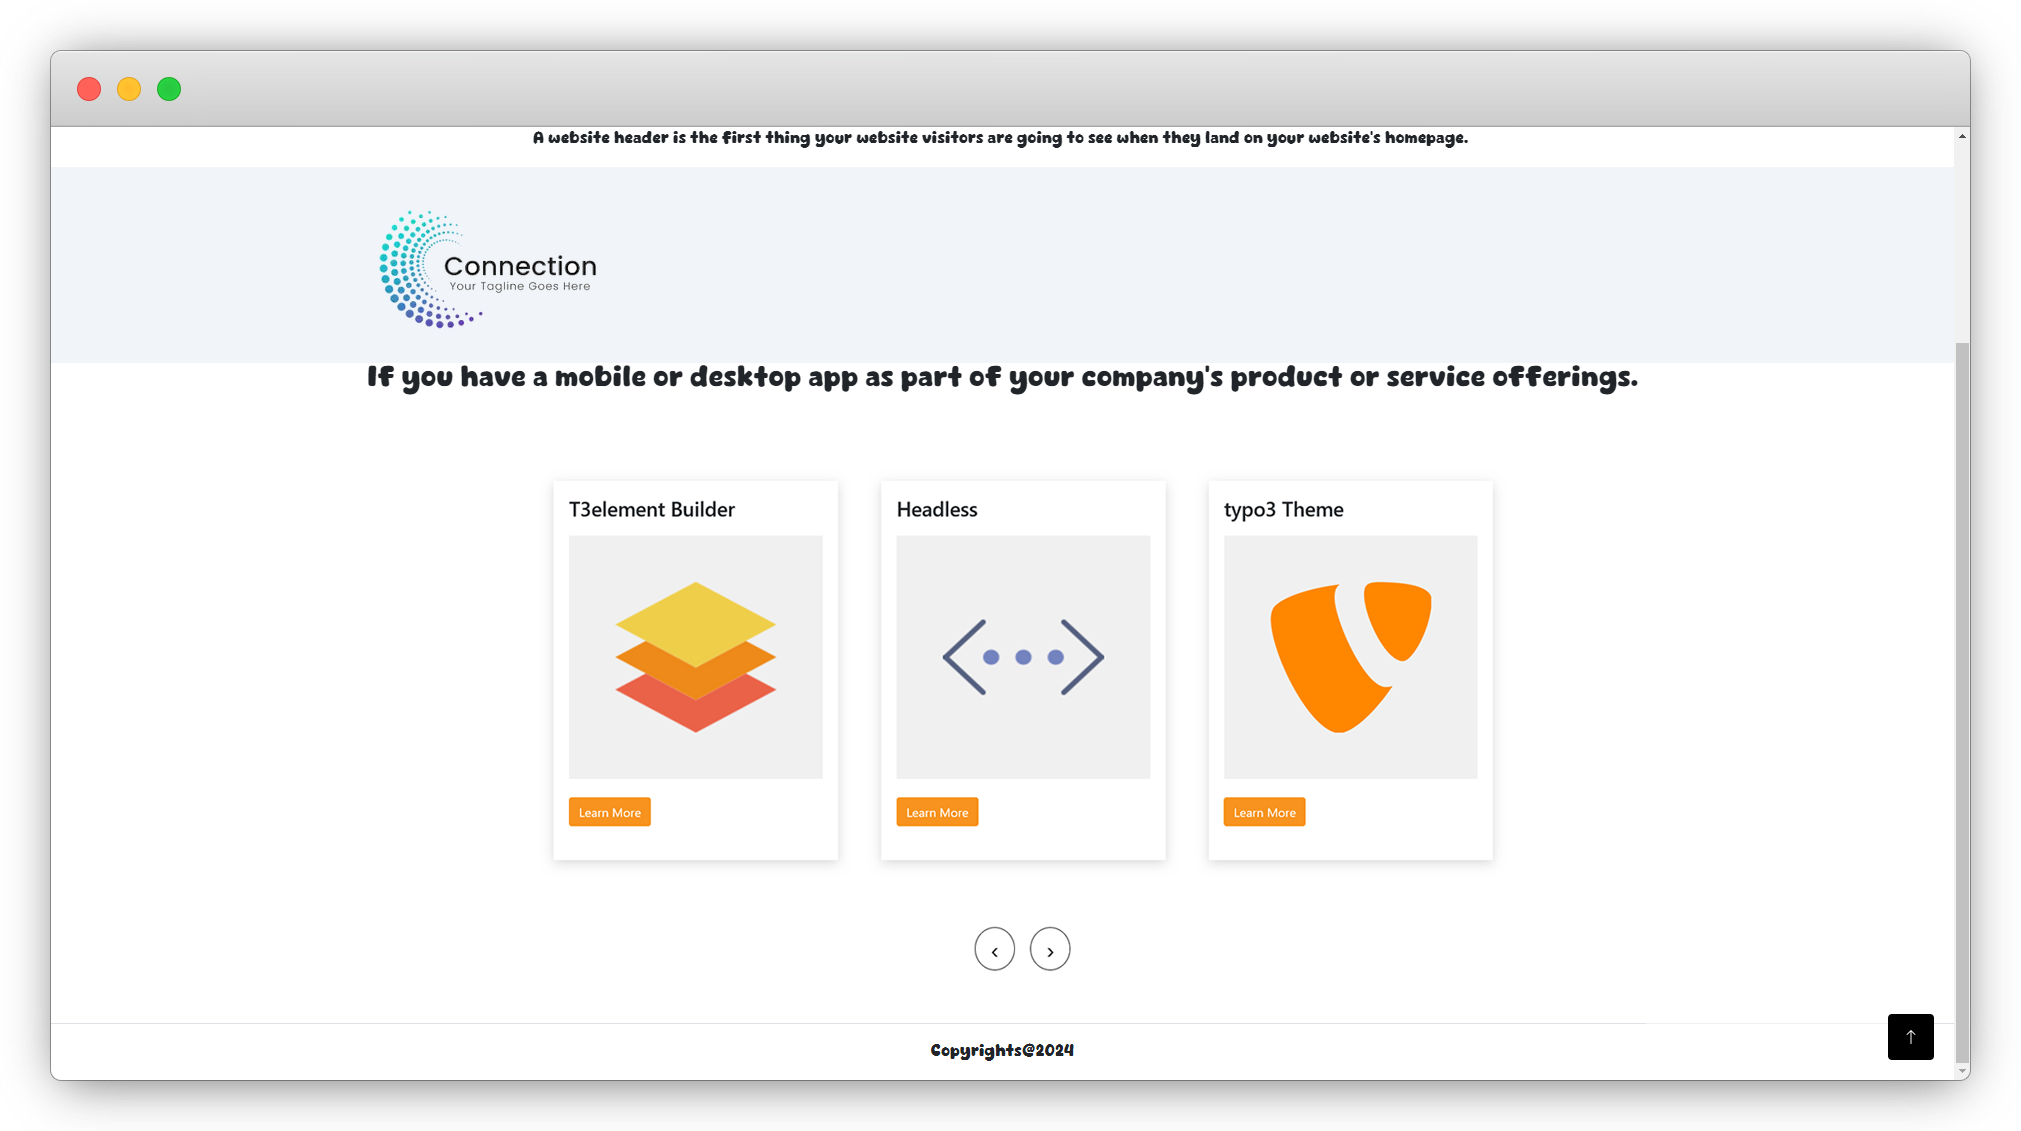
8. The organized view can be seen only if you have structured the template properly and uploaded CSS and JS files for your slider. If you haven’t updated the template file or CSS/JS, then you can edit the template, CSS, and JS.
9. This way you can create your Custom content elements.
Headless Elements Synchronize
After any element operation like creating an element, updating an element, deleting an element, or updating a template of the element, if you don’t get any impact in the headless theme, and if you are getting a message on the screen as seen in the screenshot below;
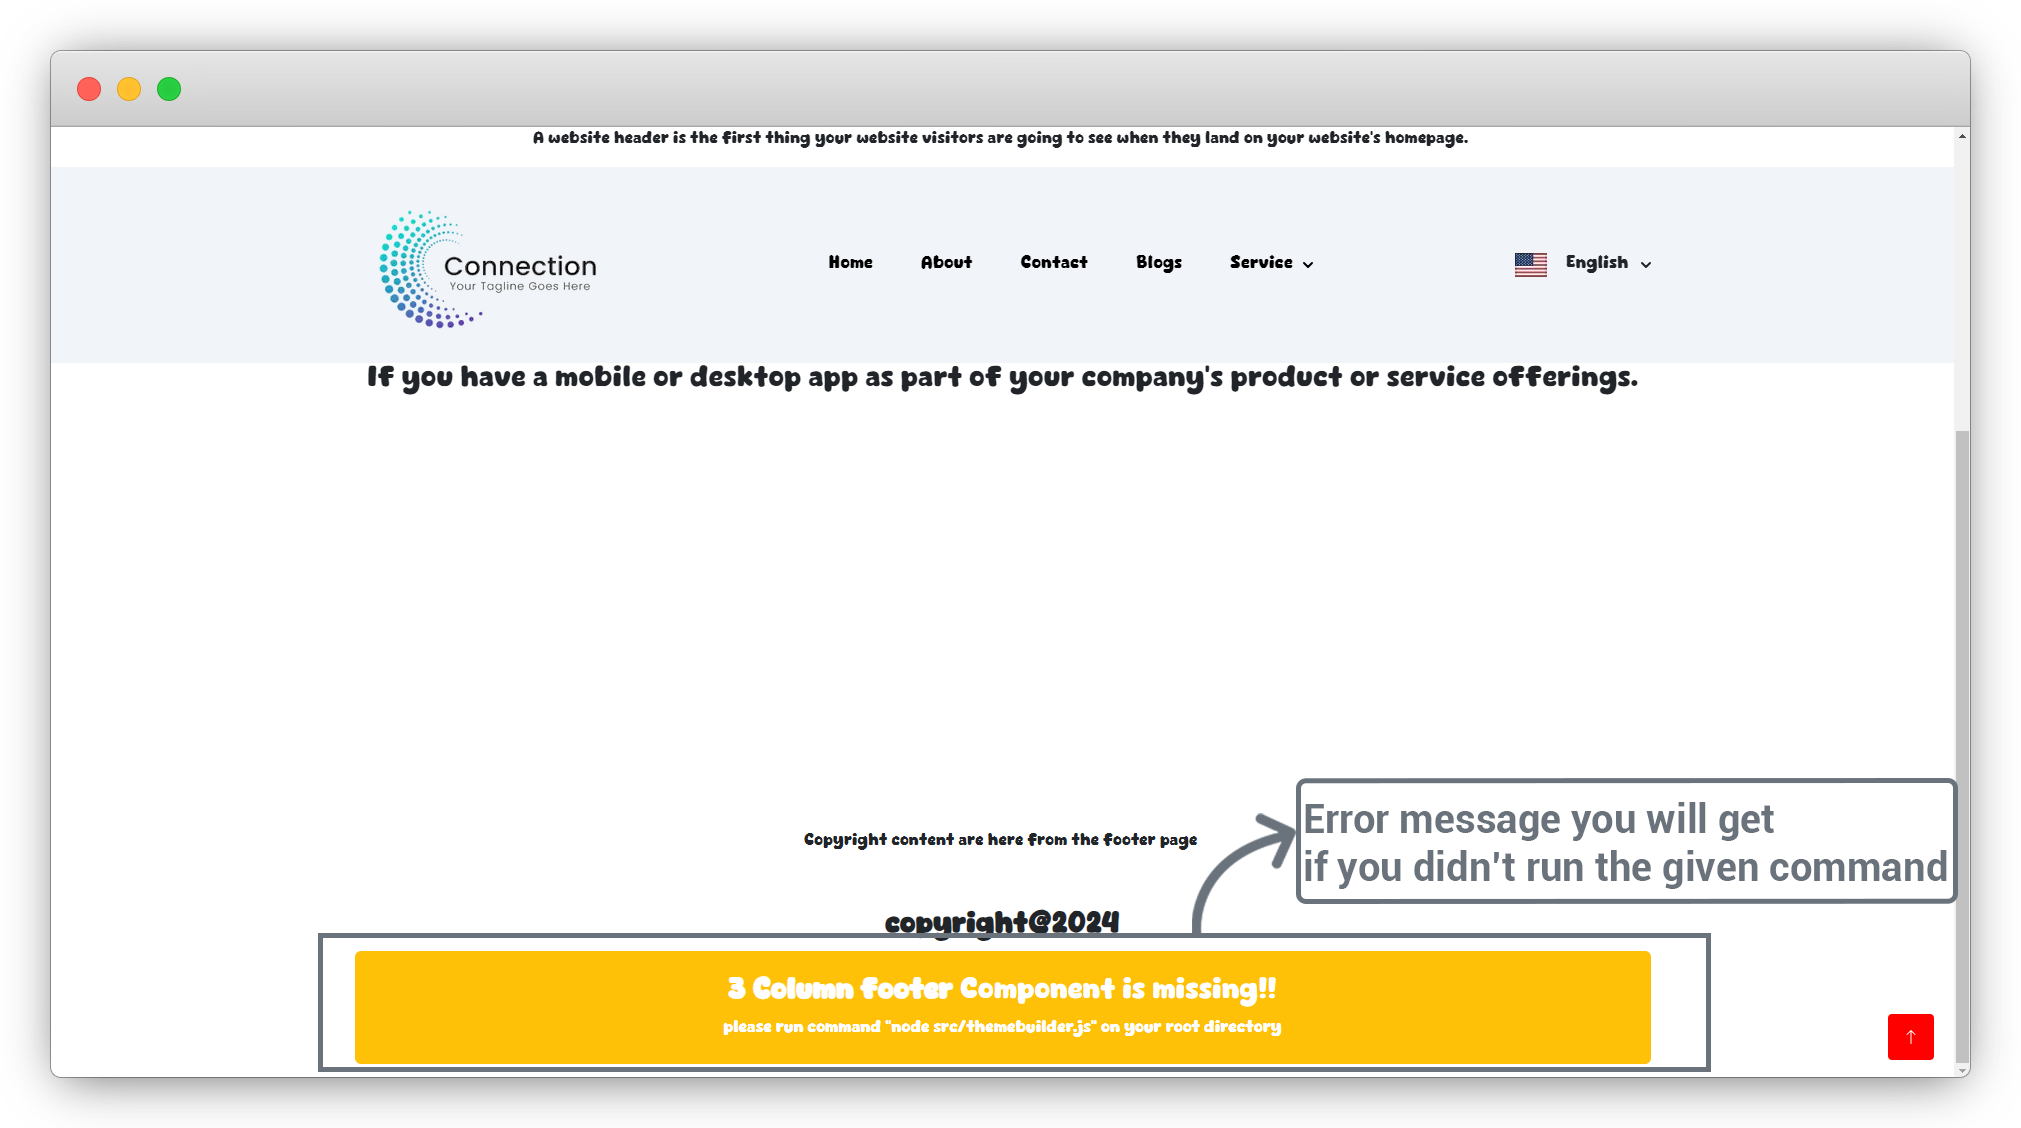
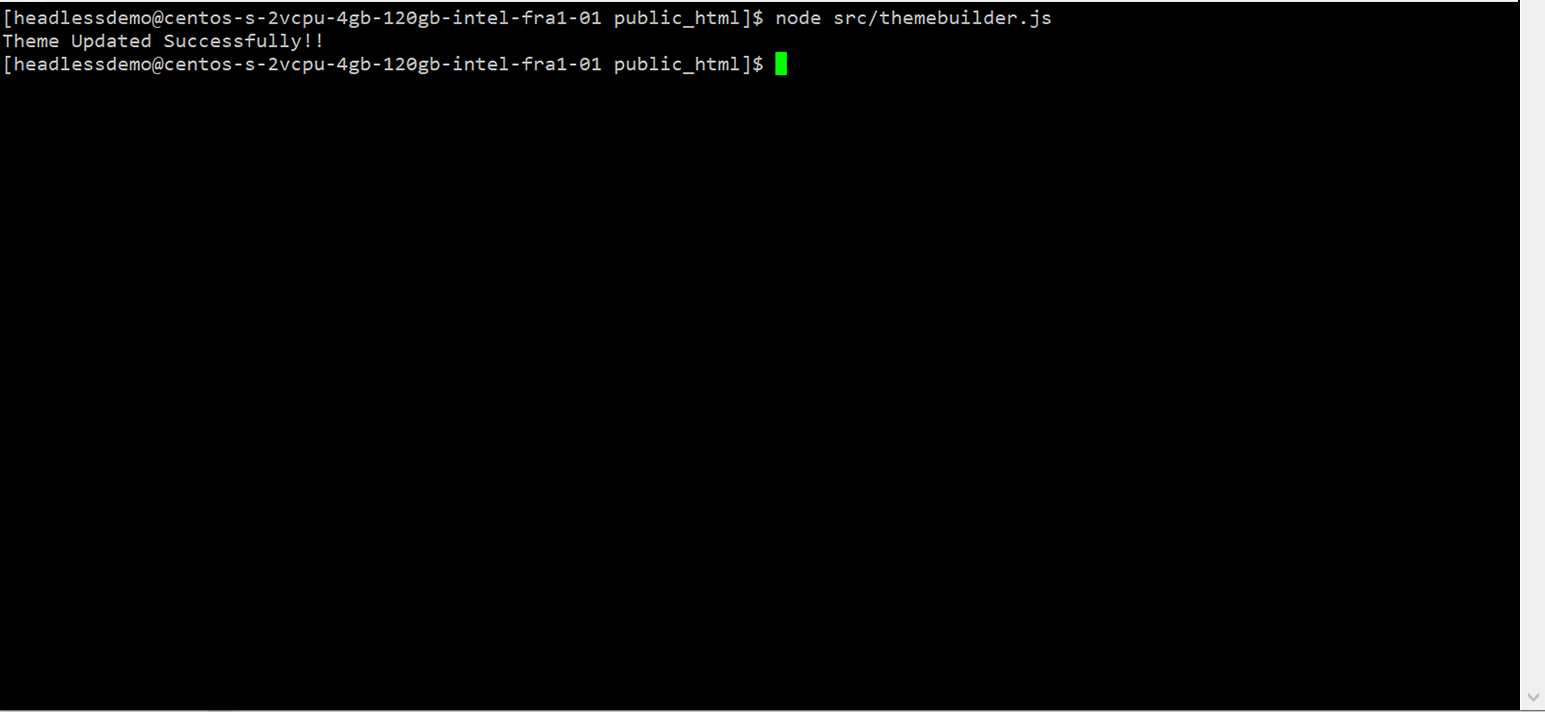
You will have to run the below command into the root directory of the headless theme Next.js setup.
Command: node src/themebuilder.js
Run setup again in dev mode by Command: yarn dev
OR
Run setup again in production mode by Command: yarn build && yarn start
Now check in frontend and you will see the error has been gone.
Share


