
URL copied to clipboard

How to use the plugin in front-end?
3 views
__readtime__ Min
read
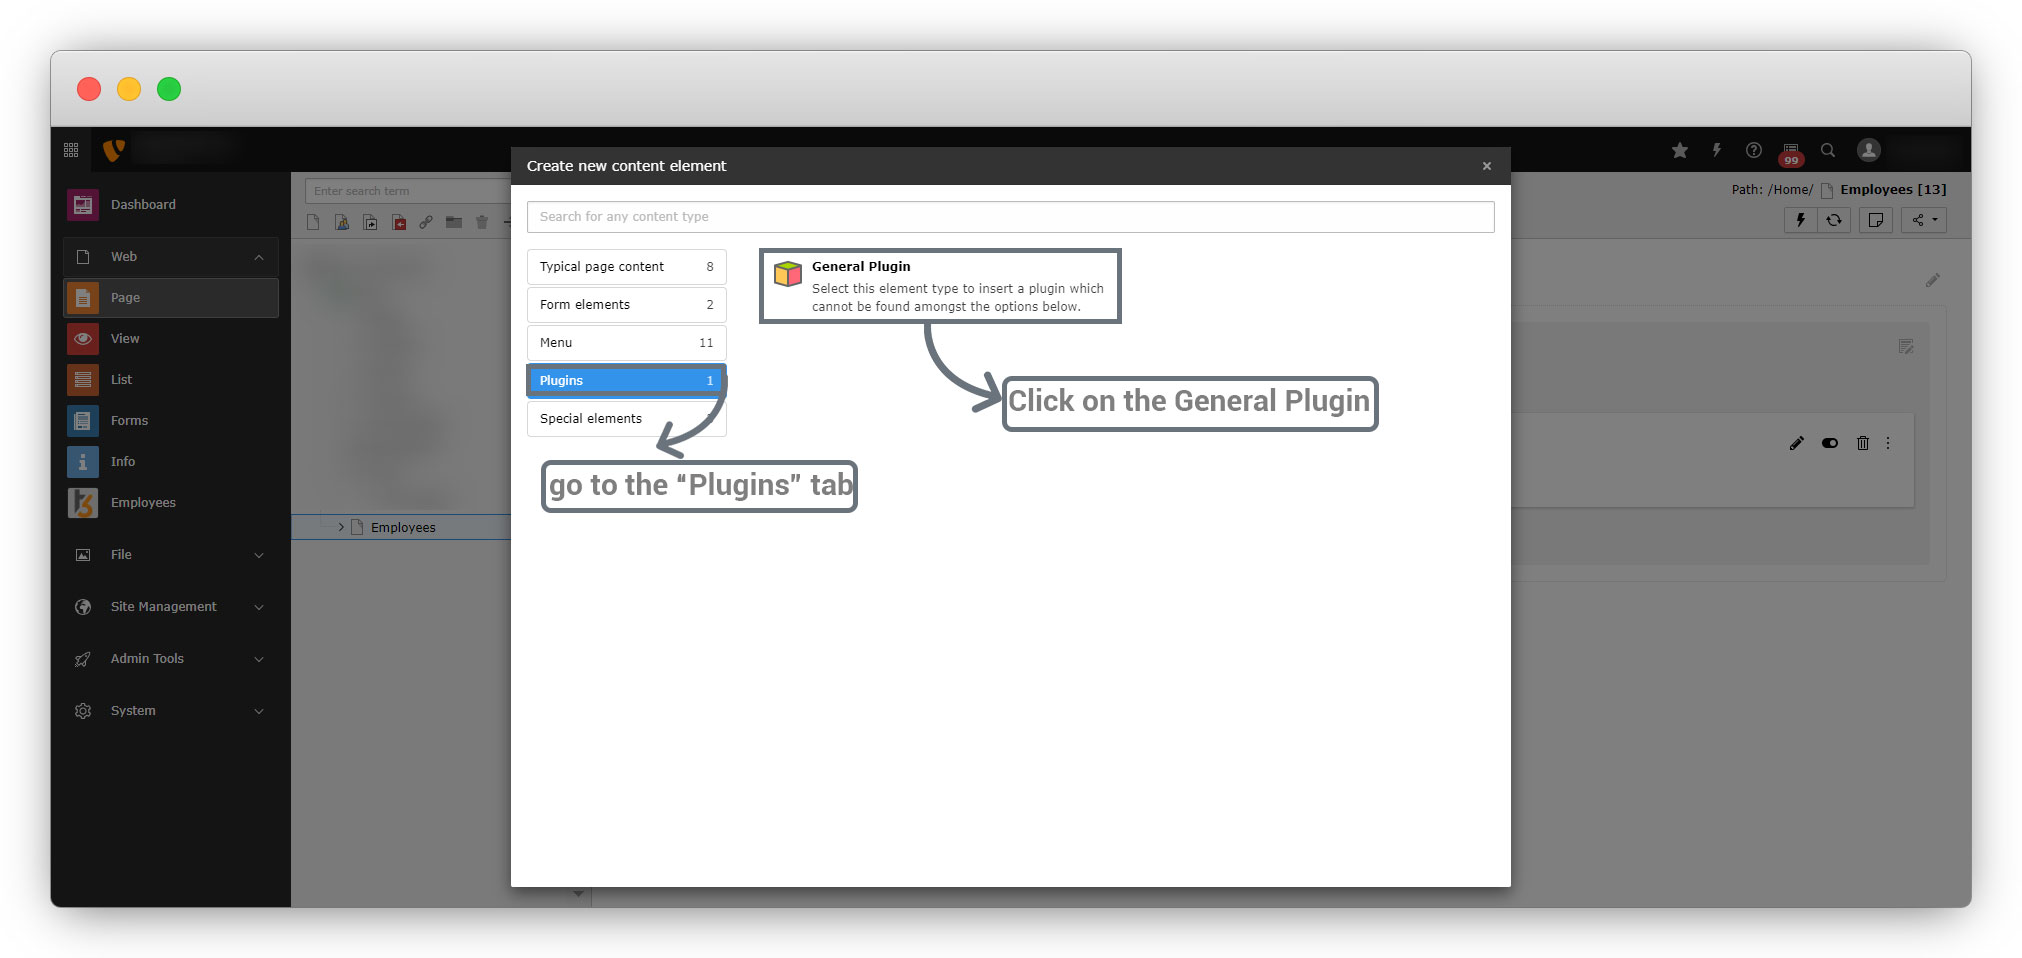
1. After completing the plugin registration, flush the cache and add the plugin to the page by going to the plugin tab > select the General plugin as seen in the screenshot below.
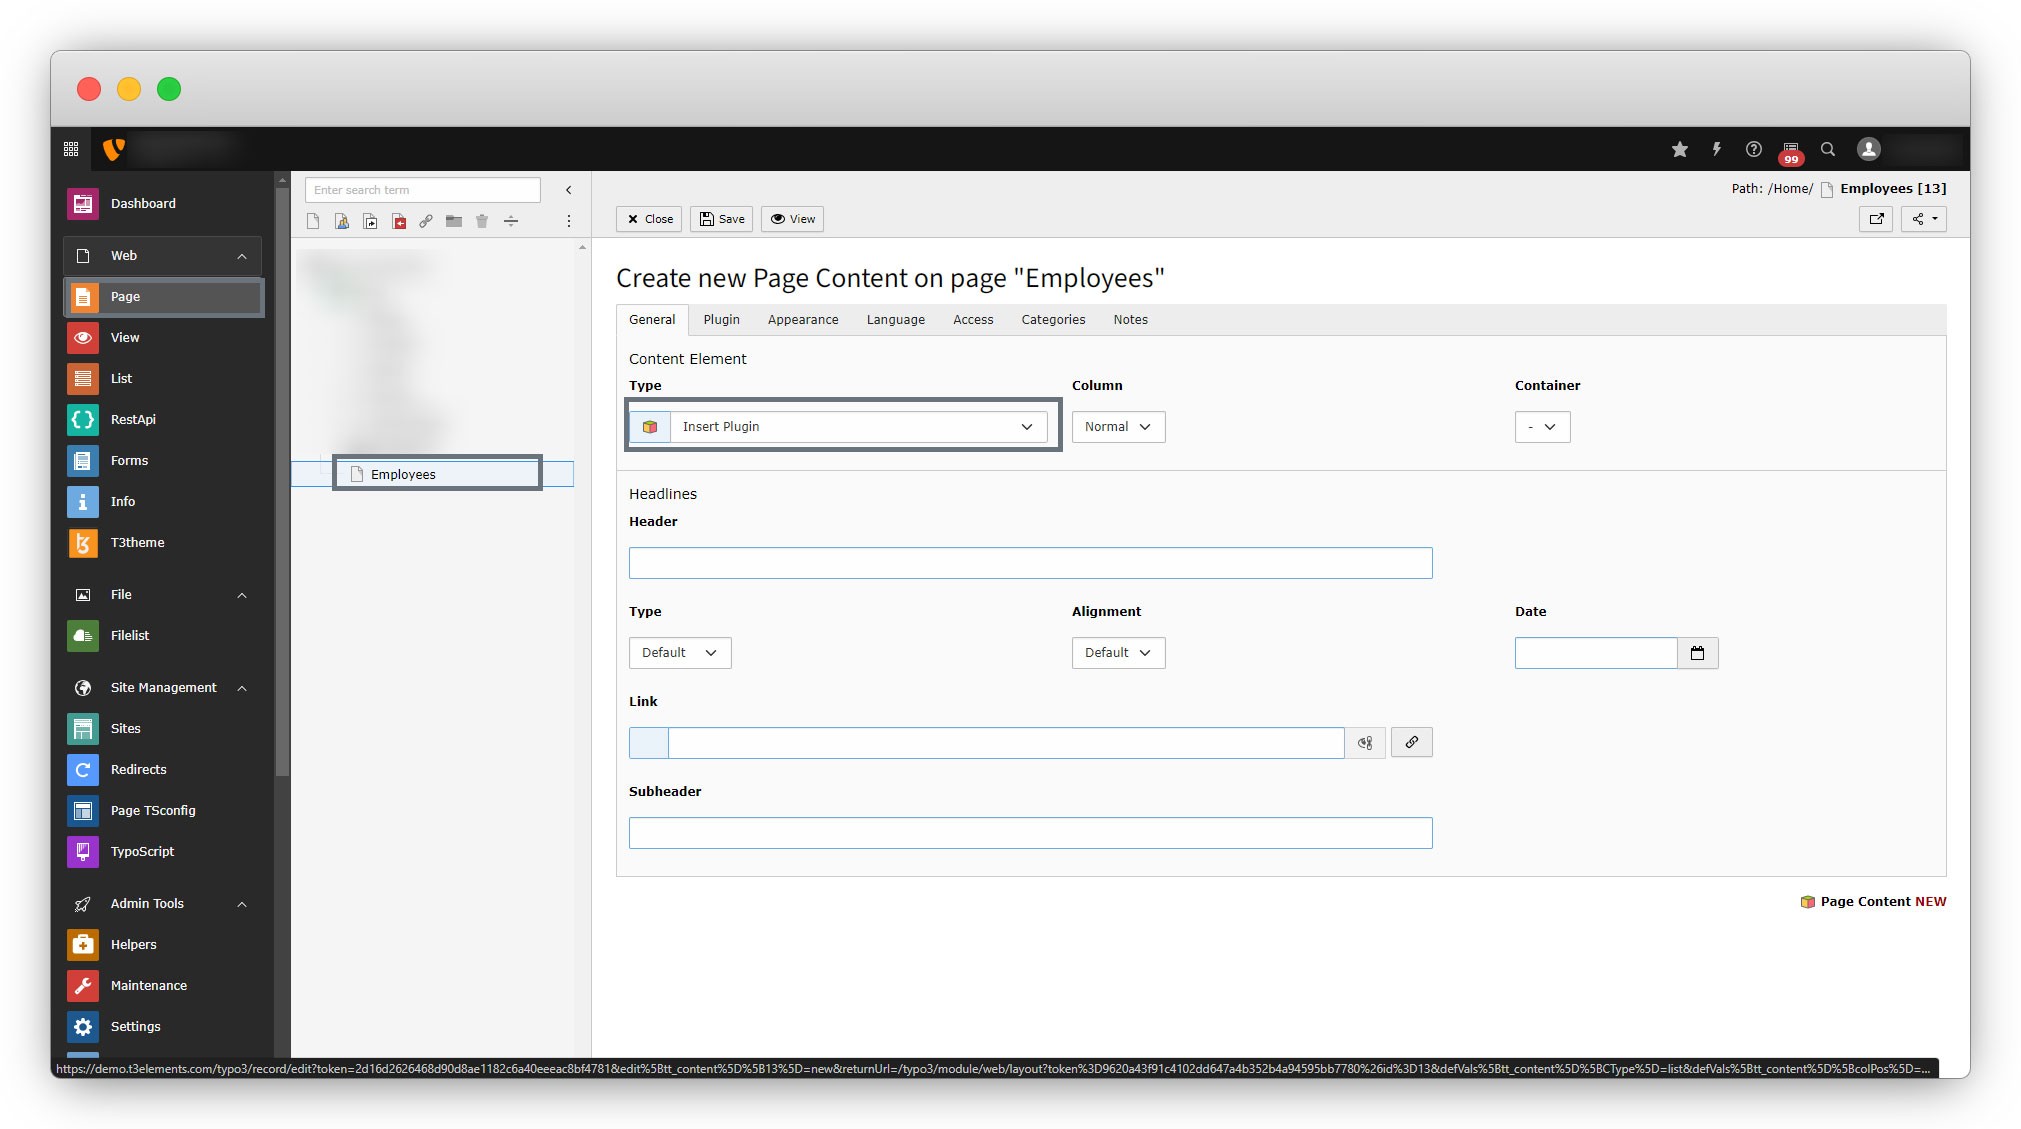
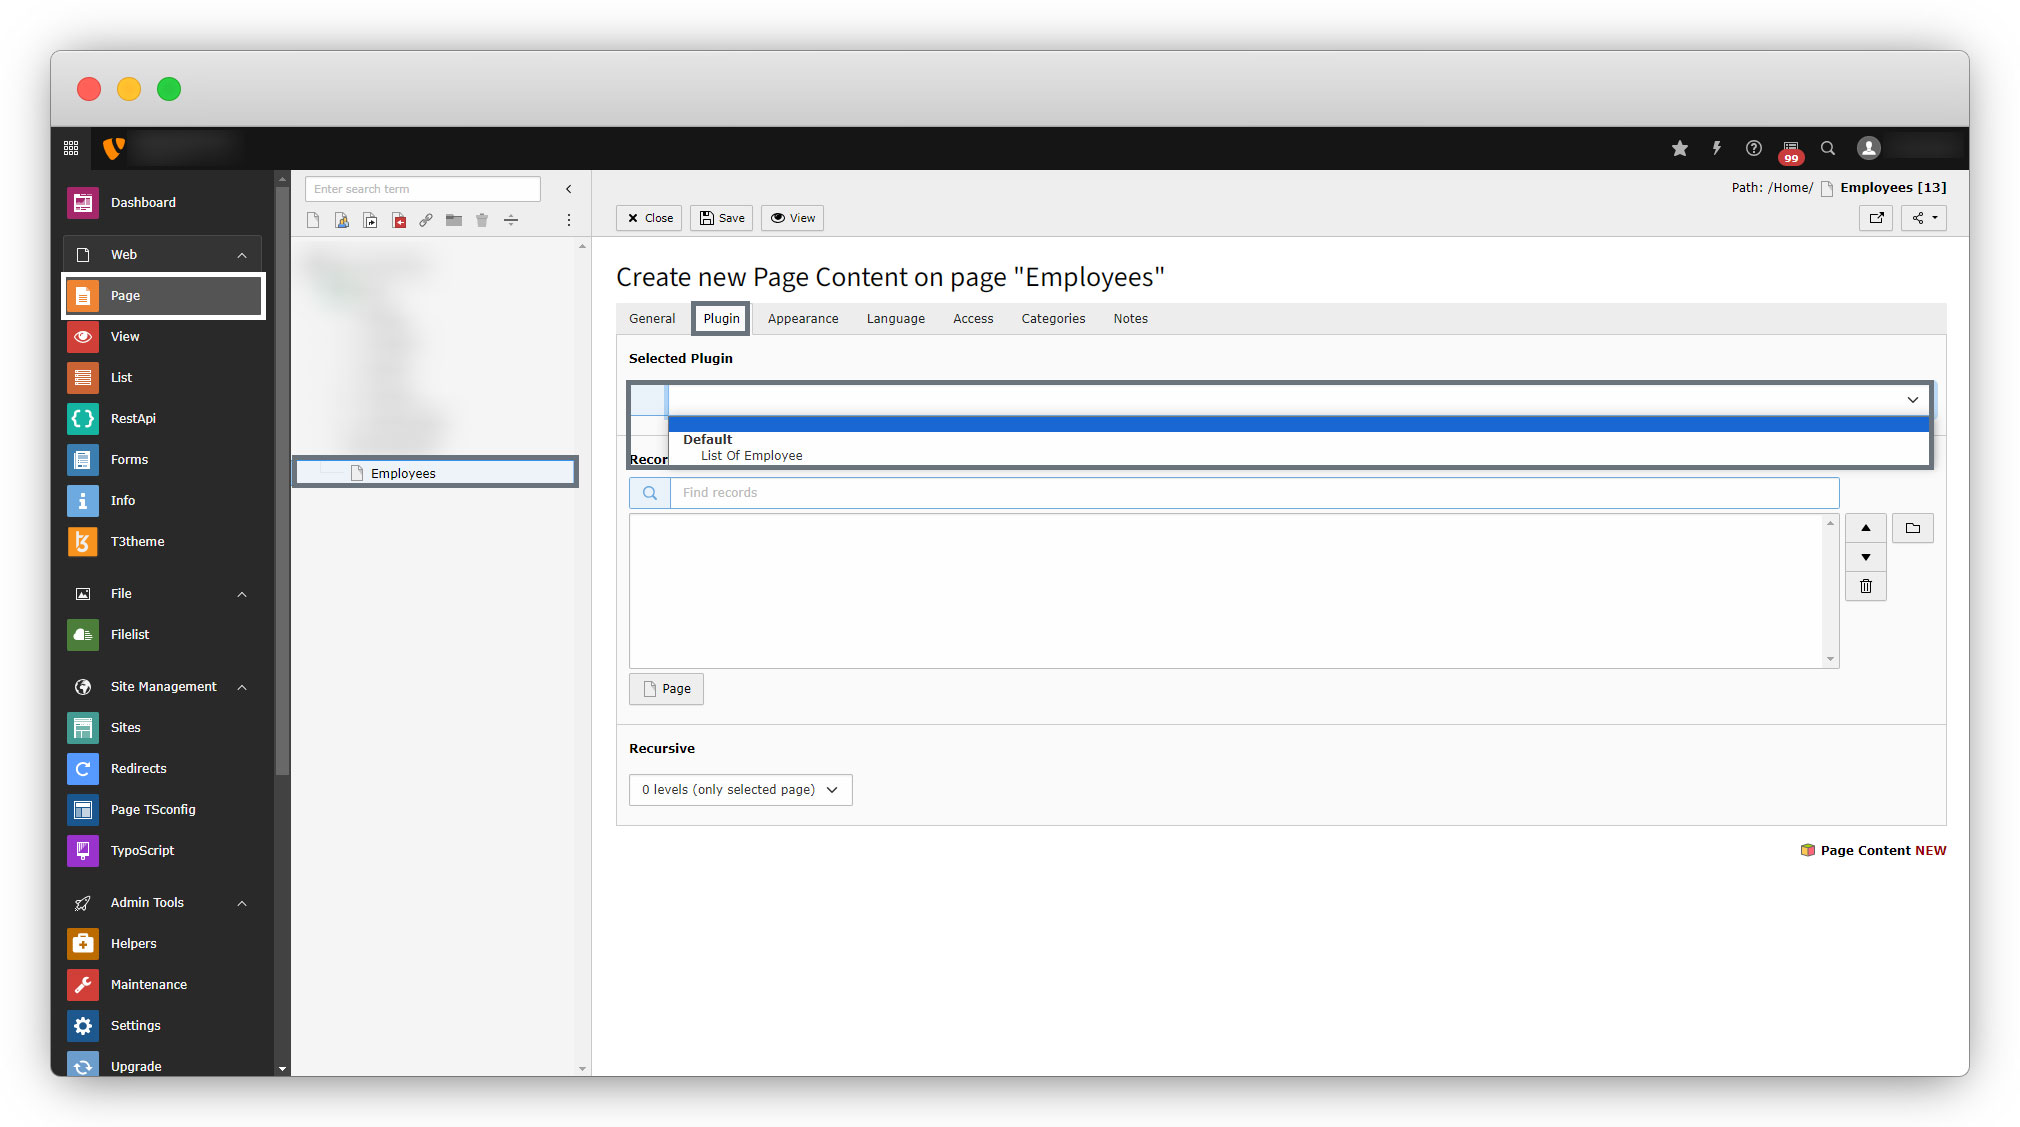
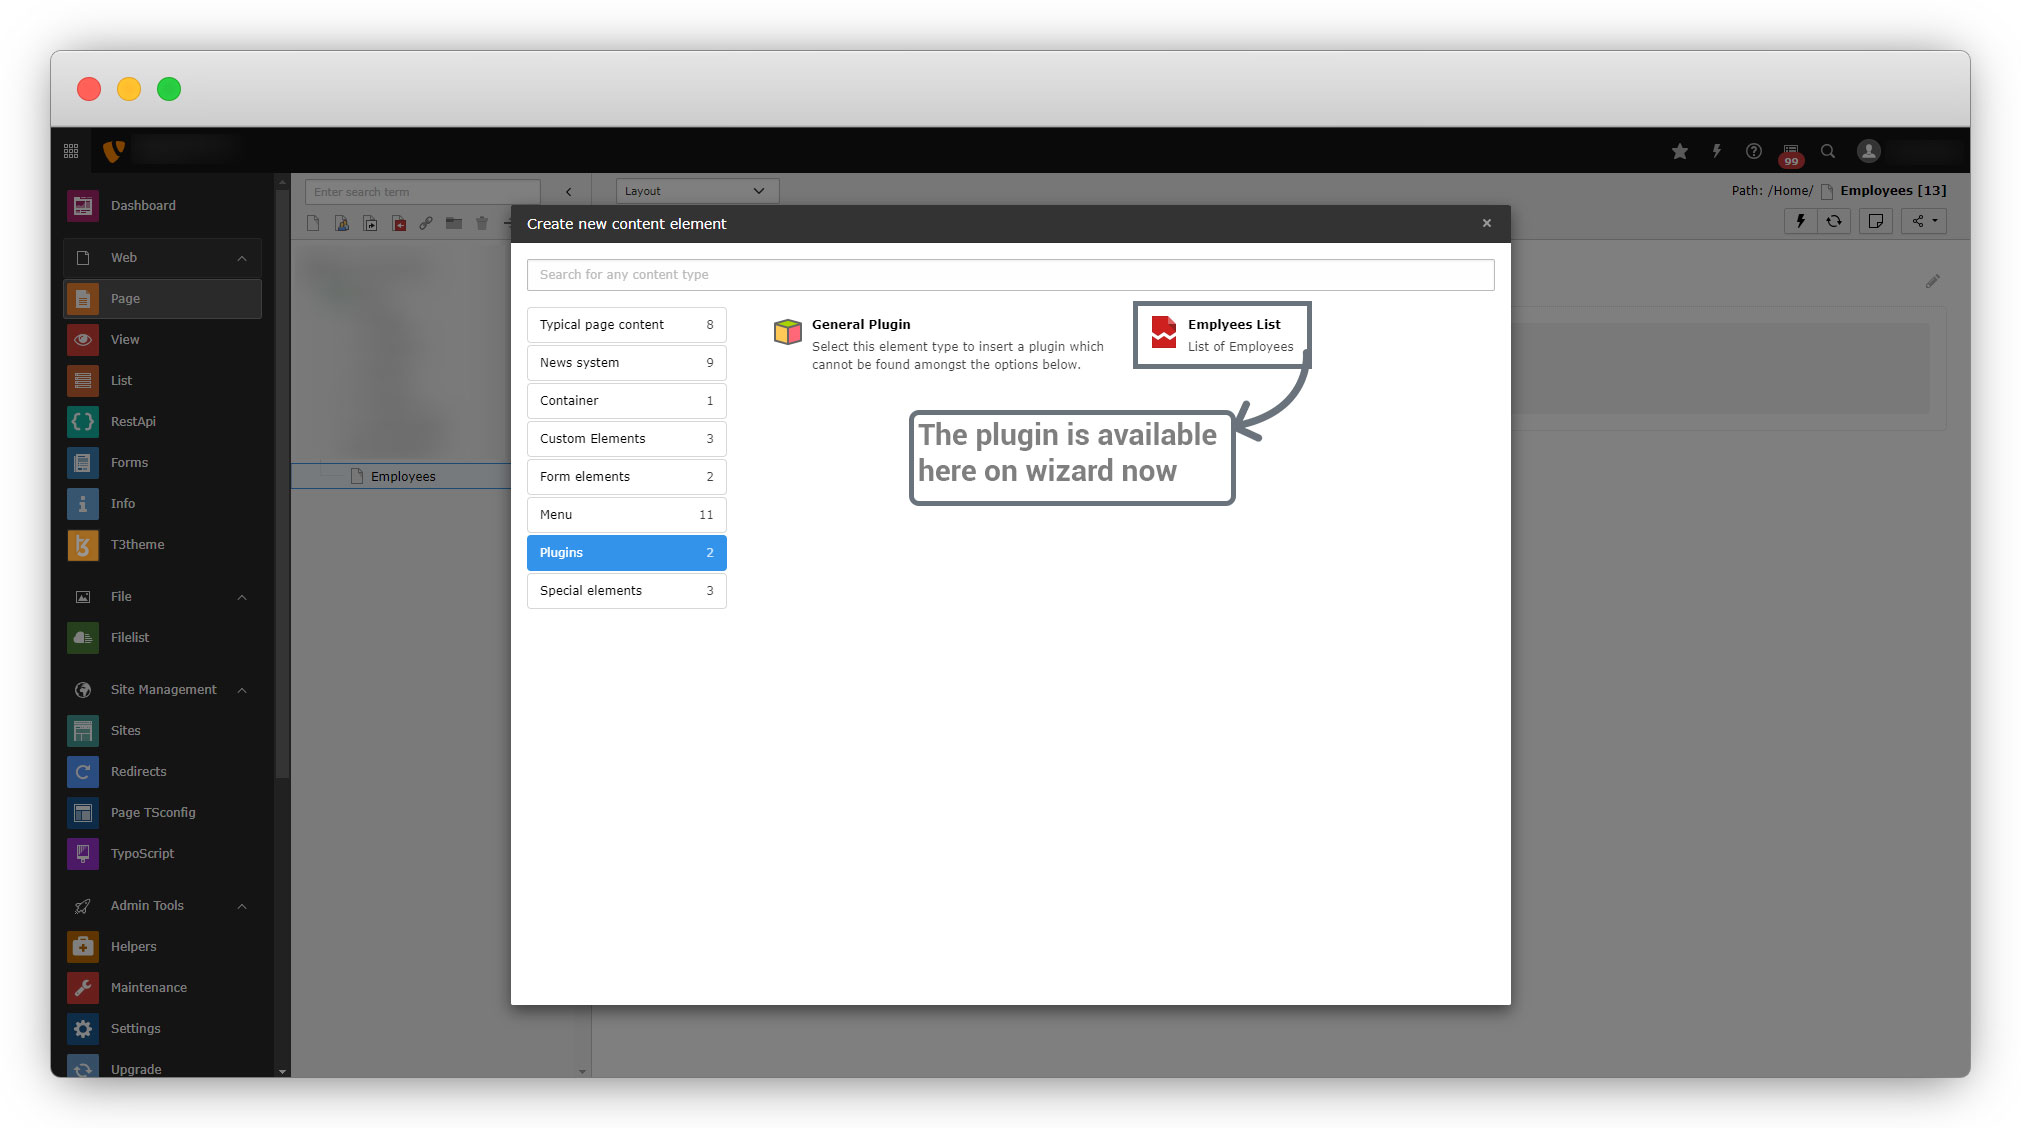
2. Still, the plugin has not been available to the wizard.
Make the plugin available to the content wizard (so the plugin can be added directly from the wizard)
1. Write tsconfig file to make the plugin available to the wizard.
2. Add tsconfig file into <extension_directory>/Configuration/page.tsconfig, here for this extension the path of the tsconfig file will be employee/Configuration/page.tsconfig
mod.wizards.newContentElement.wizardItems {
  plugins {
    elements {
      // plugin signature: It is the extension name in lowercase without underscores, followed by one underscore, followed by the plugin identifier in lowercase without underscores.
      employee_employlist {
        // icon identifier: It will load the icon that is identified write the icon identifier for this extension (the explanation of this topic is below, please continue to follow the doc.)
        iconIdentifier = employee
        // title: It will be rendered as the title of the plugin in the wizard.
        title = Emplyees List
        // description: It will rendered as the description of the plugin in the wizard.
        description = List of Employees
        tt_content_defValues {
          CType = list
          // list_type: It will use the same plugin identifier.
          list_type = employee_employlist
        }
      }
      // To add the plugin to the list add the code as seen in the below line
    show := addToList(employee_employlist)
  }
 }
}
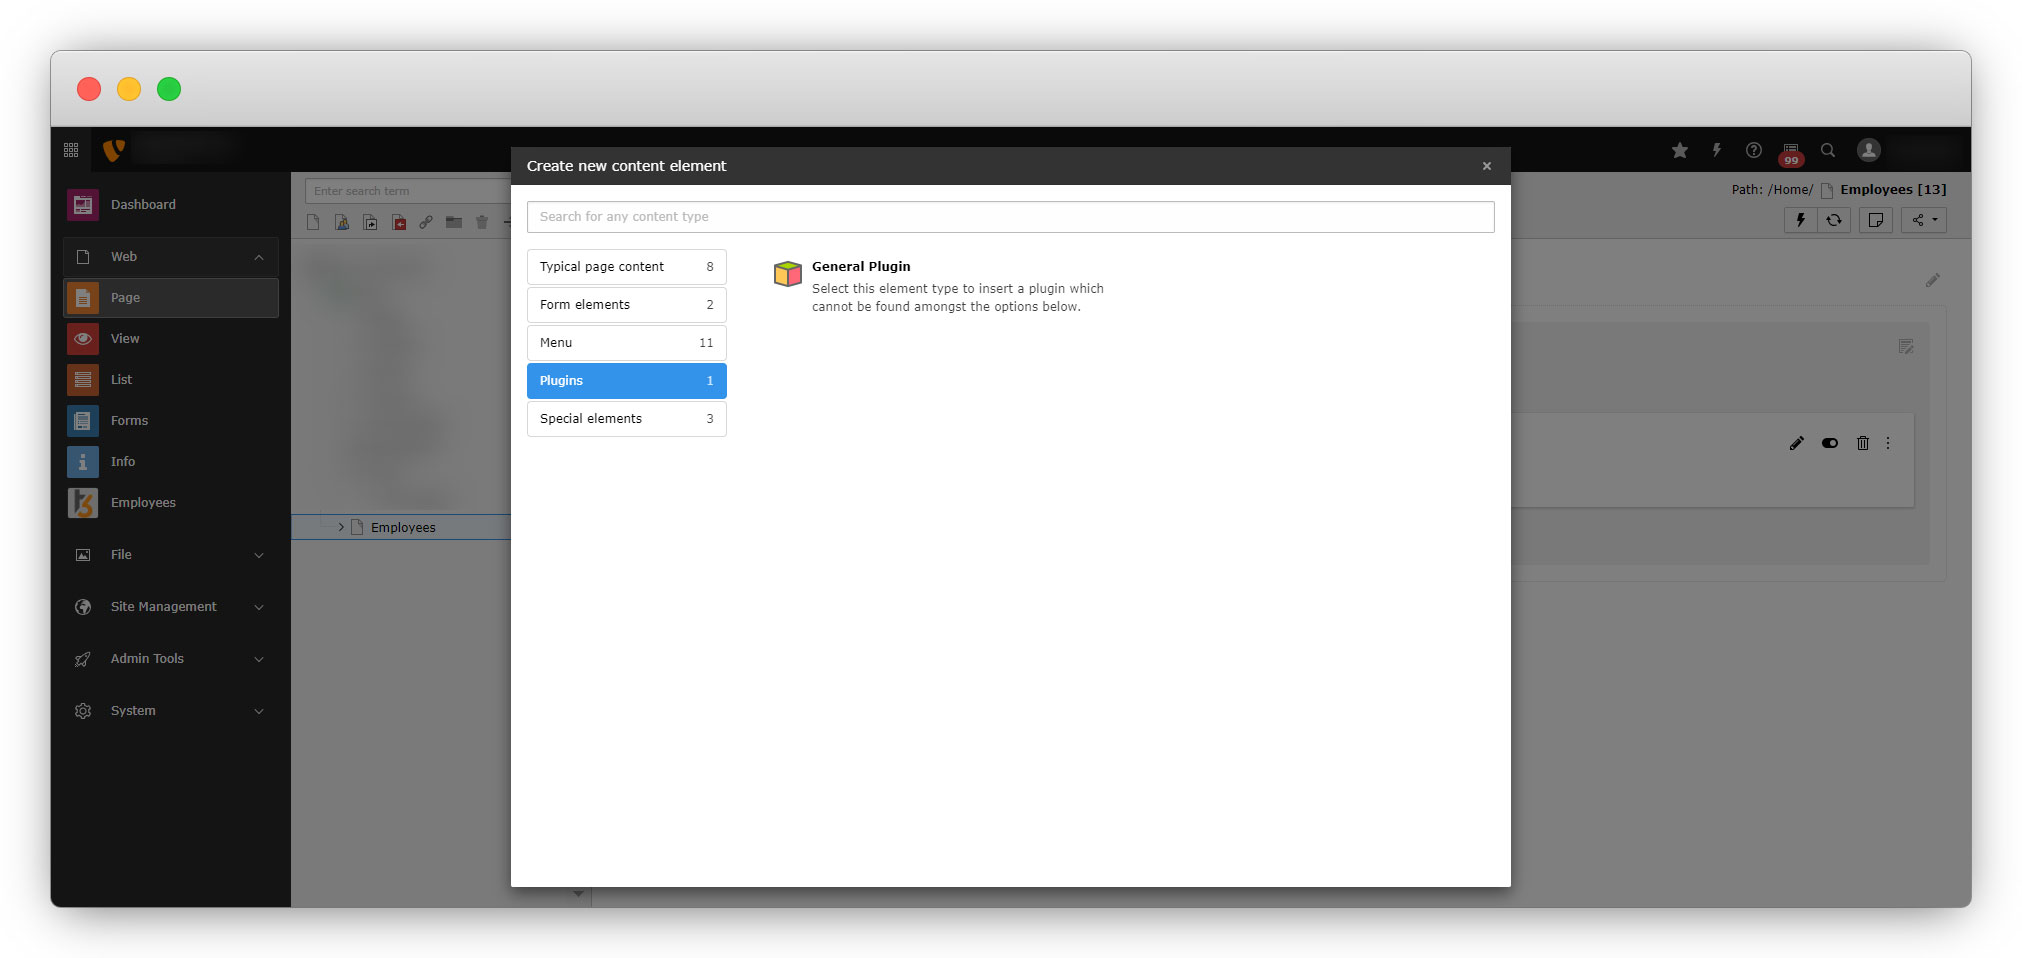
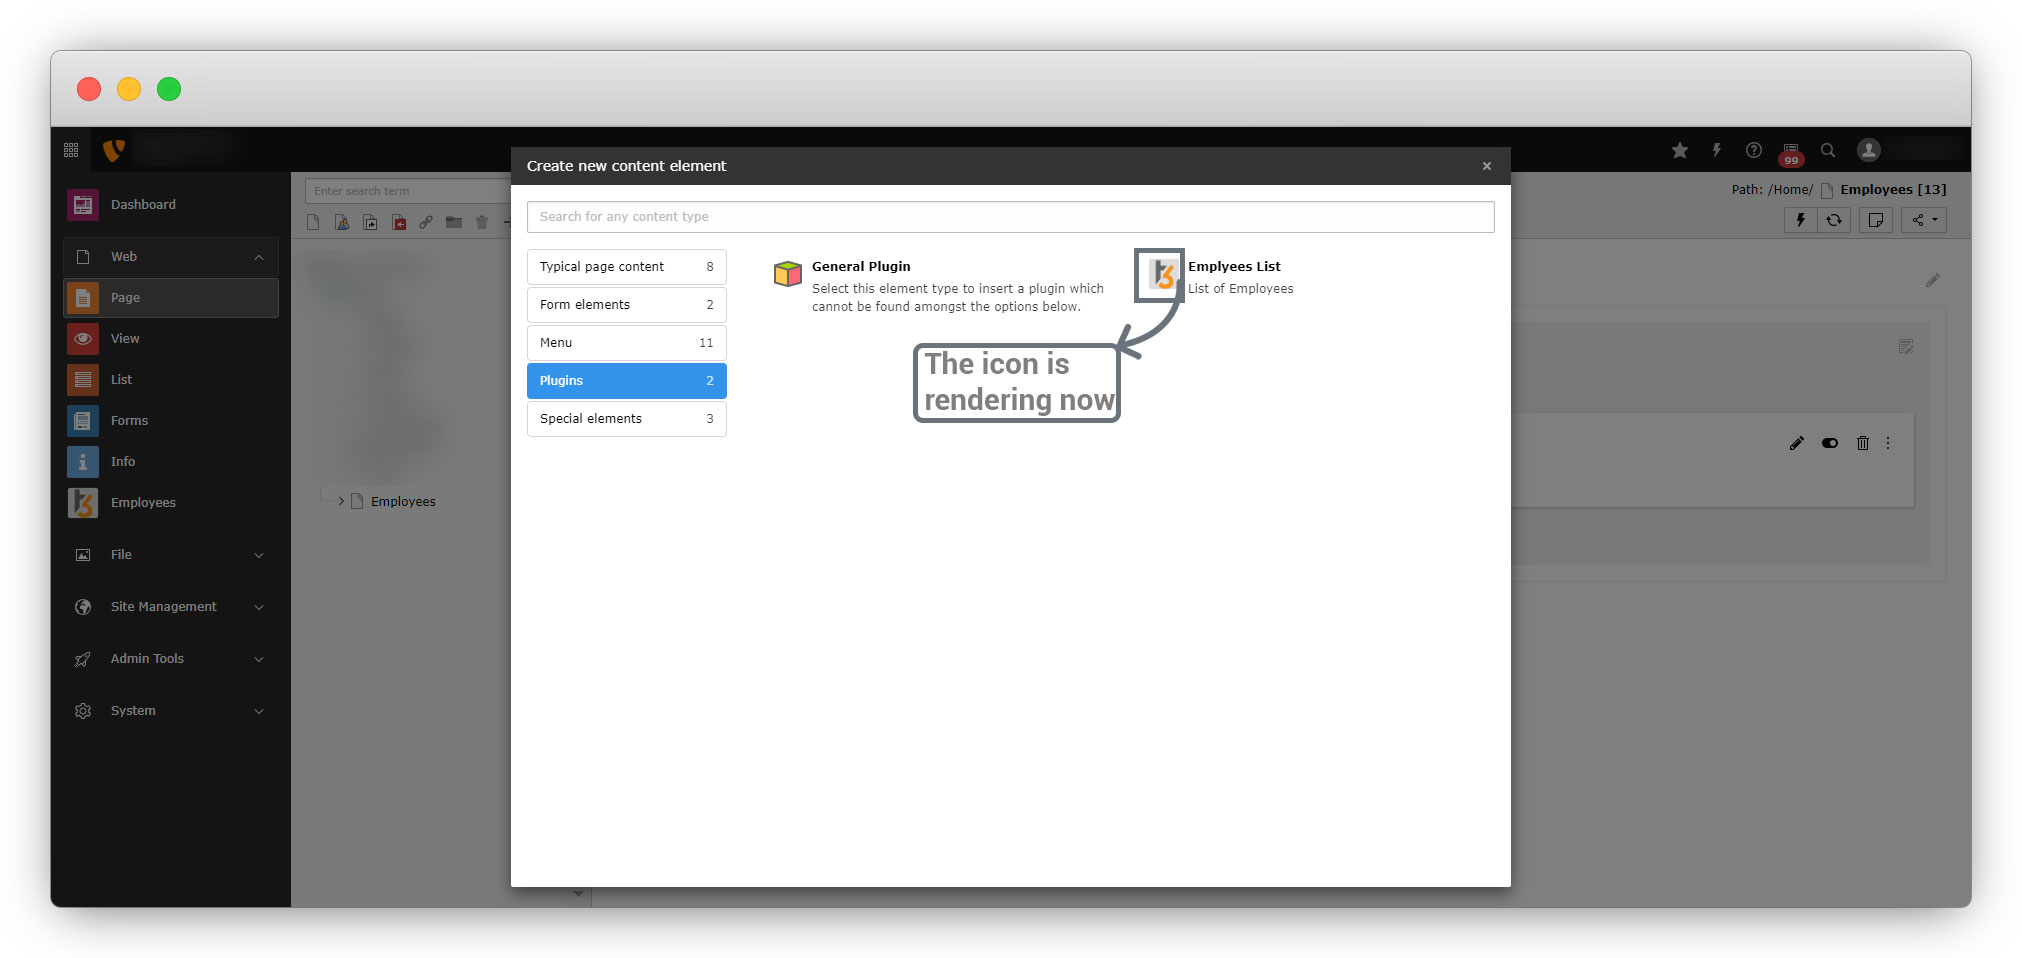
3. Now clean the cache and open wizard and you will find the plugin is available in wizard now.
4. Now you don’t need to select the general plugin and then select the custom front-end plugin
5. In the above screenshot, as you can see the icon of the plugin is not loaded.
6. The icon identifier has been set in tsconfig file as “employee” but that icon identifier is not registered yet.
7. Let’s Register the icon identifier.
Icon Identifier
1. All icons must be registered in the icon registry.
2. Before registering them, you need to upload the icons.
3. To register icons for your own extension, create a file named Icons.php in your extension, the file path is: <extension_directory>/Configuration/Icons.php.
4. For this extension, the file path is: employee/Configuration/Icons.php
<?php

declare(strict_types=1);

use TYPO3CMSCoreImagingIconProviderBitmapIconProvider;

return [
    'employee' => [
        'provider' => BitmapIconProvider::class,
        'source' => 'EXT:employee/Resources/Public/Icons/Extension.png',
        'spinning' => true,
    ],

];
Here your icon should exist on employee/Resources/Public/Icons/ path as here the defined source is: employee/Resources/Public/Icons/Extension.png
5. Name the iconIdentifier with the following parameters
- provider: Icon provider
- source: Path of the icon which should be loaded with that iconIdentifier
- spinning: set this boolean value to true if you want to spin the icon and false if you don’t want the spinning icon.
- After saving this file, clean the cache and open the wizard and you will find the plugin containing the icon now.
Share


