
URL copied to clipboard

Override the form from fileadmin (without extension)
4 views
__readtime__ Min
read
If you don’t have any extension in your TYPO3 setup and you don’t want to create any extension, then you can override the form from the fileadmin. Follow the below process to override the form directly from the fileadmin.
1. Partials: After downloading the form extension, go to the extension folder and go to the folder /Resources/Private/Frontend/Partials, copy all the things and then go to your TYPO3 setup, go to public_html/fileadmin and create a Folder structure Resources/Private/Partials/Forms and paste all the things from partial folder to here.
2. Template: Then go to the /Resources/Private/Frontend/Templates folder in your downloaded form extension, copy all the things and go to your TYPO3 setup, go to public_html/fileadmin/Resources/Private/Templates/Forms and paste all the things in this folder.
3. Yaml: Let’s create the ‘yaml file’ for the custom form. Go to public_html/fileadmin and create Configuration folder and create Yaml folder into the Configuration folder, the folder structure will be public_html/fileadmin/Configuration/Yaml, then create the file CustomFormSetup.yaml into this folder and add the code given below:
TYPO3:
  CMS:
    Form:
      prototypes:
        standard:
          formElementsDefinition:
            Form:
              renderingOptions:
                templateRootPaths:
                  100: "EXT:<my_ext>/Resources/Private/Templates/Forms/"
                partialRootPaths:
                  100: "EXT:<my_ext>/Resources/Private/Partials/Forms/"
If the TYPO3 version is older, the above code might not be working for you, in that case, please add the code given below:
TYPO3:
  CMS:
    Form:
      persistenceManager:
        allowedExtensionPaths:
          1000: EXT:<my_ext>/Resources/Private/Forms
        allowSaveToExtensionPaths: true
        allowDeleteFromExtensionPaths: true

      prototypes:
        standard:
          formElementsDefinition:
            Form:
              renderingOptions:
                templateRootPaths:
                  100: "EXT:<my_ext>/Resources/Private/Templates/Forms/"
                partialRootPaths:
                  100: "EXT:<my_ext>/Resources/Private/Partials/Forms/"
4. Typoscript: You will have to write the typoscript in the admin panel. Open the TYPO3 admin panel, go to Site Management > Typoscript, select the root page and select the “Edit Typoscript Record” option and click on the “Setup”.
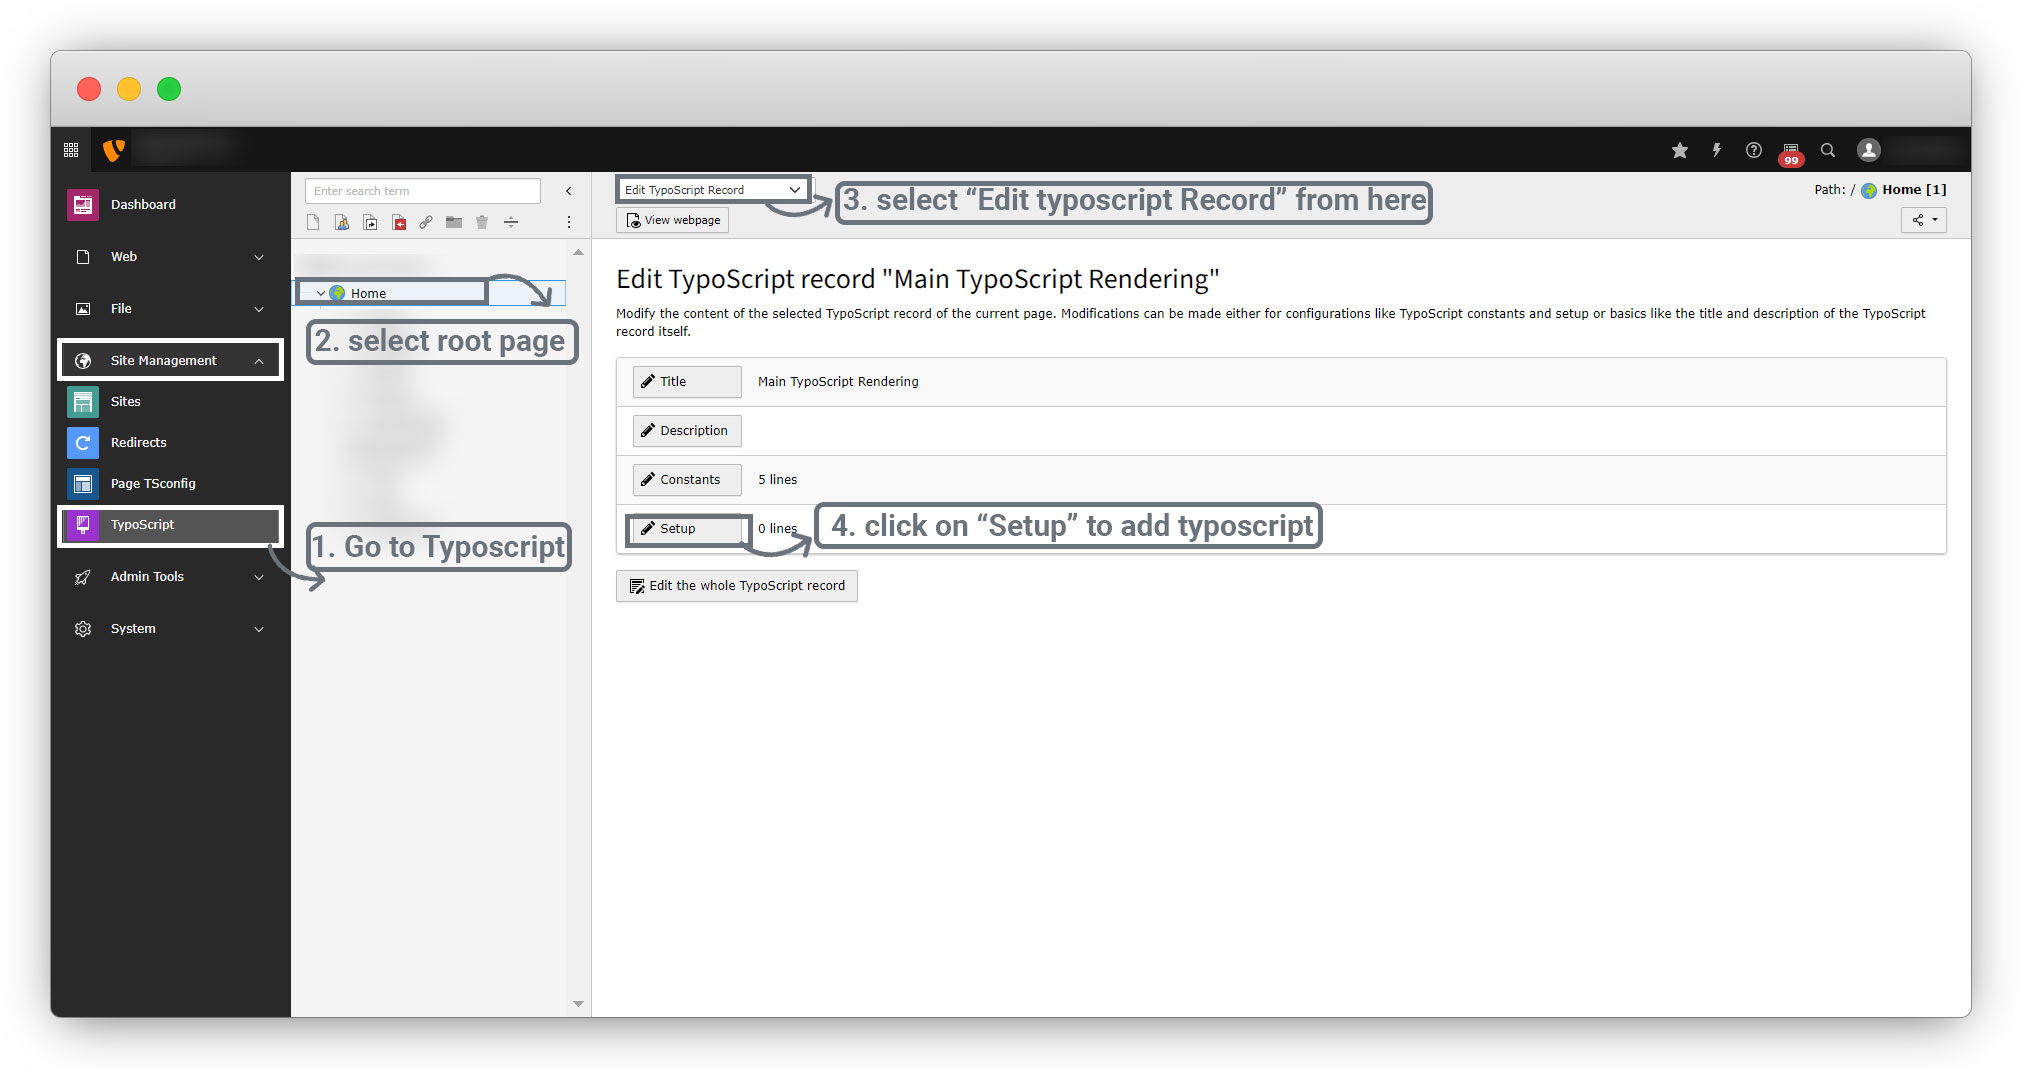
You will get the below screen where you can add the typoscript.

Add the below code in typoscript
plugin.tx_form {
    view {
        templateRootPaths.100 = fileadmin/Resources/Private/Templates/Forms/
        partialRootPaths.100 = fileadmin/Resources/Private/Partials/Forms/
    }
    settings {
        yamlConfigurations {
            200 = fileadmin/Configuration/Yaml/CustomFormSetup.yaml
        }
    }
}
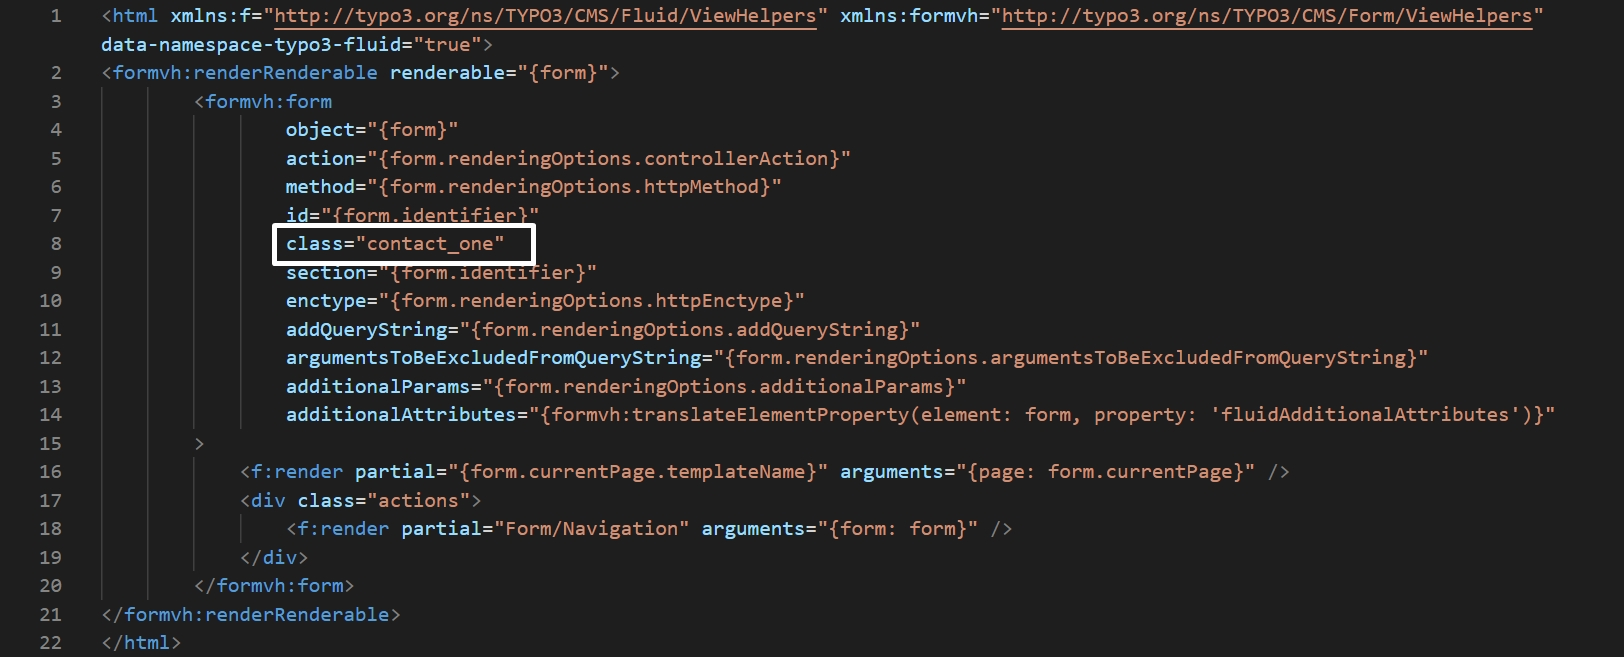
5. To add the class in the form template, go to fileadmin/Resources/Private/Templates/Forms/Form.html and add a class attribute if it is not there and assign a unique class as you can see in the screenshot below:
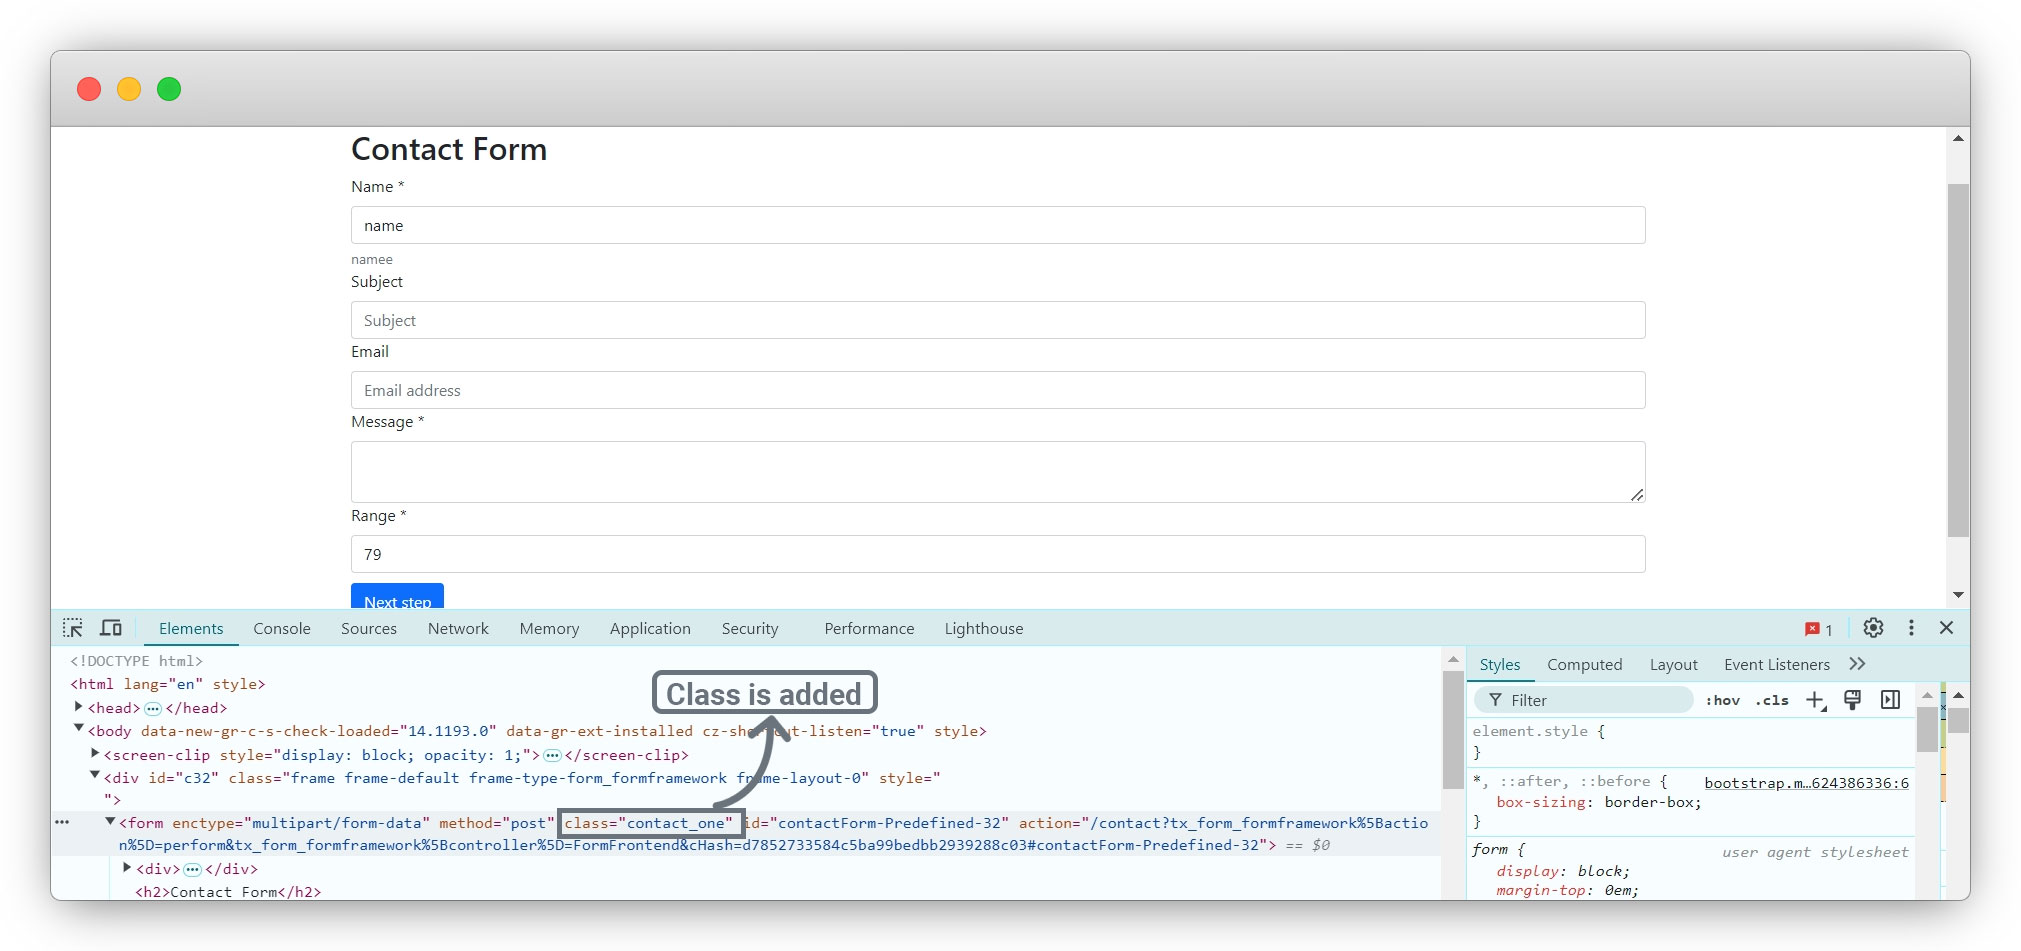
6. Now check your front-end and inspect the element and you will see the class has been added to the form.
7. Let’s add the CSS to the form.
7.1. Go to public_html/fileadmin/Resources and create the folder Public and Create CSS folder into it.
7.2. Now you should have the folder structure public_html/fileadmin/Resources/Public/css and create the file custom_form.css (you can give any name to the file.)
7.3. Then add the given code below to the custom_form.css file
.contact_one{
    padding: 50px 300px;
    background: #f0f8ff;
}

.contact_one .btn-toolbar{
    margin-top: 10px;
}

.contact_one h2{
    margin-bottom: 40px;
    text-decoration: underline;
}
7.4. Now include the CSS file into the typoscript. Add the below code in typoscript:
 page {
  includeCSS {
        customForm = fileadmin/Resources/Public/css/custom_form.css
	}
 }
Below is the screenshot of the typoscript:
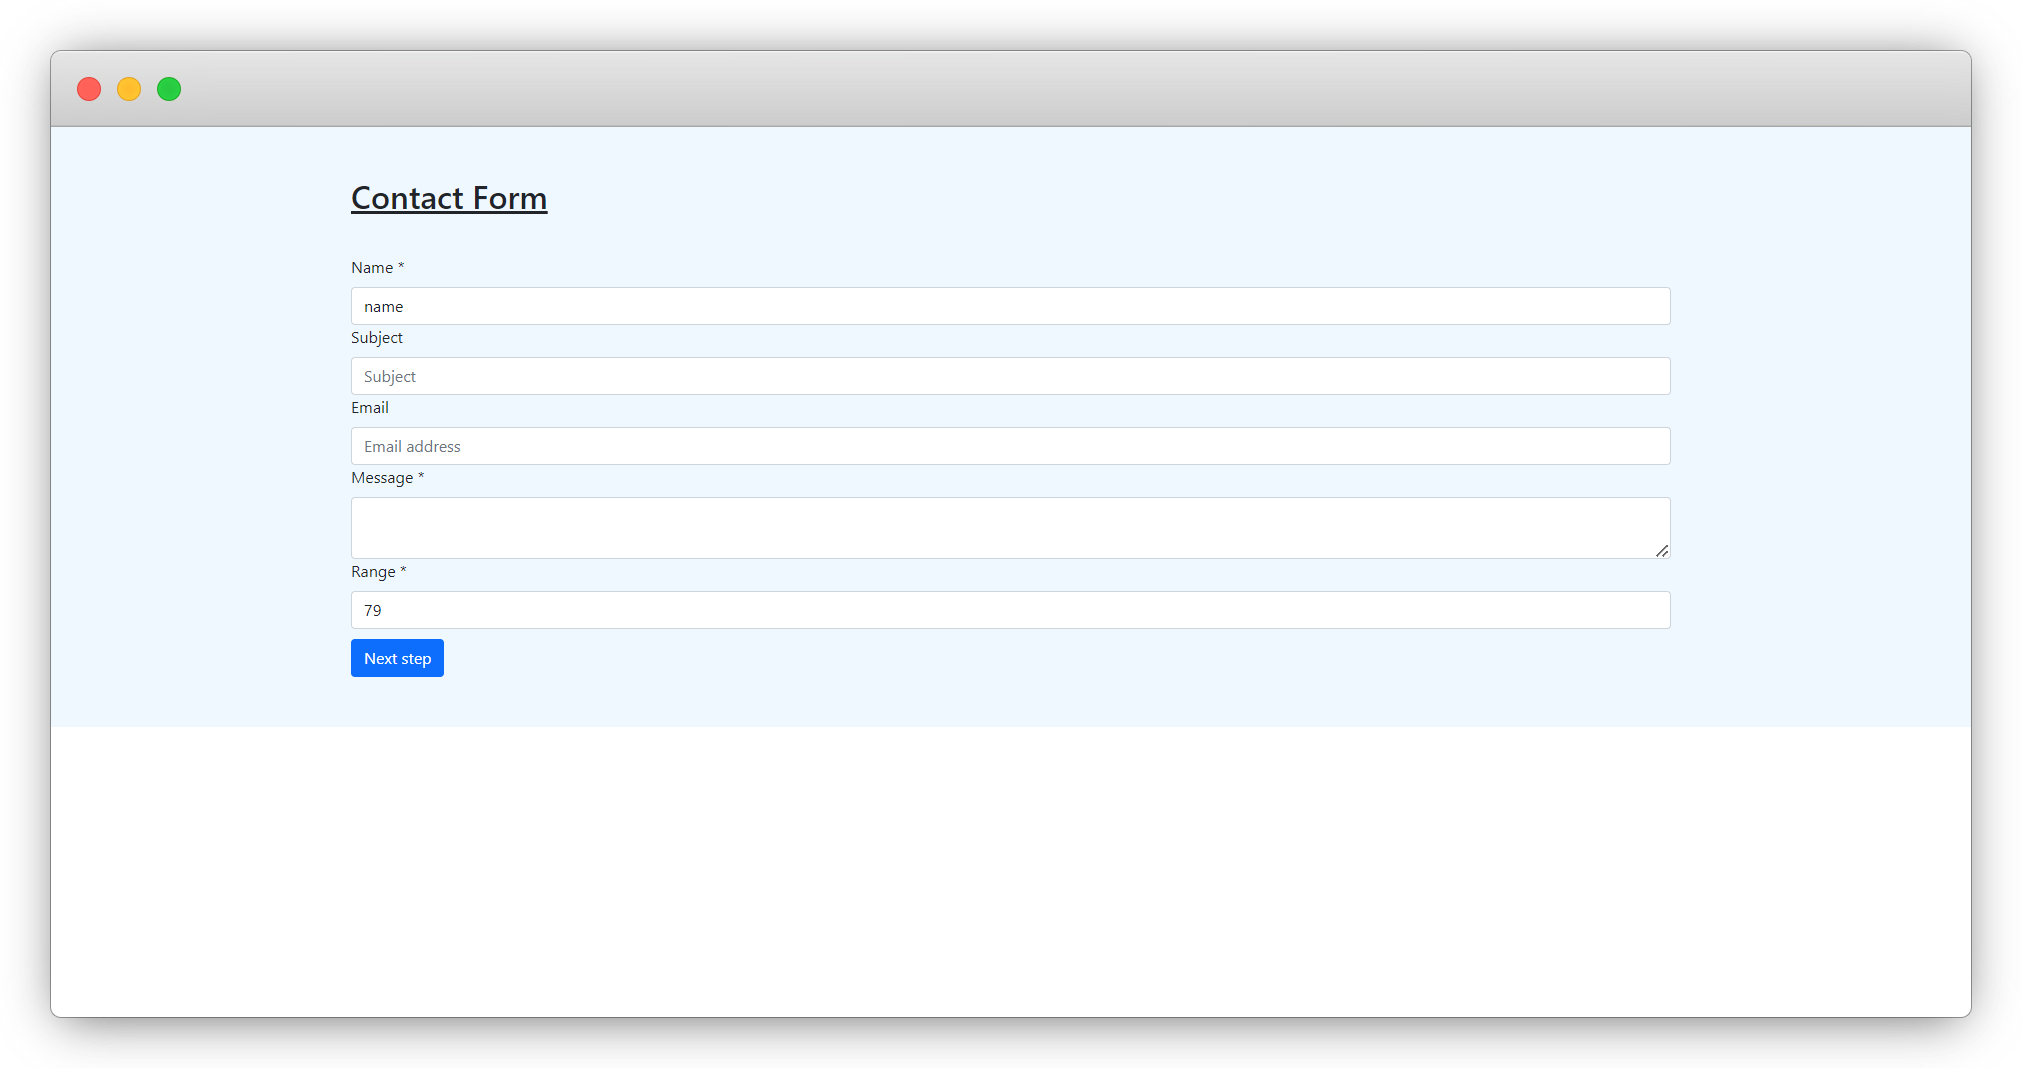
7.5. After the above changes, clear the cache and reload the front-end and you will see the form in the screenshot below:
Share


