
URL copied to clipboard

Plugin type – List
4 views
__readtime__ Min
read
1. To create a new plugin click on the “Add Plugin” button which is on the top right of the plugin list and you will see the below screen:
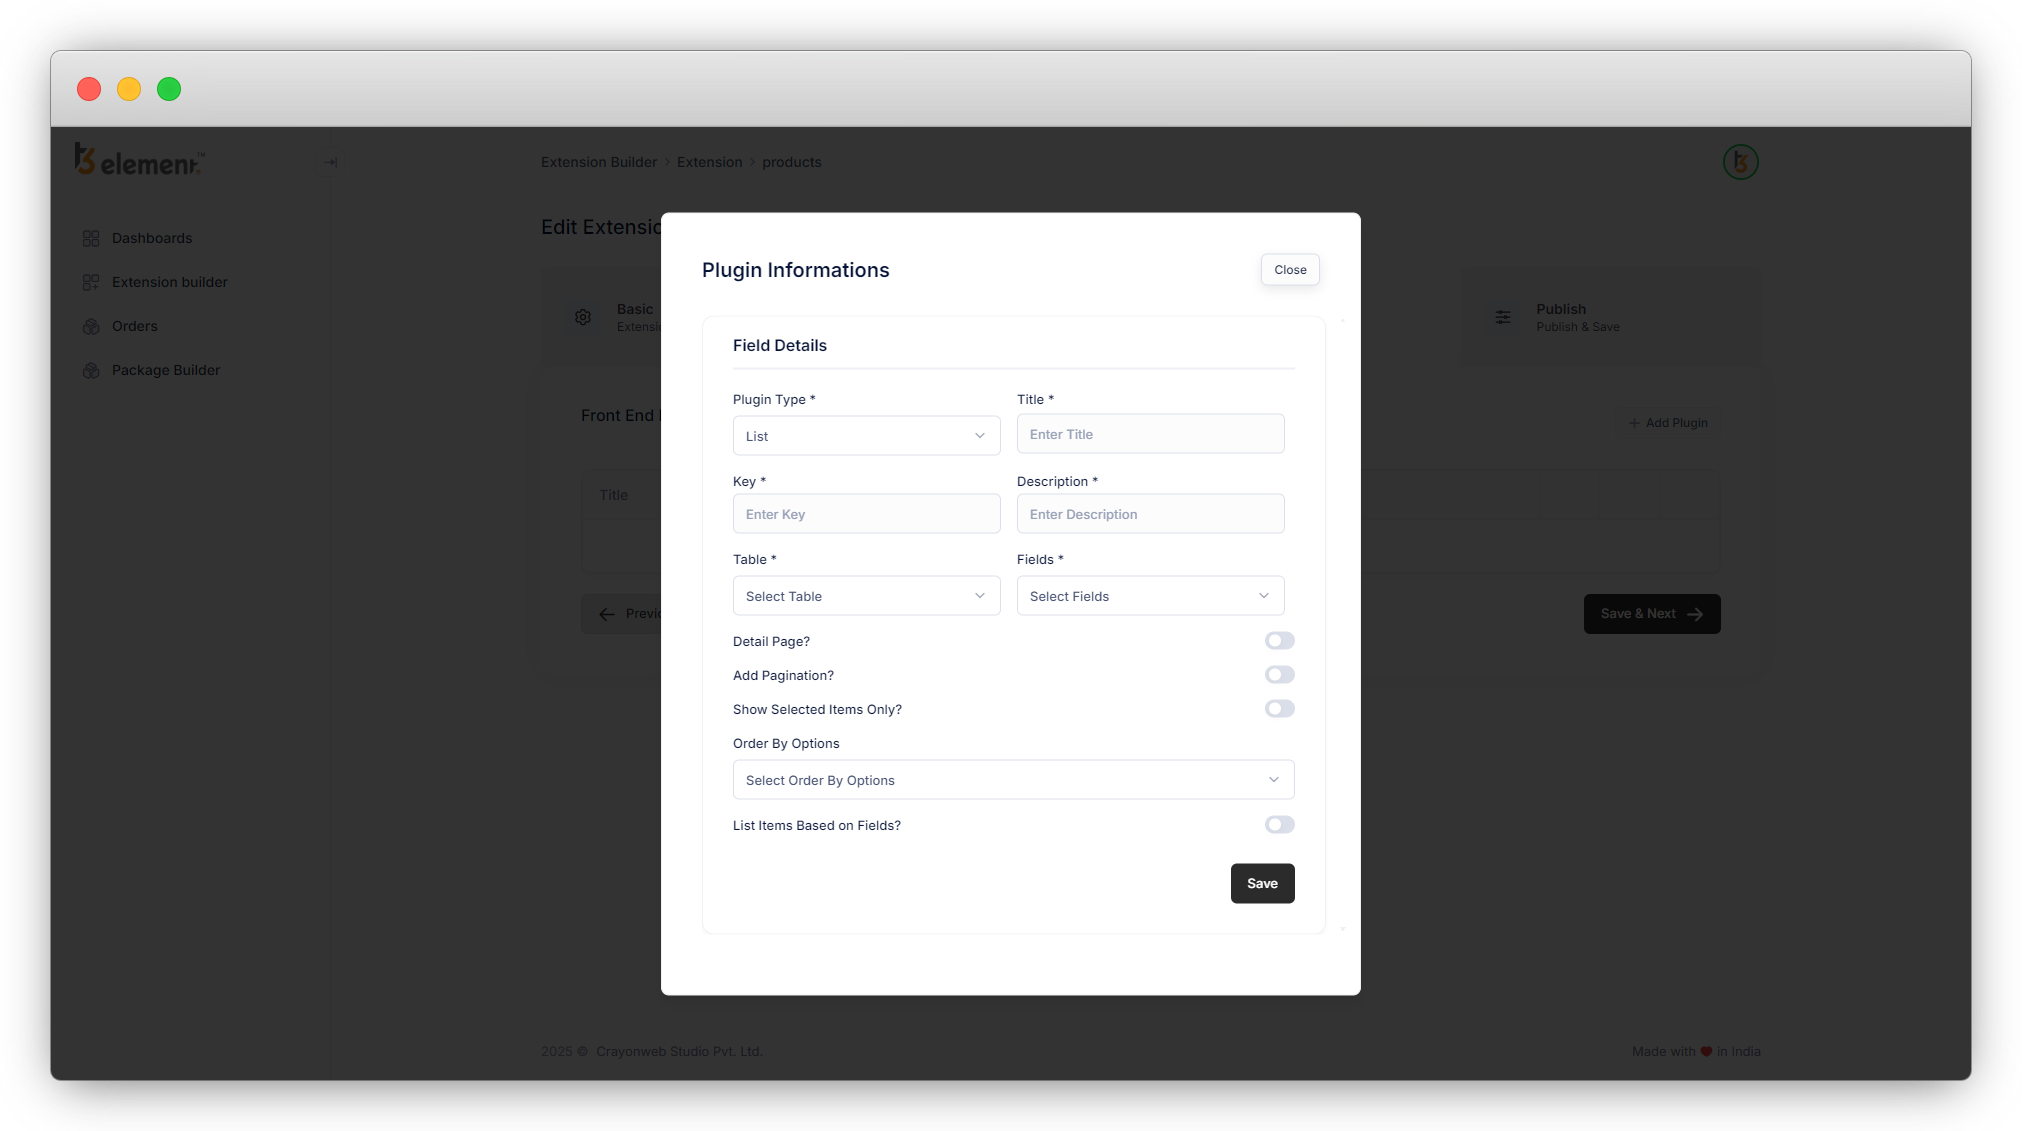
2. The default selected plugin type is list.
3. Add other information like title, key, description, etc.
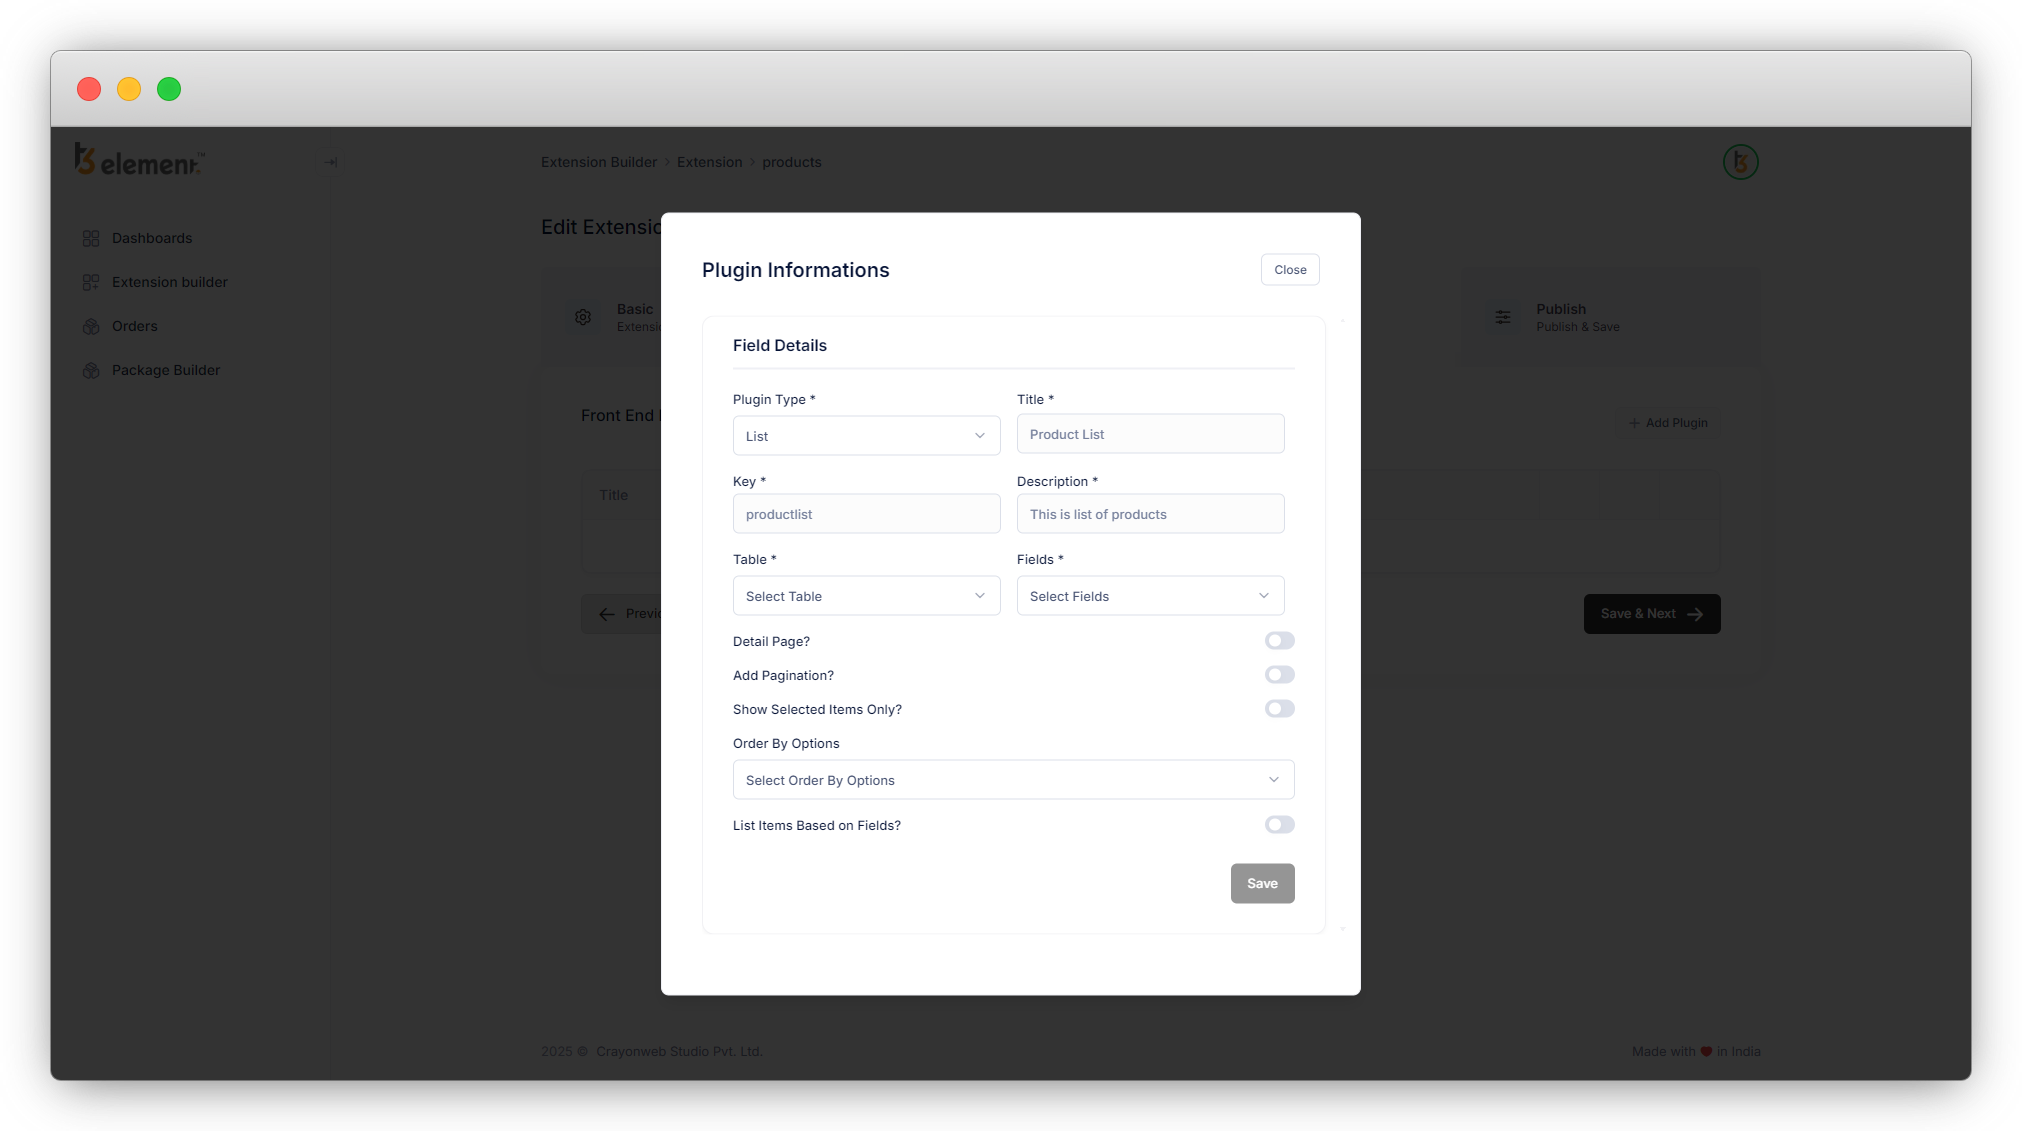
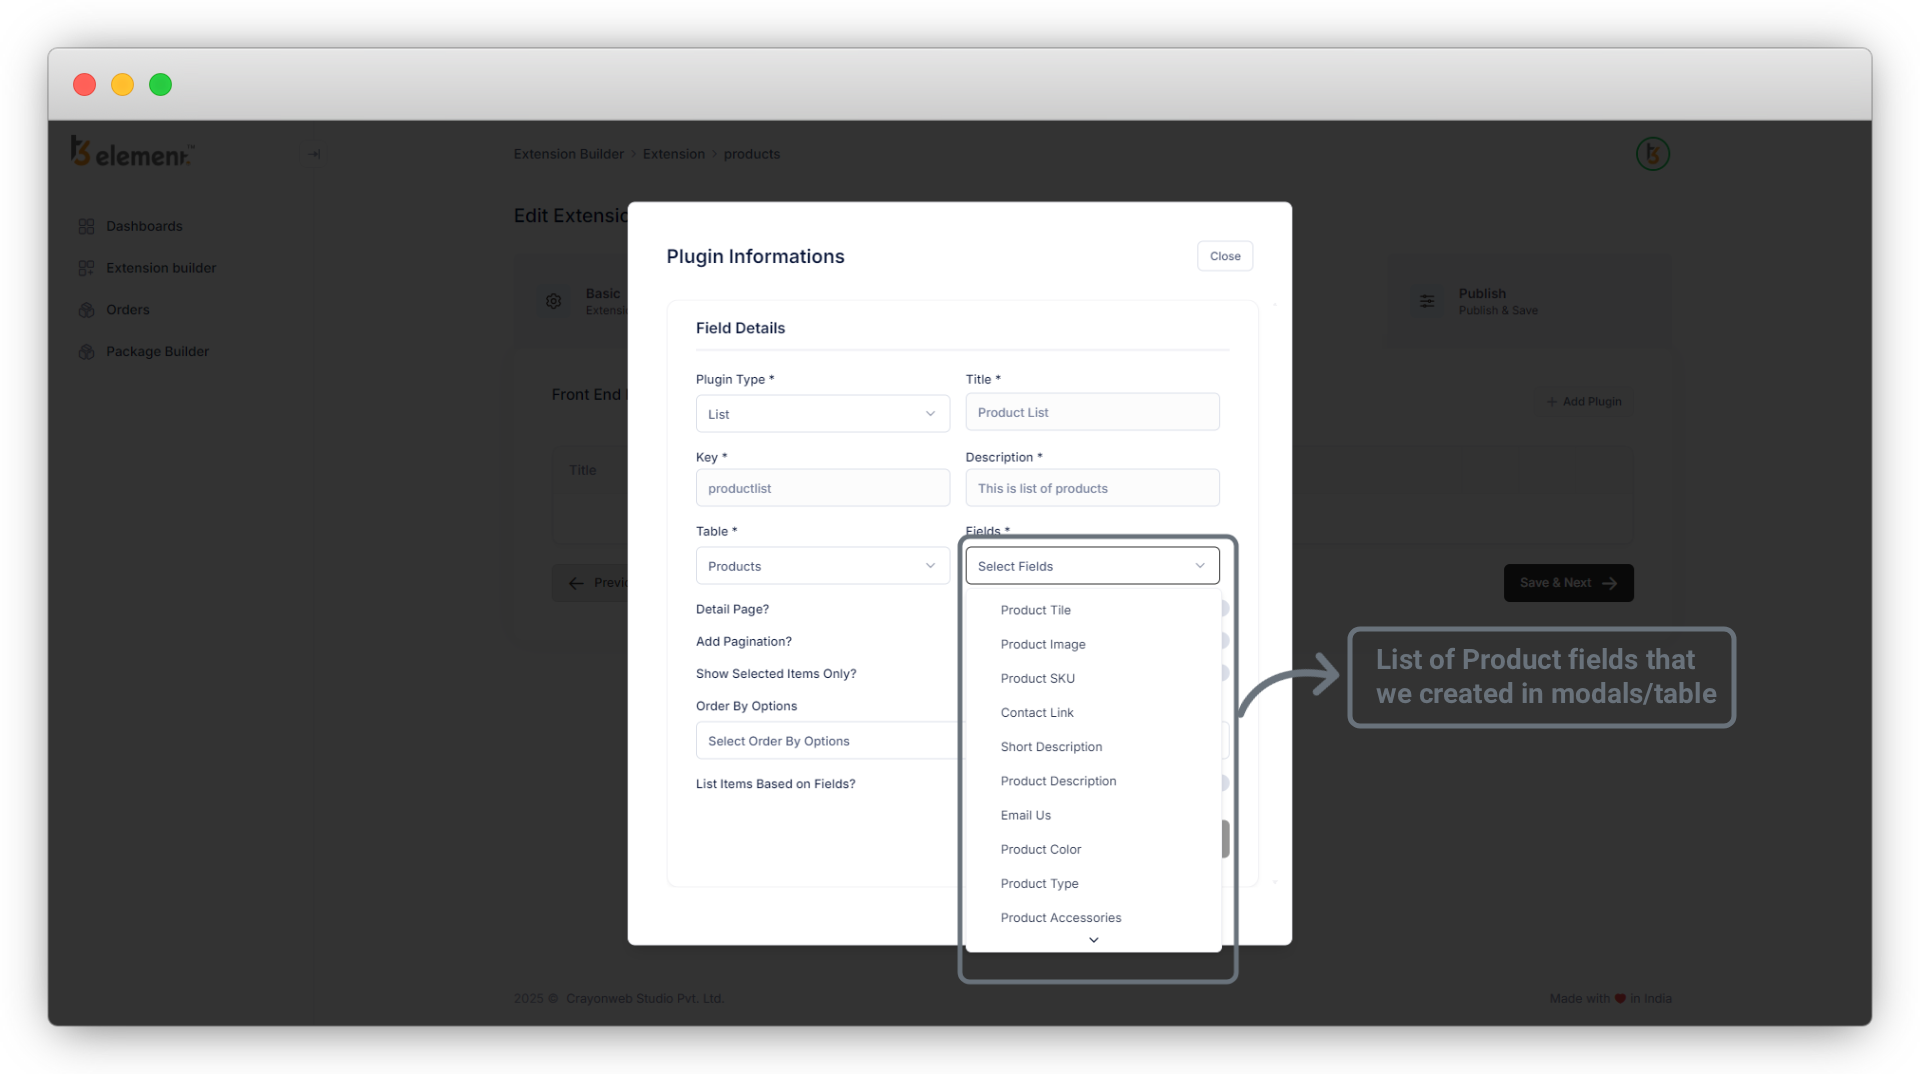
4. In the “Table” field select the table you want to create a list for and in the “Fields” select the fields of that table you want to show in your list.
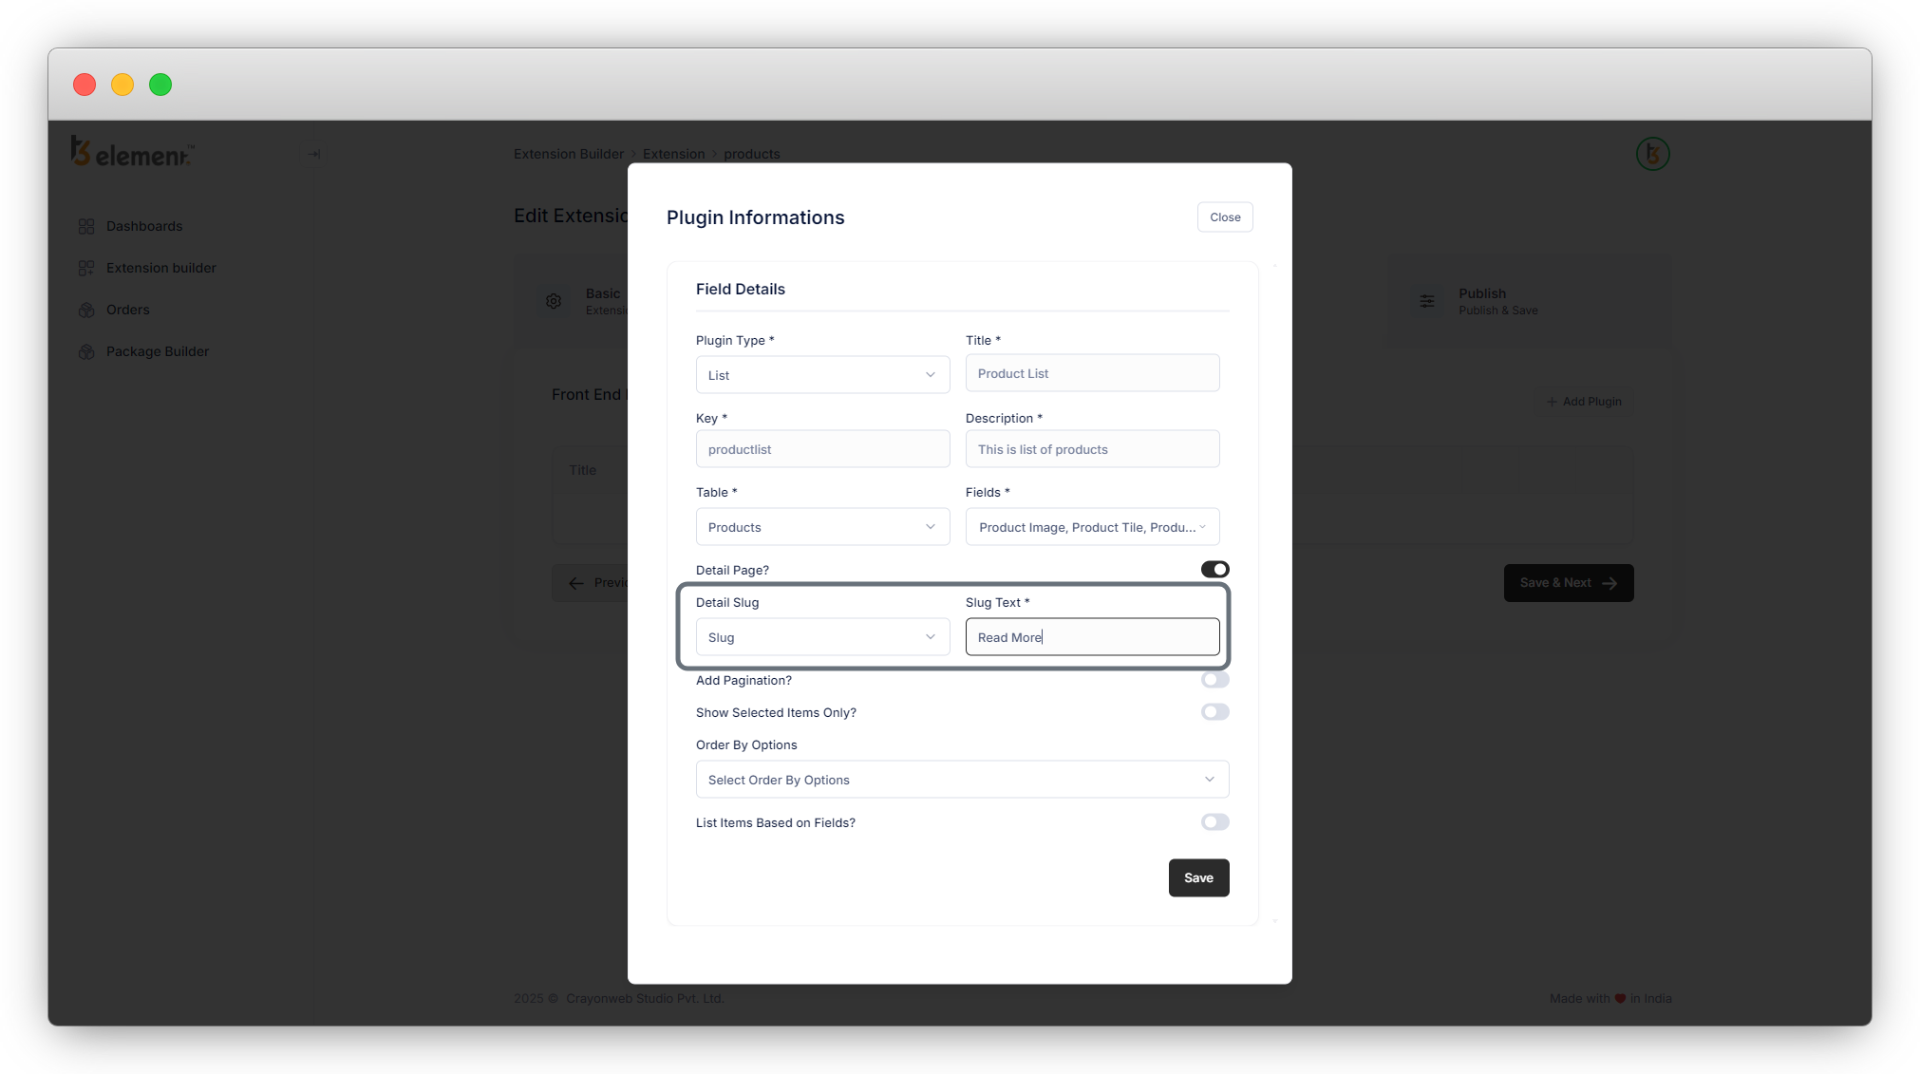
5. We need a detail page for products so let’s check the “Detail Page” checkbox.
- As you select this option, you will see another 2 fields “Detail Slug” and “Slug Text”.
- We have the field “Slug” in the “Products” table so we have the option of the “Slug” field in “Detail Slug”.
- In the “Slug Text” field, let’s add the text “Read More” for the link to the product detail page.
6. The product list should have the pagination so let’s enable the “Add Pagination” field.,
7. Let’s enable the “Show Selected Items Only?” field so we can have the option to show the selected products in the product list.

8. “Order By Options” is a mandatory field, select the options you think you will need in your extension. Let’s select the “Created At”, “Product Title”, and “Launch Date” fields. Please note here that the “Created At” and “Modified At” fields are default fields for this field, and other fields like here “Product Title”, “Product SKU”, “Launch Date”, etc. will be added according to your selected table’s fields. All the fields with the data type “String” and “Date” will be shown here as options.
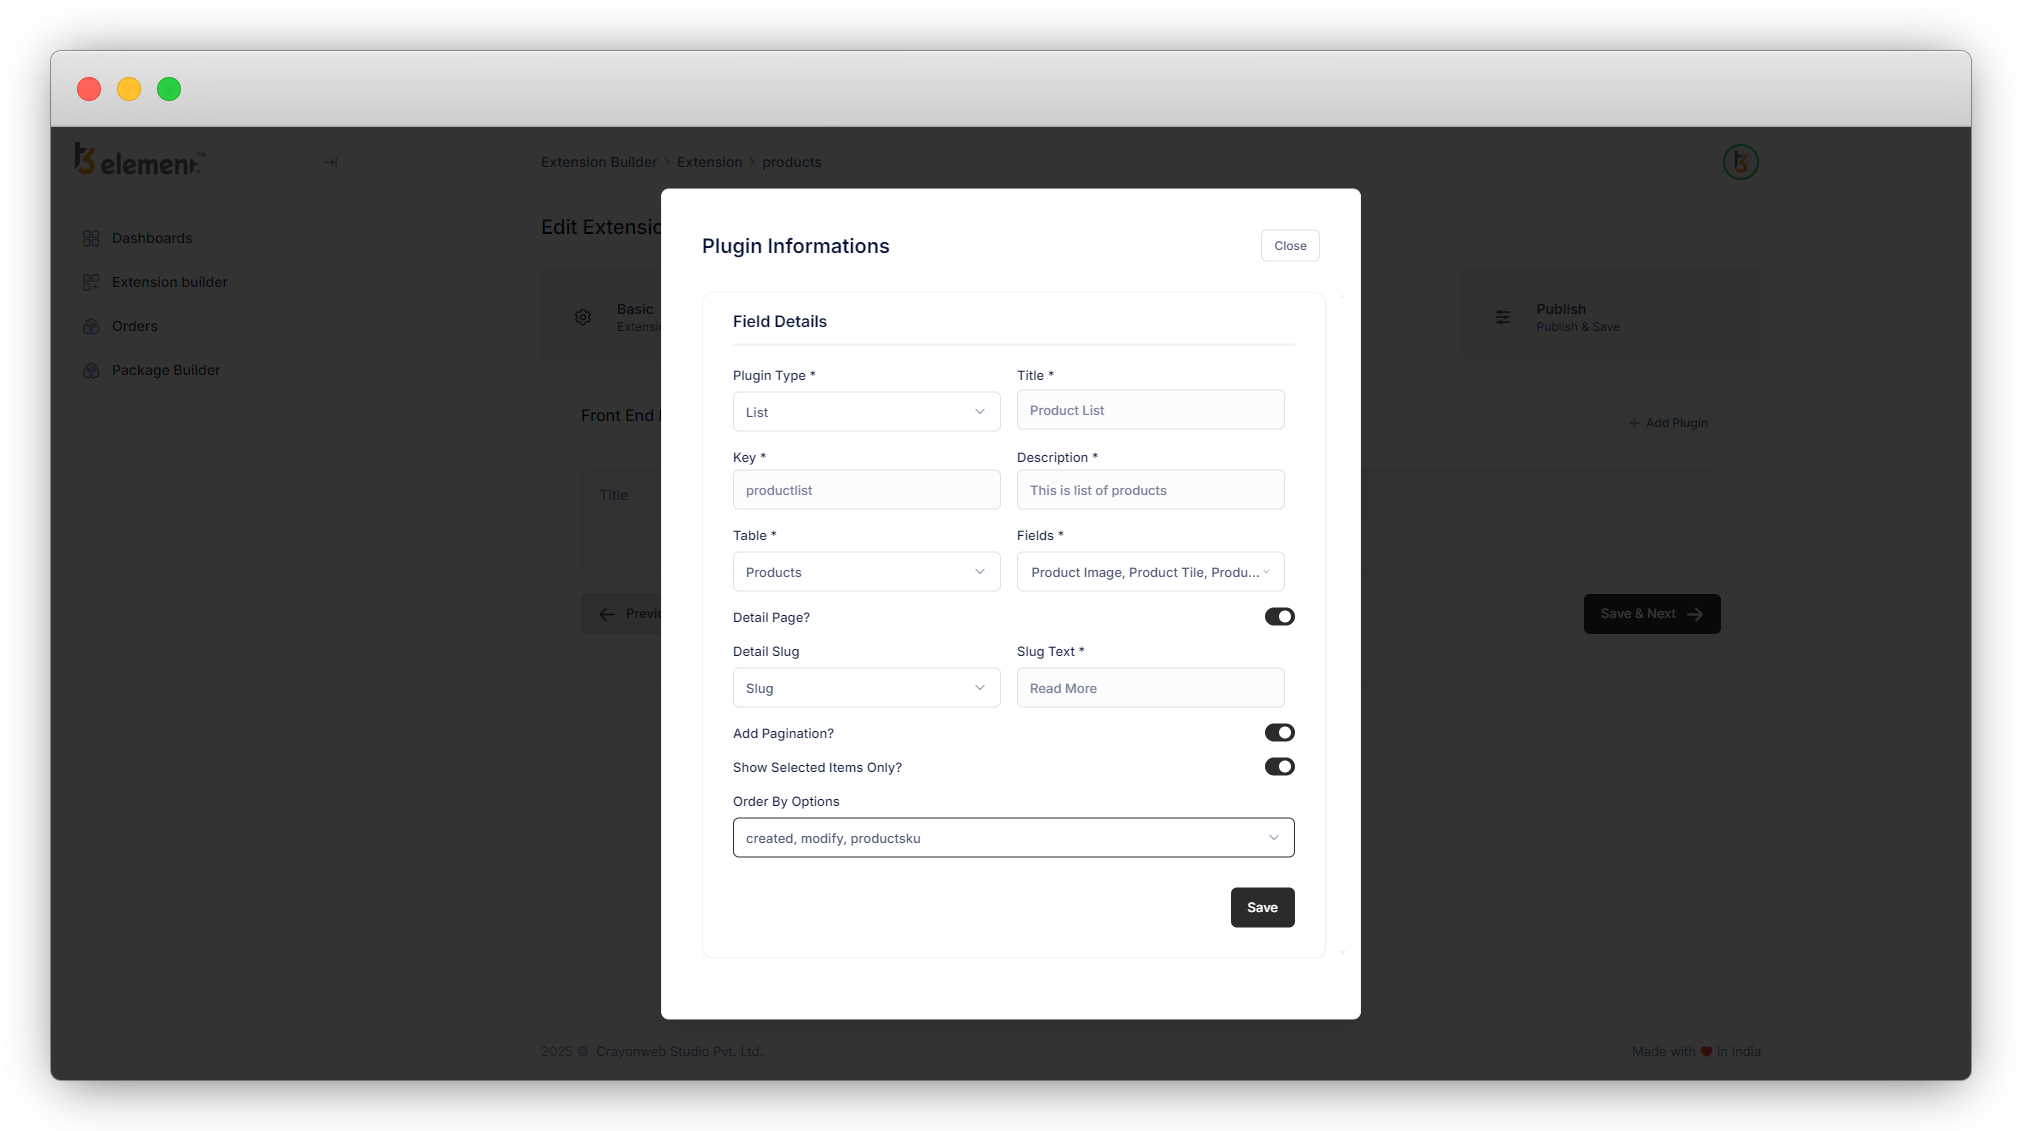
9. Here you will not see the option “List Items Based on Fields” as we already selected the field “Show Selected Items Only ?” so this option will be hidden (If you select the “List Items Based on Fields” field then “Show Selected Items Only ?” field will be hidden.)
10. Click on the “Save” button and you will see the “List” plugin is added to the plugin list as seen in the screenshot below
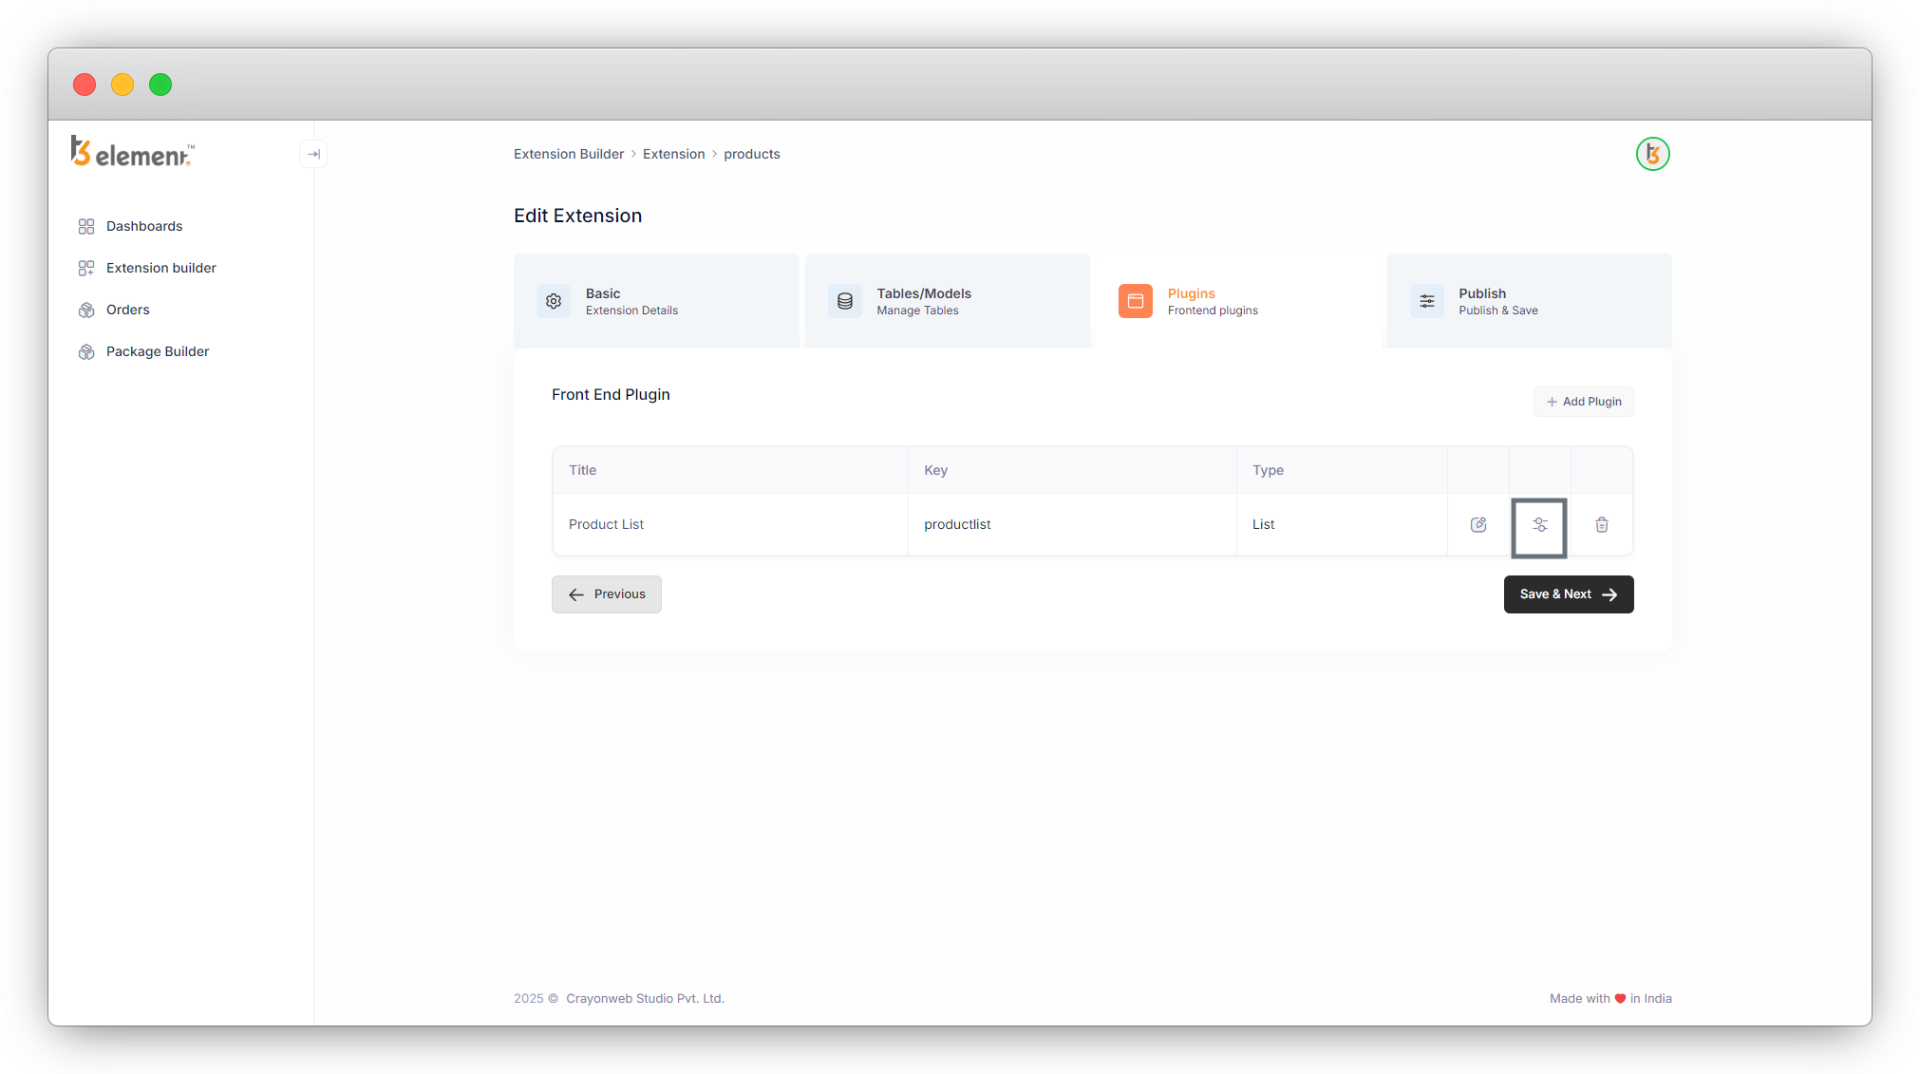
11. If you click on “Save & Next”, you will get an error of “Set Template for the plugin!”. As you can see in the above screenshot, on the far right side there are 3 action icons and the second icon is highlighted in red which is a template icon. As we haven’t set the template yet, the icon is highlighted in red. To set the template, click on the template icon and you will see a template as seen in the screenshot below:
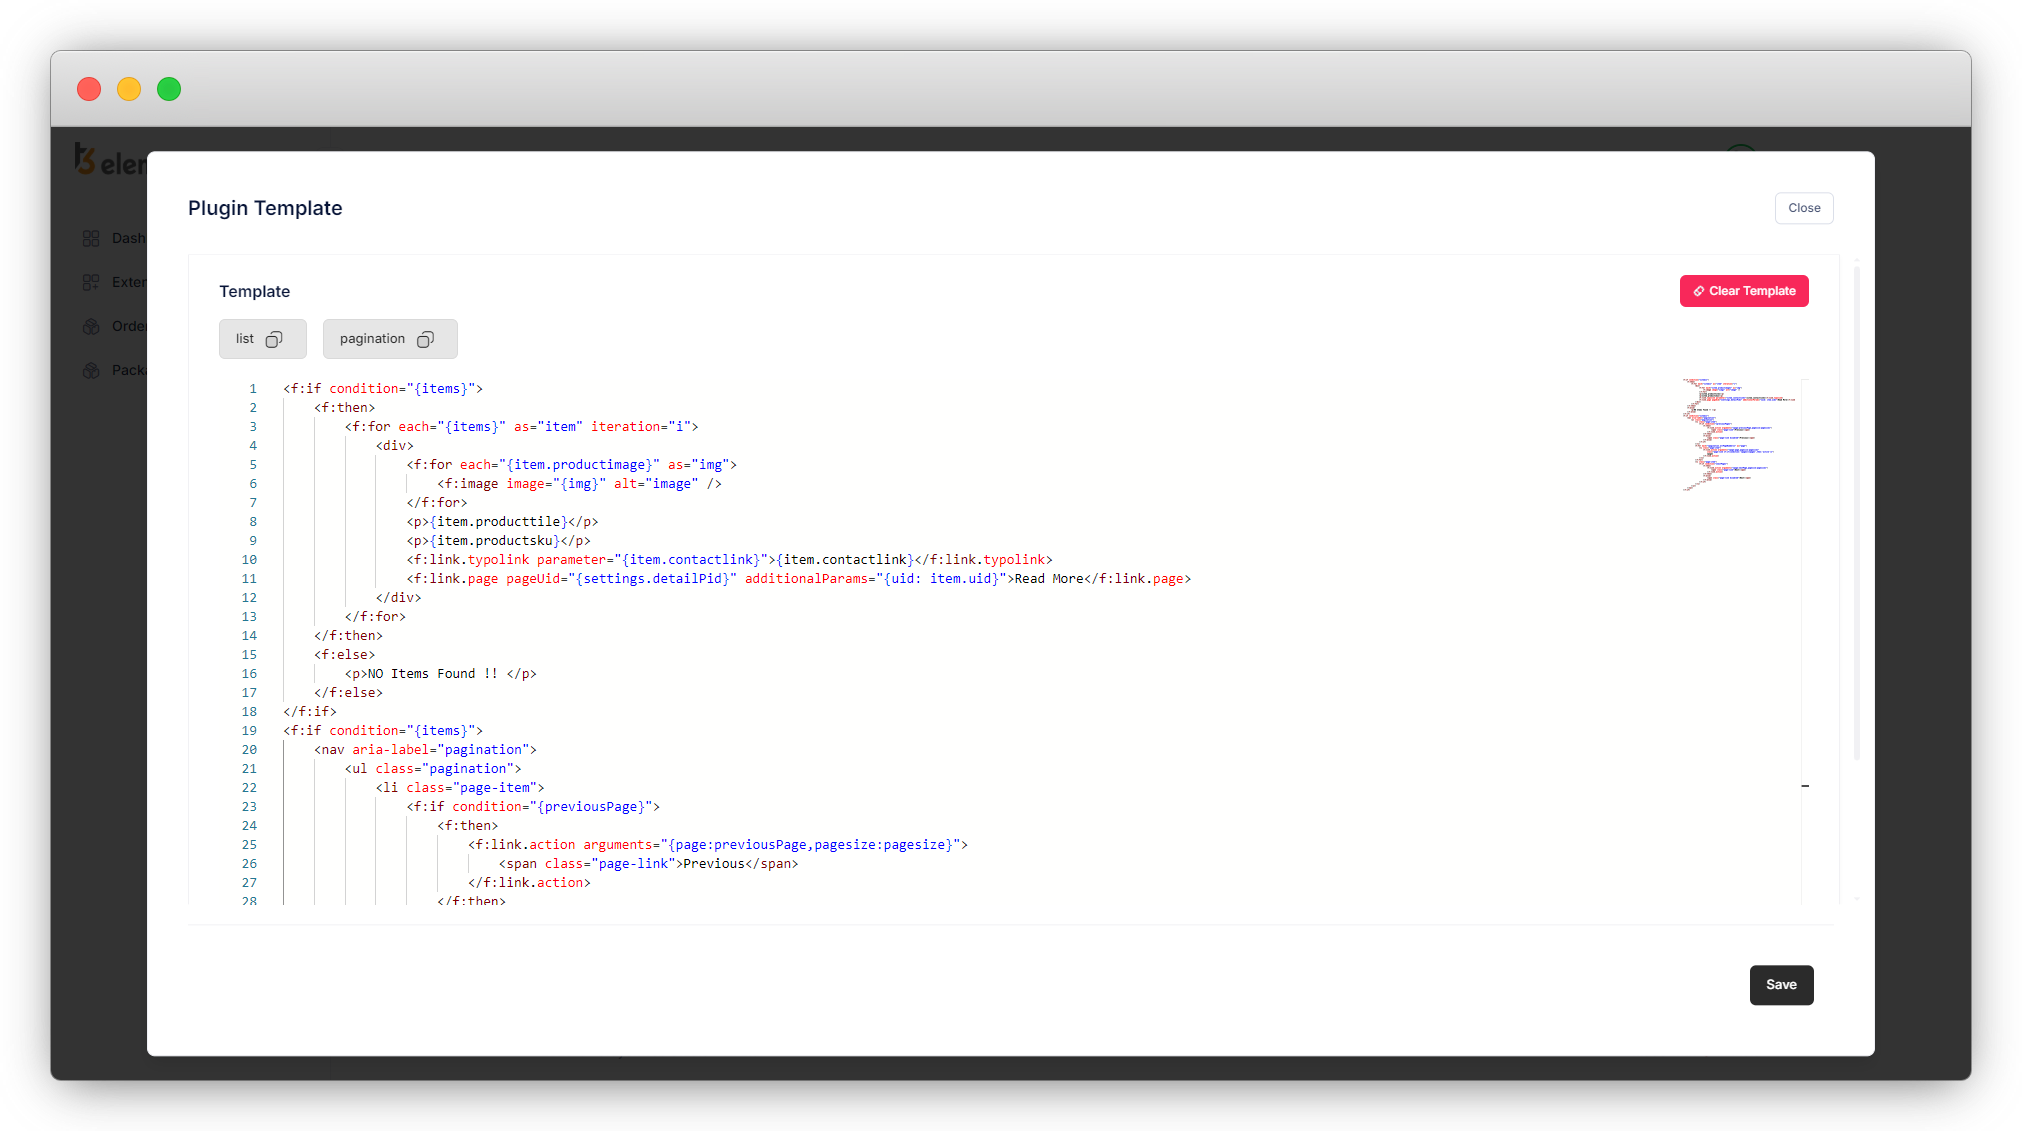
12. Above is the fluid template. You can make changes to the template according to your requirements (Fluid template ref. link: https://docs.typo3.org/other/typo3/view-helper-reference/main/en-us/ ). And if you don’t want to make any changes, just click on the save button and save the template, as you save the template, you will be redirected to the plugin list and now there is no error.

13. Now let’s create another plugin for the product detail page. You can click on the “Save & Next” button before creating the new plugin everytime so the created plugin will be saved.
Share


